In the Spotlight: Themes

Themes are what determine your site’s appearance and presentation and what tools and features it has.

Changing your site’s theme is a great way to give your site a new look and feel. If you’ve created a new site recently, it uses a newer theme that will allow your site to have a contemporary style, layout, and range of tools. Once you’ve created your site, you can choose a new theme if you want a different set of customizations or different appearance for your work.

If you’ve been cloning a course for a long time, or if you’ve been adding content to a site you created a log time ago, it might be time for a new theme!

Choosing a new theme can be as simple as previewing and clicking a button to make the change. From your site’s Dashboard, choose Appearance and then Themes to see what’s available, preview your site with the new theme, and activate that new theme. You can follow along with OpenLab Help on changing your site’s appearance with themes.

Screenshot of some thumbnails of WordPress themes available on City Tech's OpenLab.
A sample of theme options on the OpenLab

As new themes are available for WordPress (that’s the software that OpenLab uses), the OpenLab team researches which to add based on whether they are accessible and what they offer in terms of design and functionality.

One new theme we’ve just added is Typology.  This text-based theme looks great with or without images and allows for a lot of customization. Learn more in February’s This Month in the OpenLab.  Help documentation for the theme is coming soon, but there’s also good documentation from the theme authors. Let us know if you’re using it and we may feature your site in the future!

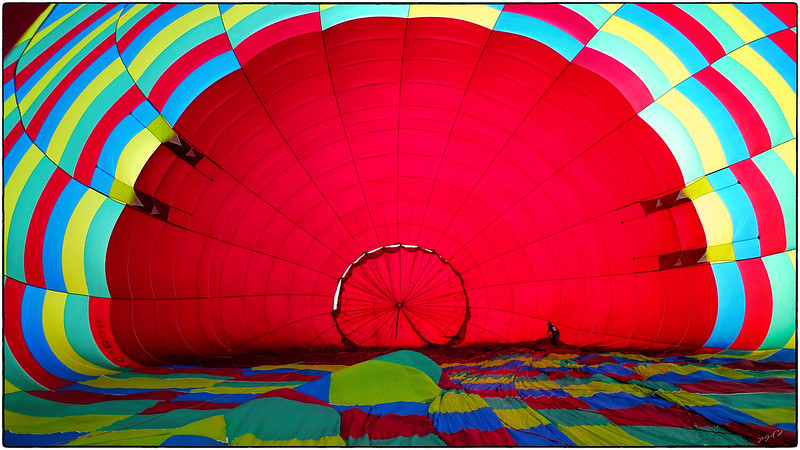
Featured image credit:”Inside the balloon” By Alan E via Flickr under the license CC BY 2.0 Deed

In the Spotlight: Student Research Project Template

Choices
Choices” by Derek Bruff via Flickr CC BY-NC 2.0 Deed

You may have noticed in the August edition of This Month on the OpenLab that one of the new features from the summer updates is a template chooser. When you create a new Course, Project, Club, or Portfolio, the site created uses a template that is appropriate for each type of site. For example, new Course sites come with pre-created pages for Syllabus, Assignments, etc. The template chooser makes it possible to have more than one template for each type of site. In the spotlight on Fall 2023 Welcome, for example, we highlighted the two templates for Course sites: Interactive, intended for use with active student posting and commenting, and Informational, for sites containing course materials, with instructor posts.

So what does that have to do with student research projects?

When student researchers create a Project, they can now choose the template designed for student research projects! This template was designed with City Tech’s Undergraduate Research programs in mind–and was launched at the Undergraduate Research Workshop on Using OpenLab for Your Research Project.

The site features spaces for students to write about themselves and their research project, include an abstract, and feature any achievements like the poster session, conference presentations, or awards. Additionally, the blog page has been turned into a research log, where students can chronicle their work, track the sources they read, and reflect on their experience.

Screenshot of Sample Research Project created using the Student Research template

As you can see, the site is very streamlined with a clean look. Students can customize it, but they can also get started with their work right away, without needing to first decide about how to design and organize the site.

We can’t wait to spotlight some great student research projects using this template!

In the Spotlight: Accessibility on the OpenLab

Just Three Colours
Just Three Colors” by Rosmarie Voegtli via Flickr CC BY 2.0 Deed

The OpenLab has some useful resources to help you consider accessibility when you create or add content to a site. Learn more about accessibility on the OpenLab, and take advantage of the new Editoria11y plugin, a “spellcheck for accessibility” created by the web team at Princeton.

Editoria11y (pronounced “editorially”) checks your site and displays any existing issues with a thorough description of what they are and how you can address them. 

Once activated, the plugin will automatically perform accessibility checks. The results will appear for all admins, editors, and authors of the site. Professors and students alike will be able to see any accessibility issues in the posts they author on a site.

Editoria11y does not make changes on your site, but it provides instructions for how to make changes to anything that is flagged as an accessibility issue and provides useful context to understand why the changes are necessary.

To get started, activate Editoria11y Accessibility Checker in Dashboard > Plugins. For more information, read the Help materials on how to add plugins to your site.

We’ve found Editoria11y extremely useful and hope you do too!

If you’re curious about the a11y part of the name Editoria11y, check out this A11Y Project blog post about the numeronym a11y as a helpful resource to understand that a11y=accessibility.

In the Spotlight: Welcome to Spring 2023!

Yellow flower in full bloom
Mid-winter Optimism I” by Carl Campbell via Flickr, licensed under CC BY-SA 2.0

It might not look like spring outside, but welcome back for the Spring 2023 semester!

The OpenLab team is excited to work with you as you do great things on the OpenLab–and to help you learn more about using the OpenLab and working in an open community.

The OpenLab team has been busy adding new features and functionality. For example, you may have noticed some changes to the tools that are on by default in the profile of your course, project, or club. One addition is an Announcements feature, which allows admins of a Course, Project, or Club to post announcements that appear just beneath the avatar on a group’s profile. These provide an easy and prominent way to share announcements with members, such as an upcoming class, event, meeting. In addition to appearing on the profile, these announcements will also be sent via email notification to help ensure that everyone who needs to see them does. Announcements are activated by default, but admins can deactivate them in Profile > Settings, if you don’t plan to use them.

There are other helpful improvements that we described in the January 2023 Release Notes–we’ll be spotlighting some of them soon!

Be sure to check out the Spring 2023 OpenLab support options and join us for synchronous support:

  • Open Hours: students, faculty, and staff can sign up for open hours, one-on-one appointments to ask specific questions or ask to learn more about topics ranging from getting started to using a tool to implementing pedagogical approach. We’ve added a new tool for registering for open hours, which allows site admins to embed Calendly–many of you use this tool already, and now you can feature your Calendly directly in a page or post on your site–activate the Embed Calendly plugin via Dashboard>Plugins>Embed Calendly.
  • Workshops: If you missed the OpenLab workshops during intersession, you can request a workshop on any topic or technique! Bring a few colleagues, fellow students, or officemates to learn about how to build something, do something, or use something on the OpenLab!

There are also great asynchronous options for support:

  • Faculty members with any questions about getting your course site ready for the semester can refer to the helpful tips posted in the Teaching with the OpenLab module.
  • Students getting ready to use the OpenLab this semester can use the helpful OpenLab for Students module.
  • Everyone can get inspired by what this community has done on the OpenLab by looking through our past In the Spotlight posts.
  • The Help materials on the OpenLab are extensive, guiding members through creating and working in Courses, Projects, Clubs, and Portfolios. For example, our help documentation will walk instructors through step-by-step how to add students in bulk to your course by using a list of student emails, a feature we added a few semesters ago. Being able to add students to courses this way is so convenient, we even spotlighted it! Students, this means you might find yourself *automagically* added into a course without having to request membership or join it yourself.
  • As always, reach out to us if you need additional help: openlab@citytech.cuny.edu.

Wishing everyone a safe, healthy, and inspiring start to the semester. See you on the OpenLab!

In the Spotlight: Commenting

Graphic Conversation” by Marc Wathieu via Flickr CC BY-NC 2.0

Exciting news about comments!

If you added formatted text, links, or media to your comments on OpenLab posts or pages recently, you probably noticed some changes. If you read our This Month on the OpenLab posts on The Open Road (in the OpenLab News category), you probably already knew about this change to add rich text and media embedding for comments. Here’s what’s new:

The OpenLab now has enhanced commenting functionality, allowing you and your site members and visitors to write comments with rich text (bold, italics, links, etc), and easily embed media by simply pasting the URL, as you would in a post.

When you add a comment, you’ll see buttons to add rich text styles to your comment – bold, italics, underline, and numbered and bulleted lists. There’s also a button for adding a link, and one for embedding media. 

These plugins are already activated on all OpenLab sites, so if you’re a site admin, you don’t need to do anything on your site. We have help for Commenting on a Site, which includes the new rich text and media embedding functionality.

We hope this helps to make discussions on the OpenLab even more vibrant! 

In the Spotlight: Finding Public Domain & Creative Commons Images

This week, we spotlight three different sites where you can find public domain/ creative commons images to use on the OpenLab. As a reminder, when you add images to your OpenLab site or posts, it is important to make sure you respect copyright guidelines (see the library’s OpenLab module on copyright and fair use). This can be tricky! Just because an image can be grabbed online doesn’t mean it’s free to use or repost. The safest (and, in my opinion, best) way to source images is to look for media that is either in the public domain or licensed as part of the Creative Commons. Below are three repositories where you can search for such images:

A screenshot of Flickr that shows how to use the main search tool to filter images according to their licensing time. Mousing over "Explore" in the main Flickr menu will give you an option to search exclusively for creative commons images.
  1. Flickr: When you go to flickr.com/explore, you’ll see an option to search for images on the Commons. You can search by keyword to find what you need. You can also search in the top right toolbar and filter your results to limit these to images that have Creative Commons licenses, as pictured above.

  2. Unsplash: Unsplash is a repository of strictly freely-usable images. Any image on here is free for you to use. Unsplash is a wonderful resource. Bookmark it!

  3. Pixabay: Like Unsplash, Pixabay is a repository of thousands of free images. Use their search tool to find what you need!

Don’t forget that some Creative Commons licenses still require attribution, and, as a general rule, it is always nice to give an author credit for their work, even if it is openly-licensed. This attribution tool makes it really easy. If you’re using the OpenLab, you can also use this attribution plugin.

We hope this helps! Happy-image searching!

In the Spotlight: Request a workshop

This week, we spotlight the OpenLab “request a workshop” feature! Each semester, the OpenLab team offers workshops on topics that members often ask about. But there are always other topics, other interest, and other scheduling needs. The OpenLab team welcomes requests for focused workshops for the faculty, staff, or students in your departments, offices, and other stakeholder groups at City Tech. These targeted workshops can meet the needs of your group .

Not sure what might be of interest and/or use to your faculty? Here are some suggestions:

  • Using WordPress’s Block Editor
  • Collaborative Digital Annotation on the OpenLab
  • Using OERs and other open resources on the OpenLab
  • Sharing & Remixing Pedagogy: Rethinking Copyright and Attribution on the OpenLab
  • Supporting Multimedia Pedagogy with the OpenLab
  • Fostering Community through OpenLab interactions

If you are interested in having the OpenLab lead workshops for your department, office, club, initiative,or group, fill out our “Request a Workshop” form. Your responses will give us a better idea of your group’s size, schedule, and needs. Once we receive your request we’ll evaluate it and work with you to develop a workshop plan.

Please note that these workshops are accepted on a rolling basis, so get your requests in early if you want to have the workshop this semester.  

We look forward to working with you!

In the Spotlight: Favorites

This week, we spotlight the OpenLab favorites functionality, which makes it easy to bookmark courses, projects, clubs, and portfolios. 

Using the favorites functionality is easy: when logged-in users visit the profile of a group, a new menu item appears beneath the avatar, below the “Join Now/Request to Join” menu. This item reads “Add to Favorites” and is accompanied by a bookmark icon. 

A club profile featuring an avatar image,  beneath which appears a "join now" button and an "add to favorites" button. The "add to favorites" button is highlighted to draw attention to how it can be used.

In order to favorite a course/project/ club/ portfolio, click the “Add to Favorites” menu item. The page will reload and the menu item will be updated. Note that you can favorite a group even if you are not a member.

Going forward, you can access all of your favorites by hovering over the favorites icon in the black toolbar that appears at the top of every page (as long as you are logged in). 

A bookmark icon that appears on the a black toolbar at the top of an OpenLab page. This is the icon for "My Favorites" and it is highlighted in red to illustrate how it can be used.

We suggest adding your courses for this semester to your favorites list. This should make them easier to find!

Please also note that the option to add groups to your favorite doesn’t appear yet on mobile, only on desktop. We hope to add a mobile version in the future.

In the Spotlight: Block Editor Workflow, Pt. 2 of 3

back alley
Photo by Timothy Vollmer on Flickr.

This week, we spotlight how to create reusable blocks in your block editor. What is a reusable block, you ask? Great question! A reusable block is a way to easily access content that repeats on your site. For example, do your assignments frequently end with the same set of instructions (e.g. Please post by Sunday at midnight. Make sure to include relevant citations and end your post with a discussion question to the class)? Does your club frequently post reminders about when and where to meet? This is content that you can save as a reusable block. This will save you from having to create the content anew or copying and pasting it.

To create a reusable block:

  1. Select a block.
  2. Click on the three dots that appear in the toolbar.
  3. Click Add to Reusable blocks.
  4. Give the block a name.
  5. Click Save.

When you want to add your reusable block to a page or post, you can retrieve it by:

  1. Typing a forward slash in your editor, followed by the block’s name (e.g. /assignment block).
  2. Finding it in your block toolbar.

You can learn more about reusable blocks here

Ready to try your hand at this? Feel free to reply to this post if you have any trouble!

In the Spotlight: Block Editor Workflow, Pt. 1 of 3

Over the next two months, we will be sharing tips and tricks to using the new(ish) block editor. These posts will be short and focus on just one best practice at a time, giving you space to experiment. 

If you’ve tried your hand at the block editor already, you know there are multiple ways to add new blocks to a page or post. We find, however, that one of the best ways to add a new type of block is to type a forward slash followed by the block name. For example, as pictured below, “/image” or “/heading”.

Then, choose the type of block you want to use. That’s it! This is an easy way to avoid the “pointing and clicking” options, which can interrupt your writing process. Please note though that this only works if you have no other text in the block! 

We hope this was helpful. Please reach back out to us here if you run into trouble!