Find a tallish object more or less the size of the spray bottle I used in this example. Put it in a window during the day. Take two pictures of that object: one with the exposure set for the background-what is out the window and one where the exposure is set for the object that is inside on the windowsill.
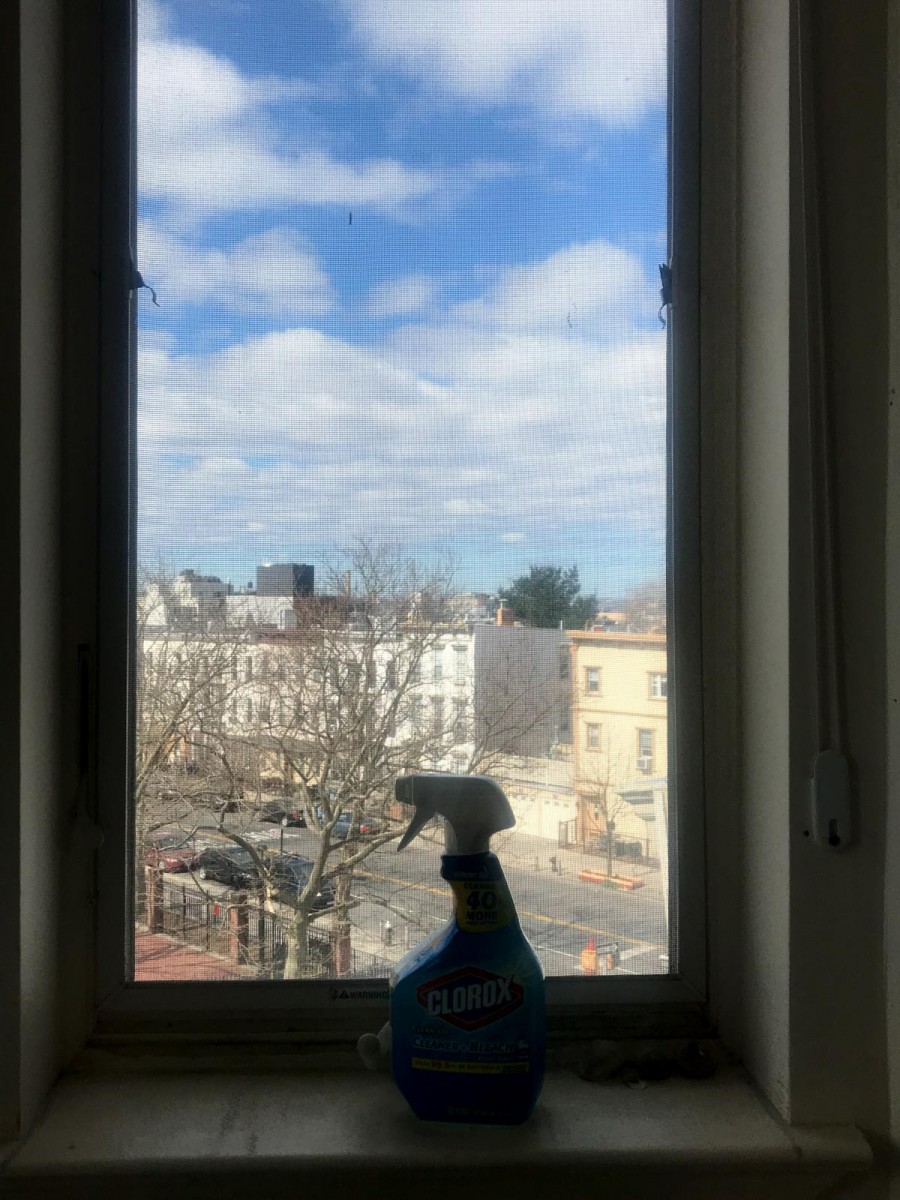
Exposed for out the window
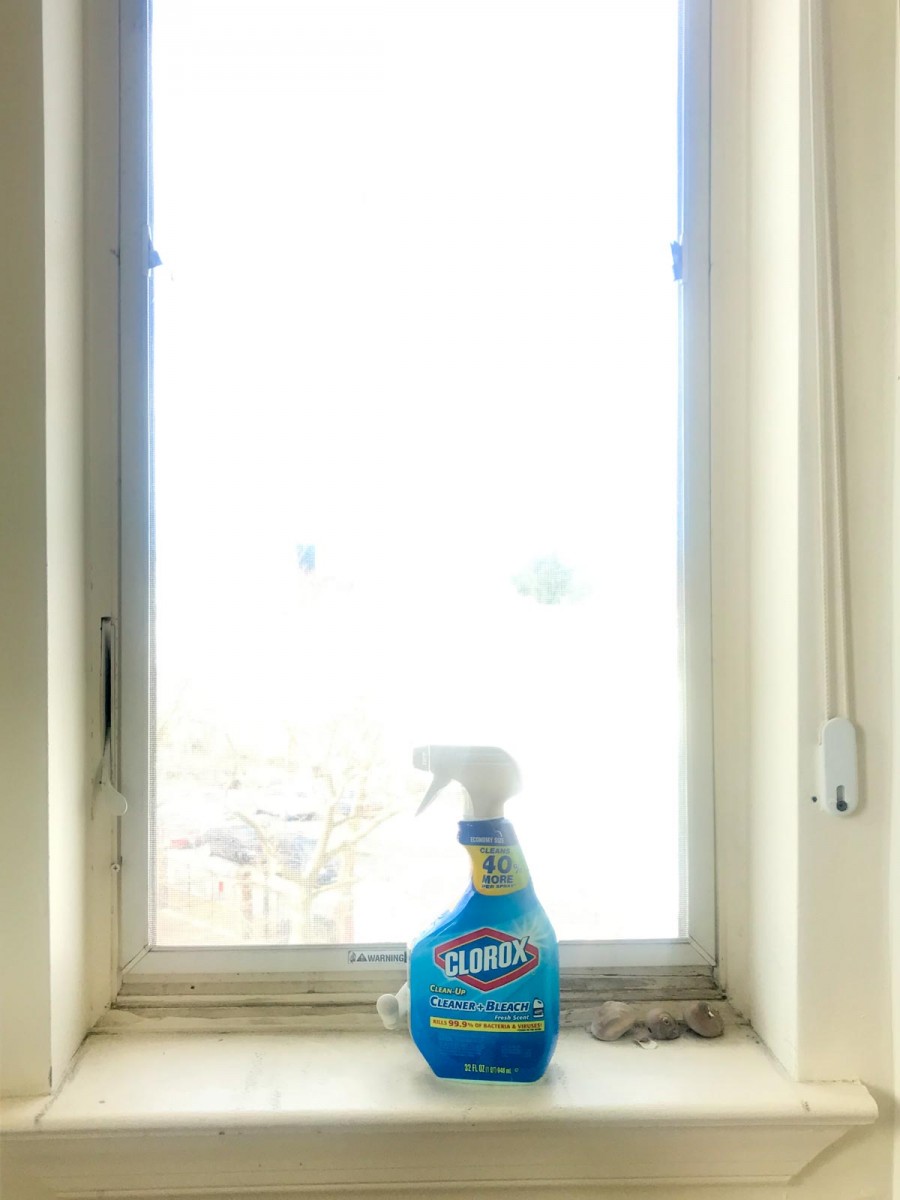
Exposed for the bottle on the windowsill
With a cameraphone: Touch the area where the bottle is and then drag the little sun icon down to reduce the overall exposure. For the second photo, drag the little sun icon up to increase the overall exposure.
With a camera: Use Exposure Compensation to take the two photos.
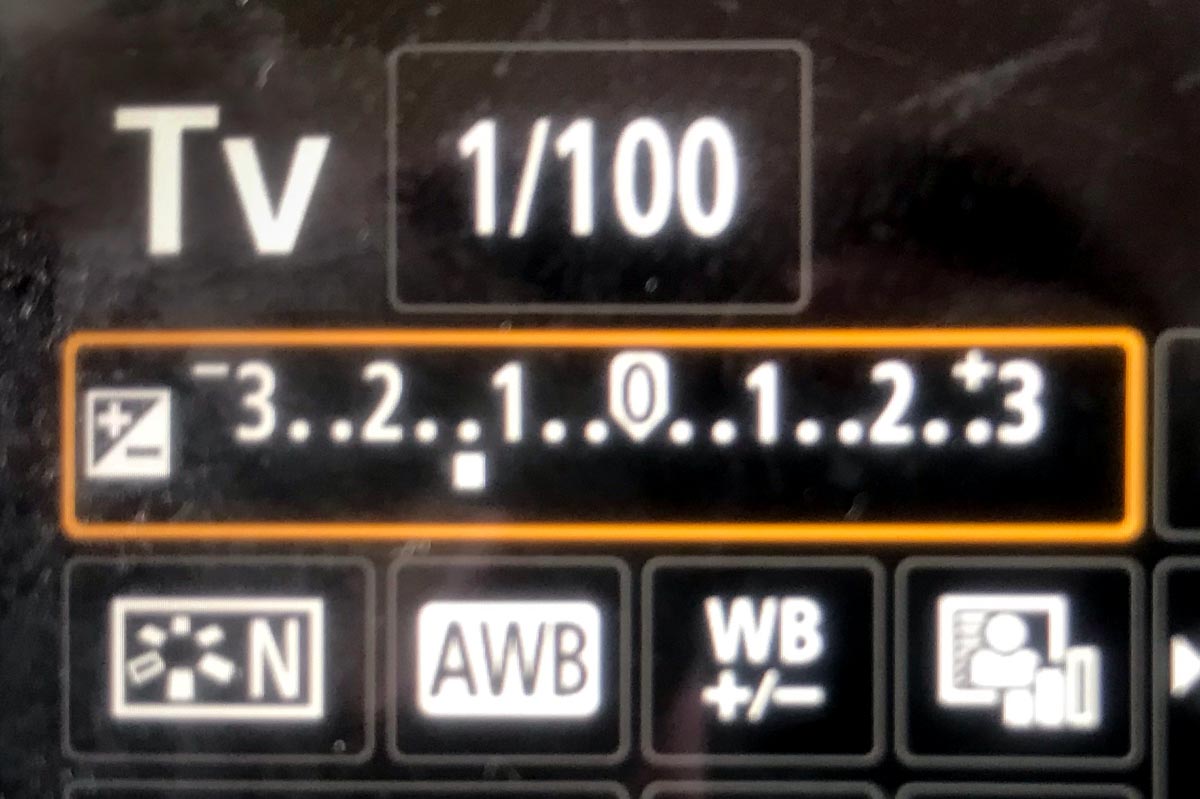
Exposure compensation scale set here to minus 1.3
Exposure Compensation-a way to force the camera to make an exposure either lighter or darker than the meter reading. Good for backlight or extremes of light and dark.
To find exposure compensation on your camera look for the scale with the plus and minus icon.
Below is a second example using different exposures of scissors on a windowsill partially in sunlight.
Create 5 pairs of images of that use different exposures to the change the mood and the feeling of the photograph. Work on a windowsill or with a bright desk lamp. You may use Lightroom or the Lightroom Photoshop App to adjust the highlights, shadows, blacks and whites of your final images.
Create a post with the category “Week 8 – Exposure” and post your final 5 pairs of images.
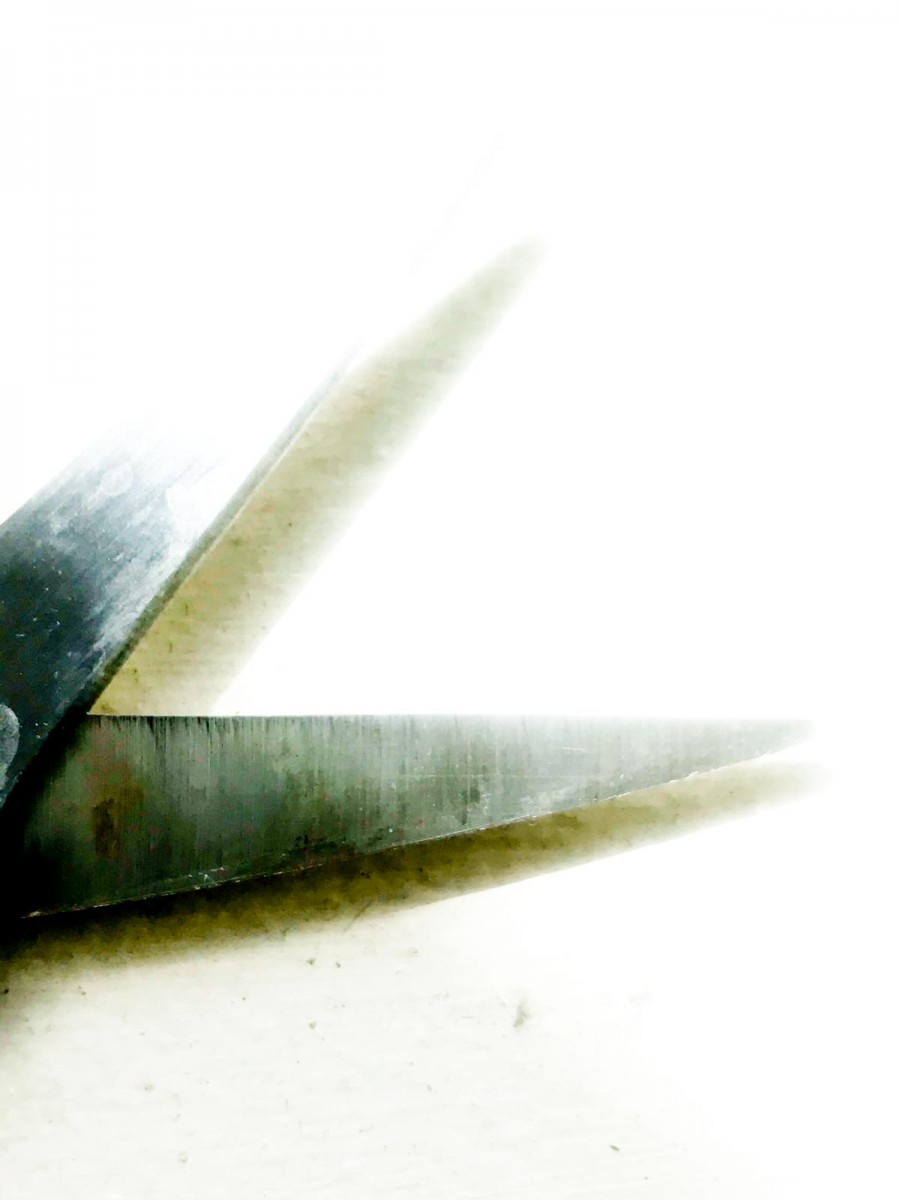
Scissors on window sill – Overexposed
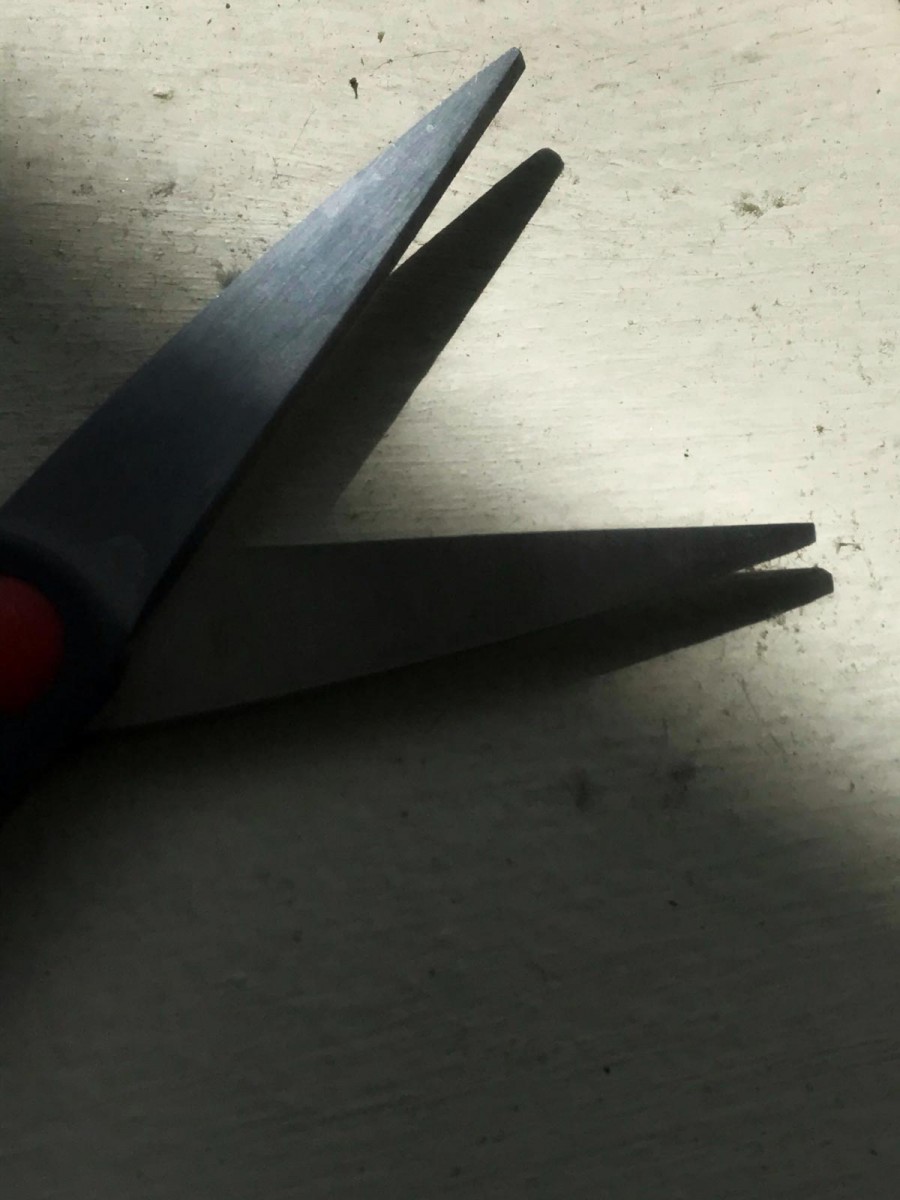
Scissors on windowsill – Underexposed

