Rotating Gallery

The Rotating Gallery is a simple plug in that allows a user to have a (you guessed it!) rotating gallery of images appear in one of the sidebars of their site.  Each time a visitor refreshes or visits a new page, the image will change, giving them an appealing overall sense of the site activity.  Here’s a screenshot of the final result:

The set up is easy too!  Follow these steps:

1) First, go to your Plugins page (left hand menu of your dashboard), find the ‘Rotating Post Gallery,’ and click ‘activate.’

2) Once activated, ‘Gallery Post’ will appear in the left hand menu, click there, hit ‘Add Post’ and begin adding images via the media uploader (as you would on any page or post to which you’re adding images).  We do recommend reducing the size of these images, to help them fit the sidebar without distortion.  You can add text (see the arrow below), but there’s not much room in a sidebar, so keep it short!  Once finished, click publish.

3) Now visit your widgets page, which you can find at Appearance>Widgets.  Drag the Rotating Gallery widget to your sidebar, choose a number of images (type ‘all’ if you want all to appear), an image size, and you’re done!

We do recommend changing the image size when uploading the images, because the plugin will try to stretch images to fit in the sidebar, sometimes distorting them more than you’d like.  Changing the size in the widget helps this a bit, but choosing ‘thumbnail’ when uploading is even better.

As always, contact us with any questions!

Ajax WP Edit Comments

Many of our professors use the ‘comments’ function on course sites to have students respond either to one another’s work or to a prompt, as in the example from Professor Rosen’s above.

And comments are not just useful for professors–encouraging comments from users is one of the main ways for a site to interact with the public, particularly the larger public outside CityTech.  But until recently, users couldn’t edit their comments if, say, they rethought what they had said, had something additional to add, or even just misspelled something.

To deal with that, we’ve installed a new plug-in called “Ajax Edit Comments.”  This plug-in allows for comments to be edited by users for a set length of time (the administrator of the site can set that time-length), and it also has a spell check feature.  Unlike most plug-ins, which usually have a specific audience, we really recommend that all OpenLab users activate this one.

Once you’ve activated the plug-in users who post will see–depending on how long the administrator sets it for–an editing interface.  Clicking there will allow users to edit the message, the username, etc.  And they also will see a button which will allow them to request deletion:

All of these options, can be changed by the administrator, and you can do that on the plug-ins page, under settings.  DO REMEMBER THAT IT’S HERE, as the plug-ins page is not the most common place to find the settings interface:

Here you can change the length of time that users can edit, etc.

In addition, the administrator can edit all comments, and will find a more robust set of editing options on the dashboard.

Including an editing interface:

And even a way to adjust comment times, etc:

There’s more information on how to use the plug-in in the video below.  And as always, contact us with any questions!

http://youtu.be/JZyudPKg44g

Contact Form 7

Contact Form 7 is way of allowing visitors and users to contact you that is simple yet flexible (in wordpress that usually means there’s a simple set-up for people who want simple, and complexity for people who want complexity).  On the OpenLab, this plug-in is probably most useful to clubs and projects, particularly those who have visitors from outside the CityTech OpenLab community.  Here’s a screenshot of the final result:

Below is a nice video with clear explanaition that shows how to use the plugin. Remember (as with many of the video tutorials you’ll find on The Open Road) the Contact Form 7 plugin is already installed on your site.  That means you only need to go to the ‘plugins’ (left hand column of your dashboard) and ‘activate’ it.  That also means you can skip any information in the tutorial about installation.  In this video, that means you can watch the first 30 seconds or so, and then skip to 2:33.  And most of the basic setup info ends about 2 minutes after that.

Hope you like it.  And here you can find support forums, an FAQ, etc.  And as always, contact us with any questions!

WP-Polls

Adding a poll to your site is a snap with the WP-Polls plugin!  Clubs and projects can use polls on the OpenLab to determine user needs, interests, or even just set up a meeting time!

This short video is a perfect introduction to this simple plugin.  If you have any questions, remember, you can always contact us!

Image Resizing

Image resizing gets easier and easier with WordPress.  Once upon a time editing of that sort had to take place elsewhere, but now most simple image editing can be done directly in the media upload dialogue box, or later in the Media Library.

That said, image-resizing is critically important for a few reasons:  first, it’s good practice to keep images as small as needed in order to keep pages loading smoothly and quickly.  Note that most digital cameras and even some phones are likely to be set to take images that are vastly larger than a user of a computer screen is likely to need (unless you’re NASA, then you might feel the need for this).  Second, all OpenLab posts and pages have media upload limits, and this can help you get under those limits.  And third, OpenLab sites themselves have storage limits–if you are running photograph or image heavy courses (as we do here in the CityTech AD/GA department, for example) or clubs, you might find yourself approaching that limit unnecessarily.  These tips will help with that.  Do note, while all images can be changed later, we can’t recommend enough the importance of editing images when you upload, rather than setting yourself up for the daunting project of going back in to edit when things have gotten out of hand.

To resize your images, after you upload your image click on ‘edit image’ in the media upload dialogue box:

Then click ‘Scale Image’ in the upper right of the dialogue box.  It depends on the theme you’re using, but as a general rule, most posts are about 600 to 700 pixels wide.  So if you don’t need your viewer to enlarge the image to see greater detail, no image needs to be wider than 600 to 700 pixels, and you can set that here.

Also note the Thumbnail Settings, which will allow you to choose which part of your picture will appear as a thumbnail in your post (this is especially valuable when the focus of your picture isn’t in the center–by default thumbnails will focus there).

And you’re done!  Also remember that you can resize images when inserting them into the post or page, but that won’t change the image size in the media library, just how it appears  on your site.  And as always, contact us with any questions!

WP LaTeX

The WP LaTeX developers created this plugin to “combine the power of LaTeX and the simplicity of WordPress to give you the ultimate in math blogging platforms” which, they admit really “sounds nerdy.”

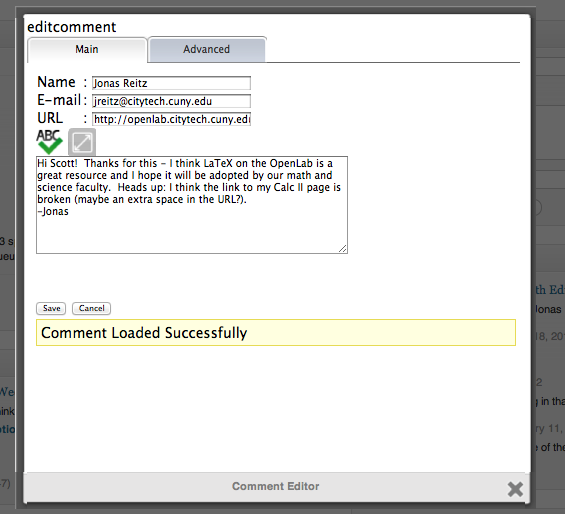
The plug-in presumes you know LaTeX, but just in case you’d like to know more, or if you’re looking for a refresher, or if you’re just one of the curious, there is a useful tutorial here.  In addition, Jonas Reitz has kindly allowed us to link to an assignment in his Calc II class which includes some basics, like fractions, radicals, and integrals.  You can find that here.  And if you’re trying to write LaTeX code, you’ll find that a tester is an invaluable too.  You can find a good one here.   Thanks to Jonas for all these resources!

What follows, then, are guides and tips for how to use the WP LaTeX plug-in, written by the plug-in creators.  More information about them can be found here.  As always, contact us with any questions.

_____________________

How do I add LaTeX to my posts?

This plugin uses the WordPress Shortcode Syntax. Enter your LaTeX code inside of a[latex]...[/latex] shortcode.

[latex]e^{\i \pi} + 1 = 0[/latex]

You may alternatively use the following equivalent syntax reminiscent of LaTeX’s inline math mode syntax.

$latex e^{\i \pi} + 1 = 0$

That is, if you would have written $some-code$ in a LaTeX document, just write $latex some-code$ in your WordPress post.

For the curious, the shortcode syntax is slightly faster for WordPress to process, but the inline syntax is a little easier for us humans to read. Pick your poison.

________________

Can I change the color of the images produced?

Yes. You can set the default text color and background color of the images in the Plugins -> WP LaTeX admin page.

You can also change the colors on an image by image basis by specifying color andbackground attributes inside the LaTeX shortcode. For example:

[latex color="ff0000" background="00ff00"]e^{\i \pi} + 1 = 0[/latex]

will produce an image with a bright green background and a bright red foreground color. Colors are specified in RGB with the standard 6 digit hex notation.

The equivalent “inline” syntax uses fg and bg parameters after the LaTeX code.

$latex e^{\i \pi} + 1 = 0&bg=00ff00&fg=ff0000$

________________________

Can I change the size of the image?

You can specify a size attribute in the LaTeX shortcode:

[latex size="4"]e^{\i \pi} + 1 = 0[/latex]

or, equivalently, an s parameter after the LaTeX inline syntax:

$latex e^{\i \pi} + 1 = 0&s=4$

The size can be any integer from -4 to 4 (0 is the default). These numbers correspond to the following LaTeX size commands.

size = LaTeX size -4 \tiny -3 \scriptsize -2 \footnotesize -1 \small 0 \normalsize (12pt) 1 \large 2 \Large 3 \LARGE 4 \huge

__________________

The LaTeX images work, but they don’t really fit in with my blog’s theme

You can adjust the CSS used for the LaTeX images to suit your theme better. Go to Settings -> WP LaTeX and edit the Custom CSS.

_________________

I want to break out of math mode and do some really wild stuff. How do I do that?

You can’t with this plugin. WP LaTeX forces you to stay in math mode. Formatting and styling for your posts should be done with markup and CSS, not LaTeX.

If you really want hardcore LaTeX formatting (or any other cool LaTeX features), you should probably just use LaTeX.

________________

Instead of images, I get error messages. What’s up?

  • Formula does not parse: Your LaTeX is invalid; there must be a syntax error or something in your code (WP LaTeX doesn’t provide any debugging).
  • Formula Invalid: Your LaTeX code attempts to use LaTeX commands that this plugin does not allow for security reasons.
  • You must stay in inline math mode: Fairly self explanitory, don’t you think? See above.
  • The forumula is too long: Break your LaTeX up into multiple images. WP LaTeX limits you to 2000 characters per image.
  • Could not open TEX file for writing or Could not write to TEX file: You have some file permissions problems. See Intallation instructions.

Calendar, The Plug-In

‘Calendar,’ the not-so-creatively-named but very-nicely-designed plug-in, is now available on the OpenLab.  As you might expect, it creates a customizable, searchable calendar for your course, club, or project, and that calendar can be hosted in a post or on a page.  And the Calendar comes with two widgets which allow ‘today’s events’ and ‘upcoming events’ drawn from the Calendar to appear in your site’s home sidebar!

To get started:

1) Visit your plug-ins page, search for ‘Calendar’ and then click ‘activate.’

2) Create a new page or post (I’d name it ‘Calendar’) and type just what you see in the screen-shot below (because the plug-in is activated here on The Open Road, I can’t type it here!).  Be sure to remember the {} brackets:

3) To show ‘Today’s Events’ and ‘Upcoming Events’ in your sidebar, you’ll want to drag those widgets (found under APPEARANCE>WIDGETS) into the sidebar where you’d like them to appear.

4) Once activated and placed, you’ll find the settings for the Calendar at the lower left of your screen, near the bottom of your left menu bar.

From there you can Manage the Calendar…

Manage the Categories…

And Change Calendar Options…

Do note that on the Calendar Options page you can allow members to add their own events, and you can change appearance and even edit the code itself.  Here you can change colors, sizes, etc.  And if you’re not that comfortable with code, there’s a handy reset button just below to undo anything you don’t like.

And you’re done!   Remember, if you’d like the Calendar to be a sort of ‘home’ page for your site, you can set the Calendar into a post, then make that post sticky.

A Couple of Final Notes:  

On Usage:  Why a calendar?  A calendar is a great way for a club or group to tell its users about upcoming events, deadlines, etc.

But a Calendar can also be a useful course management tool, as a useful visual ‘catch-all’ way to organize an entire course.  Sometimes students (and instructors) find it a clearer overall view of the course as opposed to separate assignment/reading/activity pages, or long drop down lists of dates and readings/assignments.  The information here can all be repeated on other pages, and readings can be directly linked to (you can link from here to a readings page within your own site, and keep that readings page password protected).  When we talk about using the OpenLab to manage courses, we’re often trying to bring the various elements of a course to a single hub for a student, who can sometimes be overwhelmed when they feel course elements scattering across a site.

On support:  Here you can find forums started by and/or moderated by the developer of this wonderful plug-in.  Do remember that a lot of this support (like much wp support) is for people running their own sites, and so don’t be overwhelmed by installation questions, and remember we’re always glad to help.  As always, contact your Community Team with any questions!

SlideShare

The SlideShare plugin allows you to embed presentations or documents you’ve uploaded to SlideShare into your posts or pages. Since there are only a few steps involved, I’m including instructions below. But if you’d like help using the plugin — or using SlideShare itself — just let us know.

1. Go to Dashboard > Plugins, and activate the SlideShare plugin.

2. Log in to your SlideShare account or create a new one for free.

3. Find or upload the presentation you want to include on your site. Click on the “Embed” button that appears above the presentation, and then click on “Customize.” You’ll see some code labeled “Shortcode for WordPress.com blogs”: copy that code.

4. Paste the code into the post or page where you would like the SlideShare presentation to display. Click publish, and you’re done!