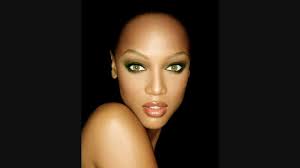
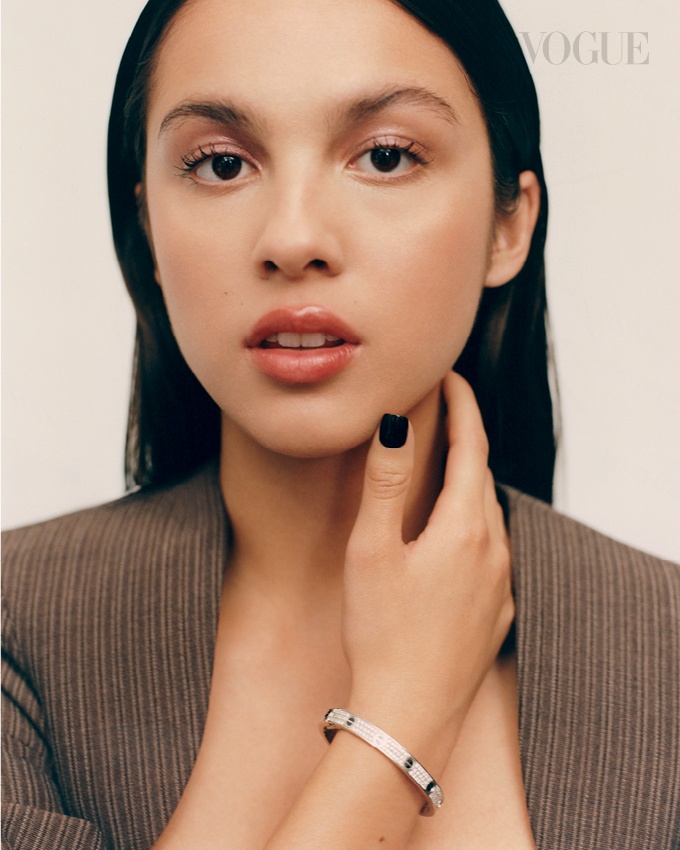
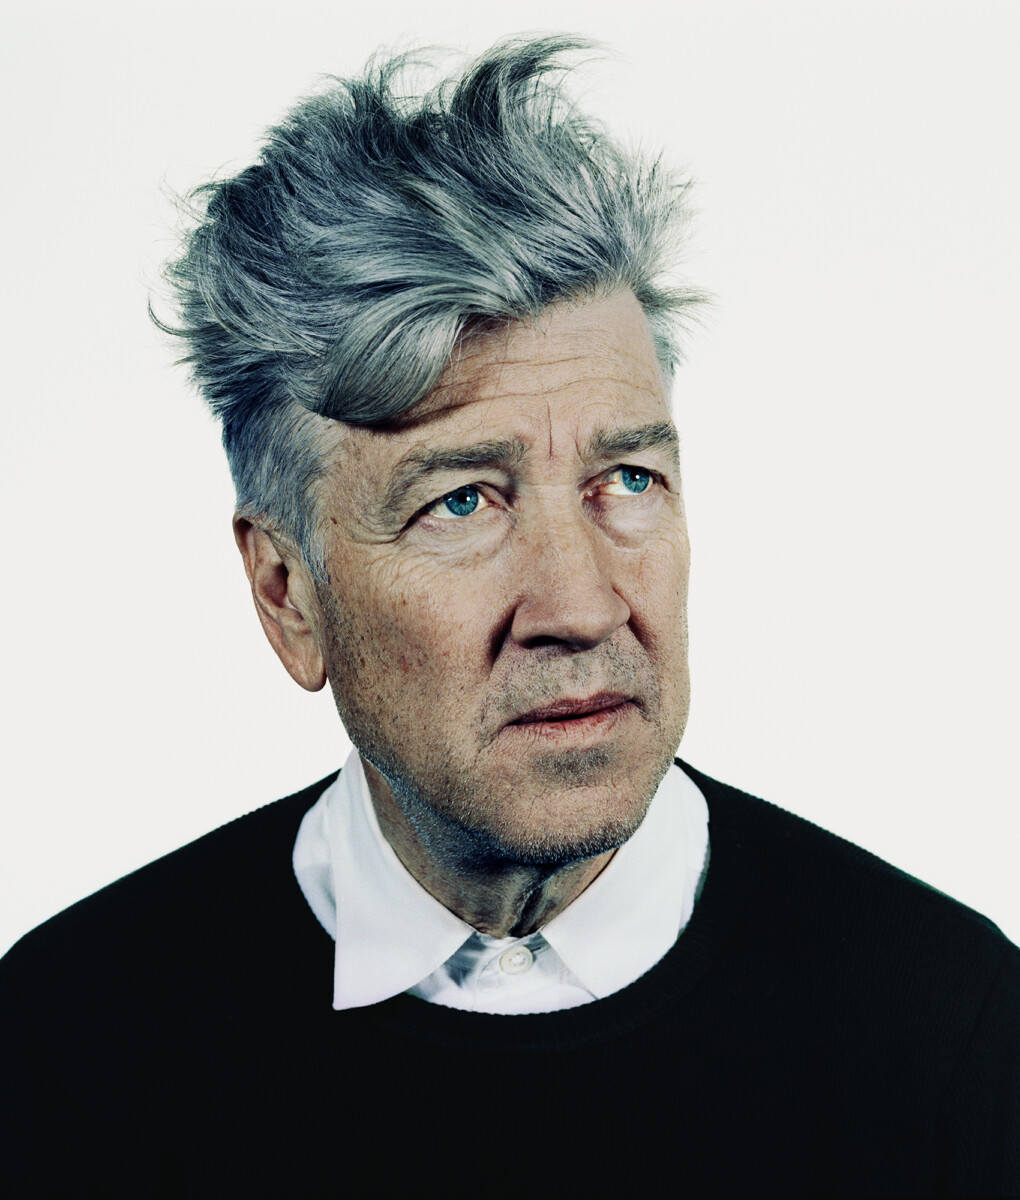
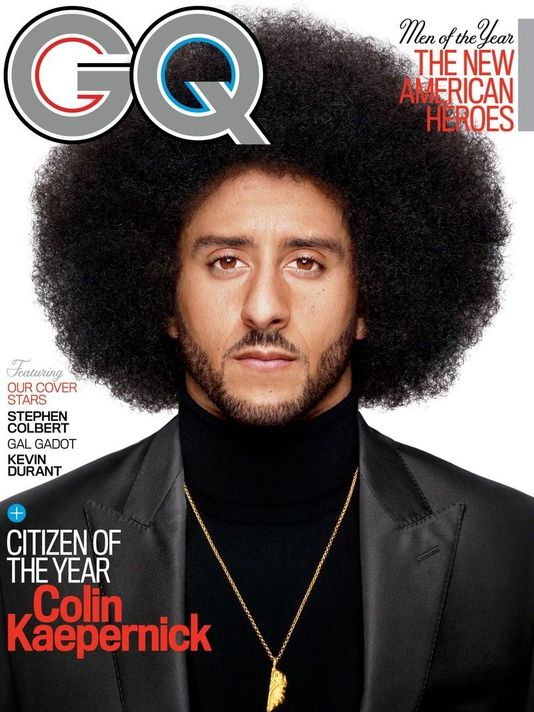
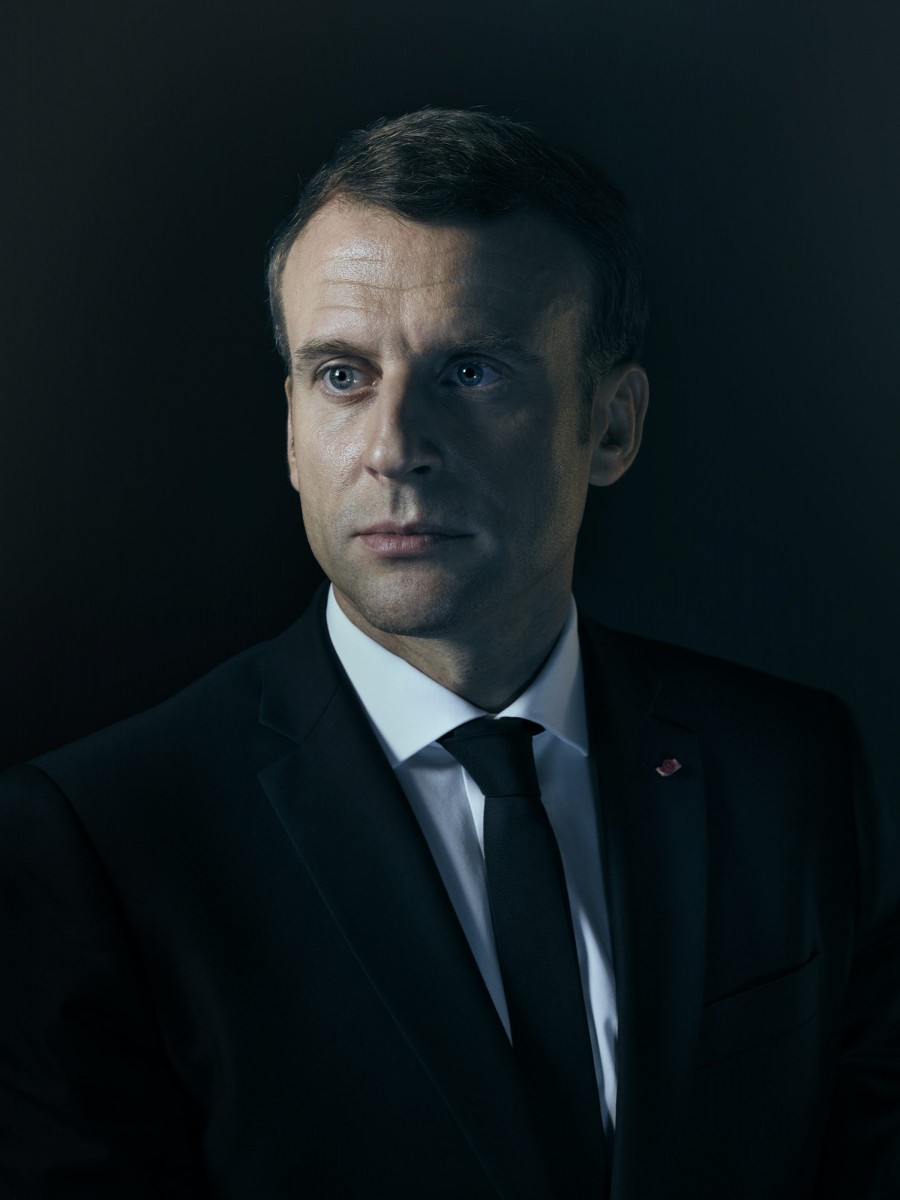
There are three basic positions for someone’s head and face in a portrait.
Front view
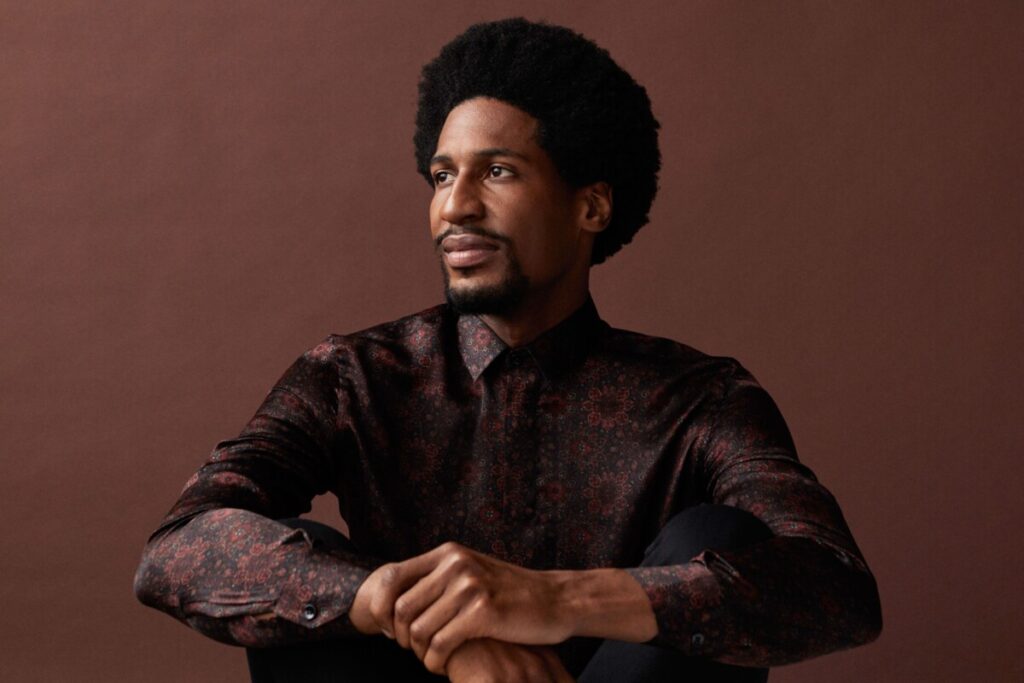
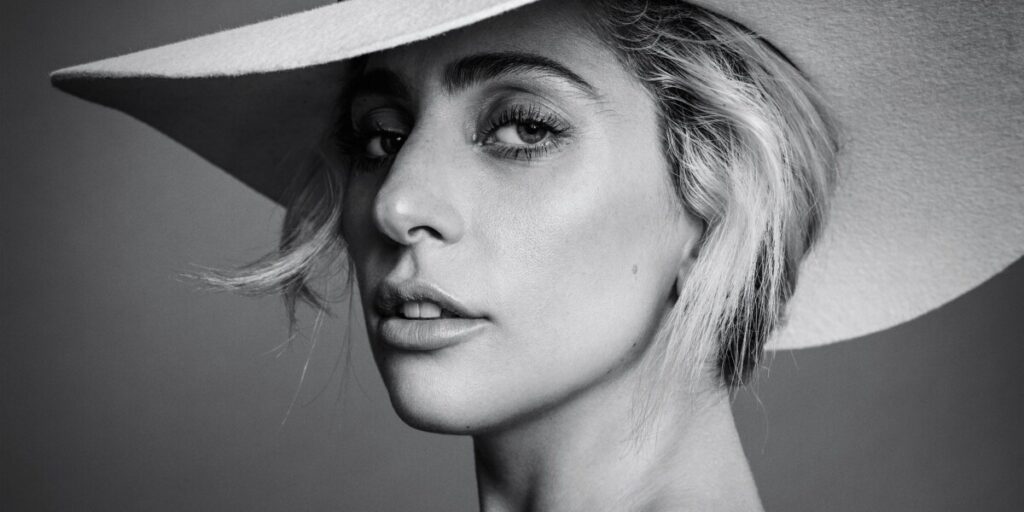
3/4 view
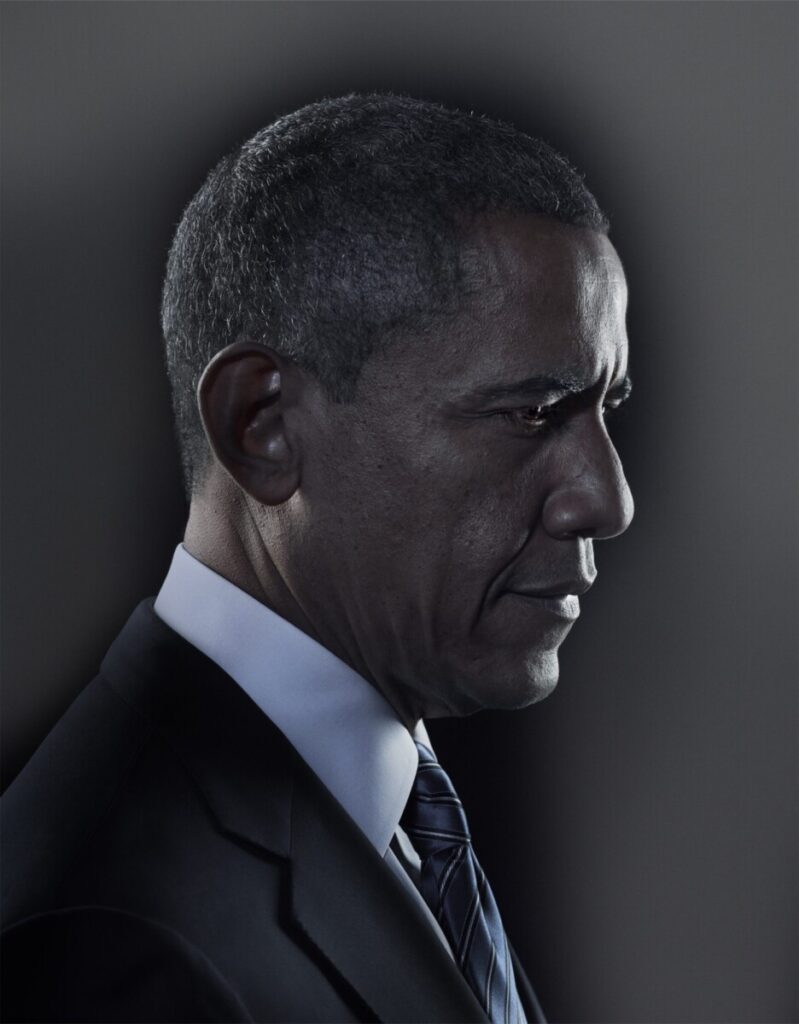
Profile
Front view. Photographer: Celeste Sloman
Three-quarter view. Photographer: Celeste Sloman
Profile. Photographer: Nadav Kandar
Expression
For family photos a smile is a must but not so for a portrait. It is however important that your subject look comfortable. It is your job as the photographer to talk with your subject and make them feel comfortable.
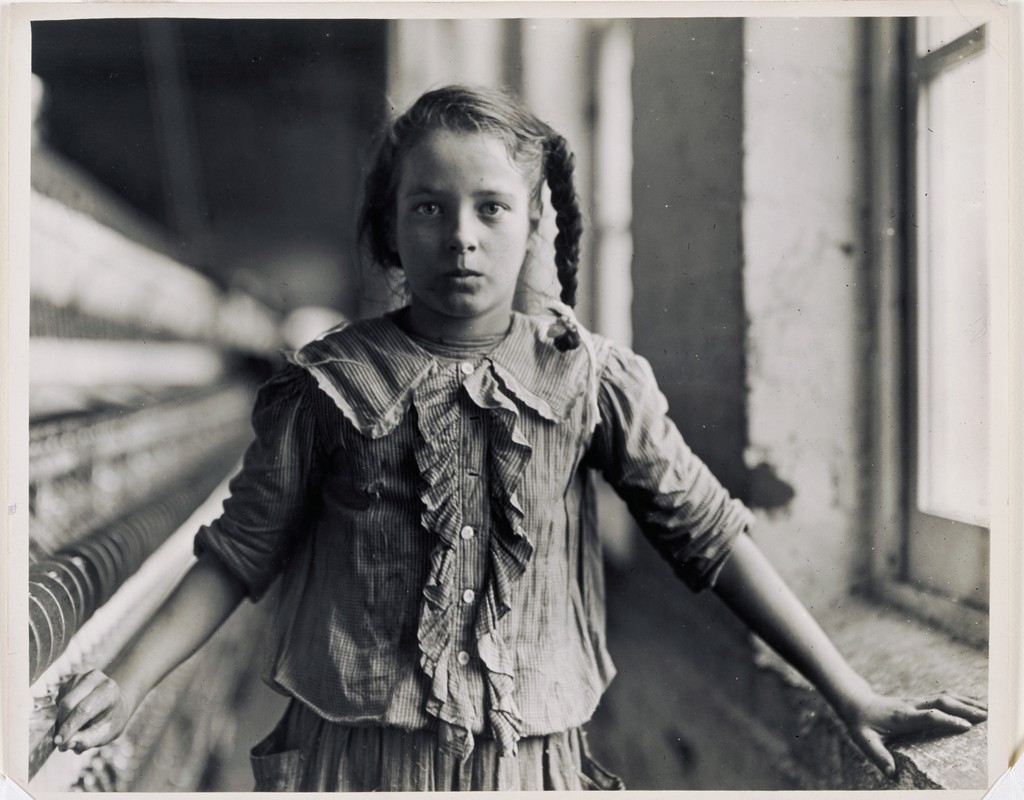
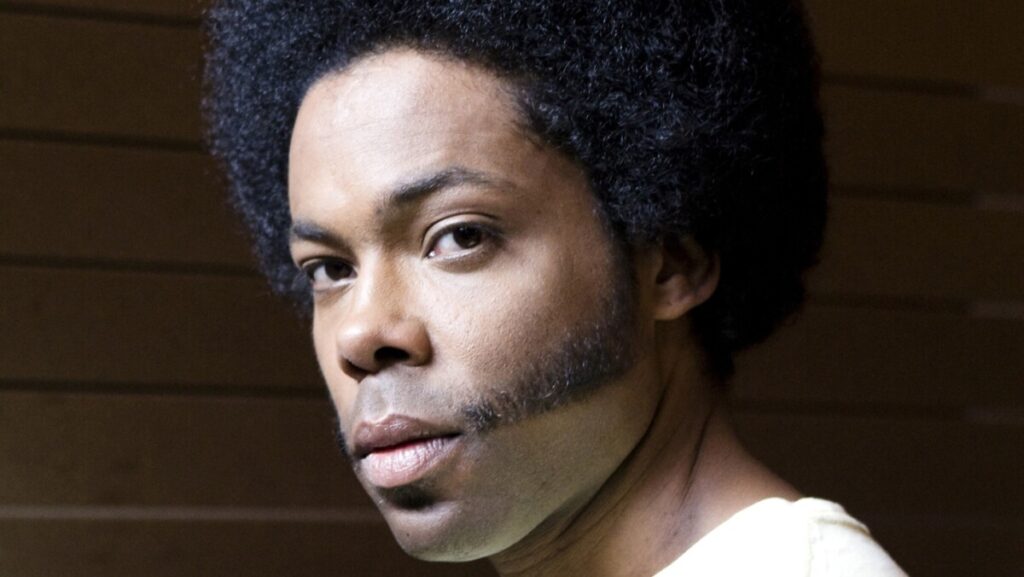
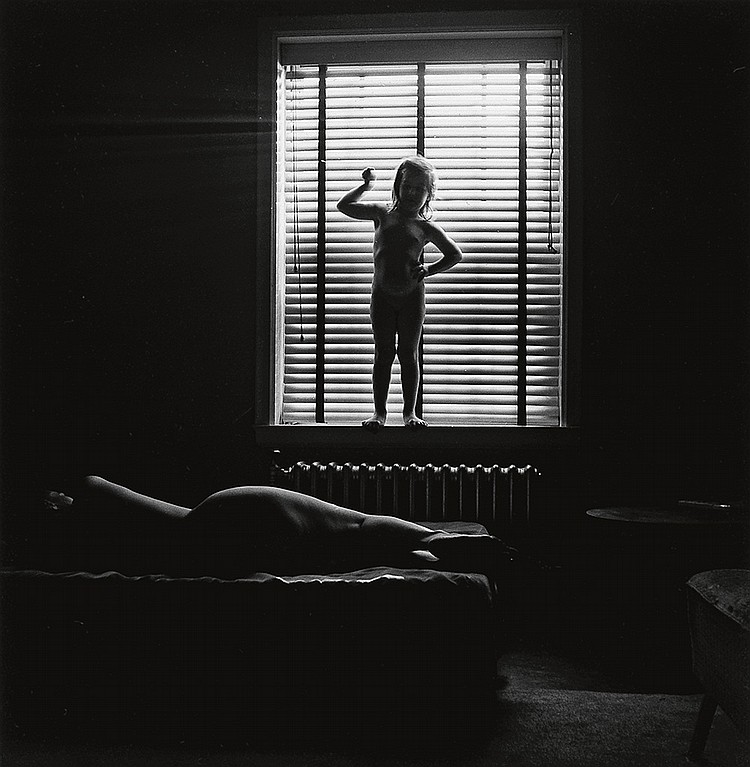
Focus
When shooting a portrait, the subject’s eyes must be in focus. Full stop. period.
Photographer: Philip-Lorca diCorcia
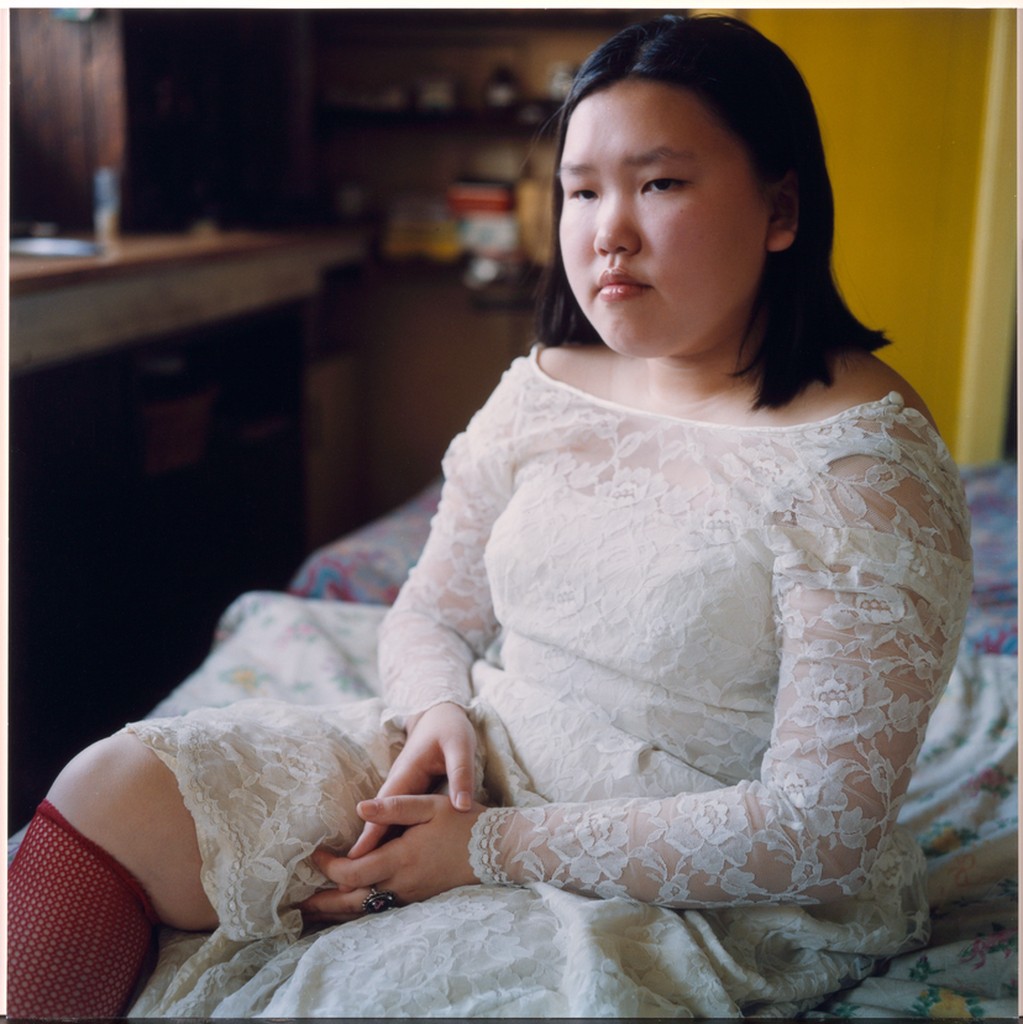
Photographer: Helene van Meene
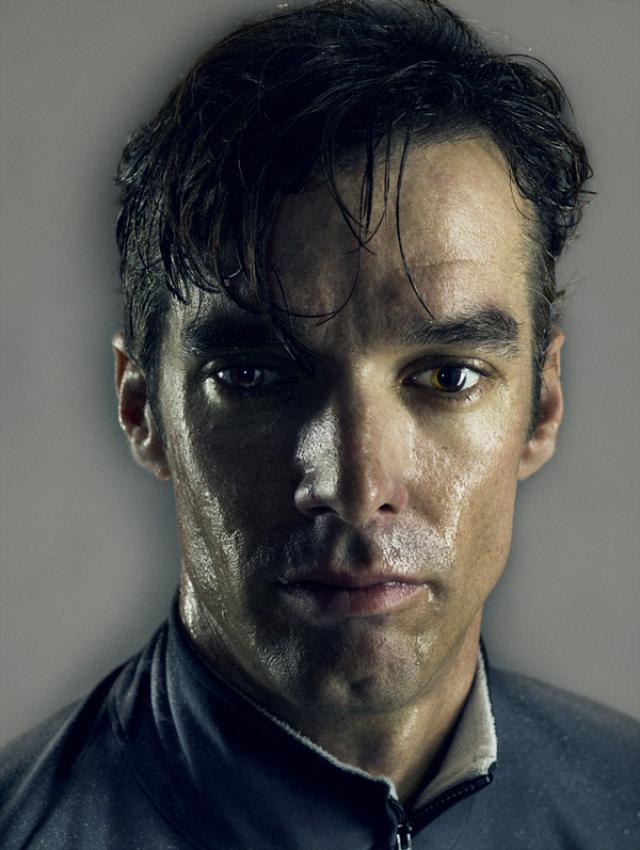
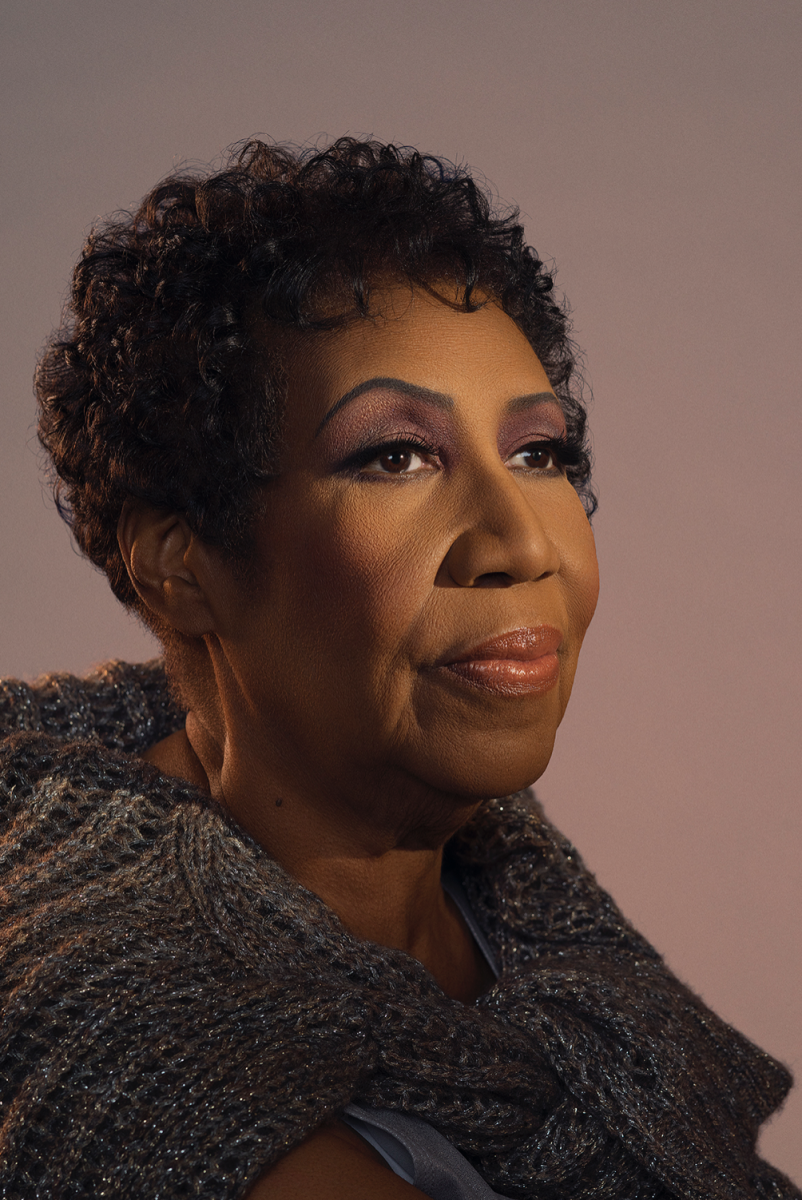
Portrait Lighting Styles
There are a 5 basic lighting styles for portrait photography. Each style is defined by how light falls on the face.
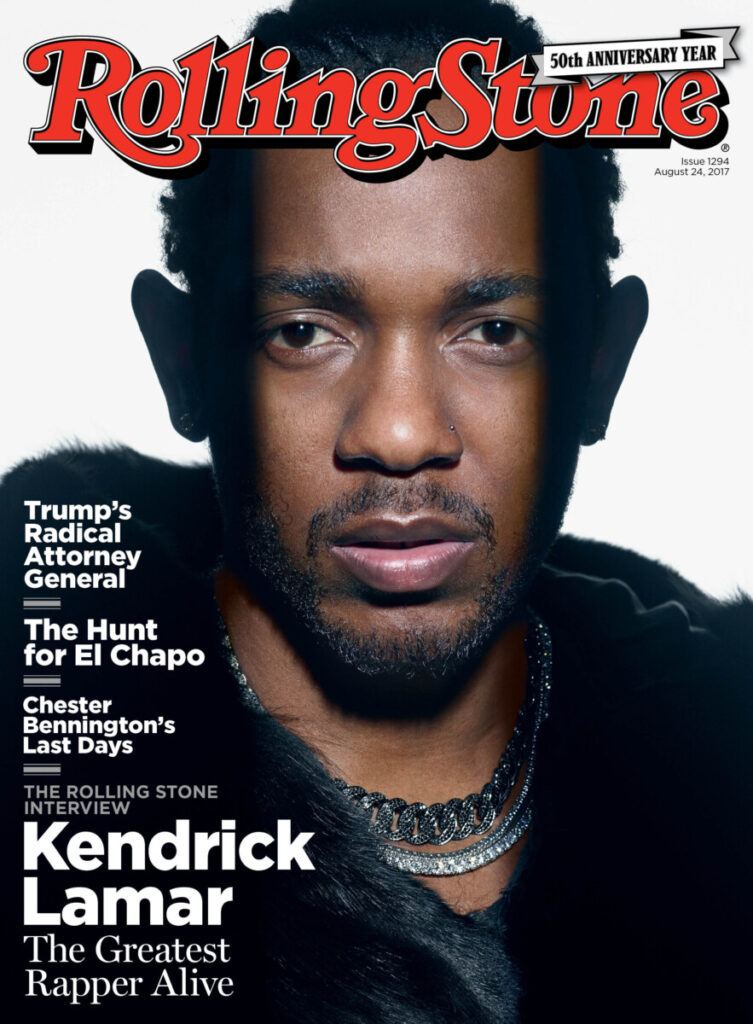
Rembrandt Light – the model is face forward, main light is at 45 degrees and casts a light on the opposite side of the face to form a triangle on the cheek.
Michael B. Jordan. Photographer: Peggy Sirota
2. Broad Light-model’s face in 3/4 view-light falls on the side of the face with the visible ear. Good for controlling the reflections on glasses.
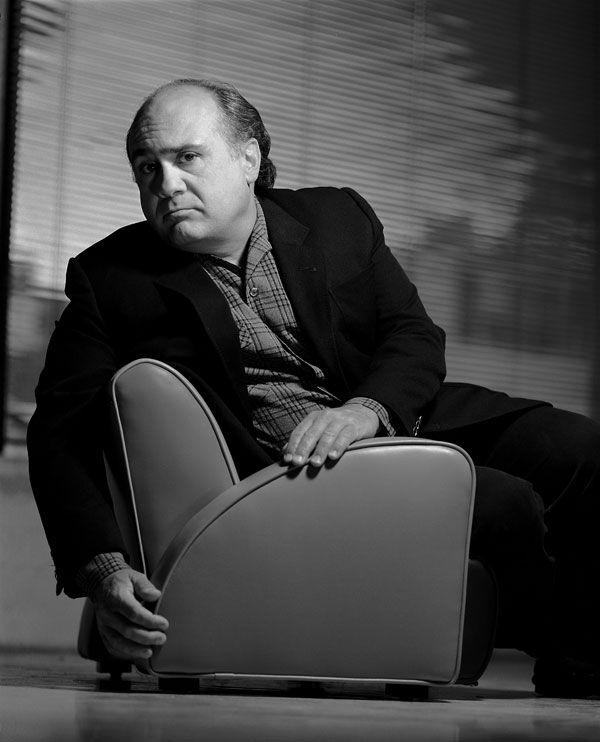
Danny Devito. Photographer: Gregory Heisler.
3. Short Light-model’s face is in 3/4 view, the light falls on the side of the face with the features. (Not on the side with the visible ear.)
Aretha Franklin. Photographer: Matthew Jordan Smith
Respect the presenter. Give them your full attention.
Ask questions about your colleague’s photography. This is not the time to ask questions about your personal concerns.
Start with the positive when you comment on your colleague’s works. Use the terms below that we have learned this semester.
Be generous. Offer your thoughts. Your opinion and judgements are important. Do not leave the work of giving feedback to the others in the class.
Conversely, please do not speak over your classmates.
Terms
Framing: How the frame brings together the elements inside the rectangle juxtaposing them, creating relationships between them
Types of shots: how much information is in the frame
a long shot
a medium shot
a close up
an extreme close up.
Frame within a frame – use elements in the frame to enclose the main subject and draw attention to it. A frame within a frame can be a window or door or it can be items in the foreground such as branches.
Angle of View: describes the camera position in relationship to the subject. The angle of view may be:
a worm’s-eye view
a low-angle
eye-level
a high-angle
a bird’s-eye or aerial or overhead view
an oblique angle.
Rule of Thirds – Instead of placing the main subject in the center of the frame, divide the frame into thirds horizontally and vertically and place the main subject at one of these intersections.
Fill the Frame – (get closer) – do not leave empty areas that do not add to the composition and plan to crop in later.
Perspective-the representation of a 3-dimensional space on a 2-dimensional surface by converging lines, diminishing scale and/or atmospheric perspective.
Depth of Field-The distance between the nearest and farthest points that appear in acceptably sharp focus in a photograph. Depth of field can be shallow or extensive. While the term includes the word depth, depth of field refers to focus.
Frozen Motion-Motion is stopped and captured in the frame with a fast shutter speed.
The Decisive Moment: A term coined by Cartier Bresson- “the simultaneous recognition, in a fraction of a second, of the significance of an event as well as the precise organization of forms which gives that event its proper expression.”
Blurred motion-moving elements blur with a longer shutter speed.
Aspect Ratio-the proportion of the width of the image to the height of a 2D image
Clipping-the intensity of the light falls outside of what can be recorded by the camera and there is a loss of detail.
Color Profile-the data for a digital device, such as a printer or monitor, which describes its gamut, or range of colors. Used to match the gamut from one device to another.
Exif Data-information stored by the camera in the file.
Gamut-range of colors
Histogram- a graphic representation of the tones in an image. A spike of data on the left side indicates underexposure, on the right overexposure.
Neutral Value-RGB values are equal or gray
Non-destructive Editing-adjust the image without overwriting the original image data. Instructions are written to a sidecar file that tells the software how to interpret the image.
White Balance-the setting that adjusts for the color temperature of the light and that will make a white object appear white or a gray object a neutral value
Demo Photos
Global Corrections
Global corrections adjust the entire file. In the Lightroom CC, it includes the controls under Light, Color and Effects. In Lightroom Classic, this includes everything in the basic panel: White balance, Tone and Presence.
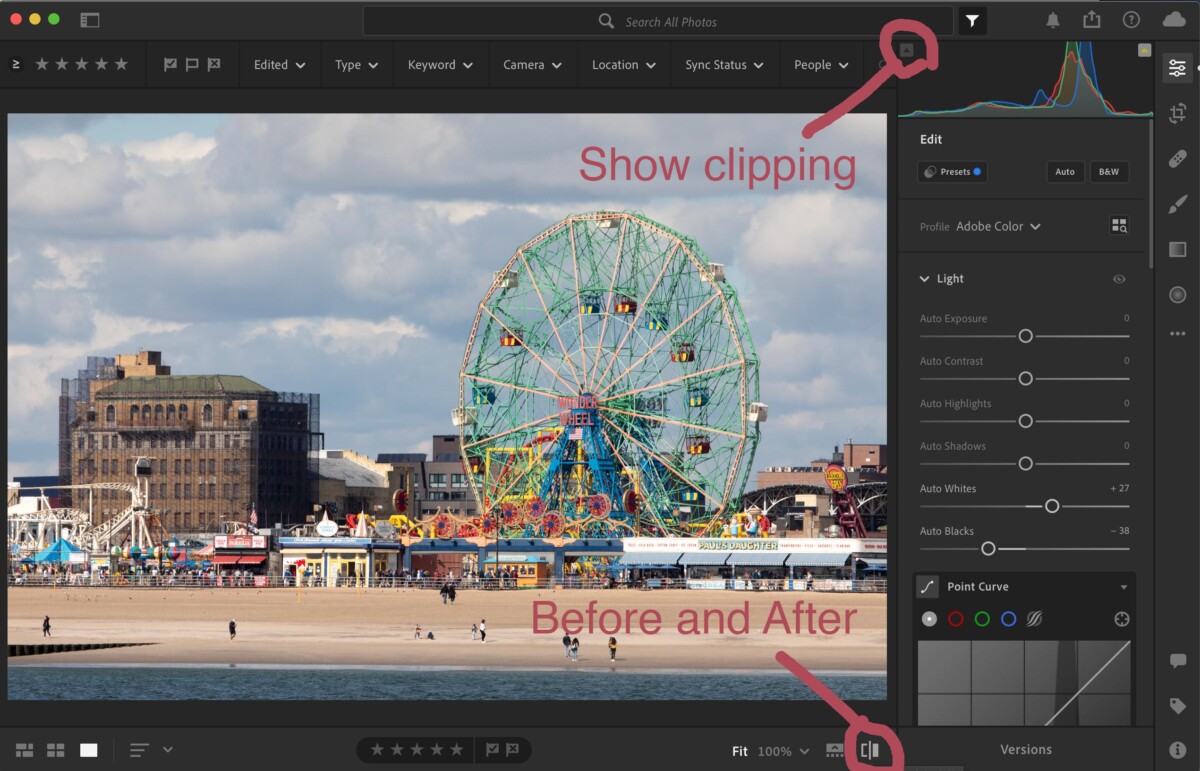
Using the Histogram
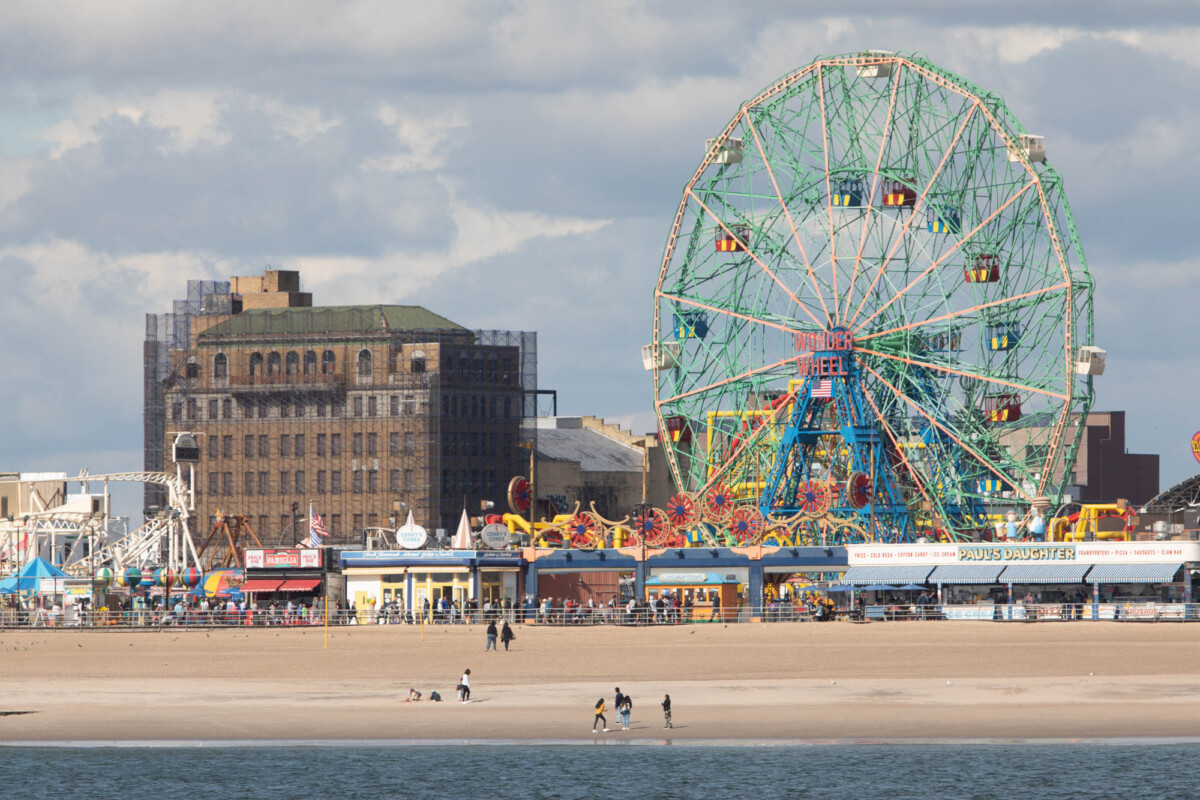
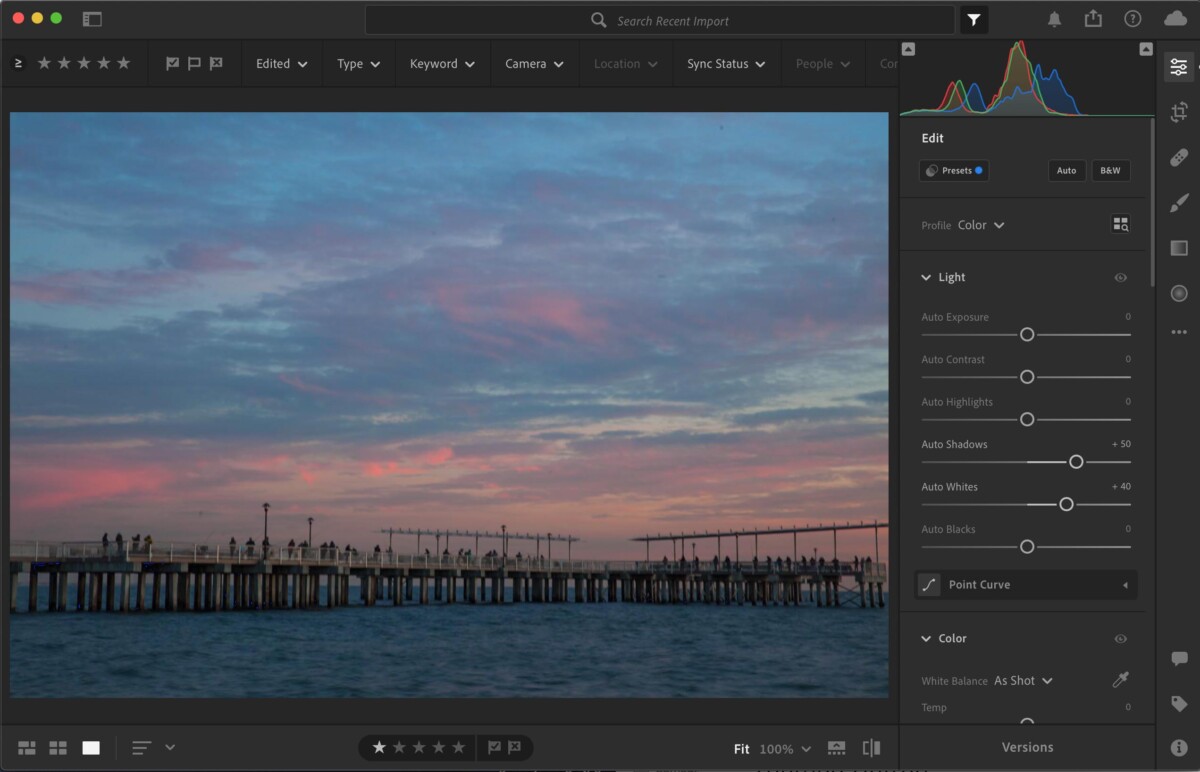
The histogram is a graphic representation of the tones in the photograph. It is a guide to exposure decisions. Most images look best when there is a full range of tones from black to white in the image. But there are no iron clad rules.
To access the histogram in Lightroom, from the keyboard select: Command 0
Or get it from the three dots on the right menu bar.
From the top of the histogram, there is a triangular button. Toggle it to turn on/off show clipping.
To maximize the the tonal range, adjust a photo to have some tones that are totally black and totally white but only a few so that you don’t lose detail in either the shadows or the highlights.
Looking at the histogram, we can see that there is not a true black or white. To raise the contrast of the image and use the full tonal range, use the following adjustments:
Select show clipping on the top left of the histogram. Adjust the blacks slider to the left until you see bright blue flecks on your image.
Select show clipping on the top right of the histogram. Adjust the whites slider to the right until you see bright red flecks on your image.
Most images improve with:
shadows slider to +50 add detail to the dark areas
the highlights slider brought to the left to bring detail into the highlights.
In this photo of the pier in Coney Island, the histogram shows that is underexposed. But we also know that it is an evening scene and that there is nothing in the photo that should be bright white.
Lightroom Workflow:
Optics: enable lens correction. If there is architecture or a strong horizon line, geometry>upright>auto
Crop.
Color. Adjust the white balance if necessary.
Light a. Exposure slider-use to adjust the overall tonality b. Set black point using show clipping c. Set white point using show clipping d. Use shadows slider to brighten mid tones.
Effects – Adjust clarity (mid tone contrast)
App: color – Adjust vibrance and or saturation
Detail panel – Sharpen-amount at least 50
Lightroom CC Resource
Lightroom Classic Resource
A few tips for Lightroom Mobile:
To access the histogram, tap on the image with two fingers. If you can’t really see the histogram background, brighten the display.
To see the image before your corrections, press on the image.
Food photography is a genre of commercial photography that makes food look appetizing for the camera. It is not just photographs of food. It has its own vocabulary and conventions.
Inspiration
Other Inspiration
Jennifer Causey https://www.michelekarpe.com/Jennifer-Causey/Food/1
Kana Okada https://www.michelekarpe.com/Kana-Okada/Food/1
Marcus Nilsson https://www.marcusnilsson.com/
Quentin Bacon http://www.quentinbacon.com/#/food/
Food Photography Basics
Angle of View:
The two main angles of view used in food photography are: overhead and three-quarter view which is between eye level and overhead.
Depth of Field
If a three-quarter view is used, often shallow depth of field is also used to bring attention to the food itself.
Depth of Field-The distance between the nearest and farthest points that appear in acceptably sharp focus in a photograph. Depth of field can be shallow or extensive. While the term includes the word depth, depth of field refers to focus.
How to control depth of field
These four factors control depth of field:
lens aperture
focal length
camera-to-subject distance
sensor size.
Aperture is the size of the opening that allows light to hit the camera’s sensor when the photograph is taken.
Aperture values are expressed in numbers called f-stops. A smaller f-stop number means more light is coming into the camera and will create shallow depth of field. A larger f-stop number will let less light into the camera and create extensive depth of field.
The full stops for aperture are: F2, f28, f4, f5.6, f8, f11, f16, f22, f32
Cameraphones have a fixed aperture.
Focal Length is the distance from where the light converges in the lens to the sensor. If it is a short distance then the lens is a wide angle lens and shows a lot of the scene. If it is a long distance, the lens is a telephoto lens and it magnifies the scene. Wide angle lenses create extensive depth of field while telephoto lenses create shallow depth of field.
Camera-to-subject distance is how far the subject is from the camera. If everything is far from the camera, it is easier to achieve extensive depth of field. If the main subject is very close to the camera and the background elements are far from the camera, it is easier to achieve shallow depth of field.
Sensor size-the smaller the sensor the easier it is to achieve extensive depth of field. Bigger sensors allow for shallow depth of field.
Bokeh-Bokeh comes from the Japanese word boke (ボケ), which means “blur” or “haze”, or boke-aji, the “blur quality.” Bokeh is pronounced BOH-Kə or BOH-kay.
— From http://www.nikonusa.com/en/learn-and-explore/article/h0ndz86v/bokeh-for-beginners.html
Light Quality
Direct light-all comes from one direction and makes clear crisp shadows. Sunlight is an example of direct or hard light.
Diffused light– comes from many directions and makes soft shadows. The light on a cloudy day is an example of diffused or soft light.
In food photography, there is a main light. It is usually a side or a back light.
The main light casts the shadows.
The fill light brightens shadows. Often instead of a second light or the fill, we use a reflector opposite the main light to bounce the light into the shadows.
Distance
The distance between the light source and the subject will allow you to control how it looks. This is such an important factor because of the Inverse Square Law.
The Inverse Square Law states that the intensity of the illumination changes in inverse proportion to the square of the distance from the source.
Translation: The light’s brightness drops much faster closer to the light source than further away.
Generally, when working with a clamp light as the main light, set the main light a bit further from the subject to spread out the light. Hold or fasten the diffuser in front of the light. The farther in front of the light the diffusion is set, the softer the light will be.
Set up the white reflector as close to the food as possible and not have it in the frame.
Resource
Watch 1:14 to 6:00 on lighting
Quiz Questions
What is the role of the main light?
What is the role of the fill light?
What is the function of a diffusion panel? How does how you position it change how much it diffuses the light?
What is the function of a reflector? How does how you position it change how much it reflects the light?
There will be a quiz next week on March 22. It will be worth 4 pts. It will consist of three technical questions and a compare and contrast paragraph essay.
The topics will be: composition, shutter speed, freezing and blurring motion, long exposures, when to use a tripod, light quality, light direction, depth of field, food photography as a genre, role of the main light and the fill light.
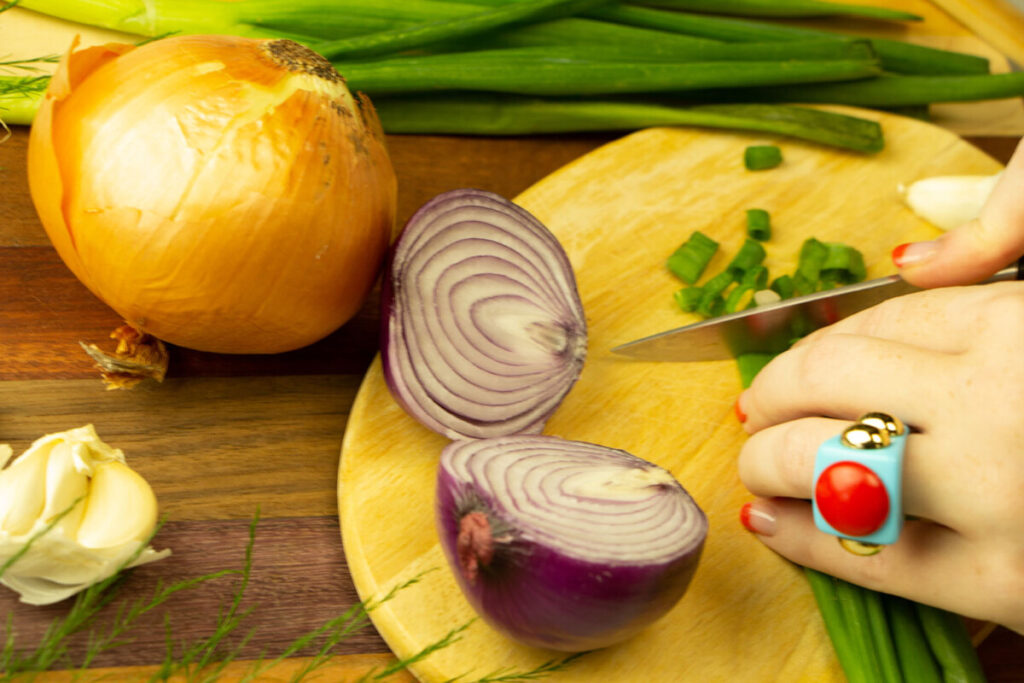
a background- a table cloth, cutting board, baking sheet, bamboo mat
one food item like an onion, head of garlic, something small and not-reflective. For examples many apples are waxed and really shiny and will cause direct reflection so avoid that for now.


Recent Comments