Professor Michals

Category: Lab Exercises (Page 1 of 2)

Lab: Week 12-On-camera fill flash

Use the on-camera flash in three ways to take portraits:

  1. In diffused light, use it at a low power directly at the subject.
  2. In diffused light, use it straight up with the catch light flap up to create a catch light.
  3. In diffused light, bounce it off a reflector to add soft but directional light to the face.

Remember to:

  1. Consider the background!
  2. Use shallow depth of field to separate the subject from the background
  3. Select a flattering focal length – about 65 mm for our class cameras, 85 mm for full-frame cameras
  4. Focus on the eyes

Put your best 20 in an album on Flickr and send the best two to the class group.

Lab: Week 11 – Photographic Style

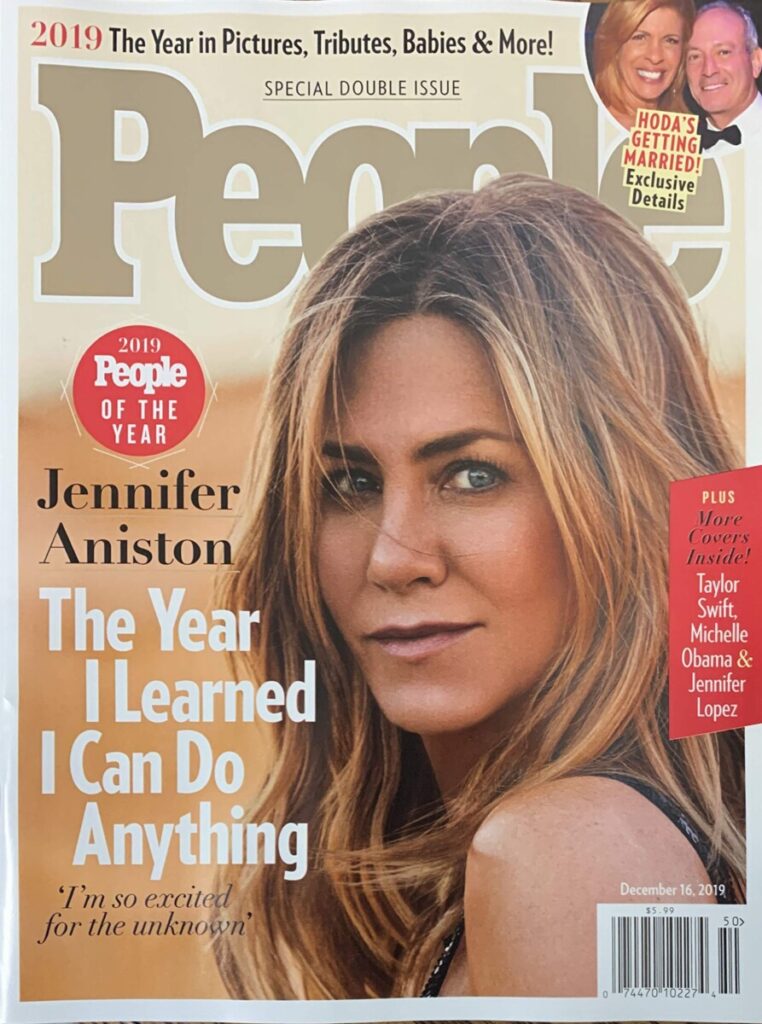
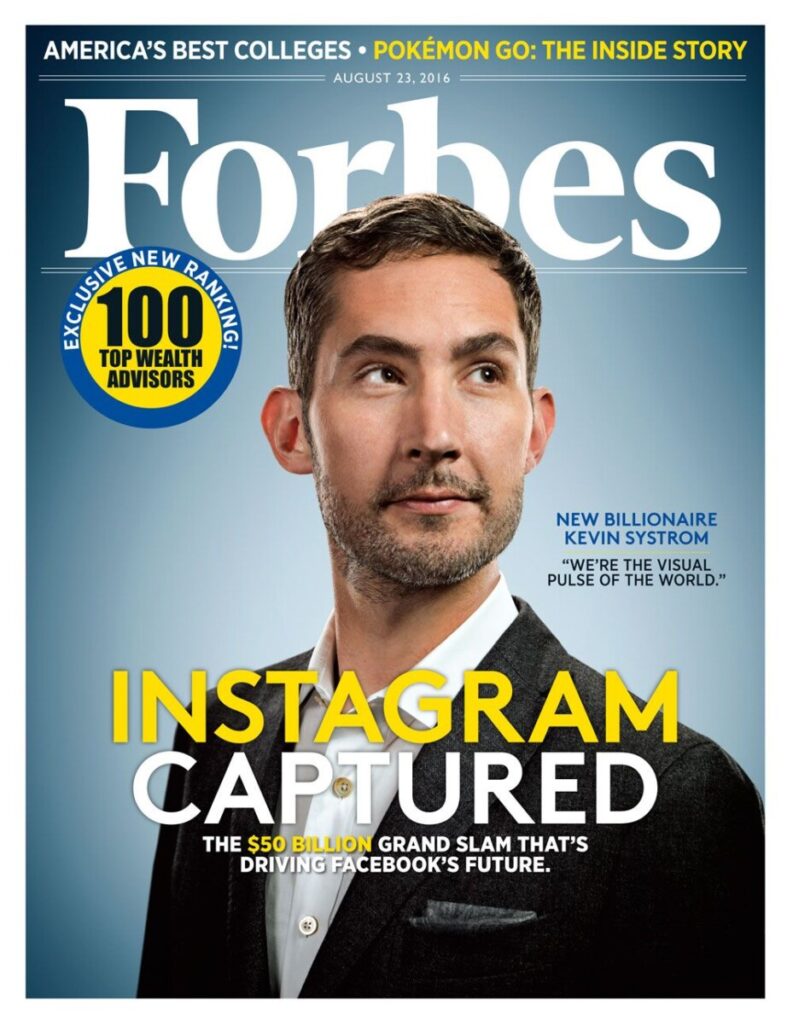
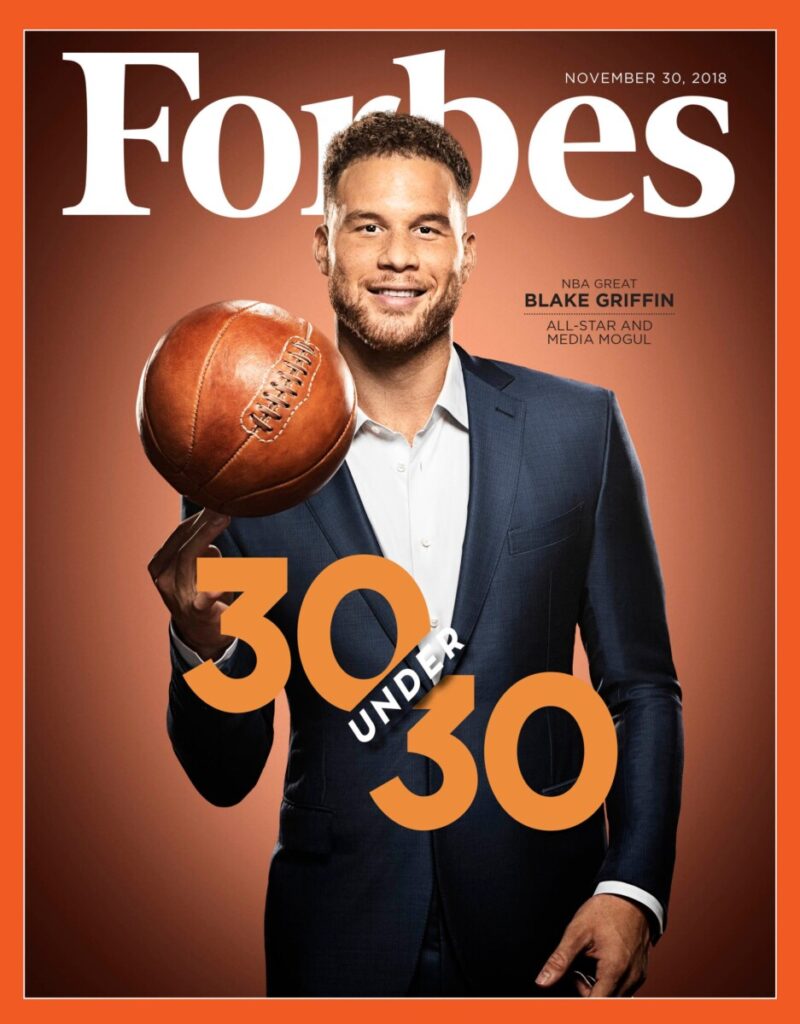
What are the stylistic differences between the way that people are photographed for each of these three magazines?

Create a cover image for each publication that fits with the existing style standards of that magazine.

Put at least 30 of the photos on Flickr. Select the best for each magazine and send it to the class group. Make sure to clearly label the image with the magazine.

Lab: Week 10 – Portraits with background lights

Each of the fours stations uses a main light, a fill light even if that is a reflector, and a background light.

Each station uses the background light in a different way.

  1. Clamshell lighting-the background lights make the background white
  2. Three point lighting with the background light pointing at the background to create a glow around the shoulders
  3. Three point lighting with the background light used as a hair light or a kicker
  4. short light with the background light pointed at the subject from behind to create a rim light.

Photograph your classmates at each of the stations in the class. Post your 20 best to an album on Flickr including your best example of each and send your two best portraits to the class group.

Make sure you have at least one good example of:

Lab: Week 9 – Basic Portrait Lighting Styles

Set up:

  • The subject should be at least 4 or 5 feet in front of the backdrop to avoid casting a shadow.
  • Use 65mm focal length when you are using a camera with a cropped frame sensor
  • Focus on the subject’s eyes.

The key or main light is the light that casts the shadows.

Working with just the key light:

Front view:

Photograph your subject with:

  • Rembrandt light – the light is at a 45 degree angle to the subject. Look for the key triangle -a triangle of light on the darker side of the face to position the light.

    Do not place the light too high because this will cause shadows around the subject’s eye sockets.
  • Split light – the light is at a 90 degree angle to the subject. One side of the face is dark but light does fall on the other side.
  • Front light (butterfly) – Light falls on the subject from the camera position.


Three-quarter view:

  • The model’s face is turned to a 45 degree angle from the camera.

Photograph your subject with:

  • broad lighting by placing the light on the side of the visible ear. There will be a broad highlight on the subject’s hair. This works for subjects wearing glasses.
  • short lighting by placing the light on the side of the invisible ear. 

Profile:

The model turns their face at a 90 degree angle to the camera. Place light like a side light. The subject faces the light BEING VERY CAREFUL NOT TO LOOK DIRECTLY INTO THE LIGHT. 

Put your 20 best photos into an album on Flickr. Make sure to represent each one of these lighting styles. Send your 2 best to the class group.

Lab: Week 7 – Global Corrections

Make global adjustments on each of the four examples on the class topic page.

Post your corrected versions of all four to Flickr.

Select your favorite of your partner’s photos that could look better with some adjustment. Tone it in Lightroom. Your partner will also adjust the same photo. Compare your results. Open one in Flickr. Select add tab in Safari. Open the second one. Toggle back and forth to see the differences in approach. Which one do you like better and why?

Now, reverse it. Your partner picks their favorite of your photos. And you both adjust it. Post the results and compare.

« Older posts

© 2024 COMD3330_D039_SP22

Theme by Anders NorenUp ↑