3.
4
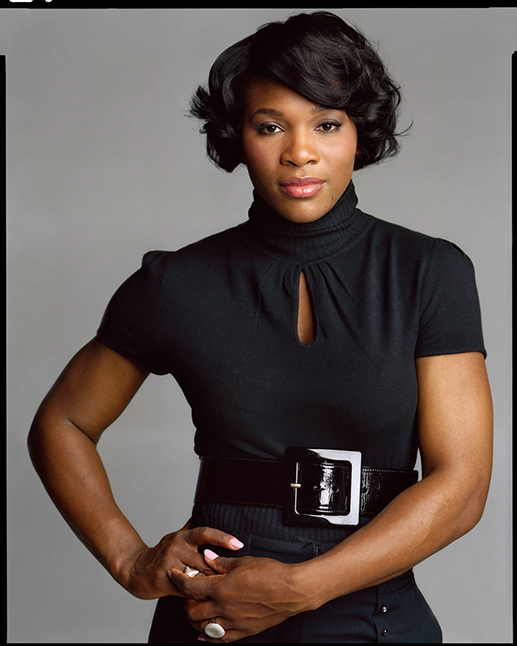
Left Photographer: Damon Winter. Right Photographer: Timothy Greenfield-Saunders
Professor Michals
3.

4

Global corrections adjust the entire file. In the Lightroom, it includes the controls under Light, Color and Effects. In Lightroom Classic, this includes everything in the basic panel: White balance, Exposure, Tone and Presence.

After you make global corrections, sometimes you will want to make corrections to part of your image. Generally, the brightest part of the image commands the most attention. Sometimes that is not where you want your viewer to look first so shifting the exposure of parts of your image can create the image you want.
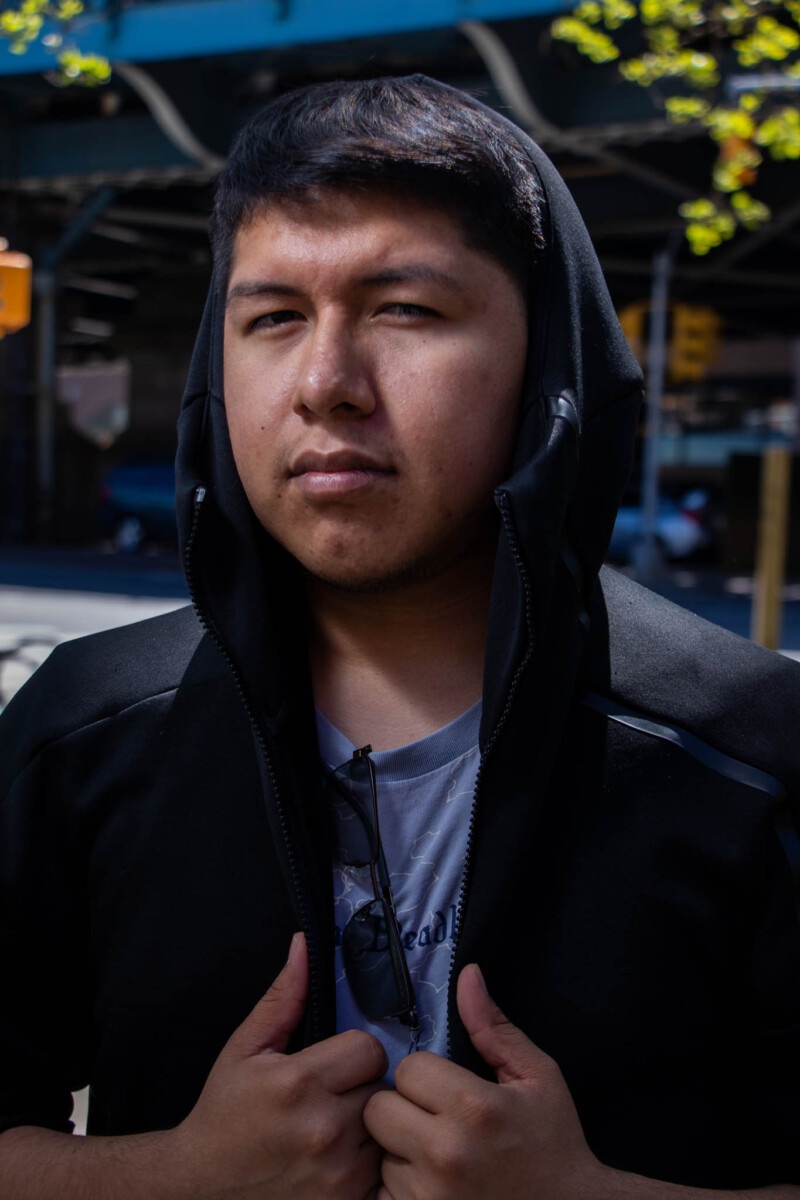
The important thing in this photo by Bryan Rodriguez is the face of the card player. However the cards are brighter and demanded too much attention. Using the adjustment brush, I darkened the cards. Creating a second adjustment, I lightened the face of the card player a little more. The goal was to bring more attention to the person’s face and less to the overly bright cards.
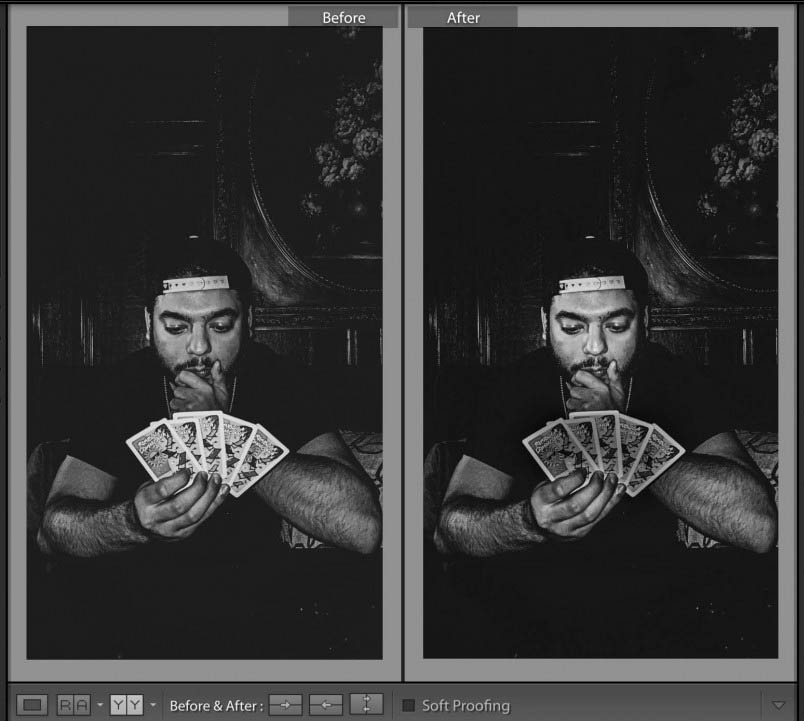
The main tools for local adjustments are the adjustment brush, the radial filter, the graduated filter, and the select sky and select subject masking tools.
Correct the six files above.
Correct one of your classmates images and compare with their correction.
Correct one of your images and compare with a correction your classmate did.
Put all 8 images in an album on flickr for today’s lab credit.
2. 3 albums each of a minimum of 30 photos
3. 1 album of the 10 best photos of the 90 total, adjusted in Lightroom
4. a 3-5 min presentation of the final project – projected from the album on Flickr.
4 pts
The contest submission consists of three portrait photos, a short bio of 100 words of each subject and a photo release form for each one.
If you want me to edit your bios, email them to me by May 22nd.
Due on May 24th
Your final submission including the three photo releases and proof of submission.
Ambient Light-the existing light that you cannot control
Stop-measurement of exposure by a factor of 2. One stop more doubles the light. One stop less reduces the light by half.
Exposure Triangle-the interchangeable association of ISO, Aperture and Shutter Speed
Strobe Basics
Strobe Lights or Flash-The exposure triangle does not hold because the shutter speed is effectively replaced by the flash duration. We adjust the exposure primarily with the aperture or the ISO.
Sync Speed-is the fastest shutter speed for which the shutter curtains are completely open at the time of exposure (or when the flash fires). For shutter speeds above sync speed, the shutter curtains are no longer fully open.-Dpreview.com
Flash duration-a measurement of the length of time of the burst of light that makes the exposure. This is how long the light is actually on. With our Dynalight strobes this is about 1/450th of a second at full power. Canon speed lites are about 1/313 at full power but 1/4,950 at 1/8th power
The sync speed of the class cameras is 1/200. To get around this, use:
High speed sync-allows the camera to be set at shutter speeds higher than the camera sync speed
DO NOT fire the flash in huge bursts when using high speed sync! If the flash becomes hot, let it cool down before using again.
Settings:
E–TTL (Evaluative-Through The Lens) is a Canon EOS flash exposure system that uses a brief pre-flash before the main flash in order to obtain thlo 7 `e exposure.
M-Manual-Set the power of the flash to full power, 1/2 power, 1/4 down to 1/128 power. The difference between each setting is one stop.
Zoom-you can spread the light over the scene or focus it by setting the zoom. A number that corresponds to a wide focal length like 28 mm will spread the light. A number corresponding to a telephoto focal length like 200mm will create a narrower beam of light.
Exposure-For consistent results use M shooting mode.
1. Figure out the exposure without the flash. If you want shallow depth of field use the widest aperture then figure out what shutter speed you need. On a bright sunny day, you should be able to shoot at 100 ISO.
2. Stop down one or two stops depending on the look you want.
Off-camera Flash
Put your flash on the channel that matches the trigger and receiver.
SAAF-Shutter Ambient, Aperture Flash
Shutter speed will control the illumination of the background.
Aperture will control the illumination of what is being lit by the flash.
Make the shutter speed faster to make the background darker when shooting with flash.
Main Light
Make a minimum of 10 portrait photos using off-camera flash as the main light.
Fill Light
Make a minimum of 10 photos with flash as the fill light.
Post your 20 best to Flickr and send the best of each one to the class group.
May 17th. 4 pts. Topics include portrait photography, flash-on and off camera.
Shoot 2 is due May 17th.
Due on May 17th
The contest submission consists of three portrait photos, a short bio of 100 words of each subject and a photo release form for each one.
Put a small jpg with your 100 word bio for each subject on Google Drive and share the document with me: robinmichals@gmail.com before noon on May 17th.
Due on May 24th
Your final submission including the three photo releases and proof of submission.
Use the on-camera flash in three ways to take portraits:
Remember to:
Put your best 20 in an album on Flickr and send the best two to the class group.
Ambient Light-the existing light that you cannot control
Fill Flash-brightens shadows
Built-in flash-part of the camera and throws light about 6 to 10 feet
External flash-added to the camera on the hot shoe and can throw light 15 to 20 feet
E–TTL (Evaluative-Through The Lens) is a Canon EOS flash exposure system that uses a brief pre-flash before the main flash in order to obtain a more correct exposure.
Fill Flash
Use M or manual.
1/1 is full power. Full stops are 1/2, 1/4, 1/8/ 1/16, 1/32, 1/64, 1/128.
Use Zoom to spread or focus the light. Wide angle numbers (smaller numbers) spread the light as for a wider shot with a wide angle lens. Higher numbers focus the light for a telephoto shot.
High speed sync-allows the camera to be set at shutter speeds higher than the camera sync speed
Resource
All the World Photo Contest entry – 4 pts – Proof of entry due May 24th

© 2024 COMD3330_D039_SP22
Theme by Anders Noren — Up ↑
The OpenLab is an open-source, digital platform designed to support teaching and learning at City Tech (New York City College of Technology), and to promote student and faculty engagement in the intellectual and social life of the college community.


Recent Comments