Contents
Types of Micropipettors
Pipettors are made by many different manufacturers and thus all do not look the same. Learning to correctly use one type of pipettor will provide you the knowledge to use others as they share the same method of distributing a small volumes. This lab will illustrate the Rainin Pipetman® micropipettors.
The top of the plunger shows the pipettor size for the Pipetman models. Each pipettor has its own volume range and it is CRITICAL to use a pipettor only in its proper volume range. The “P-number” represents the maximum volume in μL that the pipettor can measure. Pipettors are more accurate in the upper part of their range. 20 μL should be measured with a P20 rather than with a P200. The four pipettor sizes (P10, P20, P200, P1000) used in our lab will measure from 1 μL – 1000 μL as shown below.
Correctly Adjusting the Pipettors

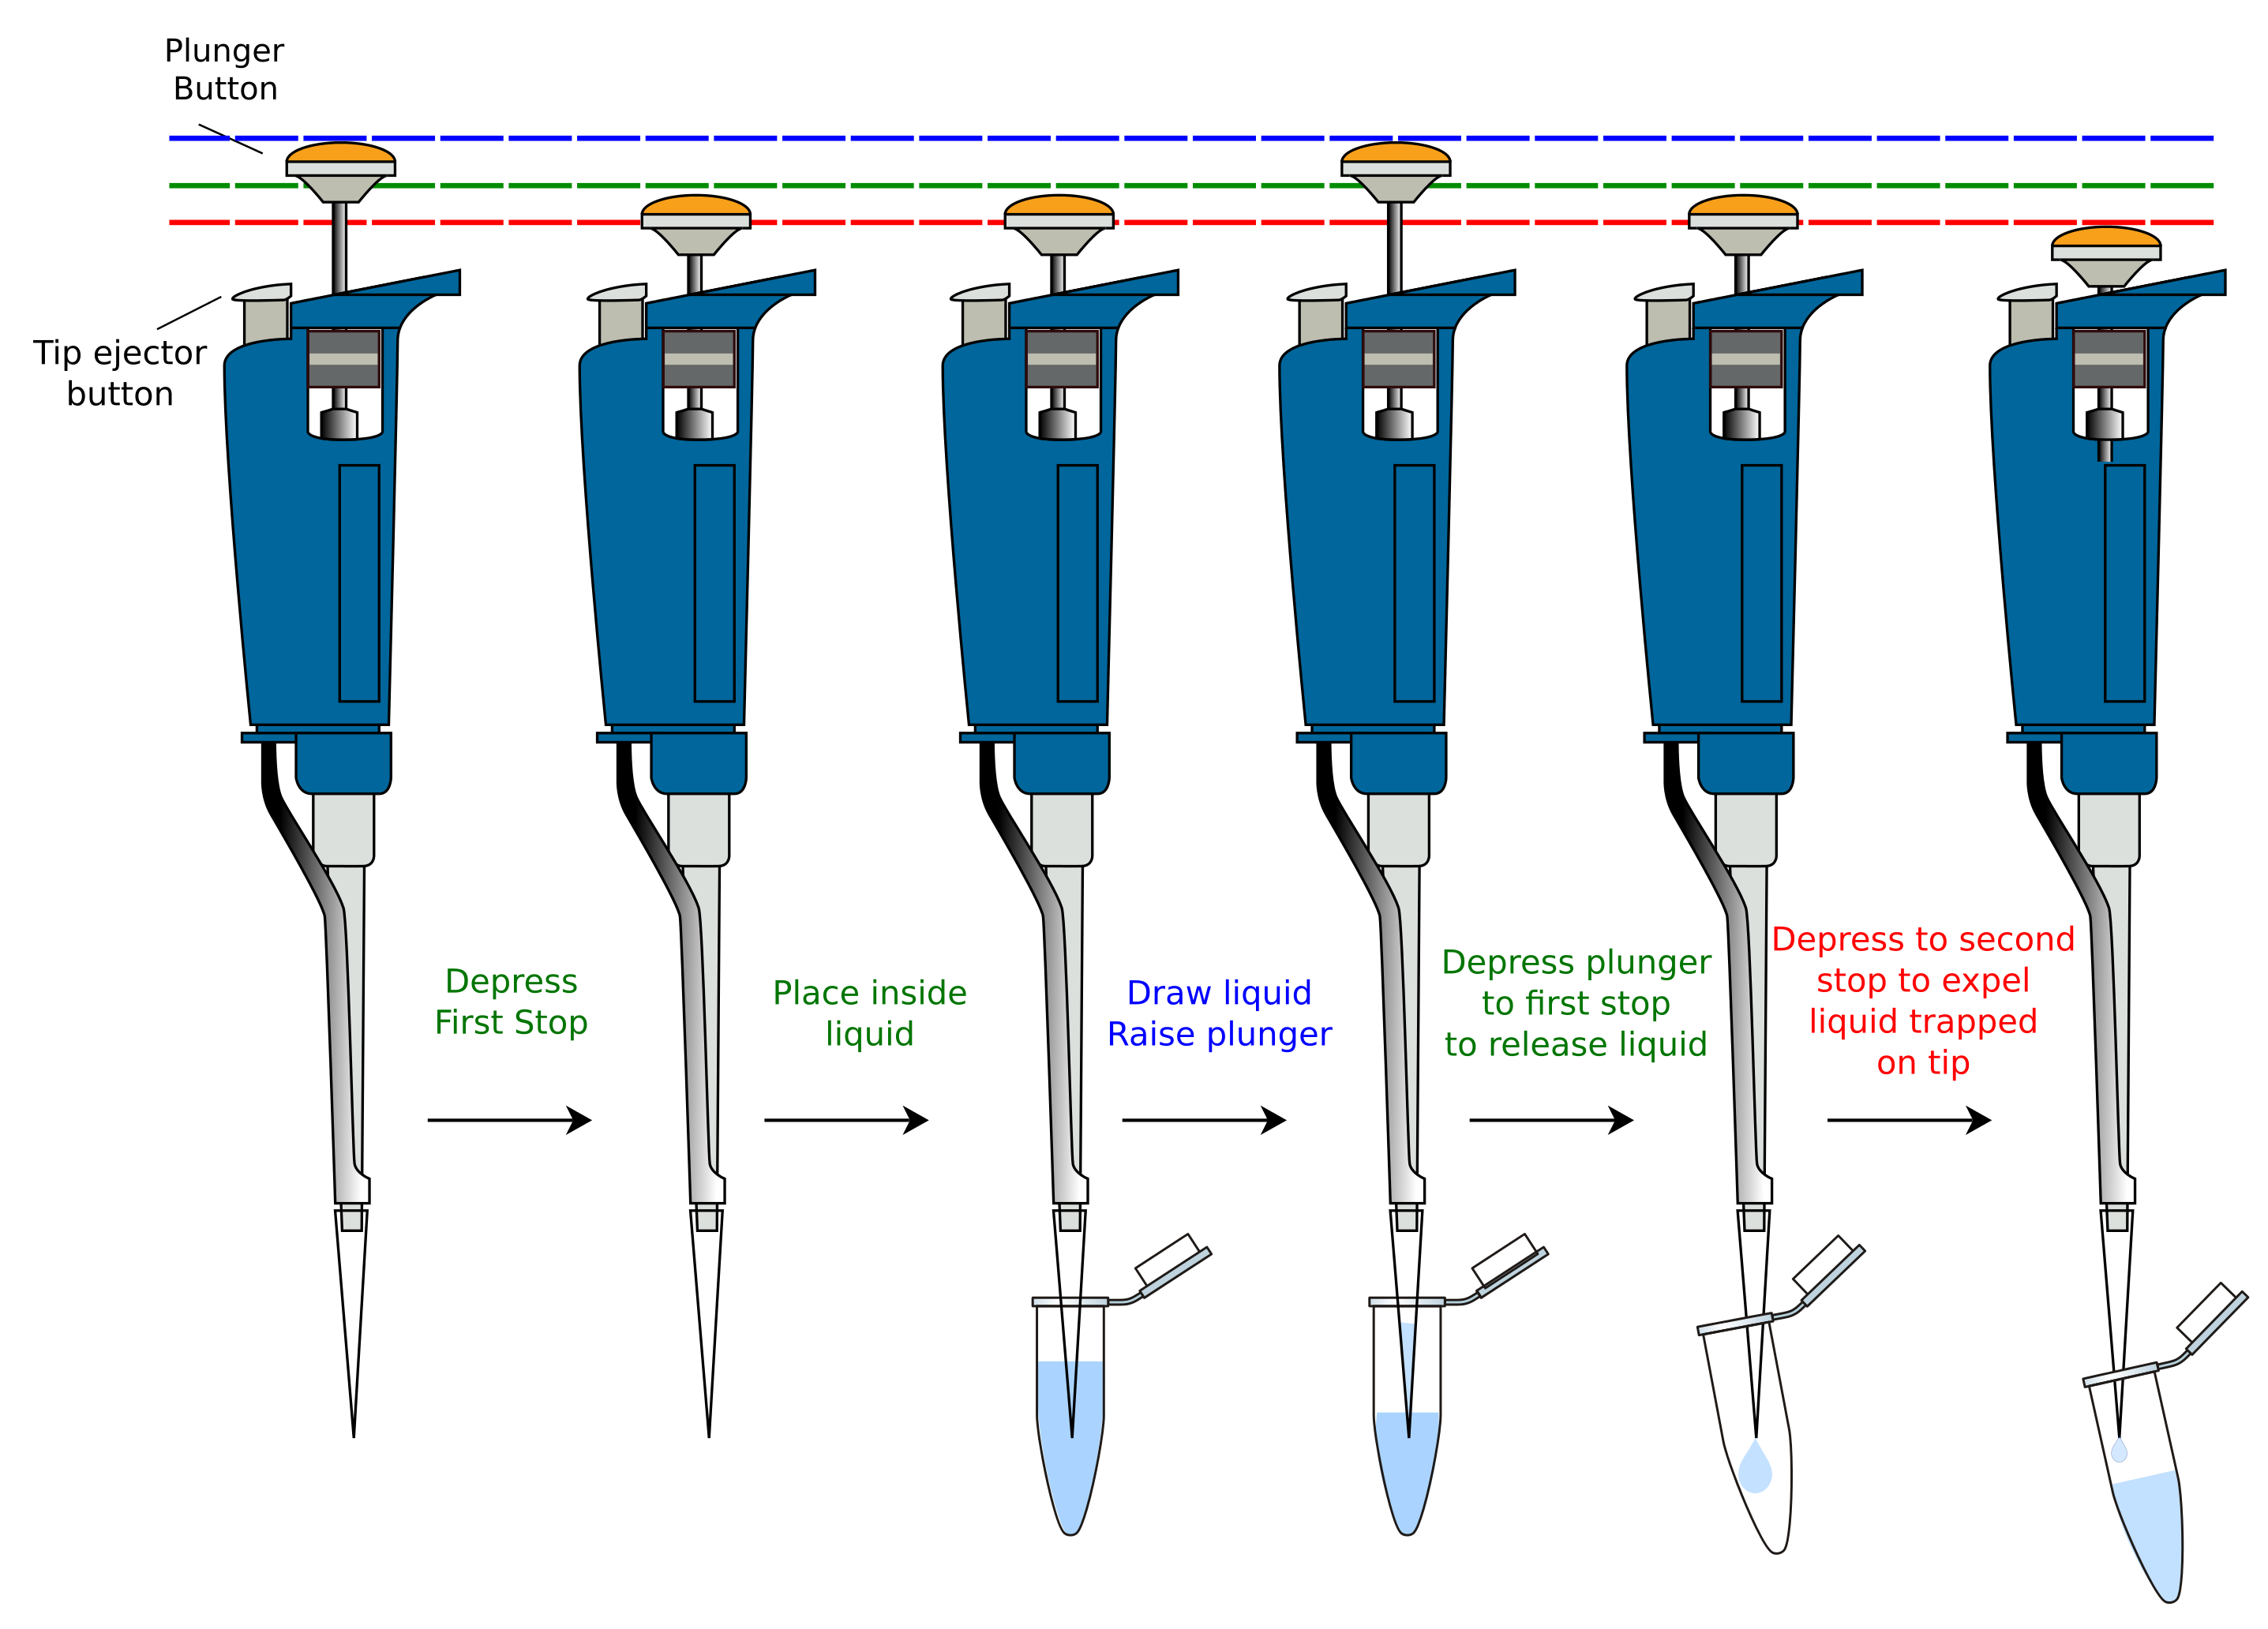
Tutorial on Proper Usage
https://www.youtube.com/watch?v=uEy_NGDfo_8
Rules for use of the micropipettors:
These are precision instruments which can easily be damaged. Treat them with respect and care. They are essential for your success in this course and shared amongst numerous students.
- Never measure higher or lower than the range of the pipettor allows.
- an exception to this rule is the P200 labeled 50-200 μl.
- while we have P100 pipettors for this range, they appear too similar to P20 that they are often confused
- originally, P200 were labeled 20-200 μl and we know that the lower range is less precise on these
- Never turn the volume adjuster above or below this range indicated on the pipettor or you risk breaking the instrument.
- Never allow liquid to get into the micropipettor.
- this causes contamination
- this weakens the seal on the o-rings and can damage them
- Never use the micropipettor without a tip.
- Never invert or lay down the micropipettor with liquid in the tip.
- liquids will roll into the piston this way
- Never let the plunger snap back when filling or ejecting liquid.
- Never immerse the barrel in fluid.
- this causes contamination
- Never set the micropipettor on the edge of the bench; this may result in the micropipettor falling or being knocked onto the floor.
Exercise: Pipetting Practice
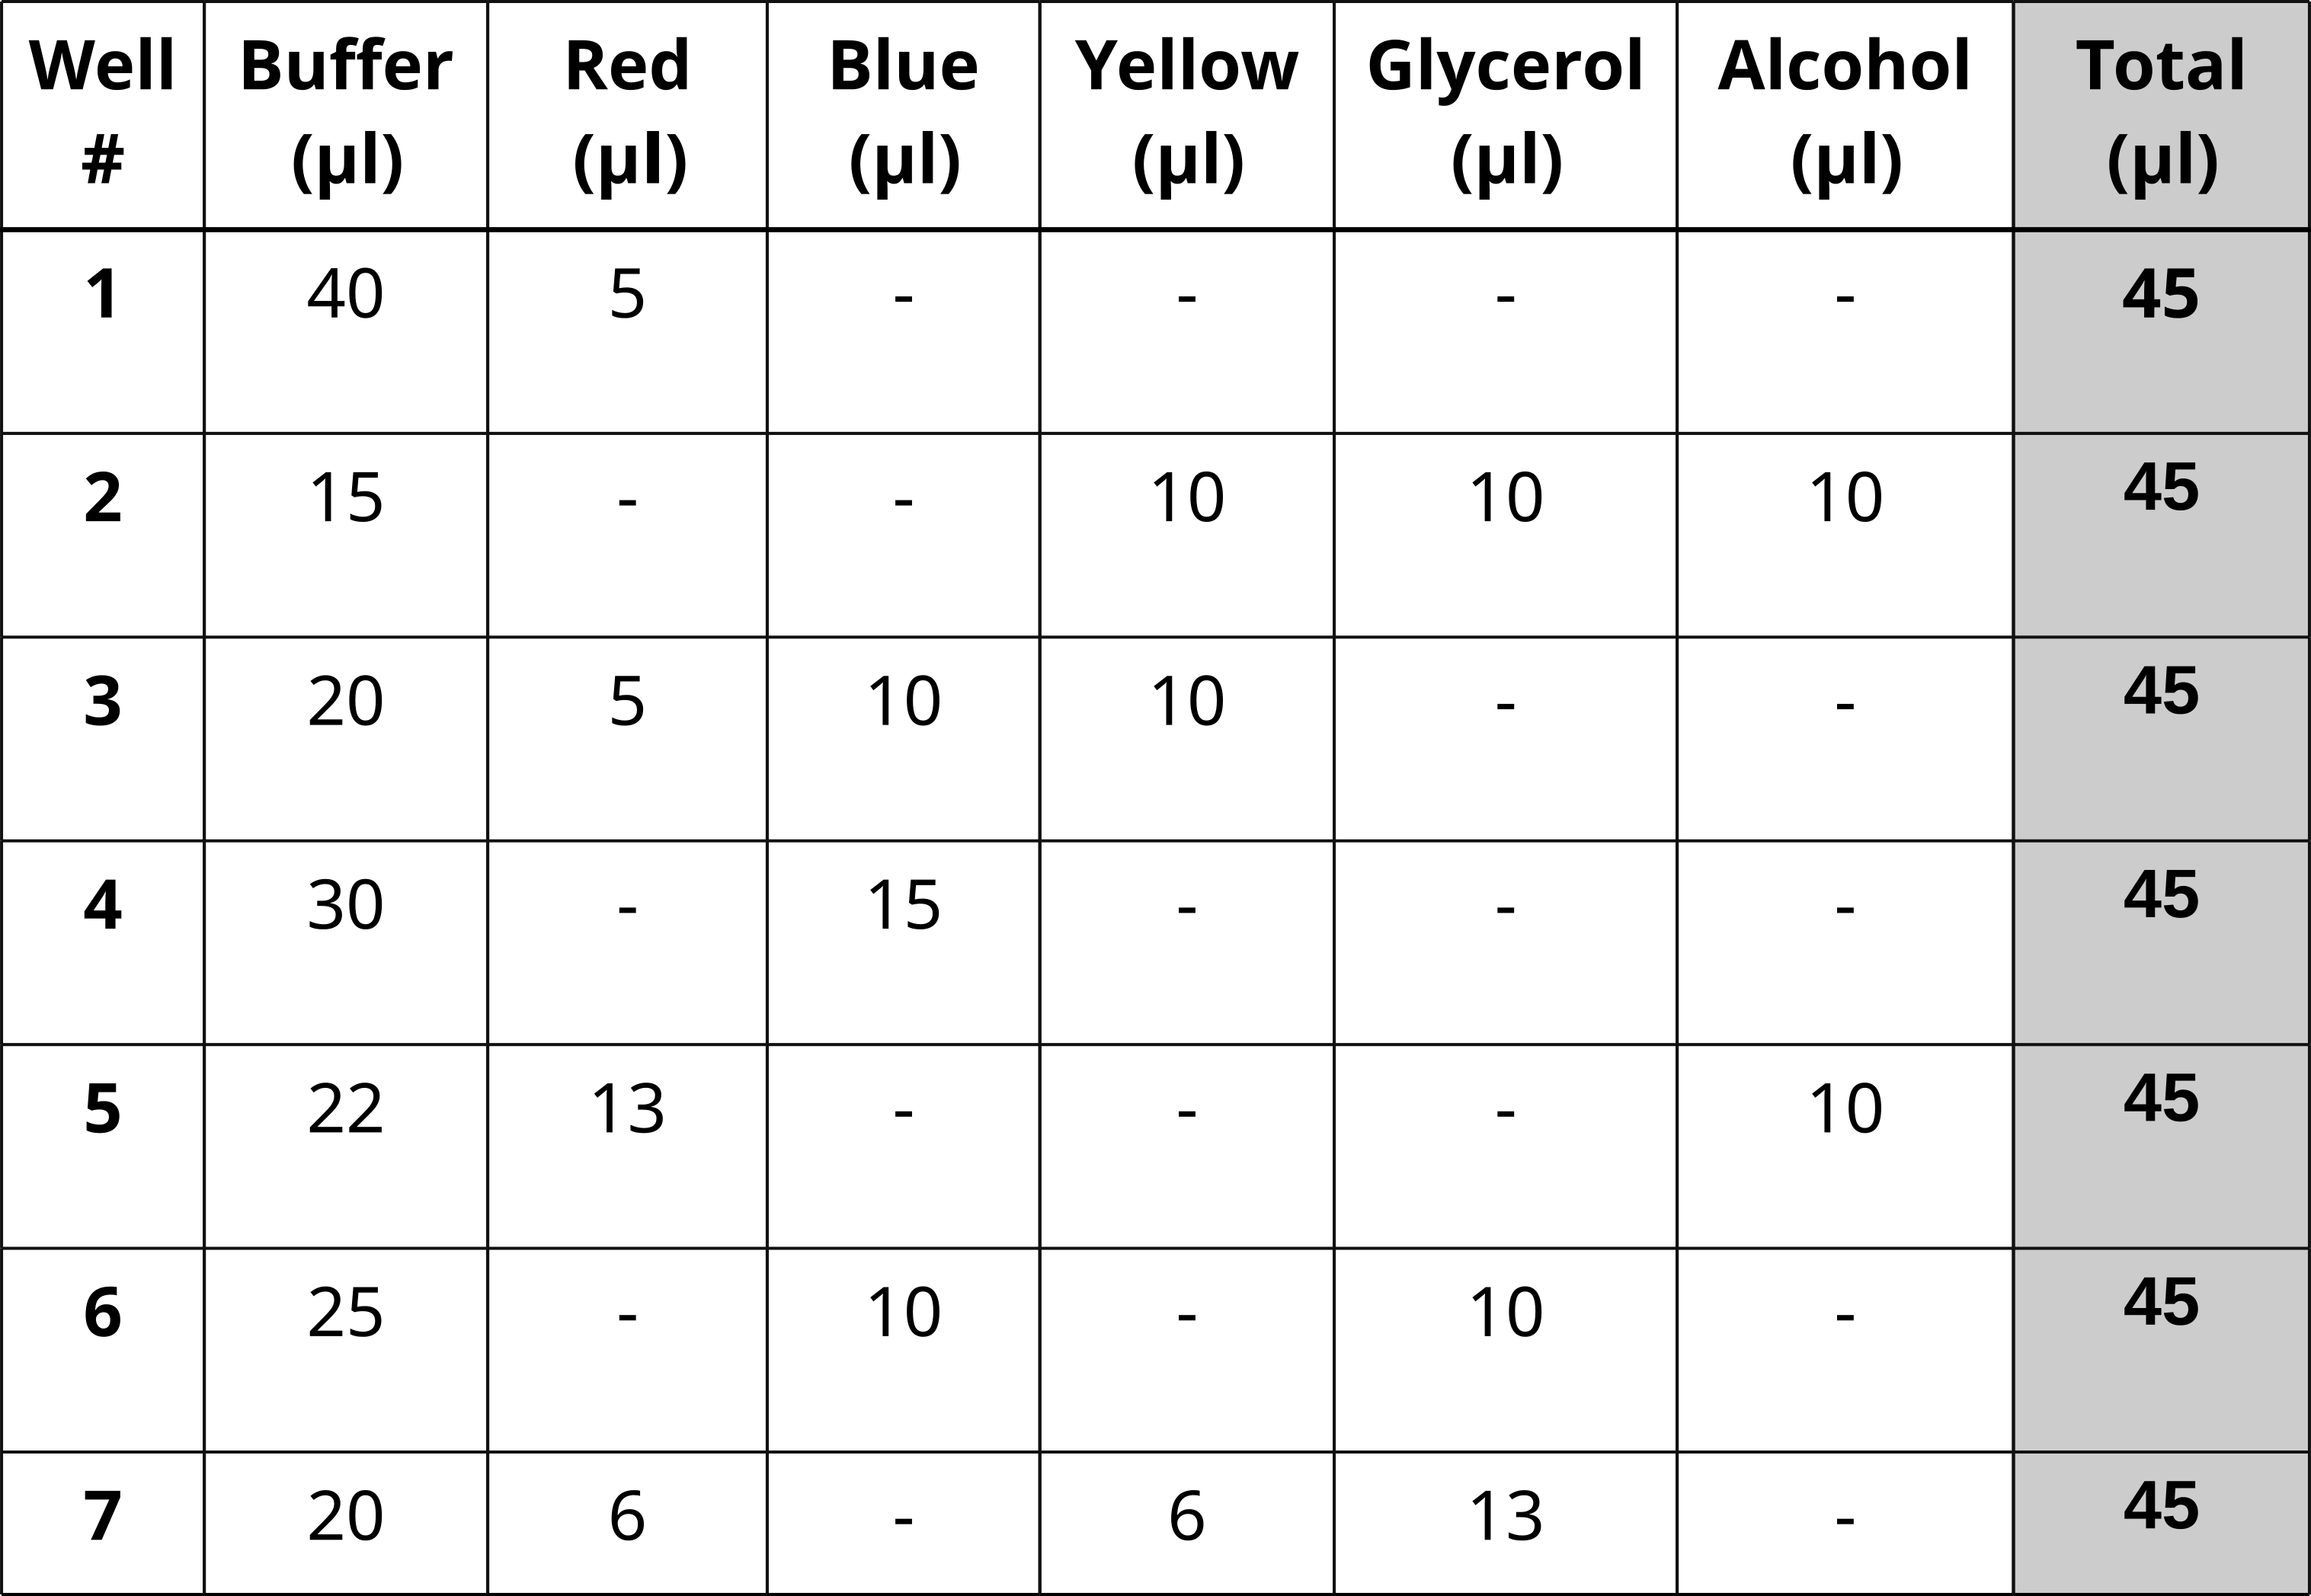
- Prepare seven dye mixtures as illustrated in the table below.
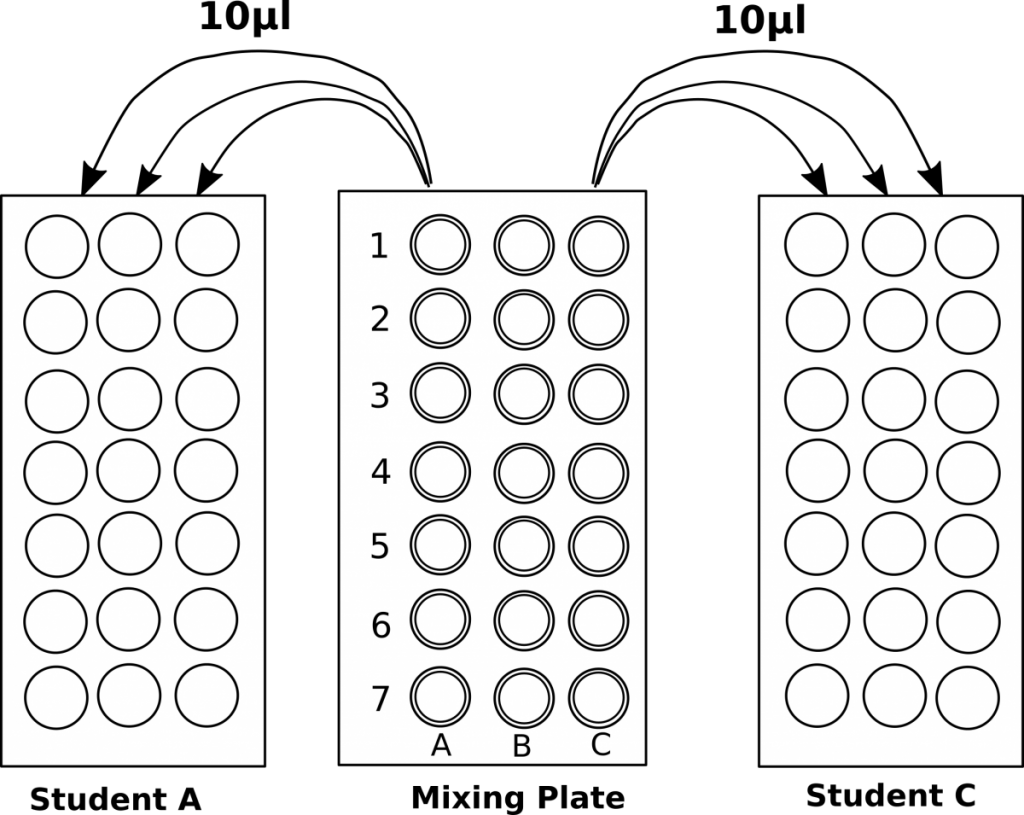
- One student mix samples in column A and a second mixes in column C
- Column B is left empty and used if one student makes a mistake
- Each dye mixture prepared in the first well to reach a total volume of 45 μl.
- Pipet 10 μl in triplicate from each well of the mixing plate into the center of the appropriate circles on the target card