Final Paper

Internet Search Engine Keywords:

  • Cyberpol = internet policing agency (Virtual authority) Commissioned by the IWIC
  • Cyber poling = The act of patrolling the internet
  • Cybertute = internet constitution (virtual freedoms)
  • Cyber law = laws governing the ****USAGE**** of the internet
  • Cyber net = Internet virtual jail
  • Cyber crime = The act of violating or committing a virtual infraction of cyber law on the internet
  • World Bill Of Rights = a clearly written list of freedoms expressed and granted to the users of the internet protected and authoritated by Cyber law
  • IWIC = International World internet Committee
  • DVIU = Department of Virtual Internet Usage
  • VL = Virtual License
  • IJPS = Internet Jurisdiction Positioning System
  • IZ = Internet zoning
  • Grid = the mapping technology used for tracking and identification of users on the net.
  • CCC = Central Control Center whose primary mandate is to use the available technologies in programming, processing, and code locking to oversee the security of the net.

We now live in a society where information and communication is more expensive than the value of a dollar.  With the dramatic increase in cyber-crime, identity theft is among the most prevalent next to copy write theft.  Then of course globally the world is affected by the war on terror.  So much so the war not only exists in a physical realm.  It’s also in a virtual realm.  These terrorist don’t even have to leave the comfort of their caves in order to recruit, manipulate, organize, and dispatch there dangerous activities due to the internet and lack thereof of its security.  Also the internet has provided a safe haven for black market activates and distribution.  The business community struggles to cope with their loss in revenue which eventually lead’s to unemployment.  By imposing structure for the internet we ensure a safer environment for it free usage.  The internet was not intended to create a new path for crime to thrive, but to increase communication and travel of information.  An analogy in comparison of the internet is the referencing of it usage and capabilities as the information super highway.  There are laws governing roads, highways and by ways, so why cant we treat the internet the same?  It will forever remain free its just in order to use it identification is required.

Conceptually the structure and or framework for organizing the Internet are derived from a virtual form of our modern day DMV.  Its premise will be focused on securing identification for its users known as a virtual license.  A virtual license will consist of not only a workstation IP address but also a personal identification code issued by DVIU (Department of Virtual Internet Usage).  This will not only ensure whose committing cyber crime (the act of violating or committing a virtual infraction of cyber law on the internet) but also their location at the time of violation.  Cyberpole is an organization commissioned by the IWIC to in short authority/ police the Internet and it’s associated cyberspace environments.  Cyberpole it self is governed by the IWIC (International World Internet committee).  The IWIC like the United Nations is a collaboration of world governments, which has set up a Cybertute ( internet constitution) and Cyber law (laws by which governs the Internet and its surrounding cyberspace. Conviction of cyber crimes warrant confinement to Cyber net (Internet virtual jail), and or revocation VL.

In order for the assignment of internet jurisdiction positioning system (IJPS) to be placed on the internet (Net) Its first broken down into zone quadrants in identification of the continents by XYZ axis.  Then for mapping purposes its color coded so that whom ever virtually travels to that region the color code attaches to their trip route like when you travel internationally each country stamps your passport.  The same will be in effect of what the passport gives international travel, will coincide with the color code.  Another important factor will be the identifying of business or personal travel to that region.  So a Class ID will be assigned at the point of registration to the DVIU whether to have access to virtual travel for business or personal use.   The assignment will benefit the specific country by the requisition of taxes once its understood that the individual was there on business not personnel use.  In addition only the country visited may request taxes for business use not the country of origin.  This will alleviate double dipping at the expense of the traveler.  The creation of a grid structure will define not only distinct paths for jurisdiction on travel but allows for each country to act as its own control tower and assumes responsibility for how the internet is being used in their country.  Another benefit to the world is this will create new jobs in order to monitor it, thus a new economical base for that region.

Zone Quadrant                                   Zone ID number             Class ID

  •    Blue = North America                     NA-5013                              *B or P
  •    Red = Europe                                    EU-2306                              *B or P
  •    Yellow = Africa                                 AF-1945                               *B or P
  •    Orange = Asia                                   AS-3864                              *B or P
  •    Green = South America                   SA-4210                              *B or P
  •    Grey = Antarctica                              AN-6653                             *B or P
  •    Purple = Australia                             AU-7981                             *B or P

gridmap

As discussed the individual user will be assigned a VL as permissions and identification to use the internet.  The way in which we would track user information is through the VL, history (acts as a foot print of travel).  One may acquire a VL for business, or personal, or both at the same time.  By the use of CPU rendering (alpha numerical calculation) and processing we will be able to pinpoint in real time when, where, and why for internet usage. Currently there is no structure identification system, nor structured accountability system on the net like this for doing business.   As discussed in the link presented below:

http://www.loc.gov/rr/business/ecommerce/

Thus we’ve created a system of democratic checks and balances devoid of violating an individuals right to surf (travel) the net. The creation of a Virtual constitution is there for necessary to ensure a users right to free surf.  This also shows a need for a system of virtual laws (Cyberlaws) to be set up to ensure a users freedoms, safety, and accountability is obeyed.

http://www.nap.edu/netsafekids/pp_li_il.html

http://www.enotes.com/internet-reference/internet-regulation

http://www.ncsl.org/issues-research/telecom/state-laws-related-to-internet-privacy.aspx

Interestingly enough the laws that are currently in effect for the governance of the net are subsequently not followed by everyone in the world community.  for  example the article below specifically speaks on this dividence and need for a world commune for the safety of our net users. They reference Europe not abiding by internet laws established by the US.  It also shows the need for the cooperation of the business community as well as other entities in order to ensure these freedoms are met.  The idea of free trade vs. fair trade comes into play when deducing the effects of governance on the the internet from the side of the business community.

http://agc-blog.agc.gov.my/agc-blog/?p=1216

In communist Peoples Republic of China they’ve imposed new regulations for identification of internet users.  They’re now requiring for internet users and providers to input there real names / identities instead of alias’s.  The new enactment will address the business community protection of commercial secrets, making it harder.  As well as websites that are viewed by communist china to be politically sensitive.  Their aim is to target internet companies to be accountable and assume more responsibility in their content and the handling of it.  The cell phone industry is the focus of these new regulations and are required to report violators back to the authorities.  As a result of these forced regulations  china has exposed a series of sexual and financial scandals that have led to the resignations or dismissals of at least 10 local officials. Thus proving the benefit and need for policing the internet.

http://www.nytimes.com/2012/12/29/world/asia/china-toughens-restrictions-on-internet-use.html?ref=internetcensorship&_r=1&


In attempts to prove why we should govern the net a group of students wrote a paper breaking down laws and concept for internet usage.  Knowingly classifying contributory internet groups / community and their usage by underling laws of governance to ensure free trade.

http://www.research.rutgers.edu/~ungurean/papers/communities.pdf

It has become more and more evident for the complete governance of the internet to work we will need a world consciousness united in the benefits for its purpose.  This must include but not limited to the commitment from the world business community and other entities.  This is also the reason to doubt the governance of net the will come to fruition.  Our world leaders have made it a point to stay divided either for the benefit of religious, economic, political, or trade sovereignty.  Clearly the benefits for governing the net out ways the negative impact for change in the way our society conducts itself.  We would embark on a social revolution questioning if we’re imposing censorship over freedom.  In some parts of the world where government controls everything this view of censorship would actually be welcomed were as in the US it would be deemed as the end of democracy as we know it.  The US for many years has made its mission to spread the concept of democracy around the world.  There are even some world leader that may call the US bully’s for trying to impose their political agenda on them.  By implementing Cyberpol a new world consciousness will not only emerge but will be lead by a new sociology-economic movement.

The new economy that will be developed by cyberpoling will allow those countries who once didn’t benefit from the net to implement a new revenue in the form of taxation.  It used to be for a country to show strength through its ability to export goods without being dependent on import. This socio-economic revolution can be compared to the industrial revolution of the late 1800′s, early 1900′s through out the world. This also puts a dent on the black market trade of the world especially in those third world country dependent on its illegal activities.  Another aspect of the social impact would have is the breaking down of terrorist organization.  Its well known the war on terror dependent on communications.  By disturbing their ability to communicate and organize we (the world community) effectively diminish their ability and power.

http://www.loc.gov/teachers/classroommaterials/primarysourcesets/industrial-revolution/pdf/teacher_guide.pdf

http://americanhistory.about.com/od/industrialrev/a/indrevoverview.htm

Time line

Point forward the establishment of a fully functioning constitution (Cybertute) will be created under the notion of a World Bill Of Rights a clearly written list of freedoms expressed and granted to the users of the internet protected and authoritated by Cyber law.  Of course this will be modeled after our own constitution and bill of rights but now with interest of a world consciousness and not with the specific agenda of spreading democracy.  Then the defining of Cyber laws to protect and govern the users freedoms when cyberpoling.  The establishment of zonal jurisdiction by the IJPS to define not only restrictions for that IV but for the creation of the Grid which is the mapping technology used for tracking and identification of users on the net.  To Organize the grid we’ll be using and alpha numerical algorithm system in identification of the zones and users to and fro the zone.  The mapping of travel restrictions to be imposed.  The creation of a central repository (Cyber net) to isolate and restrict virtual id’s in conveyance of the cyber laws.  All of this will be done by a Central Control Center (CCC) whose primary mandate is to use the available technologies in programming, processing, and code locking to oversee the security of the net.

Deliverable’ s

  • The creation of a constitution that consist of all known laws currently applied to internet.  The addition of new laws comparable to our current constitution, but tailored to govern the virtual environment of the internet.
  • The creation of a users Bill of Rights.  It will be a detailed understanding of the responsibilities to the user.
  • The creation of cyber laws.  This will be a detail mock up of laws governing the internet and its zone differentiations.  These laws were created by the IWIC for cyber pole to enforce
  • The creation of internet protocol. This will be a systematic framework for cyber pole in enforcing cyber law.

Tangible’s

  • In order to create the repository we will use python in blender physics engine as a means to maintaining, and isolating user identification profiles.  In programming terms there will only be one way in and one way out.
  • We will also use blender to create a 3d version of the grid to display access and zone jurisdiction.
  • Creation of zones and tracking grids.
  • Research behind how signals travel through cyberspace then attach an alpha character to act as a bug.  This is the intent behind our tracking initiatives.
  • Creation of User id’s with a requested Google API characters.  In addition to the API, a id character from the DVIU.  Also the assignment of a user pin.  A zone character would be placed on your user id.  This will act as a passport for international surfing.
  • Depending on your specific license your id may require a tax id number for the ability to use the net for eCommerce.

Journal Entry

Virtual: Constitution / Bill of Rights

 http://www.archives.gov/exhibits/charters/constitution.html

Amendment I

·         The Right for all United States Citizens to access the internet freely for personal use devoid of taxation or toll

Amendment II

·         The Right for all United States Citizens to engage in commerce while in use of the Internet.

Amendment III

·         The Right For business community while engaging in commerce to business to apply taxation for ecommerce transactions.

Amendment IV

·         The right for nations / countries to charge taxation for ecommerce activity done in their respective zones by the business communities of the world.

Amendment V

·         All copy written material /patens exposed, torrented software, downloads without permissions, subject to prosecution to the highest extent of the law.

Amendment VI

·         Any acts committed violently due to usage of the internet are subject to prosecution to the highest extent of the law. This includes but not limited to terrorism, solicitation of minors, deformations of character (bullying), solicitation for groups known to consort in violent acts, gangs, racial indecency.

Amendment VII

·         Any acts committed against the community, society, or mankind through the use of the internet are subject to prosecution.

Journal Entry I

for Wish List Project

The major resistance of governing the internet seems to be the freedom of usage but at what cost to society do we allow these freedoms when in a sense our way of life is affected and or threaten enemies home and abroad.  Many analyst think by governing the internet you diminish the very reason for its conceptualization.  Also by governing it there’s the promotion of censorship.  I argue that their needs to be more accountability and responsibility for users of the internet.  A student paper at Rutger University explained in detail why it should not be governed, but by my impression, as usual money is the real motivator behind businesses rallying for the dismissal of the topic.

http://www.salon.com/2012/12/05/conference_takes_up_how_to_govern_the_internet/

http://video.foxnews.com/v/2001189166001/governing-the-internet/

http://www.research.rutgers.edu/~ungurean/papers/communities.pdf

Invention Journal Entry I

Posted on March 5, 2013 by babyxface / Rosa Lee

In temps to combat piracy on the internet, internet carriers Verizon, Time Warner, At&t, Comcast etc. are trying to enforce what there calling a six – strike – program to discourage illegal client usage of the internet. The program consist of ISP address monitoring.

  • The first two infractions will warrant an email notification informing clients of the infraction.  A coupled with the email will be an informational attachment on copy write laws.
  • The third and forth violations warrants a splash screen where you have to follow the steps and acknowledge your illegal trading or you wont be able to continue using the internet.
  • The fifth and sixth offense warrants an email and splash page with a 14 day suspension of service.

For the internet providers to now want to truant their clients usage is a direction result of pressure from the business community for the loss in revenue suffered from their clients activities.  The real question is it legal for your service provider to monitor your usage on a free entity?  For example if your rent a car and rob a bank with it can the rental car company sue you for misuse of their property.

http://www.dslreports.com/shownews/Time-Warner-Cable-Gives-Us-Their-Six-Strike-Details-122103

http://www.ibtimes.com/how-six-strike-program-works-time-warner-comcast-att-other-isps-working-together-combat-online

http://arstechnica.com/tech-policy/2011/07/major-isps-agree-to-six-strikes-copyright-enforcement-plan/

Journal Entry II

Mid Term Entry

One of my primary goals was to show the need for cooperation from our world governments alongside the business community and other entities (social media outlets) in order for this project to work.   Its definitely possible once you display how the good out ways the bad, and as a matter of fact it has already happened with the social media revolution.  Face book is a prime example of how the world social structure has changed through the adaptation of social communication in real time.  So much so even our political leaders are campaigning through the social media arena  From marketing advertisements to political campaigning social media has embeded values in world operations.  Even at home when hurricane sandy hit people where rushing to gain internet access were ever they could.  everyday citizens are now real time reporters documenting crime all the way down to police brutality by the use of cell phones.

This revolution of technology and social structure justifies the need for more control on the net.  The proof of governments starting to either create laws or impose restrictions on internet providers and or its users displays the current trends and road leading down the path of a fully governed body for the net  It also shows proof of acknowledgment by the government conforming and confirming the social change / revolution.  This leads to the organization of the net and the reason for me creating a constitution, bill of rights, laws to fully govern the net.  once this set up we can then focus on the grid structure, jurisdiction, patrolling, and conviction of violators of the net.

Rosa Lee Journal Entry II

In researching the necessity for my project, I discovered that countries are already starting to implement their own forms of restrictions for internet usage. Case in point in the U.S. internet providers ( time warner, comcast, etc) has attempted to regulate the internet by imposing a 6 strike rule for downloading, copying writing, and pirating materials. The current  laws in the U.S. pertain to internet usage only address copy right laws and or sexual solicitation. This move by the internet company/business community show that the corporation from the internet providers can work and showing the change in social structure has to occur due to monitory loss. The U.S. is governed democratically and unfortunately other countries feel that they are imposing their political ideologically on them but are still effected by the social revolution. Case in point communist china. Although they don’t support democracy, they still suffer from the same consequences of miss usage of the internet. So much so they impose their own restrictions toward internet providers and users to provide identification and accountability of the internet providers and users. This has benefited them for it has uncovered several scandals with officials that have been involved with sexual crimes and misconduct. Therefore the need for regulation of the internet is global and our plan to create a grid structure for regulating internet will be approved by the world community because of the social revolution occurring because of the misuse of the internet.


Journal Entry-Rosa Lee & Ian Hodgson

Posted on May 1, 2013 by babyxface

To use Google Maps within an Android application, you must install the Google API (application programming interface), a set of tools for building software applications, in the Android SDK. By installing the Google Maps API, you can embed the Google Maps site directly into an Android application, and then overlay app-specific data on the maps. The Android Google Maps API is free for commercial use providing that the site using it is publicly accessible and does not charge for access. If the app is for public sale, you must use Google Maps API Premier, which can be accessed for a per-usage subscription fee. The classes of the Google Maps Android library offer built-in downloading, rendering, and caching of mapping tiles, as well as a variety of display options and controls. Multiple versions of the Google Maps API add-on are available, corresponding to the Android API level supported in each version. This text uses Android 4.0 Google APIs by Google Inc. You must download the add-on to your computer and install it in your SDK environment to create an Android Google Maps app. To install the Android 4.0 Google API, follow

these steps:

1. Open the Eclipse program. Click Window on the menu bar and then click Android SDK Manager to view the SDK files available. The Android SDK Manager dialog box opens with the current SDK packages listed

2.   In the Android 4.0 (API 14) category, check the Google APIs by Google Inc. check box, if it is not already installed (as indicated in the Status column). Click to remove the check mark from any other selected check boxes. Click the Install Packages button to install the Google API package. Close the Android SDK Manager after the installation.

The Android SDK Manager is updated to include the Google APIs for use with the Google Maps features.

 Adding the AVD to Target the Google API

After you install the Android Google API, you set the application’s properties to select the Google APIs add-on as the build target. Doing so sets the Android Virtual Device (AVD) Manager to use the new Google API package. Make sure to select the version (by API level) appropriate for the Google API target. To target the Google API within the AVD Manager, follow these steps:

1. Click Window on the menu bar and then click AVD Manager.

2. Click the New button. Type Google_API in the Name text box. Click the Target  button, and then click Google APIs (Google Inc.) – API Level 14.

3. Click the Create AVD button.

4. Click the Close button to close the Android Virtual Device Manager dialog box.

Obtaining a Maps API Key from Google

Before you can run an Android Google Maps application, you need to apply for a free Google Maps API key so you can integrate Google Maps into your Android application. An Android map application gives you access to Google Maps data, but Google requires that you register with the Google Maps service and agree to the Terms of Service before your mapping application can obtain data from Google Maps. This applies whether you are developing your application on the emulator or preparing your application for deployment to mobile devices.

Registering for a Google Maps API key is free. The process involves registering your computer’s MD5 fingerprint. An MD5 (Message-Digest Algorithm 5) digital fingerprint is a value included as part of a file to verify the integrity of the file. Signing up with Google to register for a Google Maps API key is a task that needs to be performed only once and the purpose is mainly for security. A unique Google Maps API key is a long string of seemingly random alphanumeric characters that may look like this:

87:B9:58:BC:6F:28:71:74:A9:32:B8:29:C2:4E:7B:02:A7:D3:7A:DD                            Certificate fingerprint (MD5): 94:1E:43:49:87:73:BB:E6:A6:88:D7:20:F1:8E:B5:98          The first step in registering for a Google Maps API key is to locate an MD5 fingerprint of the certificate used to sign your Android application. You cannot run a Google mapping application in your Eclipse Android emulator if it is not signed with your local API key. The Android installed environment contains a file named debug.keystore, which contains a unique identification. To locate the MD5 fingerprint of the debug certificate on your computer, follow these steps:

1. To generate an MD5 fingerprint of the debug certificate, first use Windows Explorer or the Finder to locate the debug.keystore file in the active AVD directory. The location of the AVD directories varies by platform:

u Windows 7 or Windows Vista: C:\Users\<user>\.android\debug.keystore

u Windows XP: C:\Documents and Settings\<user>\.android\debug.keystore

u Mac OS X: ~/.android/debug.keystore

Note: The <user> portion of this path statement indicates your user account  name on your computer. For example, using a Windows 7 computer, the location of the AVD directory on a computer with a username of Corinne is:

C:\Users\Corinne\.android\debug.keystore.

2. On a Windows 7 or Vista computer, click the Start button. Type cmd in the Search box and press the Enter key. On a Windows XP computer, click the Start button. Click Run. Type cmd and press the Enter key. On a Mac computer, on the Desktop toolbar, click the Spotlight button (upper-right corner). In the Spotlight box, type terminal and then press the Return key. To find the MD5 fingerprint of your computer, in the Command Prompt window, type the following command, replacing <user> with the name of the account:

 In Windows 7 or Vista:

keytool.exe -list -alias androiddebugkey -keystore C:\Users\<user>\.android\debug.keystore -storepass android –keypass android

In Windows XP:

keytool.exe -list -alias androiddebugkey -keystore C:\Documents and Settings\<user>\.android\debug.keystore -storepass android –keypass android

In Mac OS X:

keytool -list -keystore ~/.android/debug.keystore

Press the Enter key.

3. To select the MD5 fingerprint in Windows, right-click the Command Prompt window and then click Mark on the shortcut menu. Select the MD5 fingerprint code, being careful not to include any extra spaces

4. To copy the MD5 highlighted code, press the Ctrl+C keys (Windows) or the Command+C keys (Mac) to copy the code to the system Clipboard. The MD5 fingerprint is copied. You paste this code into a Web page in the next step.

The MD5 certificate fingerprint with Google Maps service, follow these steps:

1. Start a browser and display the following Web site:

http://developers.google.com/android/maps-api-signup

2. Scroll down the page, if necessary, and check the I have read and agree with the terms and conditions check box. Click the My certificate’s MD5 fingerprint text box and then press the Ctrl+V keys (Windows) or the Command+V keys (Mac) to paste the MD5 fingerprint code from the Command Prompt window.

3. To display the Android Maps API key, click the Generate API Key button. If necessary, enter your Gmail e-mail address and password. (You need to create a Google account if you do not have one.)


Tracking MAC address and Violaters that try to spoof:

First, you must ping the target. That will place the target — as long as it’s within your netmask, which it sounds like in this situation it will be — in your system’s ARP cache. Observe:

13:40 jsmith@undertow% ping 97.107.138.15 PING 97.107.138.15 (97.107.138.15) 56(84) bytes of data. 64 bytes from 97.107.138.15: icmp_seq=1 ttl=64 time=1.25 ms ^C 13:40 jsmith@undertow% arp -n 97.107.138.15 Address HWtype HWaddress Flags Mask Iface 97.107.138.15 ether fe:fd:61:6b:8a:0f C eth0

Knowing that, you do a little subprocess magic — otherwise you’re writing ARP cache


>>> from subprocess import Popen, PIPE

>>> IP = “1.2.3.4″ >>> # do_ping(IP)

>>> # The time between ping and arp check must be small, as ARP may not cache long

>>> pid = Popen([“arp”, “-n”, IP], stdout=PIPE)

>>> s = pid.communicate()[0]

>>> mac = re.search(r”(([a-f\d]{1,2}\:){5}[a-f\d]{1,2})”, s).groups()[0]

>>> mac "fe:fd:61:6b:8a:0f"

This is a more complex example which does an ARP ping and reports what it found with LaTeX formating.

#! /usr/bin/env python
# arping2tex : arpings a network and outputs a LaTeX table as a result

import sys
if len(sys.argv) != 2:
    print "Usage: arping2tex <net>\n  eg: arping2tex 192.168.1.0/24"
    sys.exit(1)

from scapy.all import srp,Ether,ARP,conf
conf.verb=0
ans,unans=srp(Ether(dst="ff:ff:ff:ff:ff:ff")/ARP(pdst=sys.argv[1]),
              timeout=2)

print r"\begin{tabular}{|l|l|}"
print r"\hline"
print r"MAC & IP\\"
print r"\hline"
for snd,rcv in ans:
    print rcv.sprintf(r"%Ether.src% & %ARP.psrc%\\")
print r"\hline"
print r"\end{tabular}"

 Here is another tool that will constantly monitor all interfaces on a machine and print all 
ARP request it sees, even on 802.11 frames from a Wi-Fi card in monitor mode. 
Note the store=0 parameter to sniff() to avoid storing all packets in memory for nothing.
from scapy.all import *

def arp_monitor_callback(pkt):
    if ARP in pkt and pkt[ARP].op in (1,2): #who-has or is-at
        return pkt.sprintf("%ARP.hwsrc% %ARP.psrc%")

sniff(prn=arp_monitor_callback, filter="arp", store=0)

Journal Entry

Virtual license

vl

Stage I

1.The API code for tacking.

2. The continent code for grid mapping client location.

3. The last 4 digits of the client’s social security number for identification.

4. Mac address Id

Stage II

1. Class letter identification for residential or commercial use.

2. Symbols to indicate taxation (individual or corporate), exemption, or government clearance.

Stage III

1. Embed microchip onto the back of the Virtual License.

2. Activated once Internet is accessed.

Symbols

* = Exempt

u = Taxable individual or 12 or less employees.

¤ = Taxable 12 or more employees (corporations).

v = Non-for profit exemption.

Modifications:

Originally for tracking purposes of the Virtual license we were using the Mac address to isolate the CPU in when the user acceses the internet.  After researching from our journal entry we found it to be more effective to use the individuals computer MDI fingerprint to track the CPU and user for the virtual license.  The  reasoning is that it s actually quiet easy to change/hack you MAC address at any given time. The MDI fingerprint coordinates directly with GOOGLE GPS capabilities.
Research: Philosophical

http://www.infoworld.com/d/security-central/10-building-blocks-securing-the-internet-today-165


During his keynote speech at RSA Conference 2011, Microsoft’s corporate VP for trustworthy computing Scott Charney called for a more cooperative approach to securing computer endpoints. The proposal is a natural maturation of Microsoft’s (my full-time employer) End-to-End Trust initiative to make the Internet significantly safer as a whole. It closely follows the plans I’ve been recommending for years; I’ve even written a whitepaper on the subject.

The most important point of this argument is that we could, today, make the Internet a much safer place to compute. All the open-standard protocols required to significantly decrease malicious attackers and malware already exist. What’s missing is the leadership and involvement from the politicians, organizations, and tech experts necessary to turn the vision into a reality.

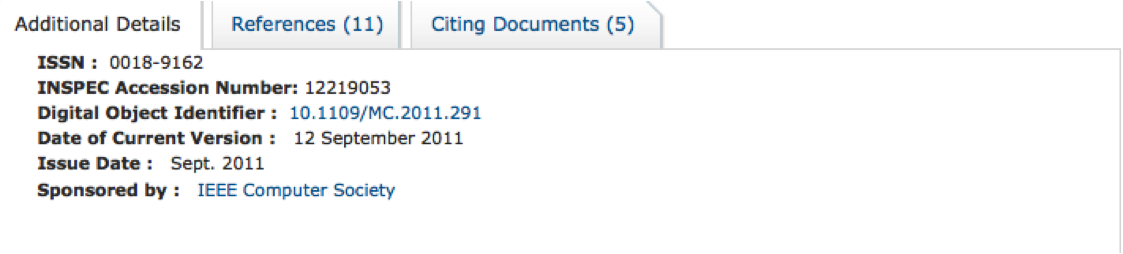
http://ieeexplore.ieee.org/xpl/freeabs_all.jsp?arnumber=6017172&abstractAccess=no&userType=inst

This paper presents security of Internet of things. In the Internet of Things vision, every physical object has a virtual component that can produce and consume services Such extreme interconnection will bring unprecedented convenience and economy, but it will also require novel approaches to ensure its safe and ethical use. The Internet and its users are already under continual attack, and a growing economy-replete with business models that undermine the Internet’s ethical use-is fully focused on exploiting the current version’s foundational weaknesses.

Future Visualization

Where we see improvements/advancement to our project would actually be in the area of tracking potential threats.  See traditionally with the creation of the virtual id its hard for hackers to operate.  Now we would use entrapment techniques to track and capture violators by once detected false identification not to blow the whistle immediately but to allow and track their destinations, transactions etc in attempts to also capture their accomplices.  See a hackers mindset is to crack your security code.  Were purposely making it hackable.

Coding – Blender to After Effects for scene

bl_info = {
    “name”: “Export: Adobe After Effects (.jsx)”,
    “description”: “Export cameras, selected objects & camera solution 3D Markers to Adobe After Effects CS3 and above”,
    “version”: (0, 6, 3),
    “blender”: (2, 62, 0),
    “location”: “File > Export > Adobe After Effects (.jsx)”,
    “warning”: “”,
    “wiki_url”: “http://wiki.blender.org/index.php/Extensions:2.6/Py/”\
        “Scripts/Import-Export/Adobe_After_Effects”,
    “tracker_url”: “https://projects.blender.org/tracker/index.php?”\
        “func=detail&aid=29858”,
    “category”: “Import-Export”,
    }
import bpy
import datetime
from math import degrees
from mathutils import Matrix
# create list of static blender’s data
def get_comp_data(context):
    scene = context.scene
    aspect_x = scene.render.pixel_aspect_x
    aspect_y = scene.render.pixel_aspect_y
    aspect = aspect_x / aspect_y
    start = scene.frame_start
    end = scene.frame_end
    active_cam_frames = get_active_cam_for_each_frame(scene, start, end)
    fps = scene.render.fps
    return {
        ‘scn’: scene,
        ‘width’: scene.render.resolution_x,
        ‘height’: scene.render.resolution_y,
        ‘aspect’: aspect,
        ‘fps’: fps,
        ‘start’: start,
        ‘end’: end,
        ‘duration’: (end – start + 1.0) / fps,
        ‘active_cam_frames’: active_cam_frames,
        ‘curframe’: scene.frame_current,
        }
# create list of active camera for each frame in case active camera is set by markers
def get_active_cam_for_each_frame(scene, start, end):
    active_cam_frames = []
    sorted_markers = []
    markers = scene.timeline_markers
    if markers:
        for marker in markers:
            if marker.camera:
                sorted_markers.append([marker.frame, marker])
        sorted_markers = sorted(sorted_markers)
        if sorted_markers:
            for frame in range(start, end + 1):
                for m, marker in enumerate(sorted_markers):
                    if marker[0] > frame:
                        if m != 0:
                            active_cam_frames.append(sorted_markers[m – 1][1].camera)
                        else:
                            active_cam_frames.append(marker[1].camera)
                        break
                    elif m == len(sorted_markers) – 1:
                        active_cam_frames.append(marker[1].camera)
    if not active_cam_frames:
        if scene.camera:
            # in this case active_cam_frames array will have legth of 1. This will indicate that there is only one active cam in all frames
            active_cam_frames.append(scene.camera)
    return(active_cam_frames)
# create managable list of selected objects
def get_selected(context):
    cameras = [] # list of selected cameras
    solids = [] # list of all selected meshes that can be exported as AE’s solids
    lights = [] # list of all selected lamps that can be exported as AE’s lights
    nulls = [] # list of all selected objects exept cameras (will be used to create nulls in AE)
    obs = context.selected_objects
    for ob in obs:
        if ob.type == ‘CAMERA’:
            cameras.append([ob, convert_name(ob.name)])
        elif is_plane(ob):
            # not ready yet. is_plane(object) returns False in all cases. This is temporary
            solids.append([ob, convert_name(ob.name)])
        elif ob.type == ‘LAMP’:
            lights.append([ob, ob.data.type + convert_name(ob.name)]) # Type of lamp added to name
        else:
            nulls.append([ob, convert_name(ob.name)])
    selection = {
        ‘cameras’: cameras,
        ‘solids’: solids,
        ‘lights’: lights,
        ‘nulls’: nulls,
        }
    return selection
# check if object is plane and can be exported as AE’s solid
def is_plane(object):
    # work in progress. Not ready yet
    return False
# convert names of objects to avoid errors in AE.
def convert_name(name):
    name = “_” + name
    ”’
# Digits are not allowed at beginning of AE vars names.
# This section is commented, as “_” is added at beginning of names anyway.
# Placeholder for this name modification is left so that it’s not ignored if needed
if name[0].isdigit():
name = “_” + name
”’
    name = bpy.path.clean_name(name)
    name = name.replace(“-“, “_”)
    return name
# get object’s blender’s location rotation and scale and return AE’s Position, Rotation/Orientation and scale
# this function will be called for every object for every frame
def convert_transform_matrix(matrix, width, height, aspect, x_rot_correction=False):
    # get blender transform data for ob
    b_loc = matrix.to_translation()
    b_rot = matrix.to_euler(‘ZYX’) # ZYX euler matches AE’s orientation and allows to use x_rot_correction
    b_scale = matrix.to_scale()
    # convert to AE Position Rotation and Scale
    # Axes in AE are different. AE’s X is blender’s X, AE’s Y is negative Blender’s Z, AE’s Z is Blender’s Y
    x = (b_loc.x * 100.0) / aspect + width / 2.0 # calculate AE’s X position
    y = (-b_loc.z * 100.0) + (height / 2.0) # calculate AE’s Y position
    z = b_loc.y * 100.0 # calculate AE’s Z position
    # Convert rotations to match AE’s orientation.
    rx = degrees(b_rot.x) # if not x_rot_correction – AE’s X orientation = blender’s X rotation if ‘ZYX’ euler.
    ry = -degrees(b_rot.y) # AE’s Y orientation is negative blender’s Y rotation if ‘ZYX’ euler
    rz = -degrees(b_rot.z) # AE’s Z orientation is negative blender’s Z rotation if ‘ZYX’ euler
    if x_rot_correction:
        rx -= 90.0 # In blender – ob of zero rotation lay on floor. In AE layer of zero orientation “stands”
    # Convert scale to AE scale
    sx = b_scale.x * 100.0 # scale of 1.0 is 100% in AE
    sy = b_scale.z * 100.0 # scale of 1.0 is 100% in AE
    sz = b_scale.y * 100.0 # scale of 1.0 is 100% in AE
    return x, y, z, rx, ry, rz, sx, sy, sz
# get camera’s lens and convert to AE’s “zoom” value in pixels
# this function will be called for every camera for every frame
#
#
# AE’s lens is defined by “zoom” in pixels. Zoom determines focal angle or focal length.
#
# ZOOM VALUE CALCULATIONS:
#
# Given values:
# – sensor width (camera.data.sensor_width)
# – sensor height (camera.data.sensor_height)
# – sensor fit (camera.data.sensor_fit)
# – lens (blender’s lens in mm)
# – width (width of the composition/scene in pixels)
# – height (height of the composition/scene in pixels)
# – PAR (pixel aspect ratio)
#
# Calculations are made using sensor’s size and scene/comp dimension (width or height).
# If camera.sensor_fit is set to ‘AUTO’ or ‘HORIZONTAL’ – sensor = camera.data.sensor_width, dimension = width.
# If camera.sensor_fit is set to ‘VERTICAL’ – sensor = camera.data.sensor_height, dimension = height
#
# zoom can be calculated using simple proportions.
#
# |
# / |
# / |
# / | d
# s |\ / | i
# e | \ / | m
# n | \ / | e
# s | / \ | n
# o | / \ | s
# r |/ \ | i
# \ | o
# | | \ | n
# | | \ |
# | | |
# lens | zoom
#
# zoom / dimension = lens / sensor =>
# zoom = lens * dimension / sensor
#
# above is true if square pixels are used. If not – aspect compensation is needed, so final formula is:
# zoom = lens * dimension / sensor * aspect
def convert_lens(camera, width, height, aspect):
    if camera.data.sensor_fit == ‘VERTICAL’:
        sensor = camera.data.sensor_height
        dimension = height
    else:
        sensor = camera.data.sensor_width
        dimension = width
    zoom = camera.data.lens * dimension / sensor * aspect
    return zoom
# convert object bundle’s matrix. Not ready yet. Temporarily not active
#def get_ob_bundle_matrix_world(cam_matrix_world, bundle_matrix):
# matrix = cam_matrix_basis
# return matrix
# jsx script for AE creation
def write_jsx_file(file, data, selection, include_animation, include_active_cam, include_selected_cams, include_selected_objects, include_cam_bundles):
    print(“\n—————————\n- Export to After Effects -\n—————————“)
    # store the current frame to restore it at the end of export
    curframe = data[‘curframe’]
    # create array which will contain all keyframes values
    js_data = {
        ‘times’: ”,
        ‘cameras’: {},
        ‘solids’: {}, # not ready yet
        ‘lights’: {},
        ‘nulls’: {},
        ‘bundles_cam’: {},
        ‘bundles_ob’: {}, # not ready yet
        }
    # create structure for active camera/cameras
    active_cam_name = ”
    if include_active_cam and data[‘active_cam_frames’] != []:
        # check if more that one active cam exist (true if active cams set by markers)
        if len(data[‘active_cam_frames’]) is 1:
            name_ae = convert_name(data[‘active_cam_frames’][0].name) # take name of the only active camera in scene
        else:
            name_ae = ‘Active_Camera’
        active_cam_name = name_ae # store name to be used when creating keyframes for active cam.
        js_data[‘cameras’][name_ae] = {
            ‘position’: ”,
            ‘position_static’: ”,
            ‘position_anim’: False,
            ‘orientation’: ”,
            ‘orientation_static’: ”,
            ‘orientation_anim’: False,
            ‘zoom’: ”,
            ‘zoom_static’: ”,
            ‘zoom_anim’: False,
            }
    # create camera structure for selected cameras
    if include_selected_cams:
        for i, cam in enumerate(selection[‘cameras’]): # more than one camera can be selected
            if cam[1] != active_cam_name:
                name_ae = selection[‘cameras’][i][1]
                js_data[‘cameras’][name_ae] = {
                    ‘position’: ”,
                    ‘position_static’: ”,
                    ‘position_anim’: False,
                    ‘orientation’: ”,
                    ‘orientation_static’: ”,
                    ‘orientation_anim’: False,
                    ‘zoom’: ”,
                    ‘zoom_static’: ”,
                    ‘zoom_anim’: False,
                    }
    ”’
# create structure for solids. Not ready yet. Temporarily not active
for i, obj in enumerate(selection[‘solids’]):
name_ae = selection[‘solids’][i][1]
js_data[‘solids’][name_ae] = {
‘position’: ”,
‘orientation’: ”,
‘rotationX’: ”,
‘scale’: ”,
}
”’
    # create structure for lights
    for i, obj in enumerate(selection[‘lights’]):
        if include_selected_objects:
            name_ae = selection[‘lights’][i][1]
            js_data[‘lights’][name_ae] = {
                ‘type’: selection[‘lights’][i][0].data.type,
                ‘energy’: ”,
                ‘energy_static’: ”,
                ‘energy_anim’: False,
                ‘cone_angle’: ”,
                ‘cone_angle_static’: ”,
                ‘cone_angle_anim’: False,
                ‘cone_feather’: ”,
                ‘cone_feather_static’: ”,
                ‘cone_feather_anim’: False,
                ‘color’: ”,
                ‘color_static’: ”,
                ‘color_anim’: False,
                ‘position’: ”,
                ‘position_static’: ”,
                ‘position_anim’: False,
                ‘orientation’: ”,
                ‘orientation_static’: ”,
                ‘orientation_anim’: False,
                }
    # create structure for nulls
    for i, obj in enumerate(selection[‘nulls’]): # nulls representing blender’s obs except cameras, lamps and solids
        if include_selected_objects:
            name_ae = selection[‘nulls’][i][1]
            js_data[‘nulls’][name_ae] = {
                ‘position’: ”,
                ‘position_static’: ”,
                ‘position_anim’: False,
                ‘orientation’: ”,
                ‘orientation_static’: ”,
                ‘orientation_anim’: False,
                ‘scale’: ”,
                ‘scale_static’: ”,
                ‘scale_anim’: False,
                }
    # create structure for cam bundles including positions (cam bundles don’t move)
    if include_cam_bundles:
        # go through each selected camera and active cameras
        selected_cams = []
        active_cams = []
        if include_active_cam:
            active_cams = data[‘active_cam_frames’]
        if include_selected_cams:
            for cam in selection[‘cameras’]:
                selected_cams.append(cam[0])
        # list of cameras that will be checked for ‘CAMERA SOLVER’
        cams = list(set.union(set(selected_cams), set(active_cams)))
        for cam in cams:
            # go through each constraints of this camera
            for constraint in cam.constraints:
                # does the camera have a Camera Solver constraint
                if constraint.type == ‘CAMERA_SOLVER’:
                    # Which movie clip does it use
                    if constraint.use_active_clip:
                        clip = data[‘scn’].active_clip
                    else:
                        clip = constraint.clip
                    # go through each tracking point
                    for track in clip.tracking.tracks:
                        # Does this tracking point have a bundle (has its 3D position been solved)
                        if track.has_bundle:
                            # get the name of the tracker
                            name_ae = convert_name(str(cam.name) + ‘__’ + str(track.name))
                            js_data[‘bundles_cam’][name_ae] = {
                                ‘position’: ”,
                                }
                            # bundles are in camera space. Transpose to world space
                            matrix = Matrix.Translation(cam.matrix_basis.copy() * track.bundle)
                            # convert the position into AE space
                            ae_transform = convert_transform_matrix(matrix, data[‘width’], data[‘height’], data[‘aspect’], x_rot_correction=False)
                            js_data[‘bundles_cam’][name_ae][‘position’] += ‘[%f,%f,%f],’ % (ae_transform[0], ae_transform[1], ae_transform[2])
    # get all keyframes for each object and store in dico
    if include_animation:
        end = data[‘end’] + 1
    else:
        end = data[‘start’] + 1
    for frame in range(data[‘start’], end):
        print(“working on frame: ” + str(frame))
        data[‘scn’].frame_set(frame)
        # get time for this loop
        js_data[‘times’] += ‘%f ,’ % ((frame – data[‘start’]) / data[‘fps’])
        # keyframes for active camera/cameras
        if include_active_cam and data[‘active_cam_frames’] != []:
            if len(data[‘active_cam_frames’]) == 1:
                cur_cam_index = 0
            else:
                cur_cam_index = frame – data[‘start’]
            active_cam = data[‘active_cam_frames’][cur_cam_index]
            # get cam name
            name_ae = active_cam_name
            # convert cam transform properties to AE space
            ae_transform = convert_transform_matrix(active_cam.matrix_world.copy(), data[‘width’], data[‘height’], data[‘aspect’], x_rot_correction=True)
            # convert Blender’s lens to AE’s zoom in pixels
            zoom = convert_lens(active_cam, data[‘width’], data[‘height’], data[‘aspect’])
            # store all values in dico
            position = ‘[%f,%f,%f],’ % (ae_transform[0], ae_transform[1], ae_transform[2])
            orientation = ‘[%f,%f,%f],’ % (ae_transform[3], ae_transform[4], ae_transform[5])
            zoom = ‘%f,’ % (zoom)
            js_data[‘cameras’][name_ae][‘position’] += position
            js_data[‘cameras’][name_ae][‘orientation’] += orientation
            js_data[‘cameras’][name_ae][‘zoom’] += zoom
            # Check if properties change values compared to previous frame
            # If property don’t change through out the whole animation – keyframes won’t be added
            if frame != data[‘start’]:
                if position != js_data[‘cameras’][name_ae][‘position_static’]:
                    js_data[‘cameras’][name_ae][‘position_anim’] = True
                if orientation != js_data[‘cameras’][name_ae][‘orientation_static’]:
                    js_data[‘cameras’][name_ae][‘orientation_anim’] = True
                if zoom != js_data[‘cameras’][name_ae][‘zoom_static’]:
                    js_data[‘cameras’][name_ae][‘zoom_anim’] = True
            js_data[‘cameras’][name_ae][‘position_static’] = position
            js_data[‘cameras’][name_ae][‘orientation_static’] = orientation
            js_data[‘cameras’][name_ae][‘zoom_static’] = zoom
        # keyframes for selected cameras
        if include_selected_cams:
            for i, cam in enumerate(selection[‘cameras’]):
                if cam[1] != active_cam_name:
                    # get cam name
                    name_ae = selection[‘cameras’][i][1]
                    # convert cam transform properties to AE space
                    ae_transform = convert_transform_matrix(cam[0].matrix_world.copy(), data[‘width’], data[‘height’], data[‘aspect’], x_rot_correction=True)
                    # convert Blender’s lens to AE’s zoom in pixels
                    zoom = convert_lens(cam[0], data[‘width’], data[‘height’], data[‘aspect’])
                    # store all values in dico
                    position = ‘[%f,%f,%f],’ % (ae_transform[0], ae_transform[1], ae_transform[2])
                    orientation = ‘[%f,%f,%f],’ % (ae_transform[3], ae_transform[4], ae_transform[5])
                    zoom = ‘%f,’ % (zoom)
                    js_data[‘cameras’][name_ae][‘position’] += position
                    js_data[‘cameras’][name_ae][‘orientation’] += orientation
                    js_data[‘cameras’][name_ae][‘zoom’] += zoom
                    # Check if properties change values compared to previous frame
                    # If property don’t change through out the whole animation – keyframes won’t be added
                    if frame != data[‘start’]:
                        if position != js_data[‘cameras’][name_ae][‘position_static’]:
                            js_data[‘cameras’][name_ae][‘position_anim’] = True
                        if orientation != js_data[‘cameras’][name_ae][‘orientation_static’]:
                            js_data[‘cameras’][name_ae][‘orientation_anim’] = True
                        if zoom != js_data[‘cameras’][name_ae][‘zoom_static’]:
                            js_data[‘cameras’][name_ae][‘zoom_anim’] = True
                    js_data[‘cameras’][name_ae][‘position_static’] = position
                    js_data[‘cameras’][name_ae][‘orientation_static’] = orientation
                    js_data[‘cameras’][name_ae][‘zoom_static’] = zoom
        ”’
# keyframes for all solids. Not ready yet. Temporarily not active
for i, ob in enumerate(selection[‘solids’]):
#get object name
name_ae = selection[‘solids’][i][1]
#convert ob position to AE space
”’
        # keyframes for all lights.
        if include_selected_objects:
            for i, ob in enumerate(selection[‘lights’]):
                #get object name
                name_ae = selection[‘lights’][i][1]
                type = selection[‘lights’][i][0].data.type
                # convert ob transform properties to AE space
                ae_transform = convert_transform_matrix(ob[0].matrix_world.copy(), data[‘width’], data[‘height’], data[‘aspect’], x_rot_correction=True)
                color = ob[0].data.color
                # store all values in dico
                position = ‘[%f,%f,%f],’ % (ae_transform[0], ae_transform[1], ae_transform[2])
                orientation = ‘[%f,%f,%f],’ % (ae_transform[3], ae_transform[4], ae_transform[5])
                energy = ‘[%f],’ % (ob[0].data.energy * 100.0)
                color = ‘[%f,%f,%f],’ % (color[0], color[1], color[2])
                js_data[‘lights’][name_ae][‘position’] += position
                js_data[‘lights’][name_ae][‘orientation’] += orientation
                js_data[‘lights’][name_ae][‘energy’] += energy
                js_data[‘lights’][name_ae][‘color’] += color
                # Check if properties change values compared to previous frame
                # If property don’t change through out the whole animation – keyframes won’t be added
                if frame != data[‘start’]:
                    if position != js_data[‘lights’][name_ae][‘position_static’]:
                        js_data[‘lights’][name_ae][‘position_anim’] = True
                    if orientation != js_data[‘lights’][name_ae][‘orientation_static’]:
                        js_data[‘lights’][name_ae][‘orientation_anim’] = True
                    if energy != js_data[‘lights’][name_ae][‘energy_static’]:
                        js_data[‘lights’][name_ae][‘energy_anim’] = True
                    if color != js_data[‘lights’][name_ae][‘color_static’]:
                        js_data[‘lights’][name_ae][‘color_anim’] = True
                js_data[‘lights’][name_ae][‘position_static’] = position
                js_data[‘lights’][name_ae][‘orientation_static’] = orientation
                js_data[‘lights’][name_ae][‘energy_static’] = energy
                js_data[‘lights’][name_ae][‘color_static’] = color
                if type == ‘SPOT’:
                    cone_angle = ‘[%f],’ % (degrees(ob[0].data.spot_size))
                    cone_feather = ‘[%f],’ % (ob[0].data.spot_blend * 100.0)
                    js_data[‘lights’][name_ae][‘cone_angle’] += cone_angle
                    js_data[‘lights’][name_ae][‘cone_feather’] += cone_feather
                    # Check if properties change values compared to previous frame
                    # If property don’t change through out the whole animation – keyframes won’t be added
                    if frame != data[‘start’]:
                        if cone_angle != js_data[‘lights’][name_ae][‘cone_angle_static’]:
                            js_data[‘lights’][name_ae][‘cone_angle_anim’] = True
                        if orientation != js_data[‘lights’][name_ae][‘cone_feather_static’]:
                            js_data[‘lights’][name_ae][‘cone_feather_anim’] = True
                    js_data[‘lights’][name_ae][‘cone_angle_static’] = cone_angle
                    js_data[‘lights’][name_ae][‘cone_feather_static’] = cone_feather
        # keyframes for all nulls
        if include_selected_objects:
            for i, ob in enumerate(selection[‘nulls’]):
                # get object name
                name_ae = selection[‘nulls’][i][1]
                # convert ob transform properties to AE space
                ae_transform = convert_transform_matrix(ob[0].matrix_world.copy(), data[‘width’], data[‘height’], data[‘aspect’], x_rot_correction=True)
                # store all values in dico
                position = ‘[%f,%f,%f],’ % (ae_transform[0], ae_transform[1], ae_transform[2])
                orientation = ‘[%f,%f,%f],’ % (ae_transform[3], ae_transform[4], ae_transform[5])
                scale = ‘[%f,%f,%f],’ % (ae_transform[6], ae_transform[7], ae_transform[8])
                js_data[‘nulls’][name_ae][‘position’] += position
                js_data[‘nulls’][name_ae][‘orientation’] += orientation
                js_data[‘nulls’][name_ae][‘scale’] += scale
                # Check if properties change values compared to previous frame
                # If property don’t change through out the whole animation – keyframes won’t be added
                if frame != data[‘start’]:
                    if position != js_data[‘nulls’][name_ae][‘position_static’]:
                        js_data[‘nulls’][name_ae][‘position_anim’] = True
                    if orientation != js_data[‘nulls’][name_ae][‘orientation_static’]:
                        js_data[‘nulls’][name_ae][‘orientation_anim’] = True
                    if scale != js_data[‘nulls’][name_ae][‘scale_static’]:
                        js_data[‘nulls’][name_ae][‘scale_anim’] = True
                js_data[‘nulls’][name_ae][‘position_static’] = position
                js_data[‘nulls’][name_ae][‘orientation_static’] = orientation
                js_data[‘nulls’][name_ae][‘scale_static’] = scale
        # keyframes for all object bundles. Not ready yet.
        #
        #
        #
    # —- write JSX file
    jsx_file = open(file, ‘w’)
    # make the jsx executable in After Effects (enable double click on jsx)
    jsx_file.write(‘#target AfterEffects\n\n’)
    # Script’s header
    jsx_file.write(‘/**************************************\n’)
    jsx_file.write(‘Scene : %s\n’ % data[‘scn’].name)
    jsx_file.write(‘Resolution : %i x %i\n’ % (data[‘width’], data[‘height’]))
    jsx_file.write(‘Duration : %f\n’ % (data[‘duration’]))
    jsx_file.write(‘FPS : %f\n’ % (data[‘fps’]))
    jsx_file.write(‘Date : %s\n’ % datetime.datetime.now())
    jsx_file.write(‘Exported with io_export_after_effects.py\n’)
    jsx_file.write(‘**************************************/\n\n\n\n’)
    # wrap in function
    jsx_file.write(“function compFromBlender(){\n”)
    # create new comp
    jsx_file.write(‘\nvar compName = prompt(“Blender Comp\’s Name \\nEnter Name of newly created Composition”,”BlendComp”,”Composition\’s Name”);\n’)
    jsx_file.write(‘if (compName){‘) # Continue only if comp name is given. If not – terminate
    jsx_file.write(‘\nvar newComp = app.project.items.addComp(compName, %i, %i, %f, %f, %i);’ %
                   (data[‘width’], data[‘height’], data[‘aspect’], data[‘duration’], data[‘fps’]))
    jsx_file.write(‘\nnewComp.displayStartTime = %f;\n\n\n’ % ((data[‘start’] + 1.0) / data[‘fps’]))
    # create camera bundles (nulls)
    jsx_file.write(‘// ************** CAMERA 3D MARKERS **************\n\n\n’)
    for i, obj in enumerate(js_data[‘bundles_cam’]):
        name_ae = obj
        jsx_file.write(‘var %s = newComp.layers.addNull();\n’ % (name_ae))
        jsx_file.write(‘%s.threeDLayer = true;\n’ % name_ae)
        jsx_file.write(‘%s.source.name = “%s”;\n’ % (name_ae, name_ae))
        jsx_file.write(‘%s.property(“position”).setValue(%s);\n\n\n’ % (name_ae, js_data[‘bundles_cam’][obj][‘position’]))
    # create object bundles (not ready yet)
    # create objects (nulls)
    jsx_file.write(‘// ************** OBJECTS **************\n\n\n’)
    for i, obj in enumerate(js_data[‘nulls’]):
        name_ae = obj
        jsx_file.write(‘var %s = newComp.layers.addNull();\n’ % (name_ae))
        jsx_file.write(‘%s.threeDLayer = true;\n’ % name_ae)
        jsx_file.write(‘%s.source.name = “%s”;\n’ % (name_ae, name_ae))
        # Set values of properties, add kyeframes only where needed
        if include_animation and js_data[‘nulls’][name_ae][‘position_anim’]:
            jsx_file.write(‘%s.property(“position”).setValuesAtTimes([%s],[%s]);\n’ % (name_ae, js_data[‘times’], js_data[‘nulls’][obj][‘position’]))
        else:
            jsx_file.write(‘%s.property(“position”).setValue(%s);\n’ % (name_ae, js_data[‘nulls’][obj][‘position_static’]))
        if include_animation and js_data[‘nulls’][name_ae][‘orientation_anim’]:
            jsx_file.write(‘%s.property(“orientation”).setValuesAtTimes([%s],[%s]);\n’ % (name_ae, js_data[‘times’], js_data[‘nulls’][obj][‘orientation’]))
        else:
            jsx_file.write(‘%s.property(“orientation”).setValue(%s);\n’ % (name_ae, js_data[‘nulls’][obj][‘orientation_static’]))
        if include_animation and js_data[‘nulls’][name_ae][‘scale_anim’]:
            jsx_file.write(‘%s.property(“scale”).setValuesAtTimes([%s],[%s]);\n\n\n’ % (name_ae, js_data[‘times’], js_data[‘nulls’][obj][‘scale’]))
        else:
            jsx_file.write(‘%s.property(“scale”).setValue(%s);\n\n\n’ % (name_ae, js_data[‘nulls’][obj][‘scale_static’]))
    # create solids (not ready yet)
    # create lights
    jsx_file.write(‘// ************** LIGHTS **************\n\n\n’)
    for i, obj in enumerate(js_data[‘lights’]):
        name_ae = obj
        jsx_file.write(‘var %s = newComp.layers.addLight(“%s”, [0.0, 0.0]);\n’ % (name_ae, name_ae))
        jsx_file.write(‘%s.autoOrient = AutoOrientType.NO_AUTO_ORIENT;\n’ % name_ae)
        # Set values of properties, add kyeframes only where needed
        if include_animation and js_data[‘lights’][name_ae][‘position_anim’]:
            jsx_file.write(‘%s.property(“position”).setValuesAtTimes([%s],[%s]);\n’ % (name_ae, js_data[‘times’], js_data[‘lights’][obj][‘position’]))
        else:
            jsx_file.write(‘%s.property(“position”).setValue(%s);\n’ % (name_ae, js_data[‘lights’][obj][‘position_static’]))
        if include_animation and js_data[‘lights’][name_ae][‘orientation_anim’]:
            jsx_file.write(‘%s.property(“orientation”).setValuesAtTimes([%s],[%s]);\n’ % (name_ae, js_data[‘times’], js_data[‘lights’][obj][‘orientation’]))
        else:
            jsx_file.write(‘%s.property(“orientation”).setValue(%s);\n’ % (name_ae, js_data[‘lights’][obj][‘orientation_static’]))
        if include_animation and js_data[‘lights’][name_ae][‘energy_anim’]:
            jsx_file.write(‘%s.property(“intensity”).setValuesAtTimes([%s],[%s]);\n’ % (name_ae, js_data[‘times’], js_data[‘lights’][obj][‘energy’]))
        else:
            jsx_file.write(‘%s.property(“intensity”).setValue(%s);\n’ % (name_ae, js_data[‘lights’][obj][‘energy_static’]))
        if include_animation and js_data[‘lights’][name_ae][‘color_anim’]:
            jsx_file.write(‘%s.property(“Color”).setValuesAtTimes([%s],[%s]);\n’ % (name_ae, js_data[‘times’], js_data[‘lights’][obj][‘color’]))
        else:
            jsx_file.write(‘%s.property(“Color”).setValue(%s);\n’ % (name_ae, js_data[‘lights’][obj][‘color_static’]))
            if js_data[‘lights’][obj][‘type’] == ‘SPOT’:
                if include_animation and js_data[‘lights’][name_ae][‘cone_angle_anim’]:
                    jsx_file.write(‘%s.property(“Cone Angle”).setValuesAtTimes([%s],[%s]);\n’ % (name_ae, js_data[‘times’], js_data[‘lights’][obj][‘cone_angle’]))
                else:
                    jsx_file.write(‘%s.property(“Cone Angle”).setValue(%s);\n’ % (name_ae, js_data[‘lights’][obj][‘cone_angle_static’]))
                if include_animation and js_data[‘lights’][name_ae][‘cone_feather_anim’]:
                    jsx_file.write(‘%s.property(“Cone Feather”).setValuesAtTimes([%s],[%s]);\n’ % (name_ae, js_data[‘times’], js_data[‘lights’][obj][‘cone_feather’]))
                else:
                    jsx_file.write(‘%s.property(“Cone Feather”).setValue(%s);\n’ % (name_ae, js_data[‘lights’][obj][‘cone_feather_static’]))
        jsx_file.write(‘\n\n’)
    # create cameras
    jsx_file.write(‘// ************** CAMERAS **************\n\n\n’)
    for i, cam in enumerate(js_data[‘cameras’]): # more than one camera can be selected
        name_ae = cam
        jsx_file.write(‘var %s = newComp.layers.addCamera(“%s”,[0,0]);\n’ % (name_ae, name_ae))
        jsx_file.write(‘%s.autoOrient = AutoOrientType.NO_AUTO_ORIENT;\n’ % name_ae)
        # Set values of properties, add kyeframes only where needed
        if include_animation and js_data[‘cameras’][name_ae][‘position_anim’]:
            jsx_file.write(‘%s.property(“position”).setValuesAtTimes([%s],[%s]);\n’ % (name_ae, js_data[‘times’], js_data[‘cameras’][cam][‘position’]))
        else:
            jsx_file.write(‘%s.property(“position”).setValue(%s);\n’ % (name_ae, js_data[‘cameras’][cam][‘position_static’]))
        if include_animation and js_data[‘cameras’][name_ae][‘orientation_anim’]:
            jsx_file.write(‘%s.property(“orientation”).setValuesAtTimes([%s],[%s]);\n’ % (name_ae, js_data[‘times’], js_data[‘cameras’][cam][‘orientation’]))
        else:
            jsx_file.write(‘%s.property(“orientation”).setValue(%s);\n’ % (name_ae, js_data[‘cameras’][cam][‘orientation_static’]))
        if include_animation and js_data[‘cameras’][name_ae][‘zoom_anim’]:
            jsx_file.write(‘%s.property(“zoom”).setValuesAtTimes([%s],[%s]);\n\n\n’ % (name_ae, js_data[‘times’], js_data[‘cameras’][cam][‘zoom’]))
        else:
            jsx_file.write(‘%s.property(“zoom”).setValue(%s);\n\n\n’ % (name_ae, js_data[‘cameras’][cam][‘zoom_static’]))
    # Exit import if no comp name given
    jsx_file.write(‘\n}else{alert (“Exit Import Blender animation data \\nNo Comp\’s name has been chosen”,”EXIT”)};’)
    # Close function
    jsx_file.write(“}\n\n\n”)
    # Execute function. Wrap in “undo group” for easy undoing import process
    jsx_file.write(‘app.beginUndoGroup(“Import Blender animation data”);\n’)
    jsx_file.write(‘compFromBlender();\n’) # execute function
    jsx_file.write(‘app.endUndoGroup();\n\n\n’)
    jsx_file.close()
    data[‘scn’].frame_set(curframe) # set current frame of animation in blender to state before export
##########################################
# DO IT
##########################################
def main(file, context, include_animation, include_active_cam, include_selected_cams, include_selected_objects, include_cam_bundles):
    data = get_comp_data(context)
    selection = get_selected(context)
    write_jsx_file(file, data, selection, include_animation, include_active_cam, include_selected_cams, include_selected_objects, include_cam_bundles)
    print (“\nExport to After Effects Completed”)
    return {‘FINISHED’}
##########################################
# ExportJsx class register/unregister
##########################################
from bpy_extras.io_utils import ExportHelper
from bpy.props import StringProperty, BoolProperty
class ExportJsx(bpy.types.Operator, ExportHelper):
    “””Export selected cameras and objects animation to After Effects”””
    bl_idname = “export.jsx”
    bl_label = “Export to Adobe After Effects”
    filename_ext = “.jsx”
    filter_glob = StringProperty(default=”*.jsx”, options={‘HIDDEN’})
    include_animation = BoolProperty(
            name=”Animation”,
            description=”Animate Exported Cameras and Objects”,
            default=True,
            )
    include_active_cam = BoolProperty(
            name=”Active Camera”,
            description=”Include Active Camera”,
            default=True,
            )
    include_selected_cams = BoolProperty(
            name=”Selected Cameras”,
            description=”Add Selected Cameras”,
            default=True,
            )
    include_selected_objects = BoolProperty(
            name=”Selected Objects”,
            description=”Export Selected Objects”,
            default=True,
            )
    include_cam_bundles = BoolProperty(
            name=”Camera 3D Markers”,
            description=”Include 3D Markers of Camera Motion Solution for selected cameras”,
            default=True,
            )
# include_ob_bundles = BoolProperty(
# name=”Objects 3D Markers”,
# description=”Include 3D Markers of Object Motion Solution for selected cameras”,
# default=True,
# )
    def draw(self, context):
        layout = self.layout
        box = layout.box()
        box.label(‘Animation:’)
        box.prop(self, ‘include_animation’)
        box.label(‘Include Cameras and Objects:’)
        box.prop(self, ‘include_active_cam’)
        box.prop(self, ‘include_selected_cams’)
        box.prop(self, ‘include_selected_objects’)
        box.label(“Include Tracking Data:”)
        box.prop(self, ‘include_cam_bundles’)
# box.prop(self, ‘include_ob_bundles’)
    @classmethod
    def poll(cls, context):
        active = context.active_object
        selected = context.selected_objects
        camera = context.scene.camera
        ok = selected or camera
        return ok
    def execute(self, context):
        return main(self.filepath, context, self.include_animation, self.include_active_cam, self.include_selected_cams, self.include_selected_objects, self.include_cam_bundles)
def menu_func(self, context):
    self.layout.operator(ExportJsx.bl_idname, text=”Adobe After Effects (.jsx)”)
def register():
    bpy.utils.register_class(ExportJsx)
    bpy.types.INFO_MT_file_export.append(menu_func)
def unregister():
    bpy.utils.unregister_class(ExportJsx)
    bpy.types.INFO_MT_file_export.remove(menu_func)
if __name__ == “__main__”:
    register()
Posted in Assignments, Final Papers, Ian Hodgson, Rosa Lee, Students | 1 Comment

Journals | Zohaib

Journal Entry #1 | 04/07/13
I have to do more research on how Solar energy works and how much solar energy is required for the Solar Powered Battery to keep a small device functioning properly. I have  to determine the size, width and length of the solar battery’s. The battery will act as a universal (one size fits all kind of thing)  so it must be of a size that will fit any small handheld electronic device and will not weigh too much to become too much of an inconvenience. I have to also figure out what would be the ideal size of the battery for the solar panel on the back because if the solar panel is too small it won’t hold enough charge for the battery to function properly. So the battery has to be small enough size to fit most if not all hand held electronic devices but at the same time it must be big enough to carry solar cells on the backside that will hold enough charge for small electronic devices.

Journal Entry #2 | 04/14/13
I have finally been able to do some more research on Solar Energy. Here’s a little summary of the information I have managed to gather so far. Solar energy is the energy produced by the Sun; the radiation is emitted by the Sun in the form of light and heat. Almost all the energy on Earth comes from the Sun. The earth receives 170 pet watts of solar radiation. 30% is reflected into space and the rest is absorbed by the earth. Most of the solar radiation falls in the visible to near infrared region of electromagnetic spectrum with a small amount in the ultraviolet region. Today most nanometers based energy conversion focuses on converting solar energy into electrical energy. Solar energy is everywhere as long as sunlight is available. So that makes it very easy to utilize this “free” form of energy that our sun provides for everyone throughout the entire planet. The only thing I need to do now is figure out a way that wouldn’t make my invention rely entirely on solar energy. I must figure out a backup energy source even though Solar Energy seems quite promising and is available everywhere for FREE. To read more about solar energy by following these links below.
http://www.universetoday.com/73693/what-is-solar-energy/
http://www.universetoday.com/18107/energy-from-the-sun/

Journal Entry #3 | 04/21/13
Okay so I’ve been trying to do some sketches for how and what my Solar Powered battery will look like and I have come to a conclusion that before I create sketches I have come up with the perfect dimensions (length, width, depth and weight). I have decided that these dimensions would be perfect for most if not all everyday handheld devices. The battery will be pretty much the same size or perhaps a little smaller than the average cellphone. The solar powered battery will weigh only 2.5 ounces will is roughly 70 grams. So the battery adding extra weight on whatever its attached to will not be a problem. Here is the specific information about the size of the battery.

  • Height: 4.2 inches (106.68 mm)
  • Width: 2.0 inches (50.8 mm)
  • Depth: 0.50 inch (12.7 mm)
  • Weight: 2.5 ounces (70 grams)

Journal Entry #4 | 04/27/13
I’ve been looking for ways to create the Solar Power Battery more efficient. I don’t want it to rely entirely on Solar Power. I have to have a backup source of energy just in case something happens and sunlight isn’t available anymore for example on cloudy days or night times etc. I have to find an alternative way to charge the battery other than solar power. I do not want to rely entirely on solar  energy no matter how cost efficient it may seem. So my goal now is to find another way that I can make the solar power battery even better than it is now. I must find other wireless power sources or do more research into wireless energy.

Journal Entry #5 | 04/14/13
Wireless Energy is what I have been doing my research on for past few days, reading articles online and trying to comprehend as much as I can in this short period of time that I have been provided with. Here is a summary of information that I have gathered so far. There are different kinds of wireless charging technologies available.  One way is through electromagnetic induction, an electric current is sent through a magnetic field generated by a power conductor to a smaller magnetic field generated by a receiving device. One other method is magnetic resonance coupling. Which was created by researchers working for Intel and MIT. The technology involves setting up a magnetic field that is actually able to transmit energy between two poles from a transmitting device to a receiving device. They experimented with two electromagnetic resonators vibrating at a specific frequency and found they shared power through their magnetic fields at distances far greater than their conventional, magnetic induction counterparts.  Where previous technologies only allowed transmission over distances of inches, magnetic resonance coupling would allow transmission at long enough distances that it opens the door to many new applications. So in theory you could have a room full of people with their electronic devices and you can charge multiple devices all at once. With this wireless charging technology finding an outlet will become obsolete. So all I have to do now is to imagine a device in my mind that will be able to transmit electromagnetic waves to the solar powered battery and charge it. I will also have to make tweaks on my original battery model and add some sort of a receiver to gather electromagnetic waves.

Journal Entry #6 | 05/04/13
Regarding wireless energy I have come up with an idea on how the Solar Battery can also be charged using wireless Power Stations or charging docks (I’m not very good at naming these things). These charging docks or power stations will send out electromagnetic waves that will be picked up my the Solar Battery’s built-in receiver to charge the battery. It will be similar to how our WiFi works now days with hotspots available for devices to connect pretty much anywhere such as stores, coffee shops, restaurants, bus stops, train stations, airports and pretty much all other public places. So all these places will have hotspots for not only WiFi but for wireless charging for people who would like to charge their electronic devices on the go. All I have to do now is to do some concept sketches and drawings on how these power station or charging docks will look like. I will soon post my original sketches for the battery.

Posted in Journals, Zohaib Hussain | 1 Comment

Deliverable

Ian Hodgson & Rosa Lee

Emerging Technology

Deliverable

Virtual: Constitution / Bill of Rights

 http://www.archives.gov/exhibits/charters/constitution.html

Amendment I


·         The Right for all United States Citizens to access the internet freely for personal use devoid of taxation or toll


Amendment II


·         The Right for all United States Citizens to engage in commerce while in use of the Internet.


Amendment III


·         The Right For business community while engaging in commerce to business to apply taxation for ecommerce transactions.


Amendment IV


·         The right for nations / countries to charge taxation for ecommerce activity done in their respective zones by the business communities of the world.


Amendment V


·         All copy written material /patens exposed, torrented software, downloads without permissions, subject to prosecution to the highest extent of the law.

Amendment VI


·         Any acts committed violently due to usage of the internet are subject to prosecution to the highest extent of the law. This includes but not limited to terrorism, solicitation of minors, deformations of character (bullying), solicitation for groups known to consort in violent acts, gangs, racial indecency.


Amendment VII


·         Any acts committed against the community, society, or mankind through the use of the internet are subject to prosecution.


Posted in Assignments, Ian Hodgson, Journals, Rosa Lee, Students | Leave a comment

Journal Entries

Journal Entry  # 1

For my research over the break I basically just went over the parts Baker sent me.  I went through the first 2 animes he sent me, mainly going over their summaries and episode guides since I have watched those 2 animes previously in the past.   I also looked at the experiments of brain control with the rats and I was pretty surprised at the results.  It was incredibly interesting, especially since the rats were able to communicate and work together well.  It’s amazing how far technology is where rats can communicate their  thoughts via the internet, especially knowing that soon it’ll be doable with little to no effort in the future!

Journal Entry # 2

Found this interesting article about Augmented Reality.

http://www.sciencedaily.com/releases/2012/12/121205090931.htm

Now what’s so good about augmented reality contacts?  Well really, it’s just cool in general and what they offer right now for AR contacts isn’t that much of a big deal.  If anything, as of now it more or so gets in the way of your vision with all of the lights and such put directly onto your eye.  As of now, the amount of pixels are limited, even with the break through found in adding pixels.  However it still has a chance to grow.  Now how can that work with my project?  Well my project is about seeing through one’s eyes virtual computer windows that one can interact with.  If these AR contacts ever come to the level of being able to show windows like these through ones eyes, the amount of years it’ll take for my product, the Neuro Linker, to come out should be accelerated to about 10 years.

Journal Entry # 3

Found quite a bit of info on the brain chip.  Pretty interesting stuff and is so far being used to allow those who are disabled to be able to move a machine as a replacement of a missing arm.  Found a of it on a monkey who is awarded similarly to that of the rats for their brain experiment.  When the monkey does a correct task, it is given water as a reward.  Shows how simple it is to make animals happy but then again, it advances technology so who am I to complain.  All in all, really cool stuff and hopefully they’ll find a way to make it so you can control objects with your mind without any sort of implant, but instead some kind of attachment on your body.  If they do get that far, hopefully I’ll also still be alive to see it.

Either way, as soon as they can make you control something with your brain without any said implant, but rather an attachment, we’d easily be able to take that and implement ways to have an actual neuro linker up and running.

Journal Entry # 4

I’ve been working on my Deliverables.  Mainly on recording for the video.  When I tried editing, it ended up in failure.  I thought I could pull it off with something like Sony Vegas but when you overlay a clip over another one, it doesn’t entirely work out as the way I intended.  I wanted to make it seem like I was touching the computer screen, but all that really happened was that it looked like I was touching behind the virtual computer screen, rather then on it.  All in all, a complete failure on my first attempt.  I shall take this time to learn more about the program, Adobe After Effects.  After doing some research on the program itself, I’m 100% positive I can do what I can do my vision in that video.  The problem itself is learning how to do it in only 3 weeks left of class.   Either way, I’m sure it can’t be that hard.  Frame by frame might be a problem but I’ve done videos where I worked on several hours on a few frames before so maybe I’ll see if I can get this down.

Journal Entry #5


Okay, the video was way over my head.  I was way too cocky, thinking I can make a very detailed video like that with a program I was unfamiliar with.  After many, many hours I was able to make some sort of hologram window but nothing close to what I wanted at all.  Really sad and seeing as how deliverables are due next week I find that I am really unable to do it.  Guess I’ll do something else like a presentation since although the recording is complete, the lack of editing will make for a lack luster video.  I mean, it really just ended up being me talking to myself.


After Effects isn’t entirely that hard, but the amount of time it would take for me to do what I’d want to do takes longer than the time I have available.  I don’t even think a month and a half would be able to cover it, so I’m just gonna do a slide show instead.

I guess I bit more than I can chew, trying to do more than I can handle.

Posted in David Evangelista, Journals | 1 Comment

Noah Ruede – Journals

Tunewave: Journal Entry #1

           This week I have put my thoughts together for my pre-proposal, and have decided to call my invention the Tunewave.  I’m at once both excited and nervous about this project.  Obviously, my inspiration came from an idea about which I’m excited.  It would be a dream of mine to have access to a device the likes of which I plan to propose.  At the same time, I can hardly wrap my head around what it would take to make my invention a reality.  I definitely have my work cut out for me in terms of researching the relevant technologies involved.  So far I know I’ll need to look into EEG’s and how they work- I’m frankly for the most part ignorant as to the processes involved.  Hopefully it won’t be impossible for me to achieve at least a basic understanding.

Tunewave: Journal Entry #2

           I have just completed researching for and writing my midterm paper, and the ways I felt in my previous entry have been amplified.  For one, getting a clearer picture of the landscape of current technology and where it’s headed is intrinsically exciting, and some aspects of my invention don’t seem quite as far off or implausible as they once did.  At the same time, as I delved further into my research, I quickly found myself getting overwhelmed at the sheer volume of both the information and the ambiguity that the many years of development and research have given us.

Interestingly enough, EEG’s have only been used for one music-related application I could find: Erkki Kurenniemi’s “DIMI-T.”  Even this is barely applicable, as all it did was take rudimentary readings of neural electrical activity and translate them into tones.  My research has consisted mostly of studying the history of EEG’s, how they function and what applications electroencephalography has been used for.  That alone was enough to intimidate me; there is simply too much information that I don’t understand, so parsing through it to get a clear picture has been a massive challenge.

To make my final deliverables as realistic and authentic as possible would mean years of education and study in neurology and information technology; “catching up” with where science currently stands.   My challenge from this point forward would be to obtain a firm understanding of the basics.  Even that will undoubtedly prove to be very trying.

Tunewave: Journal Entry #3

           I have presented my midterm and am beginning work on my patent application summary.  Just by giving my presentation, I have achieved a greater sense of clarity and purpose to what I’m seeking to achieve.  Some say the best way to learn is to teach.  By being forced to lay out my ideas and my research in a way that makes sense and is easily digestible has in fact allowed me to further digest the information myself.  Professor Baker’s suggestions were also extremely helpful; he gave me a few things to look into which could definitely be of use—namely the possible utility of fMRI for the purposes of my invention.  I had originally passed over fMRI in favor of EEG, dismissing it as having purposes relatively irrelevant to my project.  The direction in which he has pointed me has shown me that is not the case, and really gives me more room to work with.  In addition, piecing together my patent application summary has helped motivate me further, reminding me why it is that this technology is so unique and potentially (but almost undoubtedly) revolutionary.

Tunewave: Journal Entry #4

    As I’ve begun the planning my deliverables, I’ve already hit a roadblock.  I was planning on creating an interaction diagram as one of my deliverables, but I’ve found that these diagrams aren’t what I thought they were.  As it turns out, interaction diagrams are digital graphics created through a coding language called UML, or Unified Modeling Language.  It’s used as a universal standard for design and blueprint generation, showing the various interactions between components of a system.  Seeing as it isn’t really feasible for me to learn the language and the in-and-outs of it’s applications, I’m going to need to find a new way to develop a diagram which illustrates how the Tunewave is used in a given user case.  I’ve started by drawing it out by hand, but eventually I intend to digitize them.  The final result depends on whether I decide to create a digital pamphlet or a physical one.  I’d assume I’ll reach that decision once I have a better grasp on the logistics of the deliverables of which it will be comprised.


Tunewave: Journal Entry #5

    As I prepare for my final paper, I have delved into researching the structure and functions of the brain in relation to the interpretation and creation of music.  I’ve avoided doing it up to this point; attempting to understand the medical and scientific terminology is a daunting task.  After hours of researching, reading and re-reading relevant materials, I finally feel as if I have a better grasp on the subject.  It seems the most relevant region of the brain is the Primary Auditory Cortex, which is located in the Temporal Lobe.  The PAC is responsible for processing sound, and it’s structure is outright fascinating.  Neurons are grouped by the specific frequencies they interpret; the neurons get excited by sounds of the frequencies for which they are responsible, or multiples of that frequency.  There are also groups responsible for interpreting harmony, timing and pitch.

    Another fascinating concept is the brain’s process of what’s called “musical imagery,” which is the experience of replaying music by imagining it inside one’s head.  Research has shown the the brain naturally extrapolates expectations for where the music is going.  What’s most astounding is that these extrapolations are consistent with music theory (!).

Tunewave: Journal Entry #6

    After having submitted my final paper, I am now in the process of realizing my deliverables.  As it turns out, I’m not as talented an artist as I thought (or perhaps I’m just very rusty).  I attempted to draw how I imagined the Tunewave headset to look like, and upon scanning the drawing was not impressed with the outcome.  This was a significant setback, but it turned out to be a good thing.  I opened up the scanned image with Adobe Illustrator (which I have used only once), and after laboriously putzing around with the thing, managed to recreate a far more professional-looking and detailed model of the original drawing.  I’m actually pretty pleased with it.

    I had intended to create a presentation from the beginning, as well as an interaction diagram or map of how the device works.  What I’ve ultimately decided to do was to incorporate this map into my presentation by using Prezi.  Prezi affords me the opportunity to visually link images and concepts.  This way, rather than my presentation being disjointed, comprised of separate components, I am instead able to integrate the interaction map into the overall presentation.  As there’s a lot of information to present, keeping the right amount of detail has been challenging but interesting.  As I wrap things up, I’m excited to present my findings.

Posted in Assignments, Journals, Noah Ruede, Students | Leave a comment

journal’s

Journal #1

I will research on a device similar to my invention and see how its design and analysis its functions and understand its method. I will think of how my GPS glasses will look and how to implement it with the functions that I want it to have. It has to be lightweight and easy to use. So it would distract the driver in anyway, so they can have a safe ride.

Journal #2

After researching for devices that’s close to my invention the GPS glasses X, I came across the goggle glasses. Its functions are indeed intriguing as it has an overlay on the lens to display screens. It has a function for a camera, video calling and Google map. It looks nice to have that many functions but I don’t think its safe enough to use if the driver is going 60 mph. my invention will be a more in depth and more easy able to use so it wouldn’t distract any driver.

Journal#3

My inventions the GPS glasses will have 3 functions the driver can switch from by clicking it on the right side of the GPS glasses X. the functions I’m going for is gps, shades for when its to bright, and regular glasses for disability people who cant see very well and it will have a command voice and with lens touch screen in case people need to type in the directions.

Journal #4

I will create pictures demonstrating the 3 functions of my GPS glasses X and explaining how it works and how it will be safe enough for the driver to use. I will make a video demonstrating how it’ll work and be useful for the driver. The shades functions and the regular glasses will be demonstrated to have clear understanding. The gps function will be explain more in depth to have a understanding on how the driver is being track.

Posted in Assignments, Journals, Students, Wilmer Dumaguala | Leave a comment

Wilmer D – Final Paper

final paper

Posted in Assignments, Final Papers, Students, Wilmer Dumaguala | Leave a comment

William Maldonado’s-Final Paper

William Maldonado

Title:Jector

Keywords:Projector, Watch, Smartwatch, Portable, Videos, Photos

Abstract:

You’re out camping with the family and it’s too cloudy to see the stars.  Everyone wanted to see a movie that just came out on DVD and luckily you bought it and saved it on your Jector. What is Jector? Jector is a watch projector and just as the name states it is a watch that is also a projector. A person that loves to watch films but can’t always sit down in front of their computer and watch the movies they want because of other activities they have to do. Instead they can put down their Jector on a flat surface and aim it an empty space on the wall and watch their film of choice. This would be something that would be helpful to a film enthusiast like myself and can also be useful anywhere I am and have my friends and family watch it with me as well. What the watch will be able to project is not only videos but also photos. The user will be able to choose from multiple ways. One way is by streaming videos from your video providers such as hulu and Netflix and the other ways is that you will also be able to store videos you already have on our cloud service or a micro SD card. The watch will also have two small speakers one on the left side of the watch and one on the right. Now you and your family can watch that new movie you’ve been meaning to watch together.

Tangible:

The way Jector will become an everyday gadget is by simply displaying the time and date when it isn’t projecting your favorite movie or show. In the market thereare similar devices are being worked on as you read this such as Apple’s iwatch and LG’s smart watch. They are not the only company’s working on a smart watch, others like Samsung and Sony are also working on similar ideas. The only way these smart watches are similar to the Jector is that they both use a touch screen user interface and they show time. There still isn’t definite description’s of what these other smart watches will be able to do.

On my research for looking for devices with a built in projector within, there has been a phone from Samsung that has a built in projector called the Samsung Galaxy Beam, along with other phones such as the Micromax X40 a cell phone with a built in projector released in 2011 from Micromax in India and has dual Sim card capabilities. Another hone with a built in projector is the Spice M9000 Popkorn also released in India on 2011 with dual sim card capabilities as well is from Spice company. When the phone is purchased it comes with a small tripod to mount your cell phone on to. There are also pico projectors from Aiptek mobile cinema products that connects to apple products and display what the apple product is displaying on its screen these are more like an external small portable projector instead of it being built in the products like the two cellphones from India. What this research has helped me realize is that putting something as powerful as a projector, can be put inside of a smaller hand held device and that is where the Jector differs and is trying to become a wearable projector inside a watch, instead of a hand held device.

Philosophical:

On an article posted on the website Howstuffworks.com it speaks about the new Sony smartwatch. Sony’s smartwatch allows for bluetooth connectivity with your android smartphone. The watch also connects with your watch through an app especially made for the watch to add smaller app’s specially made for the watch such as the text message notification app which allows your watch to receive any text messages sent to your phone. There’s other small apps just like this one built for the watch, one for phone calls, facebook, twitter and weather app that allows you to check the forecast on the smartwatch. It also allows you to navigate through your music on your phone.

Another smartwatch that was funded on Kickstarter.com called Pebble is similar to the jector watch in that to use dfferent fucntions of the watch. The Pebble similar to Sony’s smartwatch in that it gives the user notifications of when they receive a phone call or text messages, is a music player and connects  to your smartphone using bluetooth connectivity with your smartphone except that its compatible with both android smartphones and iphones. The Pebble watch is also water resistant, uses an e-paper display, has customizable watchfaces and keeps tracks your time, speed and distance of your early morning run and if you like to run at night it has a backlight.

The way both of these smart watches have something in common with my imagine project watch is they are both trying to revive the watch into this modern day of technology and not have it fade out into history. Both watches although in some ways similar are trying to push the boundaries of what a watch is and show what it can become. These boundaries the jector wants to also, it differs in comparison to these smart watches because instead of having the watch just be an easier way to stay connected to the people you love, it can become an entertainment hub which is exactly what the Jector is, an entertainment hub right on your wrist.

Full Project Description:

The Jector will be a solar powered by having thin film solar panels as the wrist straps for the watch so charging wont be a problem. This is helpful to the Jector because it will need a lot of power to keep the projector turned on while you watch your favorite two hour movie. The kind of projector that will be inside the watch will be a DLP projector because it is more efficient for the size of the watch. Jector will be built to be durable which is why it will have water proof air vents on the left and right side of the watch to prevent the projector inside from over heating while it is turned on. The left side will also have two buttons one to raise the volume and one to lower the volume and on the right two other buttons one to lock and unlock the touch screen capabilities, the other to turn the projector on and off. The watch will have a capactive touch screen that will also be water, dust and scratch resistant. There will be two built in small speakers on the front of the watch one on the left one on the right. The lens will be on front side and have a small ring around it that if you turned will allow you to adjust the focus of the projector. On the back of the watch there will be a micro SD card slot and will allow the user to play videos or view photos directly from the card. The bottom side of the watch will have four small retractable stands on each corner so that you can take off the watch and rest it upon a flat surface for a better movie experience. A small fan inside that only turns on when the projector is on will also make sure the projector does not overheat.

The body of the watch will be encased with carbon fiber material and the bottom of the body of the watch will be aluminum. The user interface of the watch gives u the option of five buttons that leads you to function that the watch will be able to do. There will be a watch mode button, videos and photos button, blue-tooth button, connectivity settings button and main settings button. Watch mode button will set your watch into a mode of only showing the time and date. Going into watch mode will automatically lock the screen to get out of watch mode you will have to press the lock/unlock screen button on the right side of the watch. Videos and Photos button will allow the user to stream videos or view videos or photos they have in their micro SD card. The bluetooth button will allow you to connect with bluetooth headphones and speakers or your phone. Connectivity settings button will help the user find and connect to wifi or check up on their 4g connectivity. The final button the main settings button will allow the user to adjust the brightness of the watch, select the video provider they would like to use at the moment, view storage availability, language options, adjust the time and date and watch style and color.

Project Deliverables:

Images:

I will show images that I drew on paper of the watch from all points of view.

  • Top view will display the two front speakers, the touch screen and the size of the watch.
  • The left side view will show the volume buttons and waterproof ventilation for the built in projector.
  • The right side view will show another waterproof ventilation a button to turn on and off the built in projector along with another button locking the screen since its a touch screen so when its in time display mode you don’t accidentally touch or when you using the projector.
  • Back view will display a micros SD card slot and part of the thin film solar panel wristband.
  • From the front view you can see the lens of the projector and a rigged ring around the knob to focus the projection for a better viewing experience.

Stop motion video:

The stop motion video will show all the different events and circumstances use the Jector for. I will be using cut out drawings I made on paper to help me convey this. Then I will do editing in final cut pro.

Presentation:

I will put all of this together in a power point including information I have not spoke about thorougly like wifi, 4g capabilities, prices and colors. I will also add images of devices similar to the jector.

Links:

http://www.gsmarena.com/spice_m_9000_popkorn-4623.php

http://www.ecodirect.com/Thin-Film-Solar-Panels-s/220.htm

http://www.sonymobile.com/us/products/accessories/smartwatch/

http://getpebble.com/


Posted in Assignments, Final Papers, William Maldonado | Leave a comment

2 pitches for my project

My pitches are one of a video aspect and one of an audio aspect. My project will be completed with the head tracking device ‘Oculus Rift’. I watched a video clip which is 90 years old grandmother experiences the device.

Video Link

She is so excited about the performance of Oculus Rift device. It is very vivid and looks real so that this 90 year old woman could fully enjoy the virtual world. I thought this shows that my project ‘Bible Experience for you’ will be a very interesting game for all age groups.

Another one is ‘Bible experience- the audio version Bible.’ It was performed by a cast of more than 200 African-American actors, musicians, personalities. In spite of its high cost, it seems it became very popular version of Bible because of its convenience.

Page Link


Posted in Assignments, two pitches, Yoonshik Kim | Leave a comment

Final Paper | Zohaib

Project: Solar powered battery and Wireless Charging.


Keywords:

Solar Powered.
Wireless Energy.
Cable-free Chargers.
Electromagnetic.
Charging Station.
Charging Dock.
Extra.
Backup.
Cell phones.
Reliable.
Battery.
Go Green.
Green Future
Infinite Energy.
Plug-Free.

Abstract:

The idea is to create a solar powered battery that attaches onto the back of your cell phones or any other electronic devices (iPhone, iPads, mp3 players, Kindles etc.) that acts as a backup battery for device and charges automatically so whenever the original battery for your device runs out the solar powered battery kicks in and keeps the device working.  The battery could be a standard size lithium battery that is compatible with average cell phone devices it will simply attach on the backside of the phone and will contain a solar panel on the back of it (the side that doesn’t face the back of the cell phone directly.) Through the solar panel the battery would collect solar energy and the indicator on the side will show whether or not the battery is fully charged. Whenever the original battery needs to be replaced, the backup battery can be simply detached from the back of the phone and plugged inside of the cellphone device to power it.  The solar powered battery will not require any chargers to fully function and it will just utilize the solar panel located on its backside to harness sunlight so it can keep the electronic devices working. Although the solar powered battery will also have the option to be able to be charged at wireless power stations in the case there is insufficient sunlight available around to keep your handheld device working. The wireless power station will emit electromagnetic waves that will automatically re-charge any devices in range that support wireless charging. This way wireless power chargers will cover the charging requirements in case there is not sufficient sunlight available to fulfill the need to charge electronic devices such as during night times when sunlight isn’t available. Whereas Solar powered battery will kick in if there are any power outages or in case of  a zombie apocalypse you will have a working phone and your electronic devices will never run out of battery even without the wireless power charging stations.


Research:

What is solar energy? Solar energy is the energy produced by the Sun; the radiation is emitted by the Sun in the form of light and heat. Almost all the energy on Earth comes from the Sun. According to this article the earth receives 170 pet watts of solar radiation. 30% is reflected into space and the rest is absorbed by the earth. Most of the solar radiation falls in the visible to near infrared region of electromagnetic spectrum with a small amount in the ultraviolet region. Today most nanometers based energy conversion focuses on converting solar energy into electrical energy. Solar energy is everywhere as long as sunlight is available. So that makes it very easy to utilize this “free” form of energy that our sun provides for everyone throughout the entire planet. You can read more about solar energy by following this link;
We can harness solar energy in many different ways but the most effect way to harness energy from the sun is with (PV)photovoltaic cells or solar cells. These convert photons streaming from the Sun into electricity. There is a phenomenon known as the photoelectric effect, which is basically the emission of electrons due to absorption of energy from photons interacting with a material. So in my design solar panels will be implemented on the backside of the battery that will absorb sunlight or solar energy and convert it into electricity as shown in the picture below. Solar powered Battery uses a clean form of energy because this mode of power emits no pollution, it keeps the air clean and healthy, reducing general health costs for the population. No hydrocarbon production also reduces climate change, which–if unchecked–can raise sea levels and increase weather extremes. It provides the consumers with renewable energy source without the need to ever plugging your phone to a charger.

To read more about how solar energy is converted into electricity you can follow this Link.


Plugged in Virtually.

With the virtual charging docs installed at public places the electronic devices will be virtually charging (plugged in) all the time and never run out of battery and consumers will never have to deal with wired chargers ever again. It will be similar to how our WiFi works now days with hotspots available for devices to connect pretty much anywhere such as stores, coffee shops, restaurants, bus stops, train stations and airports etc. So all these places will have hotspots for not only WiFi but for wireless charging for people to charge their electronic devices on the go.
There are different kinds of wireless charging technologies available. According to the Article “Conventional charging devices such as the cord for a cell phone use electromagnetic induction to transmit power. Through electromagnetic induction, an electric current is sent through a magnetic field generated by a power conductor to a smaller magnetic field generated by a receiving device. (See related quiz:What You Don’t Know About Electricity“).”One other method is magnetic resonance coupling. Which was created by researchers working for Intel and MIT. The technology involves setting up a magnetic field that is actually able to transmit energy between two poles from a transmitting device to a receiving device. They experimented with two electromagnetic resonators vibrating at a specific frequency and found they shared power through their magnetic fields at distances far greater than their conventional, magnetic induction counterparts. The results of their work were published in the journal Science later. Where previous technologies only allowed transmission over distances of inches, magnetic resonance coupling would allow transmission at long enough distances that it opens the door to many new applications. So in theory you could have a room full of people with their electronic devices and you can charge multiple devices all at once. With this wireless charging technology finding an outlet will become obsolete.

The information above is taken from this Article online.


Full Project Description:
For my project the idea is to create a solar powered battery that attaches onto the back of your cell phones or any other electronic devices (iPhone, iPads, mp3 players, Kindles etc.) that acts as a backup battery for device and charges automatically so whenever the original battery for your device runs out the solar powered battery kicks in and keeps the device working.  The battery could be a standard size lithium battery that is compatible with average cell phone devices it will simply attach on the backside of the phone and will contain a solar panel on the back of it (the side that doesn’t face the back of the cell phone directly.) Through the solar panel the battery would collect solar energy and the indicator on the side will show whether or not the battery is fully charged. Whenever the original battery needs to be replaced, the backup battery can be simply detached from the back of the phone and plugged inside of the cellphone device to power it.

The solar powered battery will not require any chargers to fully function and it will just utilize the solar panel located on its backside to harness sunlight so it can keep the electronic devices working. Although the solar powered battery will also have the option to be able to be charged at wireless power stations in the case there is insufficient sunlight available around to keep your handheld device working. The wireless power station will emit electromagnetic waves that will automatically re-charge any devices in range that support wireless charging. This way wireless power chargers will cover the charging requirements in case there is not sufficient sunlight available to fulfill the need to charge electronic devices such as during night times when sunlight isn’t available. Whereas Solar powered battery will kick in if there are any power outages  you will have a working phone and your electronic devices will never run out of battery even without the wireless power charging stations.

Advantages of Solar and Wireless Energy

  • The power source of the sun is absolutely free.
  • Solar and wireless energy is GREEN environment friendly.
  • Cost efficient 
  • Solar power is infinite.
  • The production of solar energy produces no pollution.
  • Solar energy is extremely cost effective.
  • Most solar panels do not require any maintenance during their lifespan, so you never have to put money into them.
  • Wireless charging docks can function similar to WiFi hot spots and can be made available for everyone everywhere.
  • Most solar systems last up to 30 to 40 years.


Timeline:
  • Research more about how to utilize solar power in a small sized battery.
  • Research on wireless energy
  • Draw concept art for the final presentation for the wireless charger
  • Work out how the solar panel is implemented into the battery.
  • Research the conversion of solar energy into electrical energy.
  • Create a concept art about how the battery will attach and work with the phone.
  • Put together the presentation for the final project.
  • Deliverables.

Deliverables:
My deliverable will consist of the concept art which will contain diagrams, figures and different designs that will show how the device will look like the size of the battery how it will fit on the phone and will explain visually how the whole thing will work. A power point presentation of all the work I have done with the imagine project which which contain the concept art of different models that I designed myself and how they will function in daily life.

Future Manifestations:
The only way that I can think of how my project can evolve in the future is making the wireless charging instant. Something like a charging dock where you put your phone on the dock and the dock scans all the information it needs about your electronic device’s model and battery information and instantly replenishes battery to full.


Posted in Assignments, Final Papers, Zohaib Hussain | Leave a comment