Robin Michals | COMD 1340 Photography 1

Category: Course Activities (Page 4 of 9)

Lab 8: One-Light Portrait Styles

Set up:

  • The subject should be at least 4 or 5 feet in front of the backdrop to avoid casting a shadow.
  • Use 65mm focal length when you are using a camera with a cropped frame sensor, 85 mm for a full-frame sensor
  • Focus on the subject’s eyes.

The key or main light is the light that casts the shadows.

Working with just the key light:

Front view:

Photograph your subject with:

  • Rembrandt light – the light is at a 45 degree angle to the subject. Look for the key triangle -a triangle of light on the darker side of the face to position the light.

    Do not place the light too high because this will cause shadows around the subject’s eye sockets.
  • Split light – the light is at a 90 degree angle to the subject. One side of the face is dark but light does fall on the other side.
  • Front light (butterfly) – Light falls on the subject from the camera position.


Three-quarter view:

  • The model’s face is turned to a 45 degree angle from the camera.

Photograph your subject with:

  • broad lighting by placing the light on the side of the visible ear. There will be a broad highlight on the subject’s hair. This works for subjects wearing glasses.
  • short lighting by placing the light on the side of the invisible ear. 

Profile:

The model turns their face at a 90 degree angle to the camera. Place light like a side light. The subject faces the light BEING VERY CAREFUL NOT TO LOOK DIRECTLY INTO THE LIGHT. 

Put your 20 best photos into an album on Flickr. Make sure to represent each one of these lighting styles. Send your 2 best to the class group.
Week 9 – Portrait Lighting Styles

Review:

Test Yourself: Which Faces Were Made by A.I.?

Portrait Poses

There are three basic positions for someone’s head and face in a portrait.

  1. Front view or face forward
  2. 3/4 view
  3. Profile

Portrait Lighting Styles

There are a 5 basic lighting styles for portrait photography. Each style is defined by how light falls on the face.

When the subject’s whole face is towards the camera, there are three basic lighting styles.

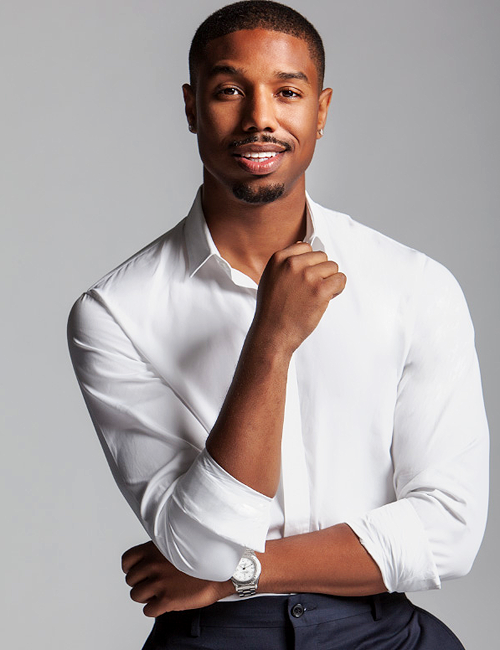
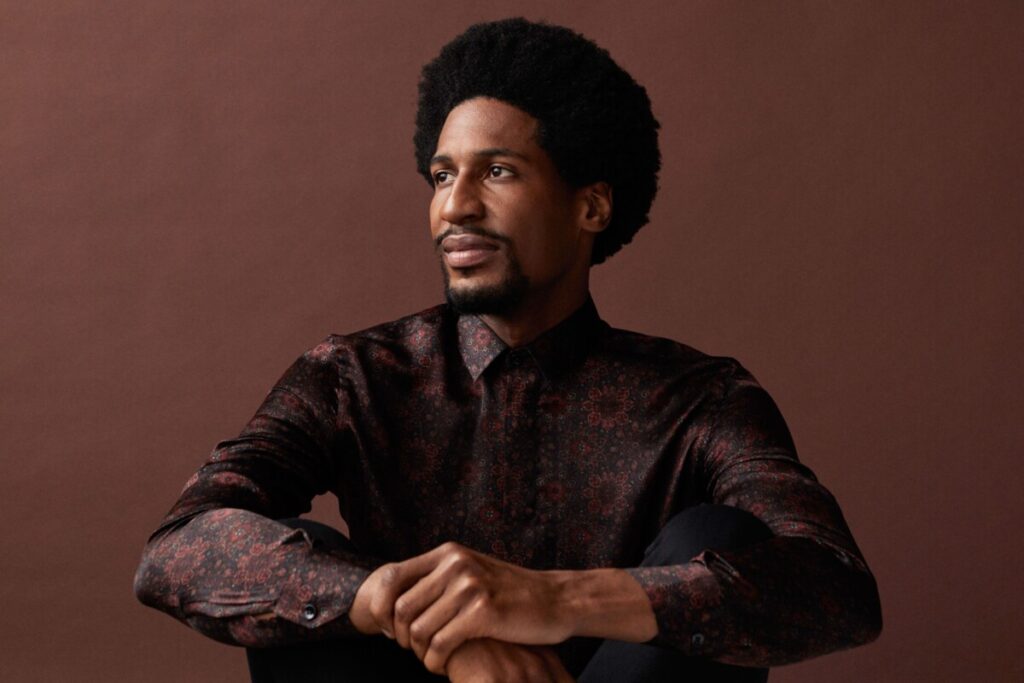
  1. Rembrandt Light – the model is face forward, main light is at 45 degrees and casts a light on the opposite side of the face to form a triangle on the cheek.

Rembrandt Lighting
Michael B. Jordan. Photographer: Peggy Sirota

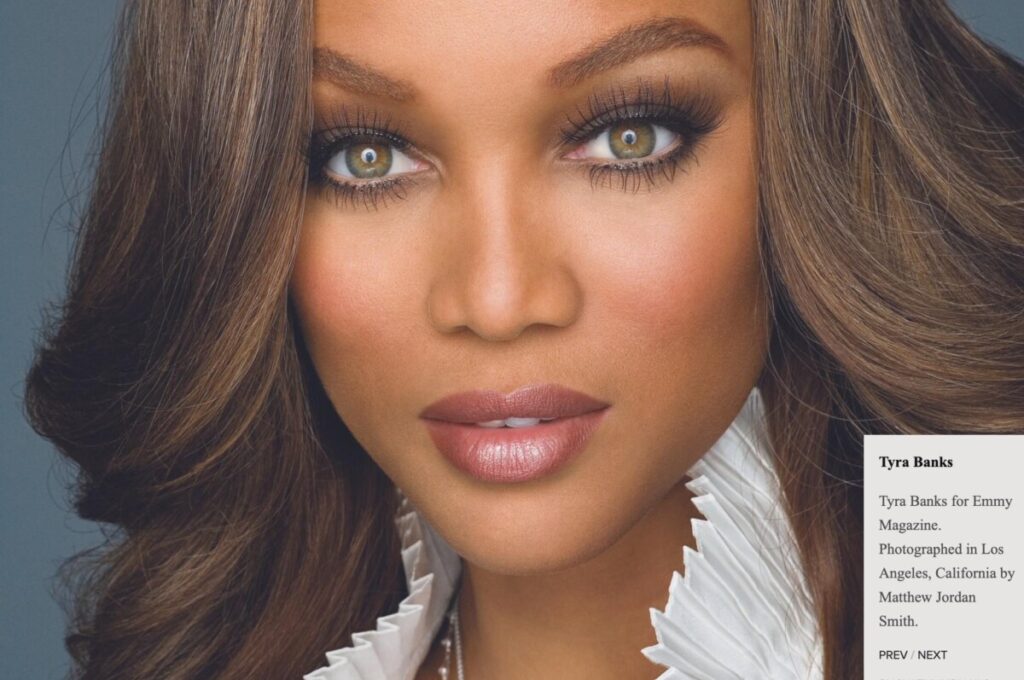
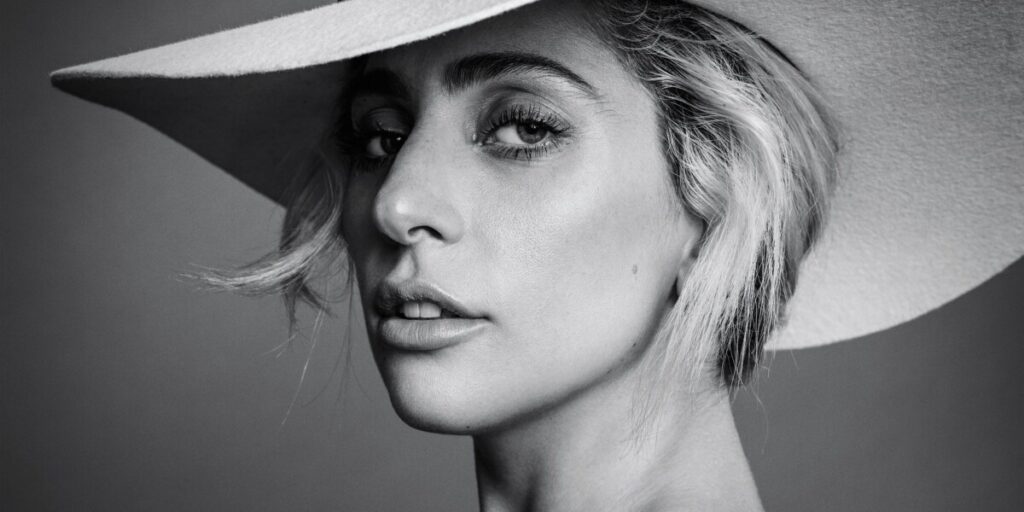
2. Butterfly Light, Clamshell or beauty or glamour light-model is face forward, front light.

Tyra Banks. Photographer: Matthew Jordan Smith

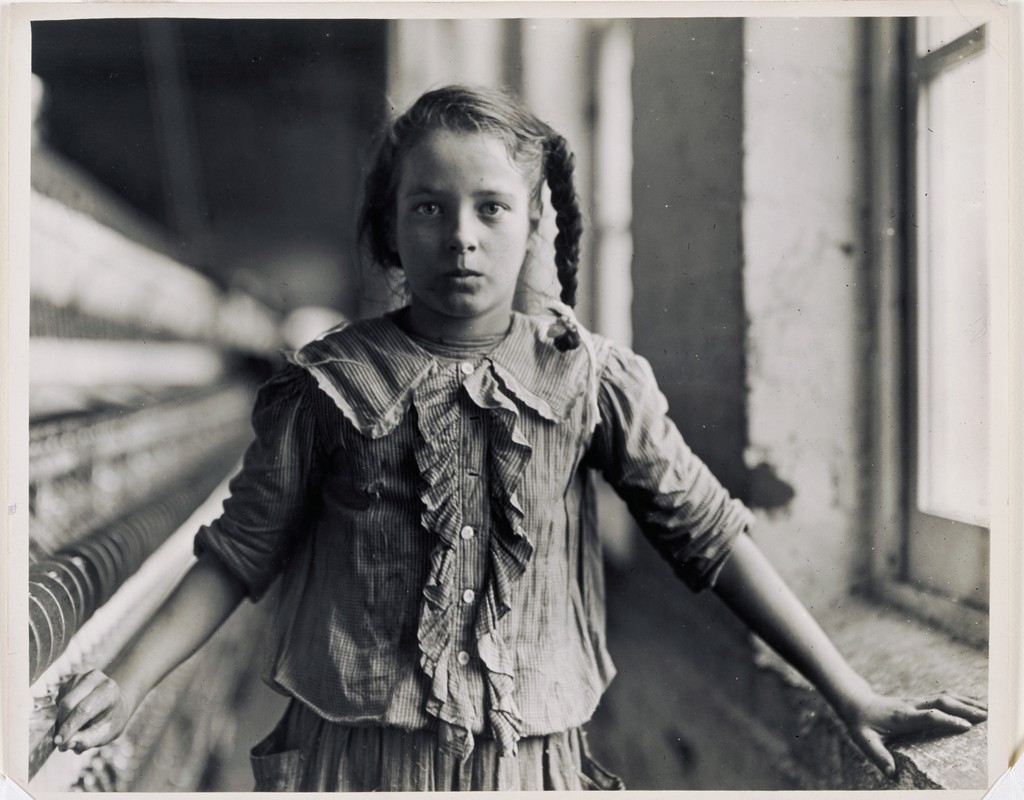
3. Split Light-model is face forward, the main light is at 90 degrees to the camera and falls on one side of the face. 

Lewis Wickes Hine (U.S.A., 1874–1940), One of the spinners in Whitnel Cotton Mfg. Co. N.C. December 1908.

When the subject is in 3/4 view, there are two basic lighting styles.

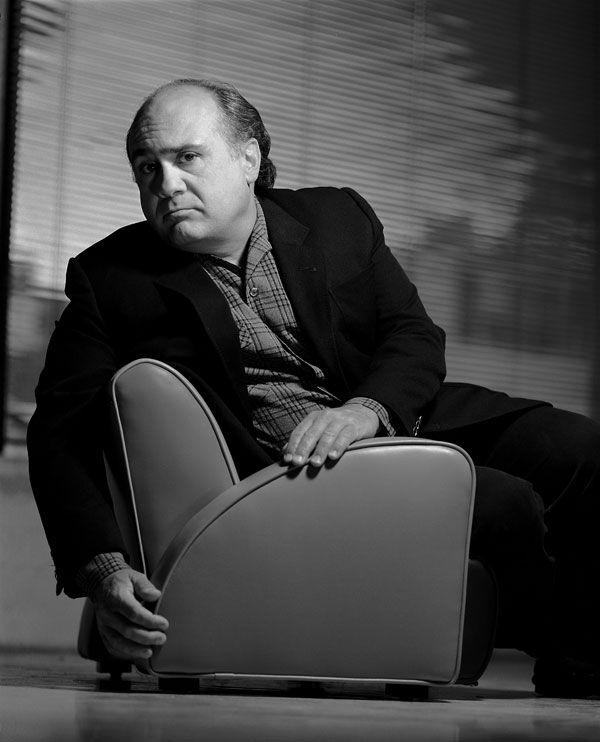
4. Broad Light-light falls on the side of the face with the visible ear. Good for controlling the reflections on glasses.

Danny Devito. Photographer: Gregory Heisler.

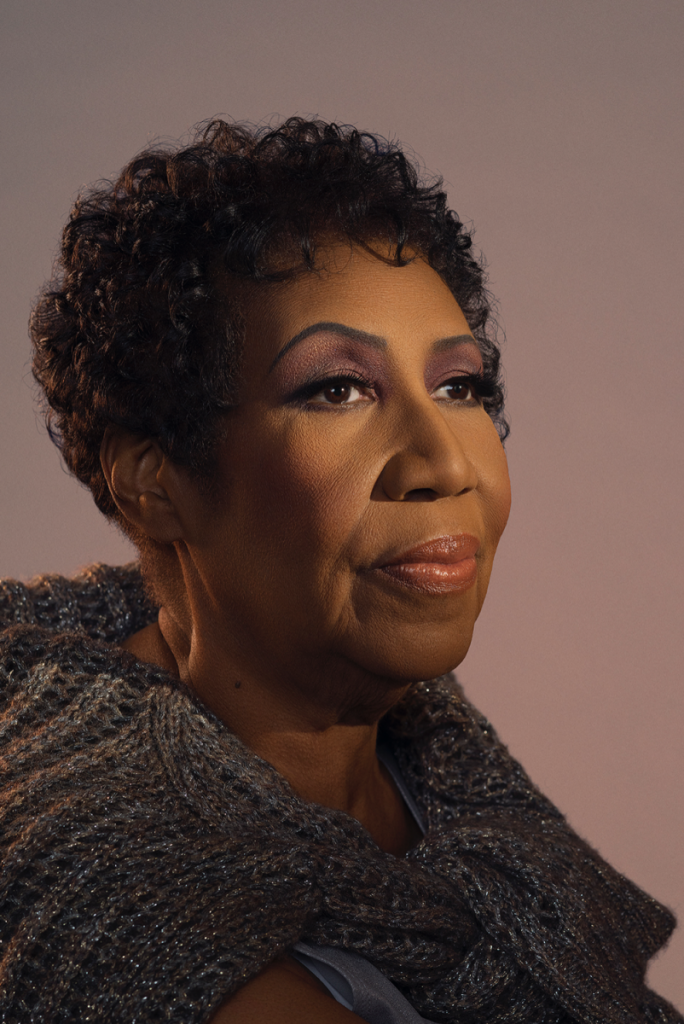
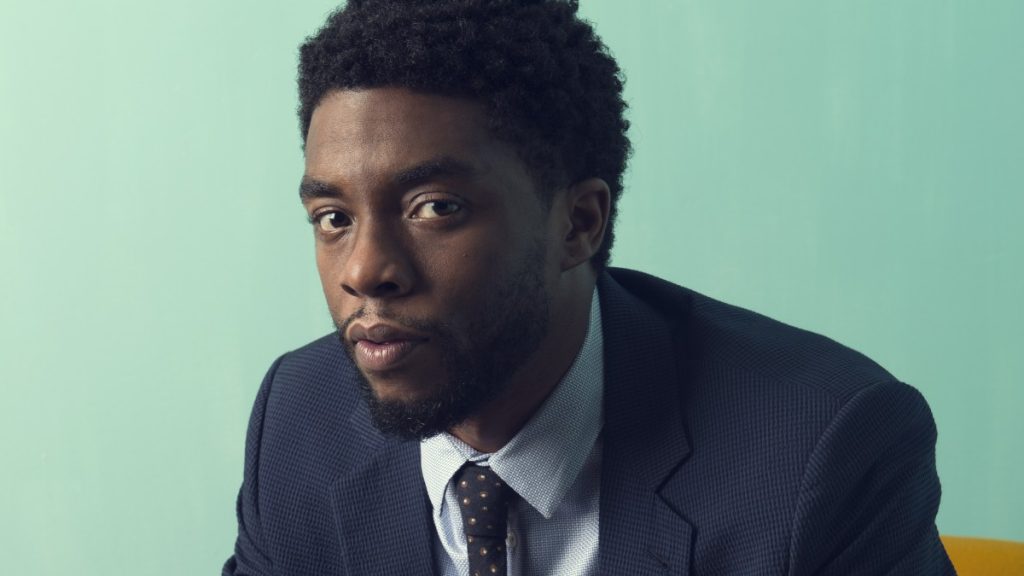
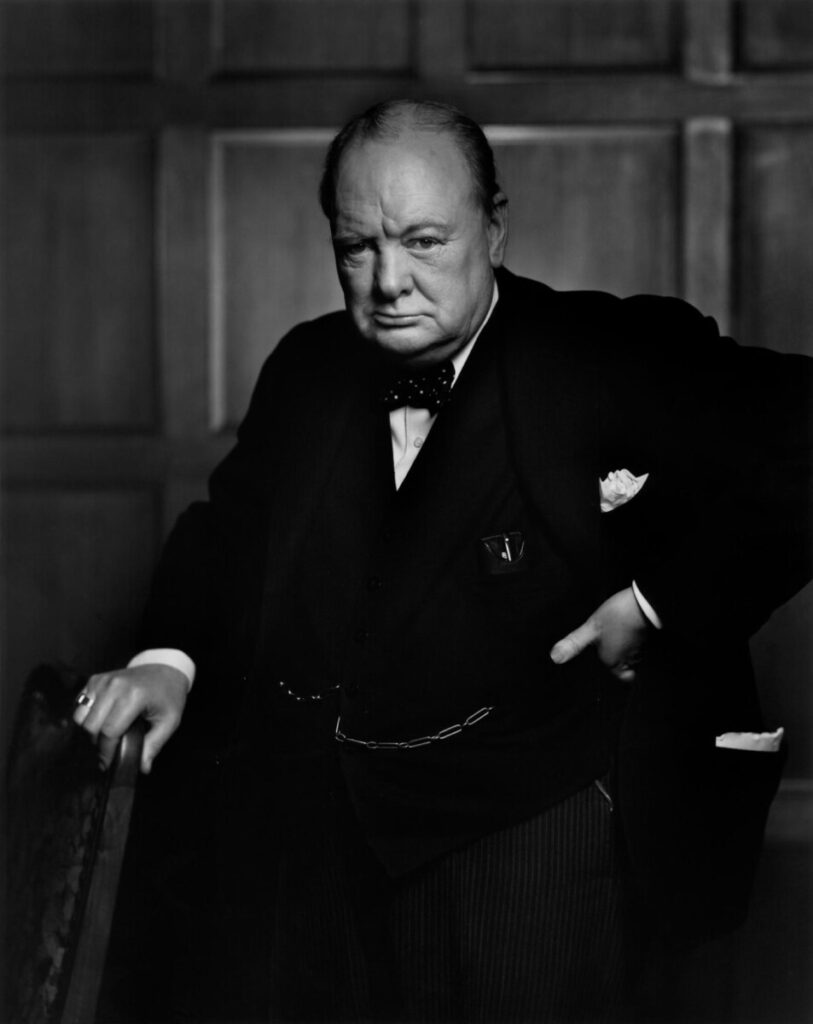
5. Short Light-the light falls on the side of the face with the features. (Not on the side with the visible ear.)

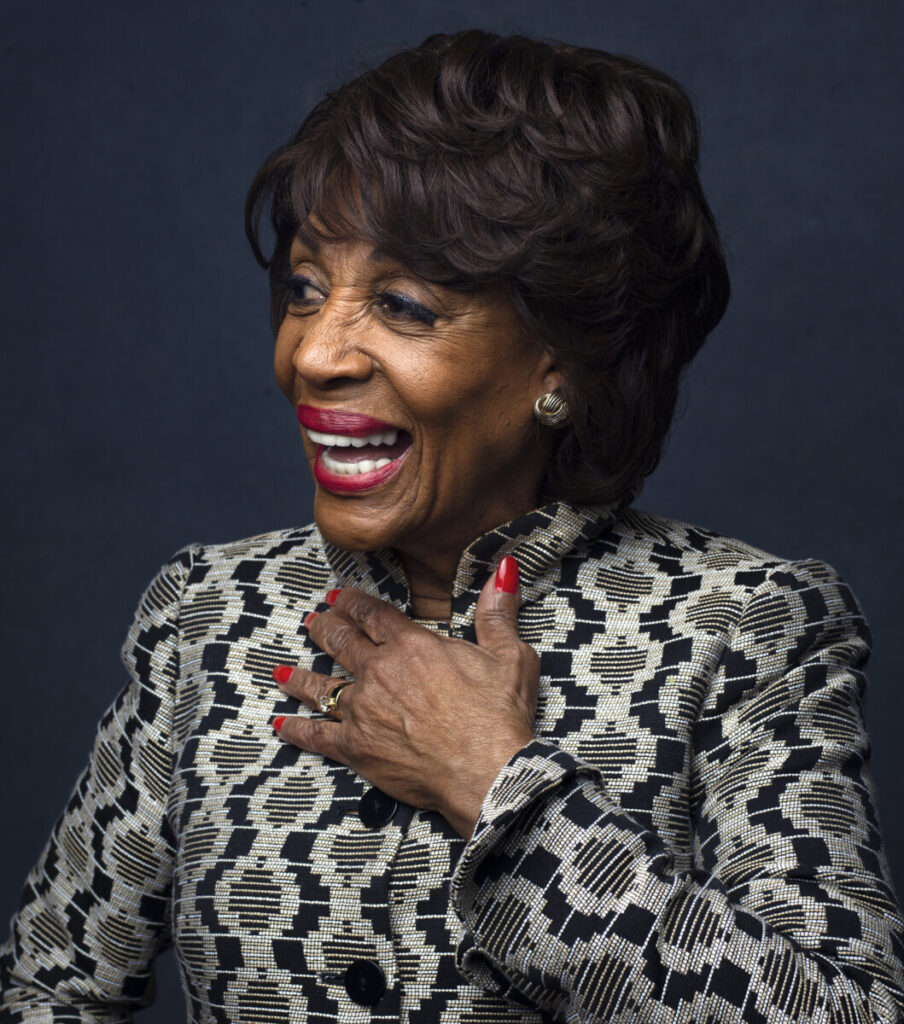
Aretha Franklin. Photographer: Matthew Jordan Smith

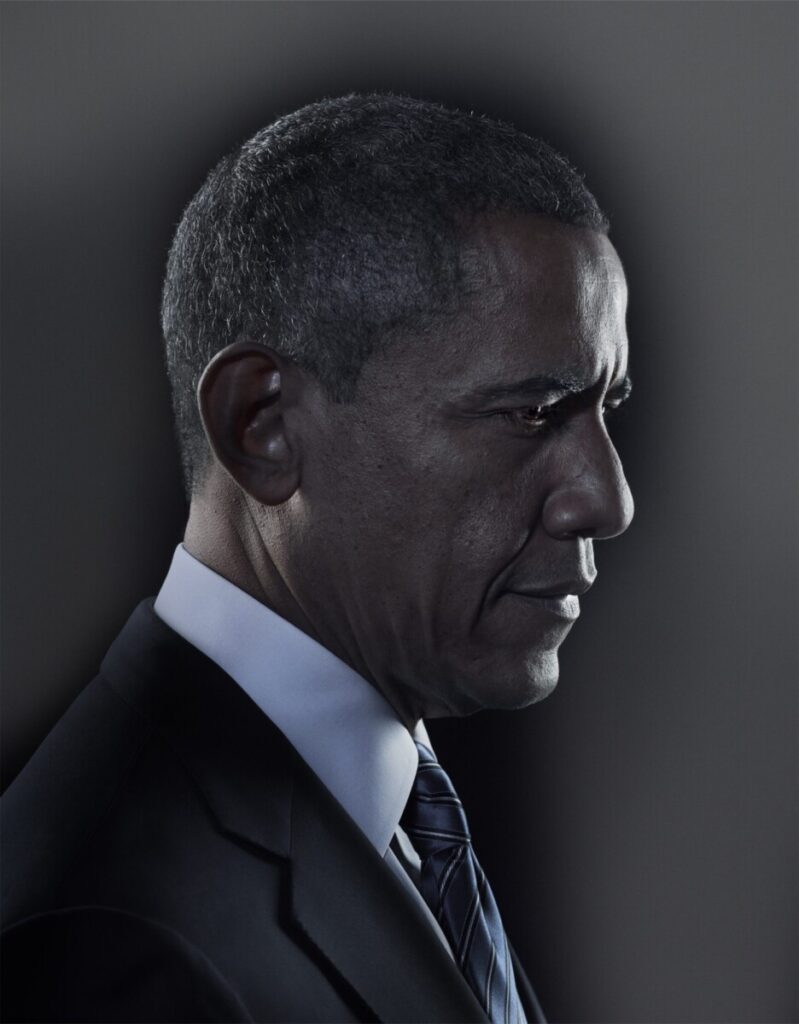
Both of these are examples of short light. Here the light is slightly behind the subject.

Chadwick Boseman. Photographer: Caitlin Cronenburg

Left: Photographer-Yousef Karsh, Winston Churchill, 1941

Right: Photographer-Nadav Kandar, Donald Trump, 2016

Yousef Karsh

https://karsh.org/overview/portraits/#thumbnails

Nadav Kandar

https://www.nadavkander.com/portraits/portraits/single

Lab 8

Portrait Lighting Styles

Homework Assignment

HW 7: Window Light Portraits

HW 6 – Freezing Motion

Due April 3, 12 noon. 4 pts. 30 frames.

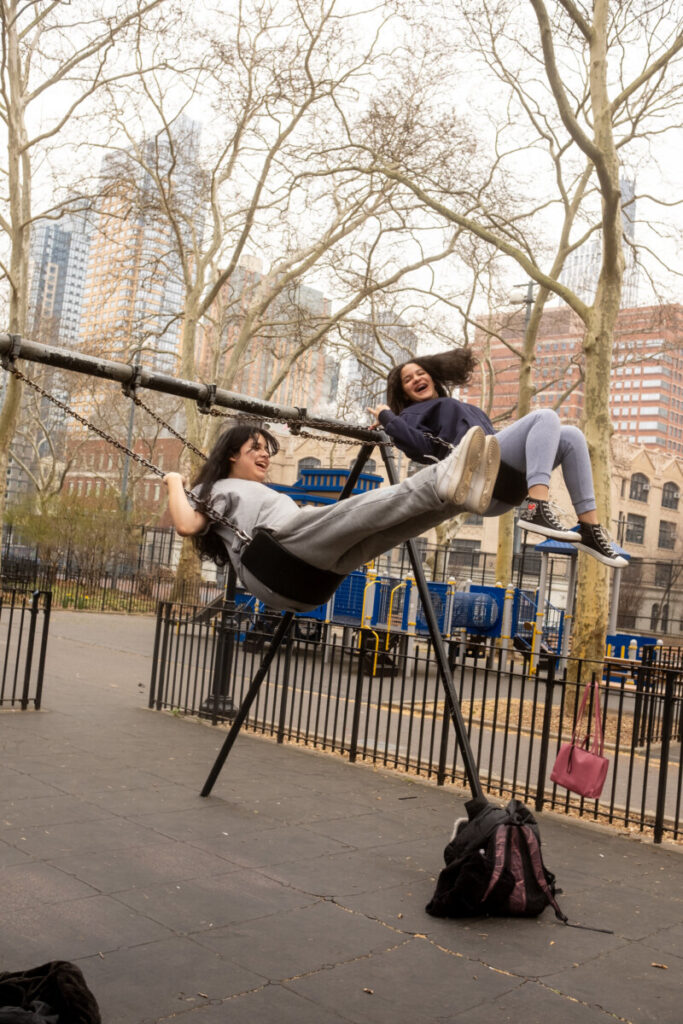
Working outside in the day, freeze the motion of athletes, roller skaters, skate boarders and bike riders, dancers, jumping dogs or try a fountain. Get your friend or brother or sister to blow bubbles, jump rope, go on a swing. Try at least two different types of subjects ie soccer players and bikers, kids on swings and dancers. Capture the decisive moment. The soccer player when their leg is fully stretched out in a kick, a bike rider doing a wheelie. Don’t be shy. Fill your frame with the action.

Subjects that don’t get credit: cars, tiny birds far away, fans, water in your facet.

Use a shutter speed 1/400 sec or faster.

If using a cameraphone outside in bright light, it will automatically use a fast shutter speed. If you are working with less light, use Lightroom or other app that lets you set the shutter speed.

Lab 7: – Freezing and Blurring Motion

Freezing Motion:

Using the shooting mode Tv, set the shutter speed to 1/400 or higher. Capture a range of subjects in motion creating a minimum of 20 photos that freeze the motion.

Blurring motion:

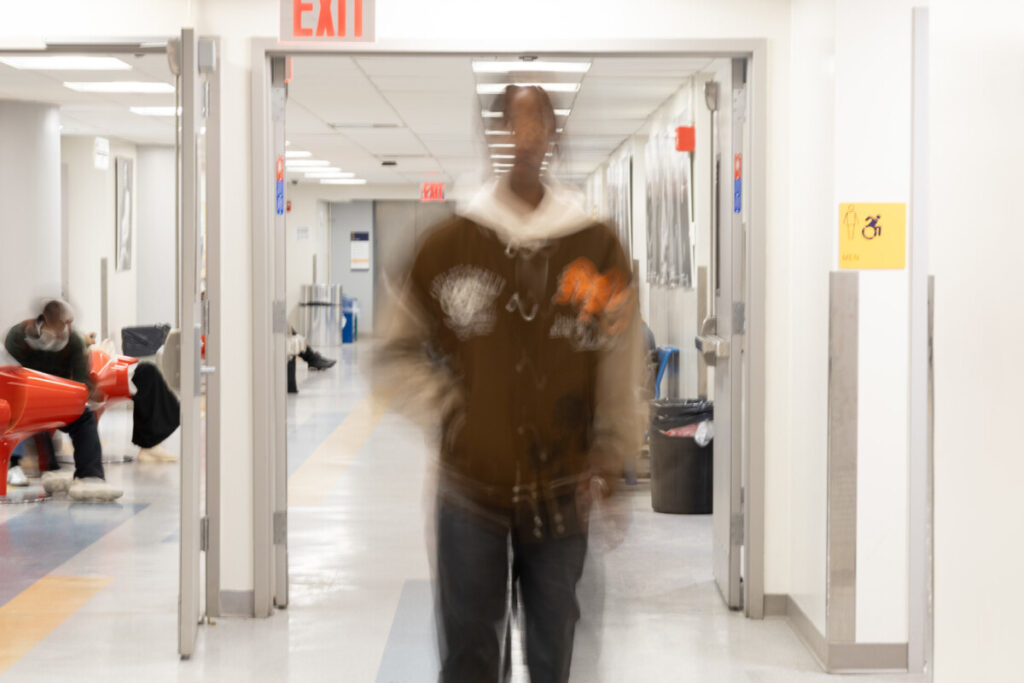
Use a tripod. Start with a shutter speed of 1 “. If your photos are too bright look for a darker place to shoot. Combine something moving and something that is still and sharp in every frame. Create a minimum of 10 photos that contrast blurred motion with a sharp environment.

Put the final 30 photos in an album on Flickr. Send your single best blurred motion and your single best frozen motion to the class group.
Week 8 – Shutter Speed: Freezing and Blurring Motion

CUNY Photo Challenge

Enter your best image! Get extra credit. Entries due March 28th.

Inspiration

Shutter Speed

Shutter Speed is the length of time that the sensor is exposed to light to create the photograph. It is measured in seconds or fractions of a second.

The full stops for shutter speed are: 30”, 15”, 8”, 4”, 2”, 1”, . sec, ., 1/8, 1/15, 1/30, 1/60, 1/125, 1/250, 1/500, 1/1000, 1/2000, 1/4000, 1/8000

Doubling the time, doubles the amount of light that reaches the sensor.

When shooting with a cameraphone and the Lightroom Photoshop app, you can set the shutter speed of your cameraphone between 1/10,000 and 1/4 sec.

A good rule of thumb when shooting with a camera is: Any shutter speeds slower then 1/60 require the use of a tripod. When shooting with a cameraphone, you will need a tripod to shoot at 1/15 or slower.

Resource

Capturing Motion

Your choice of shutter speed will change the way motion is captured in the photograph.

Frozen Motion-Motion is stopped and captured in the frame with a fast shutter speed.

Inspiration:

World Sports Photography Awards Aquatic winners

World Sports Photography Awards Basketball

Maria Baranova: Performance

Timing

The exact moment that you take the picture is as important as how long the shutter speed is. This is often called:

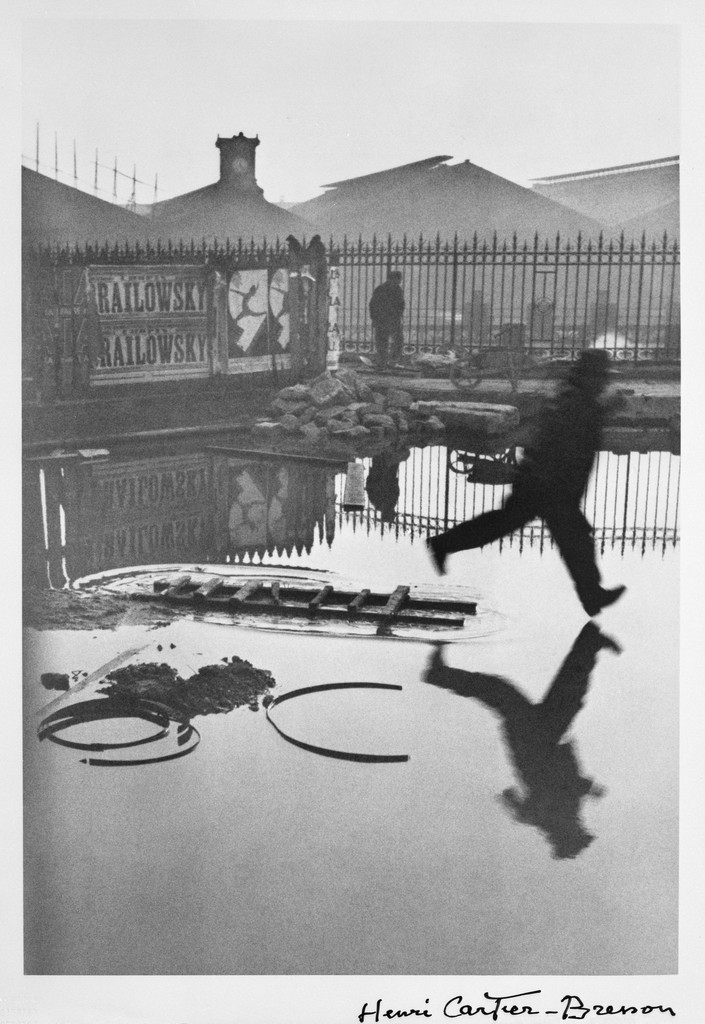
The Decisive Moment: A term coined by Cartier Bresson- “the simultaneous recognition, in a fraction of a second, of the significance of an event as well as the precise organization of forms which gives that event its proper expression.”

Behind the Gare Saint-Lazare, Paris. 1932
Photographer: Henri Cartier-Bresson

How to freeze motion:

  • Use a shutter speed of 1/ 500, 1/1000 or faster.
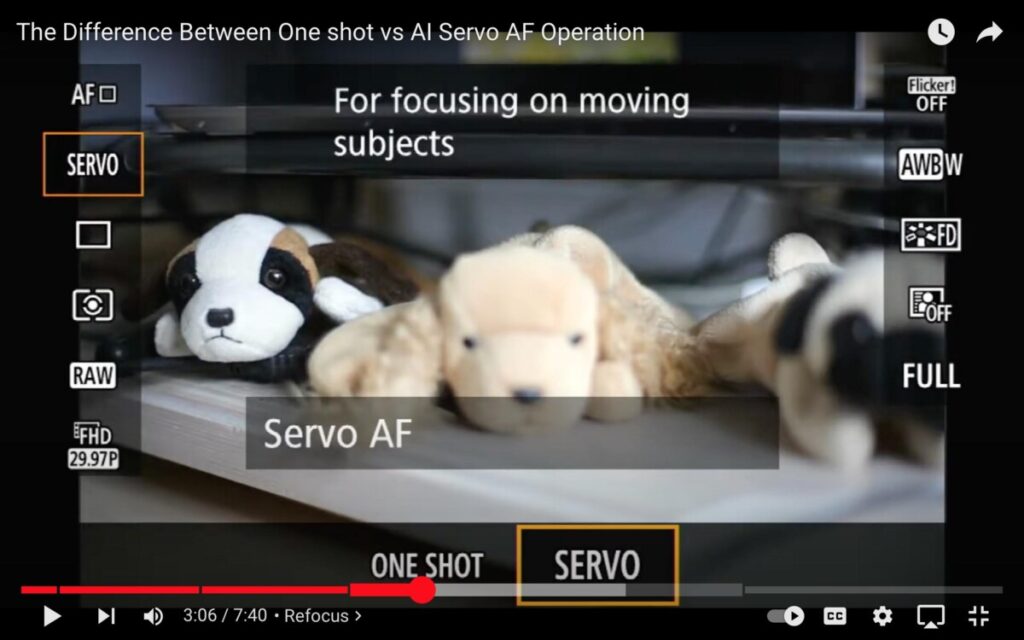
  • Use the AF mode – AI Servo.

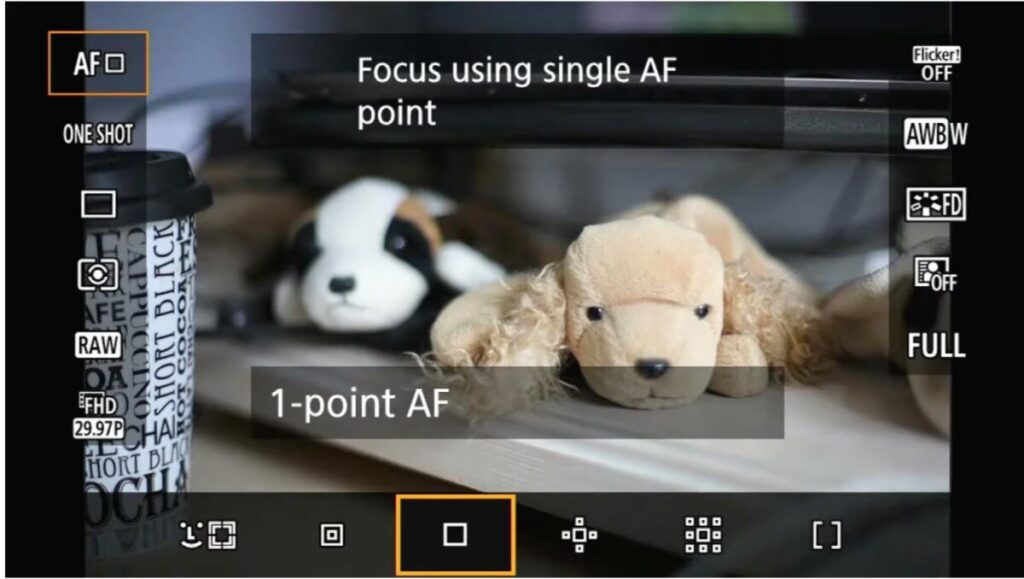
Auto Focus

AF Area Selection Mode: facial recognition, single point Spot AF, Single Point AF, AF Point Expansion, Zone AF, Large Zone AF.

One Shot is for still subjects. AI Servo is for moving subjects.

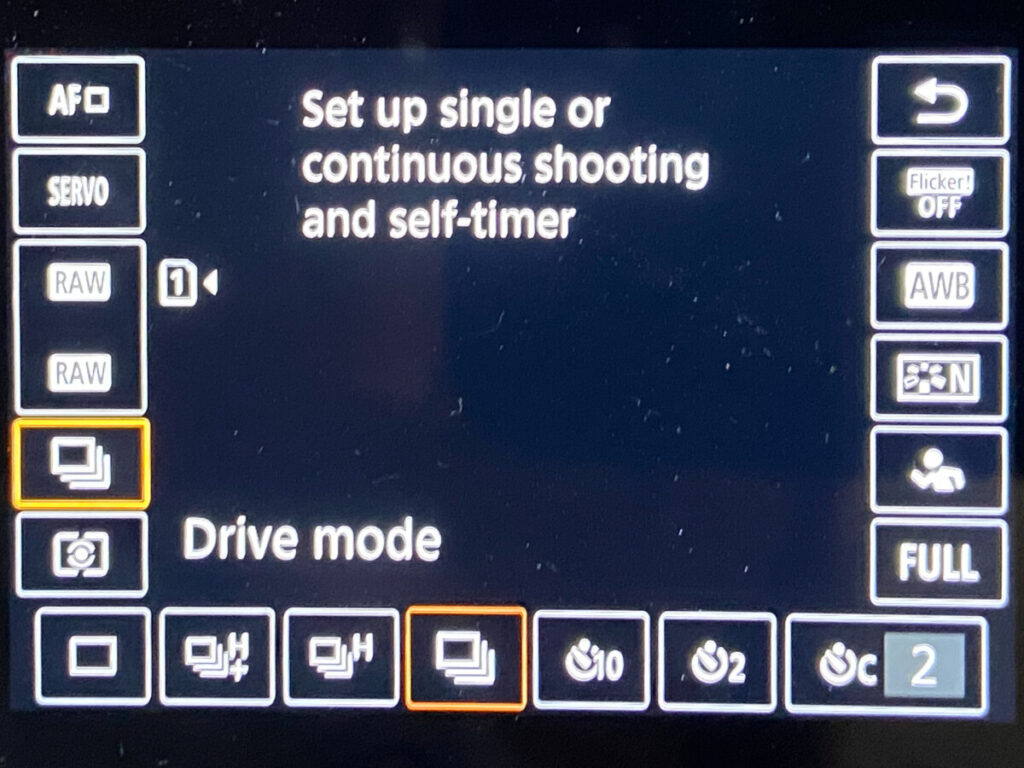
Drive Mode

For really fast motion, try a burst mode either high or low continuous.

Blurred Motion

Moving elements blur with a longer shutter speed.

Inspiration:

Lee-Ann Olwage, The Big Forget

Matthew Pillsbury, Sanctuary

How to blur motion:

  • Use a slower shutter speed – 1/4 sec to 30″ or even longer
  • Direction-if the subject moves parallel to the picture plane there is more visible movement than if the subject moves toward or away from the camera.
  • Focal length-a subject will appear blurrier when photographed with a telephoto lens than when photographed with a wide-angle lens.

Lab Exercise

Lab 7: Freezing and blurring motion

Homework Assignment

HW 6: Freezing Motion

Class Schedule

April 3: Aperture and Depth of Field: Brooklyn Botanic Garden

April 10: Portraits

April 17: Portrait w 2 and 3 lights

« Older posts Newer posts »

© 2024 COMD1340WedSpr24

Theme by Anders NorenUp ↑