Mochi…The Newest Food Trend

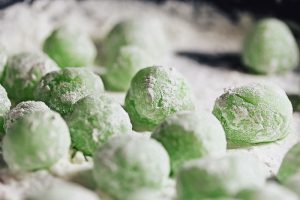
powdered green tea mochi shaped into balls

Image by: Han N

One of the newest trends that has taken the dessert world by storm is mochi. It can essentially be paired with mostly anything, both culinary and confectionary. Still, while it continues to soar in its popularity, many wonder and beg the question, “what is mochi?”. Mochi is simply a Japanese delicacy that is created from sweet rice which is pounded until it becomes a paste. This paste is then molded into the desired shape and baked. After it has baked, it is left to cool for hours. In order to ensure that it maintains its texture, it has to be covered with plastic wrap so it does not oxidize which can alter the entire texture. It is then powdered, usually with a rice or potato starch into to avoid the pieces from sticking together.

The popularity of mochi ultimately comes from its very distinctive texture. It is soft, chewy, and gelatinous, which oddly resembles similar qualities of a marshmallow. But the mochi can be used as a dumpling in a savory soup or as a dessert like being wrapped around a scoop of ice cream. I find it to be extremely delicious in that the flavor and texture that it has cannot be found in any other confection. It has a mild sweetness to it so it can be paired with other desserts without making the entire dessert too sweet. It can be paired with ice cream or frozen yogurt and can even be stuffed with an array of different fillings. Unlike most trendy desserts, mochi is fairly easy to make in that it does not have many ingredients and the steps involved are not too complex.

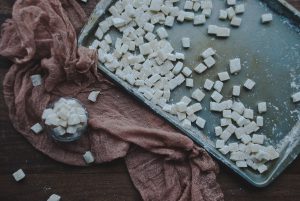
Plain Mochi
Makes about 2 cups of small pieces

Ingredients:

1 cup sweet rice (mochiko) flour

1 cup sugar

½ teaspoon baking powder

1 cup water

¾ cup full-fat coconut milk, or about half of a 13.5-ounce can

Sweet potato starch or regular cornstarch for dusting

Directions:

Preheat oven to 275° F. Line a 9- by 13-inch glass baking dish with parchment paper. (Note: A 9- by 13-inch dish will yield a thin layer of mochi, only about 1/4-inch thick. For thicker mochi, use a 9- by 9-inch glass dish and bake for longer, about 90 minutes.) In a large bowl, whisk together the mochiko, sugar, and baking powder. In a separate bowl, whisk together the water and coconut milk. (Note: Be sure to use full-fat coconut milk. You can usually find it in cans, and it should be quite thick.) Add the wet ingredients to the dry and whisk until the mixture is smooth and no lumps remain. Unlike most baking, you don’t need to worry about over-mixing the ingredients, since mochi is dense and chewy to begin with. So whisk away! Some recipes even call for mixing all the ingredients, dry and wet, in a food processor all at once, and call it a day. Pour the mixture into your lined baking dish. Cover with foil and bake for 60 minutes. The mochi is done when it is soft and gelatinous but holds its shape when touched. (NOTE: A few people have reported that their mochi did not set. A few notes on softer mochi — using low-fat coconut milk may result in a softer consistency. You may also want to check your oven to make sure it’s at the right temperature. Also, if you want extra insurance, you can add another 1/4 cup mochiko flour to the dry ingredients, which should result in significantly firmer mochi., If you’ve already baked it for an hour and it doesn’t appear to be set, raise the temperature to 300° F and remove the foil. Bake for an additional 10-15 minutes, uncovered. Also, note that even if it’s soft and gel-like when it first comes out of the oven, the mochi will set as it cools.) Let cool completely or overnight. Dust a surface with your starch (alternatively, you can simply use more mochiko flour) and turn the mochi onto the surface. Sprinkle starch over the mochi. Wrap a knife in Saran wrap to prevent the mochi sticking. Using the wrapped knife, cut the mochi into small pieces, then dust again with starch or flour, and serve!

Recipe adapted from Food52

We All Scream For …

a cup of ice cream

Image by: Brianna Vasquez

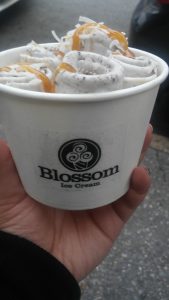
There’s a new dessert trend that has been making waves for a while for the ice cream world. It is the Thai rolled ice cream which is also known as stir-fried ice cream. This famous Asian dessert is uniquely made by way of being rolled tightly to be serve with the addition of optional toppings. Being that I am a huge fan of ice cream, I wanted to share this concept that has become so loved by all ice cream lovers.

The trend debuted in New York last summer and while many have thought of it as a fad it has continued to flourish as many still find this particular type of ice cream to be fascinating. More ice cream shops that specialize in this Thais creation are opening and more people are learning about this trend, they want to try this treat that has been so widely discussed and raved about. I had the pleasure of trying this specific ice cream and it is absolutely delicious, the concept of being rolled changes the way the ice cream is consumed which enhances the eating experience. I went to Blossom Ice Cream which is located relatively close to the college, it was a great experience and the place is so quaint that you can almost miss it if you do not keep your eyes peeled for it.

The ice cream is mostly known for the way that it is created as it is a truly intricate process. In order to make the rolled ice cream, they use a frozen slab of metal called a teppan. Then, a mixture of milk and either fruit, nuts, or other ingredients are added together before being poured onto the slab. The mixture is chopped, stirred, and spread out as it slowly crystallizes so it can have a creamy texture. As it becomes frozen enough, it is then slowly rolled with the help of a utensil then it is stuffed in rows in a serving cup when toppings can be added. But the ice cream must be rolled at the correct time or it will become too frozen and will not be able to be rolled correctly.

Comment below on some great desserts that you have had the chance to try over this past summer.

Bibble & Sip

It’s not everyday that I would trek to Hell’s Kitchen/Theater District in the city for food, but If I don’t do it when I can, then I probably won’t do it ever again. During spring break, I met with my dear friend Diane to have lunch in the area and I wanted to try Bibble & Sip as well.

a bakery called "bibble and sip"

Image Credit to Sideways.NYC

The cafe is located in Midtown West and is known for it’s friendly atmosphere, unique pastries, and adorable alpaca themed decor. There’s a limited amount of seating here, but there’s a small counter where you can munch on your food and sip on your beverage. The staff at Bibble & Sip are quick, on point, and friendly. Their personality and level of professionalism matches this interesting cafe.

I read a lot of reviews on Yelp to see what were the menu items that stood out and were the most popular so I would know what to try at Bibble & Sip, so I made a list.

an iced tea and a pastry

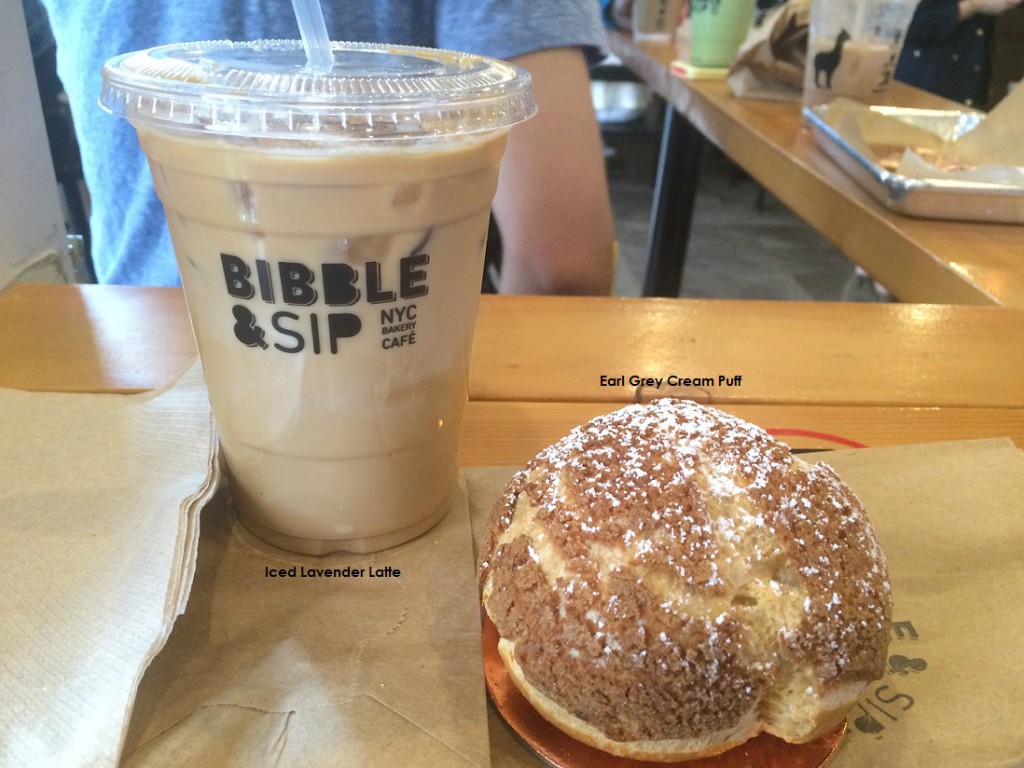
Many reviews suggested that the lavender latte was absolutely delicious, so I decided to give it a try and I got the Iced Lavender Latte instead. The iced lavender latte was coffee meets lavender in a cup! The lavender wasn’t overpowering so I was still able to taste the coffee flavor. Everything was in equal parts in this lavender heaven latte! It stole my heart.

I also ordered the Earl Grey Cream Puff which was huge and  true earl grey heaven! I’ve never had an earl grey dessert as good as this. The cream puff was flaky, soft, and absolutely delectable.

a pastry with dipping sauce

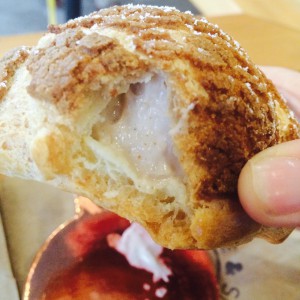
The earl grey cream filling was pure heaven! It was sweet and full of earl grey deliciousness! I took my time to eat it to make sure I was able to enjoy every bite. I wished I had a whole tub of the earl grey because it was just that amazing! I was in love.

dessert

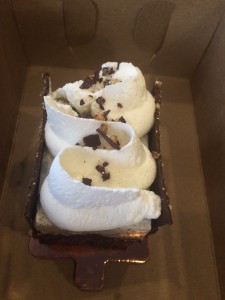
My friend had the Black Sesame Hazelnut Crunch Mousse cake which she thought was amazing especially with the different combination of flavors and textures. She actually didn’t finish it because our lunch was quite filling, so she saved it to indulge on later that day.

I am very glad  to have tried Bibble & Sip and even though I was a little disappointed in the size of this place with limited seating or standing room, I would definitely come back. I would like to try their matcha cream puff and other beverages. For those of you who haven’t been here, you definitely need to visit Bibble & Sip especially if you like unique and adorable baked offerings.

What dessert or cafe spots do you like to visit? What food and beverages would you recommend?


The Smorgasburg of 2016

Smorgasburg graced Brooklyn this weekend and showcased different foods from all over the world in one place for all those who were eager to try them. Unfortunately, I could not attend but I found many new and interesting foods that were being sold there this year in particular. This set up allows vendors to share their products or even use visitors of Smorgasburg to be taste testers to newest creations.

One of the newest innovative desserts is one that is severely time sensitive that must be eaten in half an hour. This dessert is called the raindrop cake, which literally looks like a raindrop, but if not eaten quickly it will turn into a puddle of water. It is constructed by way of agar, a vegetarian substitute for gelatin. Yet, the dessert tastes similar to water but has more body and texture. It is usually paired with other small sides to eat along with the cake.

a raindrop cake on a wooden plate

Image by: Huffington Post

The video shows how to make the newest dessert; it is simply amazing to see how the cake is constructed in a way unlike any other. I want to eventually try this cake, I find it to be super interesting and I wonder how it taste in its own complex yet simplistic way to appeal to anyone’s palate.

Many spectators felt that the foods here will eventually be sold readily in America and will be the next food craze but I wondered what really creates a food craze. And what really makes people want to wait in lines for hours just to try these foods? Many believe that it is due to the bragging rights that come with the hype of these trending foods. It is awesome to be able to understand their notions but still it is further explained by using the term, mob psychology, because if something is being sought after then everyone begins to become envious of that particular item and wants to be able to have that experience as well. We as people naturally can become obsessed over a phenomenon that everyone wants to be a part of because it gives us some sort of popularity status because we are part of a trend.

Comment below to name a food that you have always wanted to try or a dessert you recently tried that you think should be the next food trend.

French Napoleons

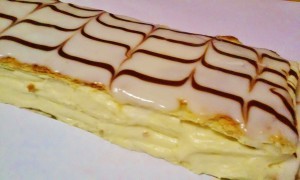
Homemade Vanilla Napoleon

Photograph by Sabrina Vasquez


This past week was my mother’s birthday and although most families celebrate birthday with cakes, my family easily finds other alternative desserts to celebrate with instead of the traditional cake that is commonly served. In the past, we have hosted birthday parties with desserts such as gelato, icees, doughnuts, and cheesecake. But, for this year in particular, my mother wanted to have a French inspired dessert which was napoleons. This dessert is complex in the processes of creating each component and then assembling it together in an appetizing way. Napoleon, also named mille-feuille, vanilla slice, or custard slice are usually consists of three layers of puff pastry alternating with two layers of pastry cream. Yet, this classic French pastry can differ from a variety of countries. An Australian version uses passion-fruit icing and infuses passion-fruit into the pastry cream as well. While a Italian version is a savory napoleon which usually has spinach, cheese, and pesto. Although, the exact origin of the napoleon is still unknown, the French name for it mille-feuille literally means cake of a thousand layers which refers to the many layers in the puff pastry first while the puff pastry is being made and as it flakes in layers as it is baking in the oven.

So as my mother’s birthday was approaching, I had to figure out a way to make one of the best napoleon to top all napoleons she has ever eaten as her birthday present. My sister agreed to help me as making the dessert is not complicated just complex.  So we agreed that she would make the pastry cream and bake the puff pastry while I would assemble the dessert to its entirety.

Napoleon Recipe

First, bake the puff pastry I purchased the Pepperidge Farm brand one and it works well. Simply, thaw it out first and then unfold it onto a cookie sheet. Then, bake until golden brown.

Now, the pastry cream …..


Ingredients:

2 cups half-and-half

½ cup sugar

Pinch salt

5 large egg yolks

3 tablespoons cornstarch

4 tablespoons (½ stick) cold unsalted butter, cut into 4 pieces

1½ teaspoons vanilla extract


Directions:

  1. Heat the half-and-half, 6 tablespoons of the sugar, and the salt in a medium heavy-bottomed saucepan over medium heat until simmering, stirring occasionally to dissolve the sugar.
  2. Meanwhile, whisk the egg yolks in a medium bowl until thoroughly combined. Whisk in the remaining 2 tablespoons sugar and whisk until the sugar has begun to dissolve and the mixture is creamy, about 15 seconds. Whisk in the cornstarch until combined and the mixture is pale yellow and thick, about 20 seconds.


  1. When the half-and-half mixture reaches a full simmer, gradually whisk the simmering half-and-half into the yolk mixture to temper. Return the mixture to the saucepan, scraping the bowl with a rubber spatula; return to a simmer over medium heat, whisking constantly, until a few bubbles burst on the surface and the mixture is thickened and glossy, about 30 seconds. Off the heat, whisk in the butter and vanilla. Strain the pastry cream through a fine-mesh sieve set over a medium bowl.


Note on straining: This is key step because it will ensure that your finished pastry cream will be silky smooth with no lumps or bumps.

Press plastic wrap directly on the surface to prevent a skin from forming and refrigerate until cold and set, at least 3 hours or up to 2 days.

Recipe adapted from Brown Eyed Baker

Assembling the pastry:

Using a sharp knife or a pizza cutter, cut the pastry into thirds.

In a small bowl whisk together:

1 cup powdered sugar

2 tsp corn syrup, light

1 TBS butter, unsalted , melted

Slowly mix in:

3 TBS milk, whole

Add enough milk to keep the icing thick, but pourable.

Pour half of the icing into another bowl, and whisk in:

1 TBS cocoa powder, unsweetened

Pour chocolate icing in to a squeeze bottle.

To assemble your napoleon, place the bottom layer of baked puff pastry onto your serving dish. Spoon half of your cooled pastry cream along the center of the pastry.

Place your middle layer of baked puff pastry over the cream, gently pressing the pastry down and pushing the cream to the edges. Spoon the remainder of the cooled pastry cream along the center of the middle pastry layer.

Top with the icing-decorated top layer and gently press over the pastry cream, again, pushing the cream to the edges. And smooth out the pastry cream around the sides.

Choose one of the three cut pieces of puff pastry to be your top layer and using a soft scraper, cover with the white icing. Using the squeeze bottle containing the chocolate icing, pour horizontal chocolate stripes over the white icing. Working quickly and use the tip of a knife to drag through the chocolate stripes and mix into the white icing.

Allow to set in the refrigerator 30 minutes or up to 4 hours.

Recipe adapted from Family Spice