Before late August 2012, users could create sites that weren’t connected to a project. In the process of improving the overall organization of the OpenLab, and to keep all the wonderful work everyone is doing here visible to everyone (when the creator chooses, that is), that had to change: at this point all sites must be connected to a project.
We have no doubt that this will improve the structure of our virtual campus, but it does mean that if you created a stand-alone site you’ll need to connect it to a project before it can appear in your “My OpenLab.” But don’t worry, it’s still there!
To do so, go through the process that you would to create any Project, whether that’s a course, project, or club.
First log in to the OpenLab, then click MY <choose your project> in the right hand column, then click CREATE <project>.
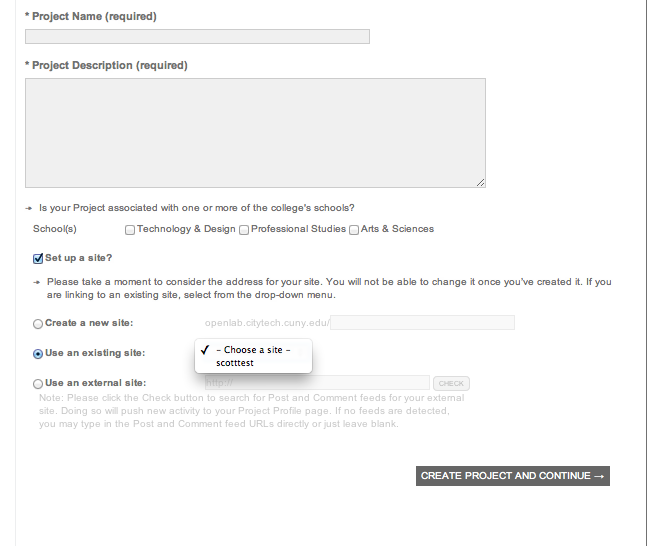
Follow the steps as you would when creating any project (see our help section for assistance on this). When it comes time to choose a site, though, you should see “Use an existing site” as one of your options, as in this screenshot:
NOTE: this option will not appear if you did not create a stand-alone site–if you don’t see “Use an existing site,” then this tutorial is probably not for you.
In the drop-down (where it says ‘scotttest’) above, you should see your existing stand-alone site. Click it, follow the rest of the instructions, and you’re done!
As always, contact us with any questions!


