Week 5 – Mood Lighting

1. I would use traditional portrait lighting with a main light, fill and background light for a traditional portrait. Something similar to a school picture, or headshot.

2. I would use a side light for a dark and dramatic photo. Maybe for a horror or very dark film poster.

3. I would use glamour light for a portrait if I was trying to create a happy and positive picture. Maybe to advertise something that makes one happy or an image for a beauty ad.

4. I’d use wide angle distortion from above in a portrait when I’d want to create a loony and silly image. This technique would make my image that much more funny. It makes the subject look like a caricature.

IMG_4669

Posted in LL5-Portrait Lighting for Mood | Leave a comment

Lighting for Mood

IMG_0160


To chose a traditional portrait light with a main light, fill and background light to make a professional picture. Key light, it is the primary light source that provides most of the illumination on your subject.  Fill light, it is use to fill the shadows created by the key light.  Background light, its purpose is to give some sense of separation between the model and background. It can provide a three-dimension look.

To use the side light for a portrait when you want to emphasize the texture, dimension, shapes, or patterns.  Use side light to exaggrate dimension and dept.  The disadvantage to use side light may be too severe for some subjects.  Some areas are too bright, and some areas are too dark.

When you want the image is bright, use the front light.  It will lighting the entire scene. The disadvantage of the front light is making a very bright subject.  Scene appear flat with few shadows.

To use the wide-angle in a portrait, it can produce beautiful photographs.  It increase the depth of field.  It is a powerful tool for exaggerating depth and relative size in photo.

Posted in LL5-Portrait Lighting for Mood | Leave a comment

Glamor Shot

I had the honor of taking this photo which i really like. Her expression is an expression you would normally make in this kind of lighting but i feel like thats the point, because of the contrast between her expression and the lighting, really makes this photo stand out.Screen Shot 2014-02-25 at 5.42.25 PM

Posted in LL5-Portrait Lighting for Mood | Leave a comment

Portrait Lighting

IMG_1402

I personally love this image because it’s so goofy. The distortion is insane. The subject’s heads look too big for its body, and the feet look super small. I love how everything is in focus, it allows the subject to show off their goofy personality.

Posted in LL5-Portrait Lighting for Mood | Leave a comment

Portrait-LL4

_MG_4117

This is my favorite post because it is one of the strongest. The intensity in her eyes bring the audience in. Her eyes are such a beautiful bright blue that it feels as if she can see right through one’s soul. The positioning of her face also helps to create a strong focal point. While it is not positioned directly in the middle, it does not affect the image in a negative way.

Posted in LL4-PortraitBasics | Leave a comment

LaQuayha Moore LL3

_MG_3757

I think this is a strong picture because of the lighting. The lighting helps to create a romantic and dramatic feel. While there is a slight contrast, the texture of the flower is noticeable. The close up creates a look that is soft and feminine.


Posted in LL3-Lighting Direction | 1 Comment

Portrait

IMG_5615

I like this particular photograph of Angel because of the lighting and the facial expression. There’s a nice contrast of shadow and light making the photo not too serious or dramatic because with a different lighting there would be a different feeling. I also like that the subject is not place in the center but off to the side adding playness to the overall photograph.

Posted in LL4-PortraitBasics | Leave a comment

Portrait Basics

Potraite of Amera-Rime Lulu

Traditional 3 light portraits is one of the oldest tricks in photography to create the best results.

The main 3 elements is 3 light portraits are:

1. The key light

2. The Fill light

3.  The Back light

The first light is a key light. Usually this is the strongest light and this light sets the lighting of the scene.

The second light is called a fill light, this light helps fill the shadows that the main light casts.

The last light is called a back light because it comes from the back, and is used to create a contour and separation

What i love about my Photo the most is the lighting direction and how the light is completing my skin ton. I also love my expression i feel this photograph of myself expresses who I’m as a person.


Posted in LL4-PortraitBasics | Leave a comment

Up Close in Person

IMG_7389

In dealing with portrait there’s many different light we are dealing with. To begin with taking portrait, we have to set up the main light known as the key light. The purpose of the key light is create a small lighting on the darker side of the person face, preferably a shape of a triangle. This allows the darker side of the face more visible. The second light we are dealing with is the broad/short lighting. This require the model to be at a three-quarter angle position. For board lighting the model body position must be face away from the camera and at least one side of the model ear must be visible. When taking board lighting, the placement of the light must be on the side of the model that has the visible ear. While the short lighting is dealing with the placement of the light away from the visible ear. The background light is used to help the viewer to separate the model and the background.  It make the model being more upfront than being blended with the background.

Out of all the photo we taken, I really like the way this photo came out. Having the camera being close up to the person, allow it be fit completely in the image as a whole. Also the way the camera was able to focus on the eye area and blurred out the back.

Posted in LL4-PortraitBasics | Leave a comment

Portrait

IMG_5655

Key Light, this is the main light used on your subject.  It is the brightest light.

Fill Light, the purpose of this light is to fill in the shadows create by the key light.  Fill light should be very soft and very broad.

Background light, this is used to separate the subject from the background.

Broad Lighting, to create a broad light, pose your subject to show three-quarter view of the face.  Light falls mainly on the side of the face is closest to the camera. 3/4 of the face is lit and 1/4 of the face is in shadow.

Short Lighting, to create a short light, pose your subject to show a three-quarter view.  Light falls mainly on the side of the face that further away from the camera.  1/4 of the face is light, 3/4 of the face is in shadow.  It brings out the contours much better than broad lighting.

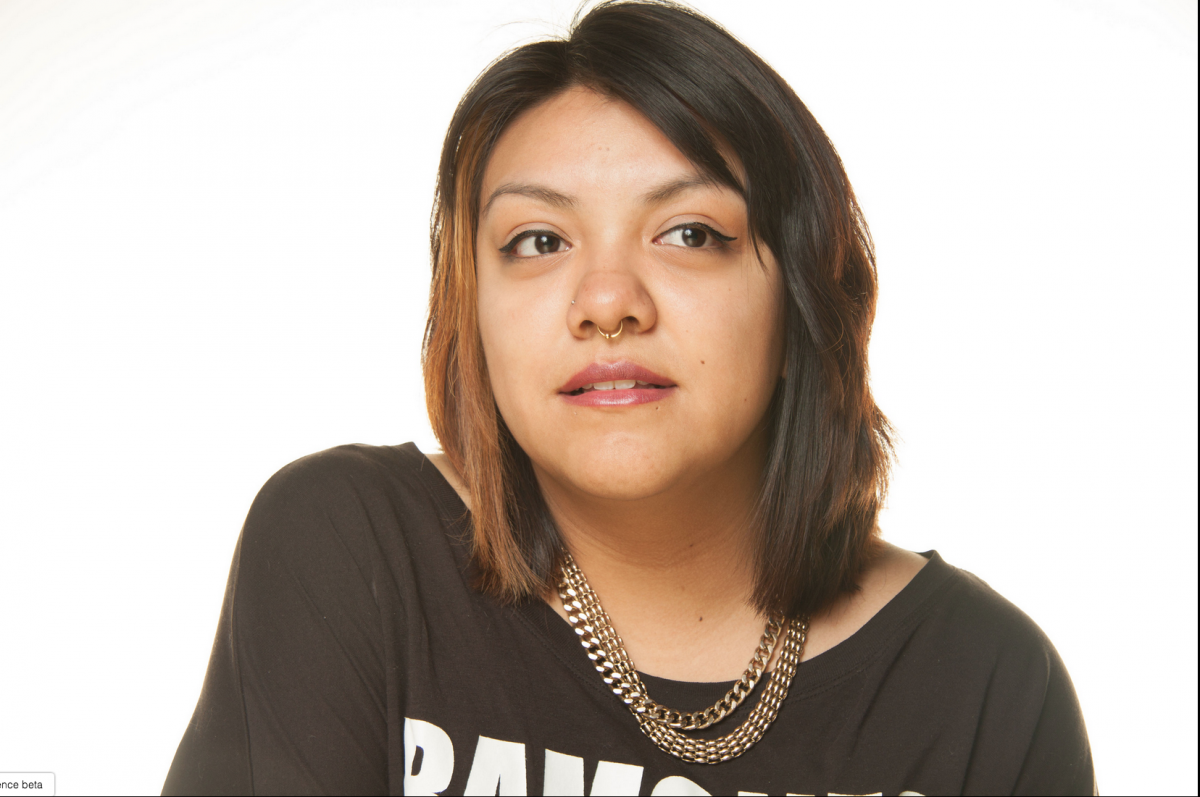
Rembrandt Lighting, to create a Rembrandt light, post your subject either front view or profile view, set the main light at approximately 45 degrees.  The main light should be place higher than the subject’s head.  45 degree lighting is the triangle of light that should highlight the cheek on the shadow side of the face.

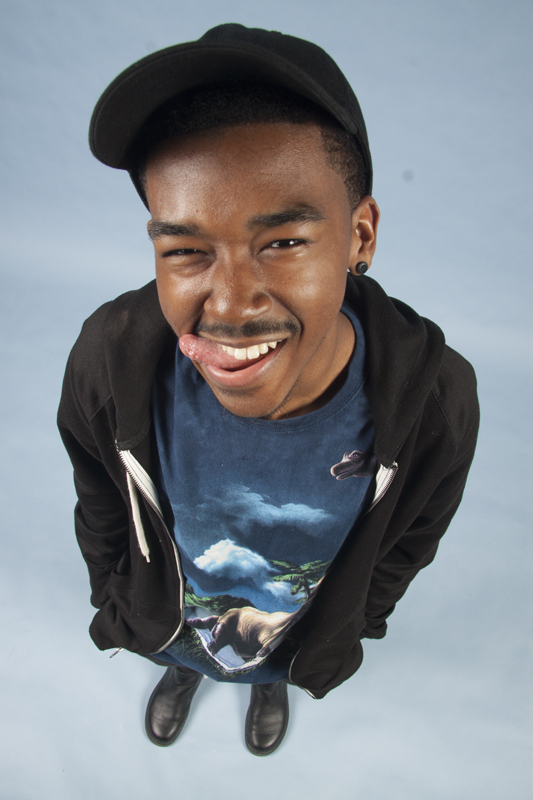
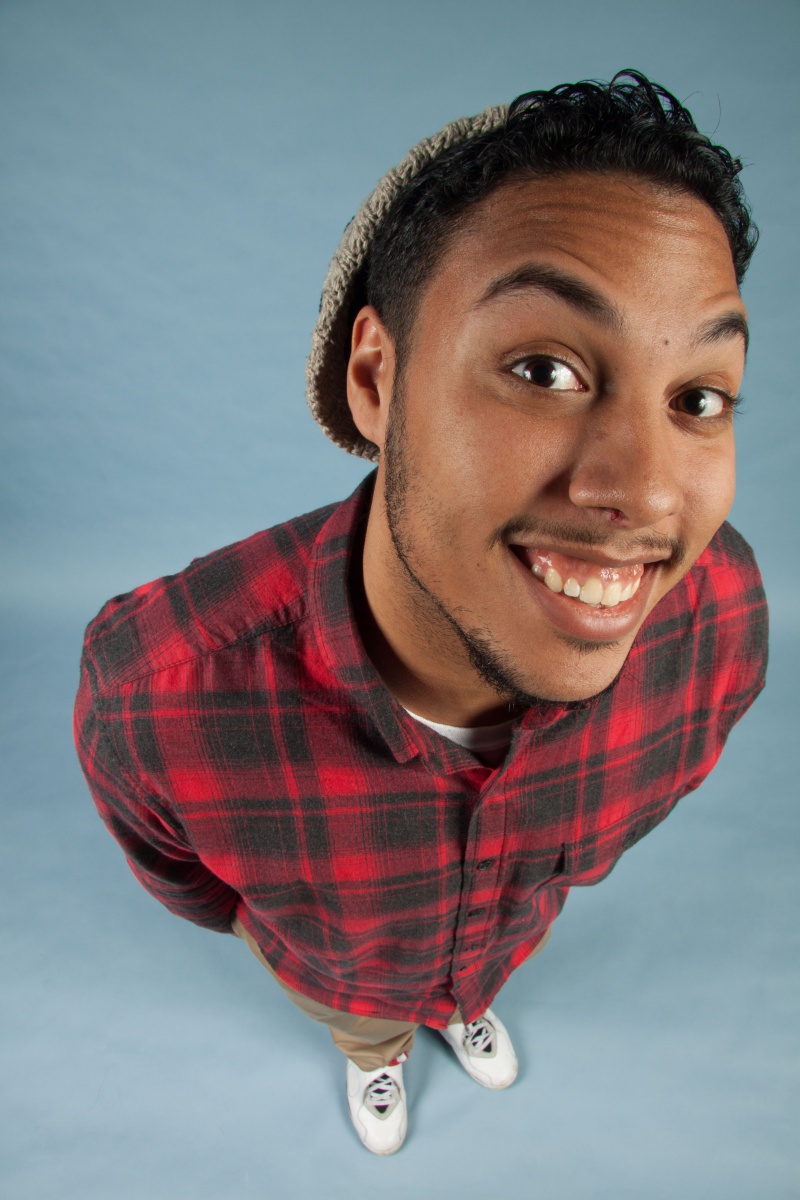
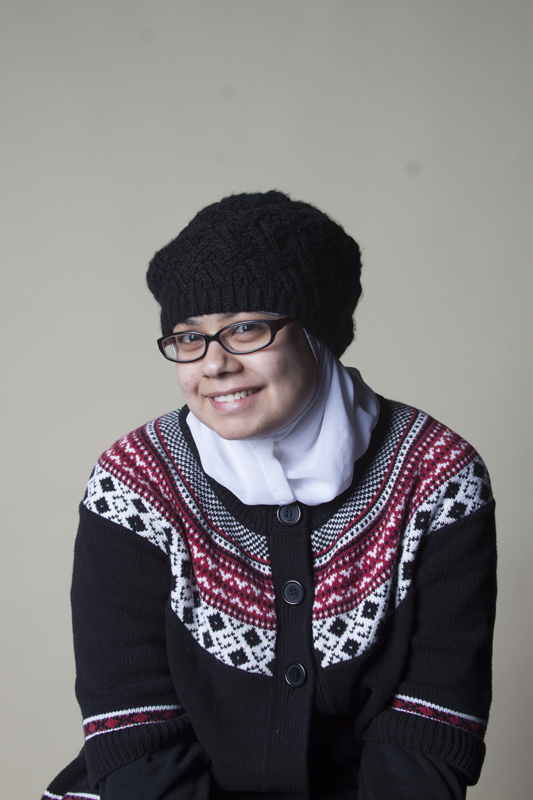
I think this is a good photograph.  The expression, pose and lighting are good.  This photo shows a happy mood. The pose is create a special angle and the background light is good.  Overall, this image is good.

Posted in Learning Logs, LL4-PortraitBasics, Uncategorized | Leave a comment