Portraits Basics

Today’s studio experiment let us discover three point of lighting: the main light, the fill light and the background light. The main light or the key light is used to shoot bright portraits pictures where the light is pointed towards the subject. The background light is used to brighten the background while the subject stands out from it. The fill light adds light to the shadow side of the subject. It was a lot of fun shooting these portraits pictures, but also what I have noticed is the light and it’s use along with the subject’s gestures can dramatically change the mood and give sometimes unexpected interpretations.

Posted in Homework, LL5-PortraitBasics | Leave a comment

Portrait Basics – In-class Portrait Shoot

Today we used 3 “lights” to create a standard 3-point portrait lighting. They are the background light, the main light, and the reflector. We began with the main light, also known as the key, by pointing it at our subject to create a  a triangle of light on the darker side of the face. You can use this lighting to create a more mysterious look to your subject. The main light is  pointed at the subject. The next light we used was the fill light, which is the reflector. This type of lighting adds light to the shadow or unlit side of the face. The closer we moved the reflector to the subject, the brighter the fill showed. The last light we used was background lighting. You use background lighting to light the background to separate the the foreground (subject) from the background. This method gives a sense of depth in photographs.

Posted in LL5-PortraitBasics | Leave a comment

Lighting Direction – Flower Shoot

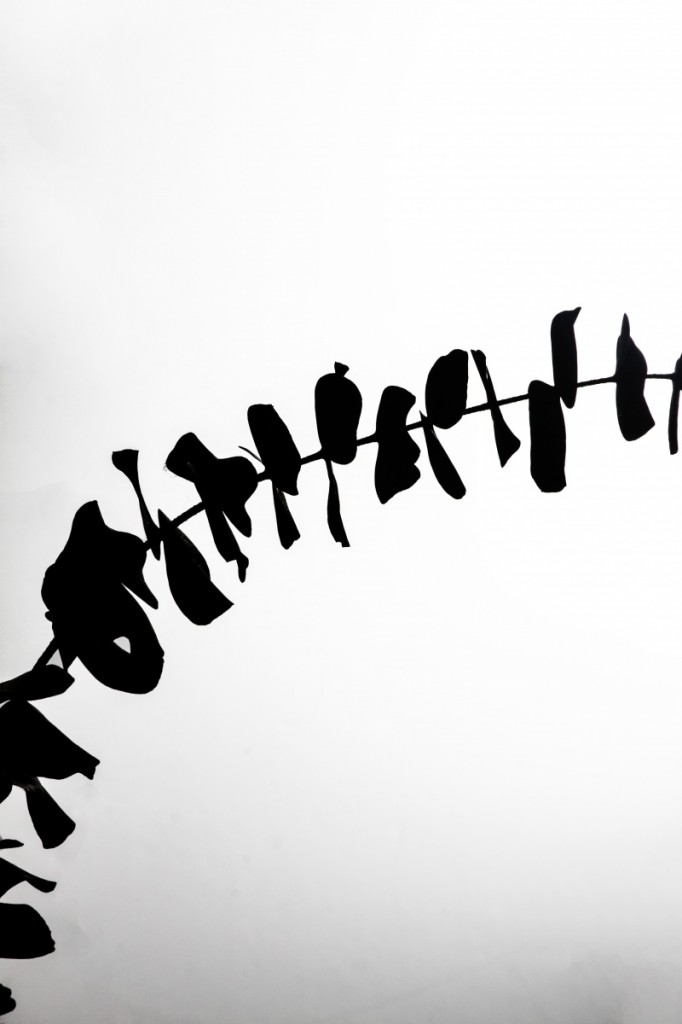
IMG_0129This is my favorite image from the flower shoot because is has a very strong silhouette which creates a very interesting negative shape. To create this effect my group used a back light; this produces a white background which creates a high contrasted image with reduced subject detail. I enjoy how simple this image is and yet it feels so dynamic with all the leaves pointing in different directions. This image was taken a bit further away then others of this shot, which is another reason why I like it: You can tell that it is a plant, and it makes an nice curve over the background.

Posted in LL4-Lighting Direction | Leave a comment

Lighting Direction

10696948664_d90578e3c8_bPut of all the pictures that my group took this one is the one that stood up for me. The extreme close up and direction of the light coming from the left side of the flower. You can see every detail on the flower and the light passing through the flower itself.  This close up made me wonder what it is.


Posted in Uncategorized | Leave a comment

3 Point Lighting

I’ve been taking pictures all my life without realizing the many components to take into consideration. 3 Point Lighting is used mainly in studio, where the subject is illuminated with light in different angles to support every pose and makes the different pictures unique. The key light, or the main light is shined directly on the subject. By using the triangle method, the shadows and the light create a unique shape on the face. Broad Lighting is used by placing the on the side of the face, which produces a highlight on the subject. The majority of the face is lit up and the face is totally clear and visible. The last light setting is the fill light. It was a bit odd using at first but I saw the difference in the reflectors use. The subject was captured with a brighter light which looked way better than without

Posted in LL5-PortraitBasics, Uncategorized | Leave a comment

3 Point Lighting

We experimented with lighting, Main or Key light, the Fill light, and the background light. The main light is the largest source of light, the light giving off a shadow. the Fill light is the reflection of the Main light.  The Background light is the light source the only targets the background. the main light in m opinion was the most interesting and the most difficult to control. The reason I believe this is because i had a hard time creating the triangle on the opposite cheek, i came close but in my professional opinion i didn’t master the distance and angel, however it was the most emotional to use, me and my group would create such a wide range of styles and emotions because we changed or position and moved the light up or down and its space on the floor.  the fill light was unique, we didn’t use too much of it because there were some shots we didn’t want a warm feel to them. Background light was the easiest because we kind of just set it up then adjusted if we needed to change the shoulder height or chest.  This was one of the most fun because the model could experiment with their pose.

Posted in LL5-PortraitBasics | Leave a comment

3 Point Lighting

The light direction in a photograph determines what type of feeling is set for the picture. Background light separates the subject to the background and give it space in between them. Short light and broad light are use to light the subject. Short light refers to the subject short space in their face when the light hits. The broad light is when the subjects majority of their face is exposed to the light. A fill light adds light and shadows to give a different feeling about the picture from the contrast between dark and light from one side of the face to the other side. The main light is use at 45 degrees from the cameras position and diffused with an umbrella to avoid harsh shadows.

Posted in Uncategorized | Leave a comment

Three-Point Lighting – Darren Parvatan

Three-Point Lighting is when the light is positioned in three different positions so the subject can be illuminated as desired.

The background light is the one that is pointed towards the back drop to make the subject stand out.

The key light is the main light used in the photo which points towards the subject and provides the brightest lighting.

The fill light reflects the light from the key light to create shadows on the subject but also maintaining a balance so the subject isn’t to dark.

Posted in Uncategorized | Leave a comment

LL5 – Lighting

Three point lighting is set up using anywhere from 1-3 light sources. The lights used are the key light, fill light, and background light. The key light is used as the main light source that can either light the front or side of the subject. The position of the light can be towards the front of the face, broad or short. The fill light is used to add light to the shadow side of the subject, filling in dark spot and bringing the contrast down. The background light is focused on the backdrop and is used to bring the subject out from the background and add more depth to the photograph. The use of these different lights in different combinations can dramatically alter the mood of the photo.

Posted in LL5-PortraitBasics | Leave a comment

Bria King -LL5 PotraitBasics

We used 3-point portrait lighting, background light, the main light, and the reflector. Key or main light is basically the front of your subject. The subject has to be facing the camera in order for the main light to work. The key triangle creates a triangle shadow on the opposite side of the face. Broad lighting is placing the light on one side of the subject. It creates a shadow on the shorter side of the face. Fill light is when you use a reflector to add light to the shadows showing up on the subject. The reflector lights up the darker side of the face. The gold fill light creates a warmer tone, and the silver light is very bright. The closer you place the reflector to the subject, the brighter the fill appears. Background light makes the subject pop out against the very bright white. It also creates separation between the subject and the background. It almost looks like a glow around the subject.

Posted in LL5-PortraitBasics | Leave a comment