Global corrections adjust the entire file. In Lightroom classic, this includes everything in the basic panel: White balance, Tone and Presence. In the Lightroom/Photoshop App, it includes the controls under Light, Color and Effects.
Local corrections
After you make global corrections, sometimes you will want to make corrections to part of your image. Generally, the brightest part of the image commands the most attention. Sometimes that is not where you want your viewer to look first so shifting the exposure of parts of your image can create the image you want.
Selective Edits is a premium feature. You should have access to it if you have an account.
The two main tools for local adjustments are the adjustment brush and the graduated filter.
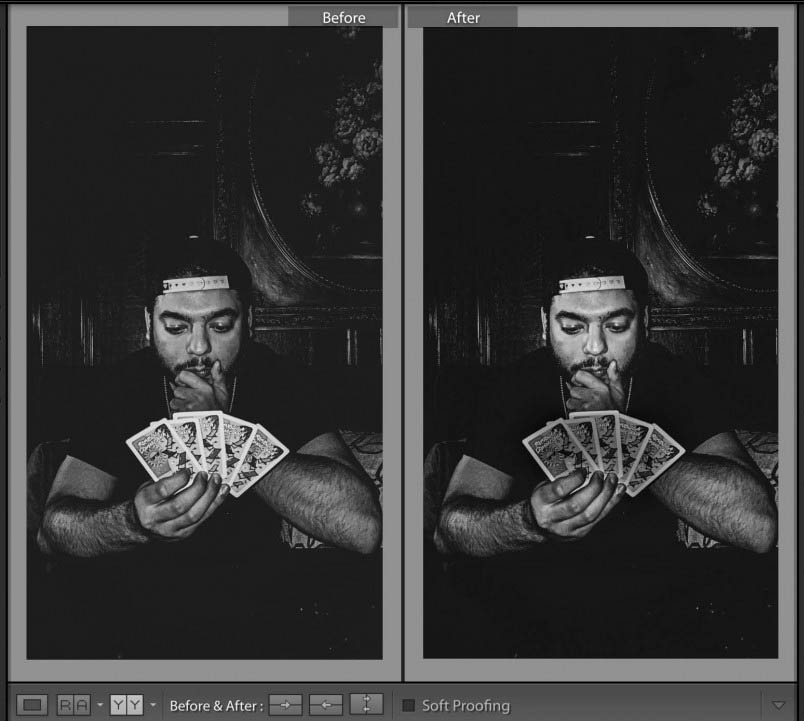
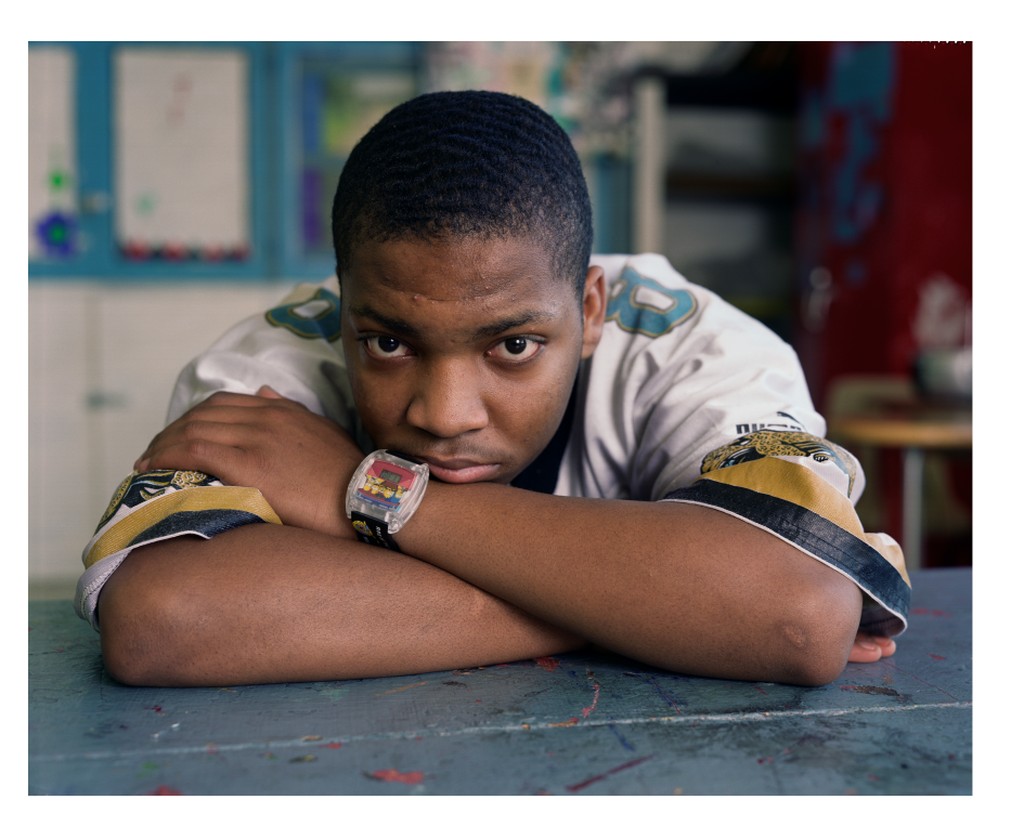
The important thing in this photo by Bryan Rodriguez is the face of the card player. However the cards are brighter and demanded too much attention. Using the adjustment brush, I darkened the cards. Creating a second adjustment, I lightened the face of the card player a little more. The goal was to bring more attention to the person’s face and less to the overly bright cards.
1 album of the 10 best photos of the 90 total, adjusted in Lightroom
a 3-5 min presentation of the final project – projected from the album on Flickr.
Presentation Guidelines
Start by introducing yourself and your project. One big picture sentence such as, ” I photographed variations on the theme of windows with most of the photos taken in downtown Brooklyn.
If you are showing 10 images, you have about 30 seconds to describe each photo. Tell us what your intention was, what interested you about the photo we are looking at, and give us information we may need to know to understand the photo. Tell us what makes it visually interesting ie the use of shallow depth of field or some other feature.
Your presentation will improve if you practice.
Do not tell us about what you did to the photo in Lightroom.
A model if possible or you can take self-portraits
Portrait Lighting Styles
There are a 5 basic lighting styles for portrait photography. Each style is defined by how light falls on the face. The examples below were all shot with lights in a studio but you can replicate these patterns with window light.
Rembrandt Light – the model is face forward, main light is at 45 degrees and casts a light on the opposite side of the face to form a triangle on the cheek.
Michael B. Jordan. Photographer: Peggy Sirota
2. Broad Light-model’s face in 3/4 view-light falls on the side of the face with the visible ear. Good for controlling the reflections on glasses.
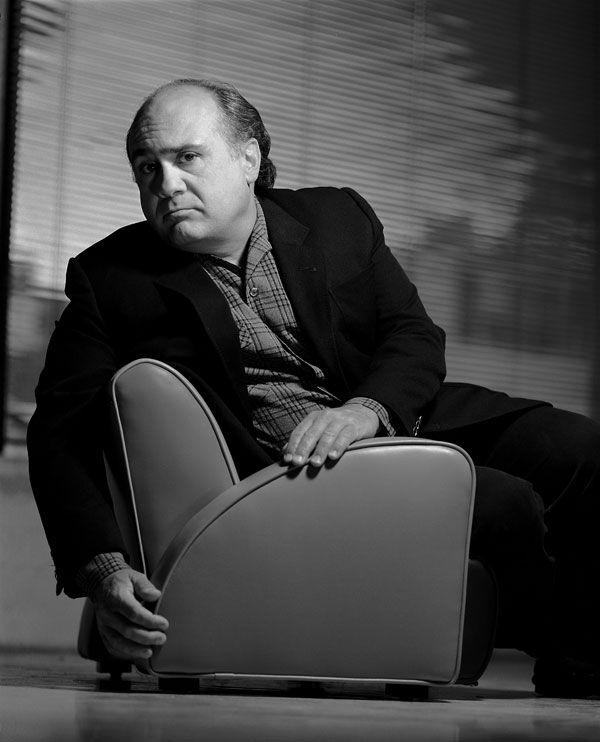
Danny Devito. Photographer: Gregory Heisler.
3. Short Light-model’s face is in 3/4 view, the light falls on the side of the face with the features. (Not on the side with the visible ear.)
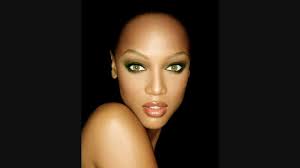
4. Butterfly Light, Clamshell or beauty or glamour light-model is face forward, front light.
Tyra Banks. Photographer: Matthew Jordan Smith
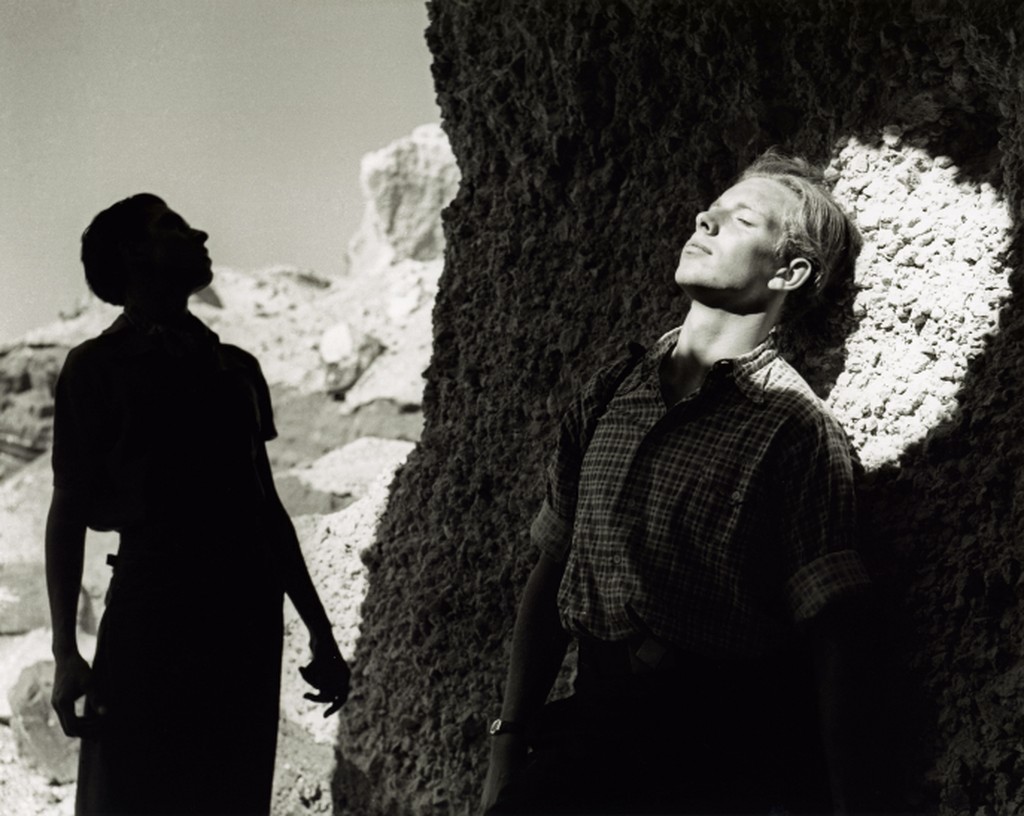
5. Split Light-model is face forward, the main light is at 90 degrees to the camera and falls on one side of the face.
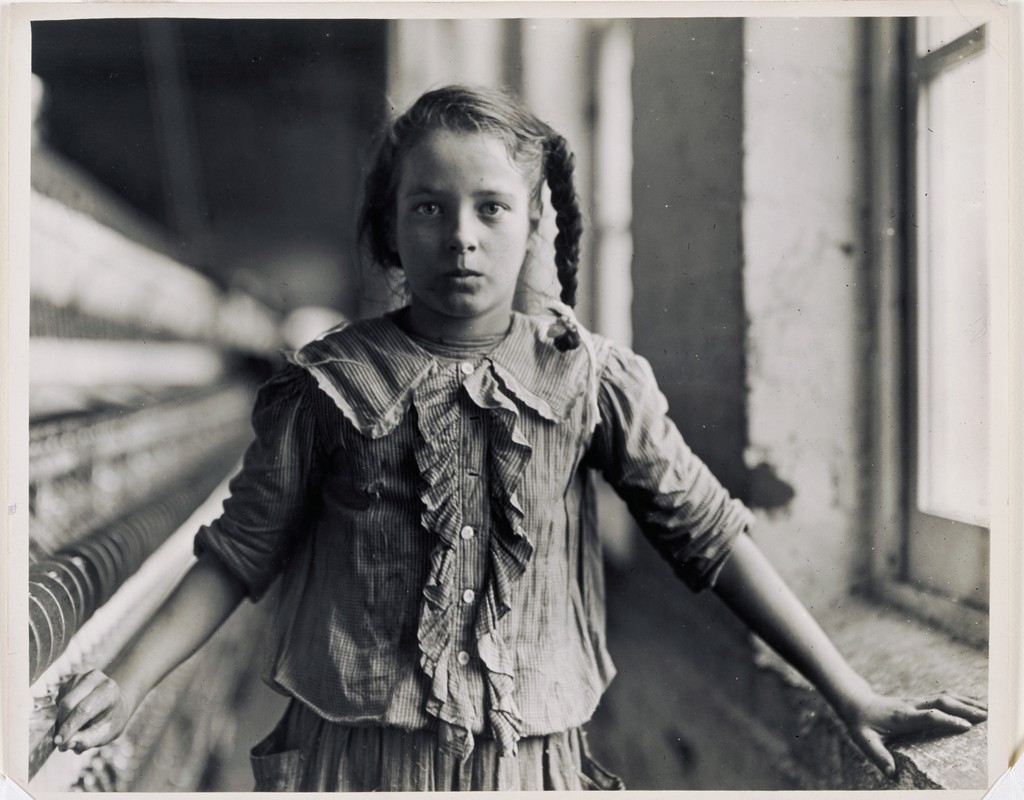
Lewis Wickes Hine (U.S.A., 1874–1940), One of the spinners in Whitnel Cotton Mfg. Co. N.C. December 1908.
When we shoot portraits in the studio, we can move the lights around the model. When shooting a portrait with a window, we have to ask the model to move their position in relation to the window.
This video shows how to use a window to create Rembrandt, split, broad and short light.
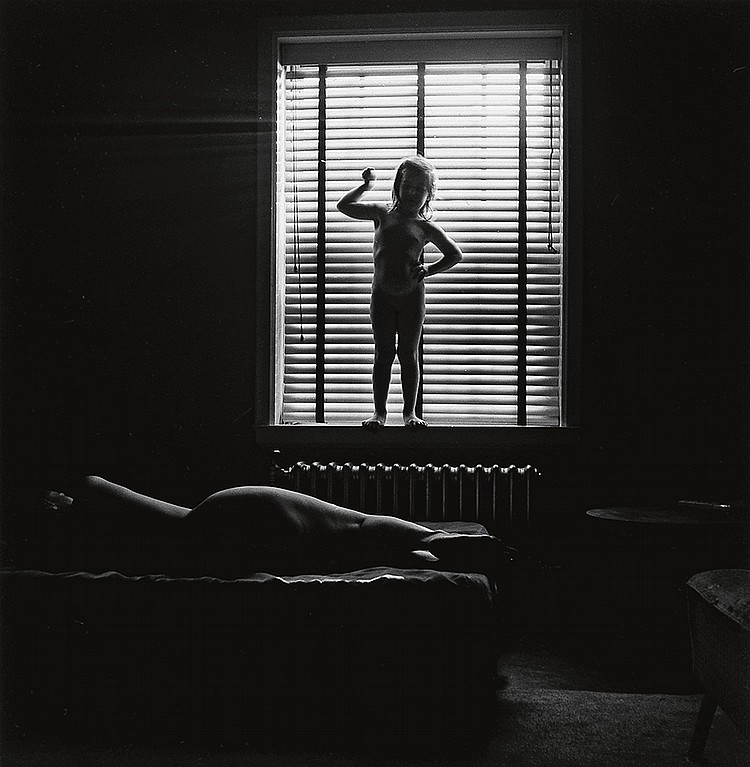
And while not exactly a portrait, window light is terrific for creating silhouettes.
To create a silhouette, have the subject stand close to the window and aim the camera towards the window. Set the exposure for what is outside the window so the subject is very underexposed.
Eleanor and Barbara. Chicago. 1954. Photographer: Harry Callahan.
Inspiration
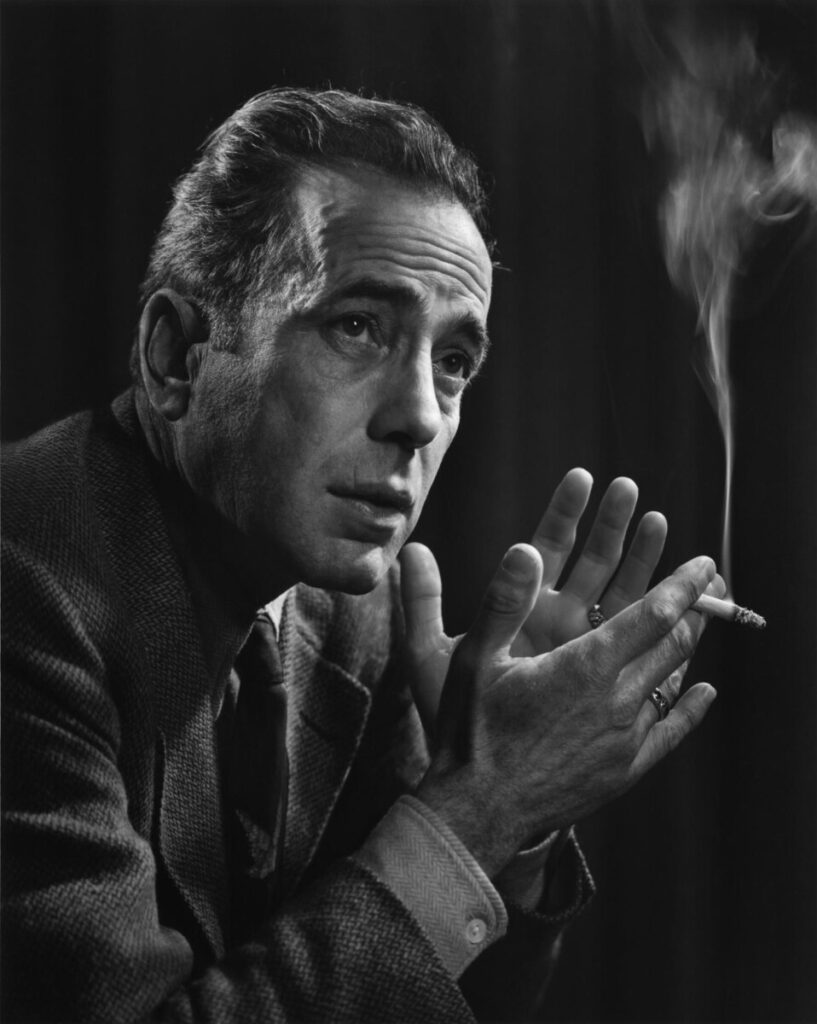
Henry Bogart. Photographer: Youef Karsh
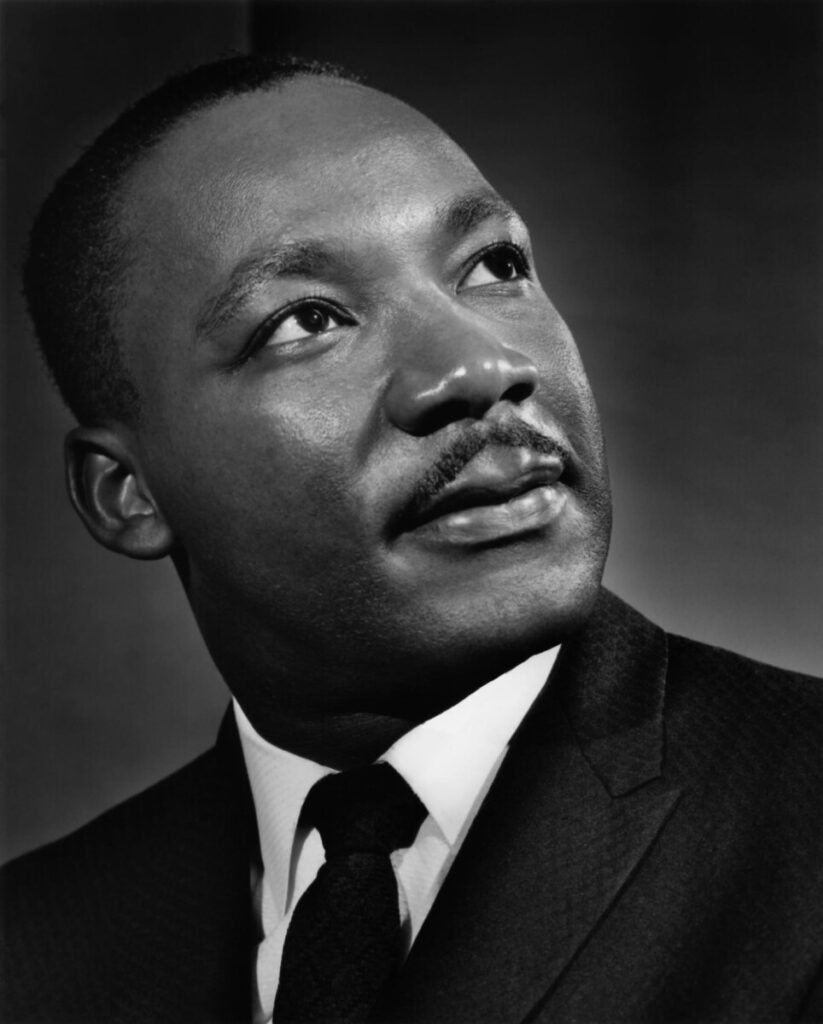
Martin Luther King. Photographer: Yousef Karsh
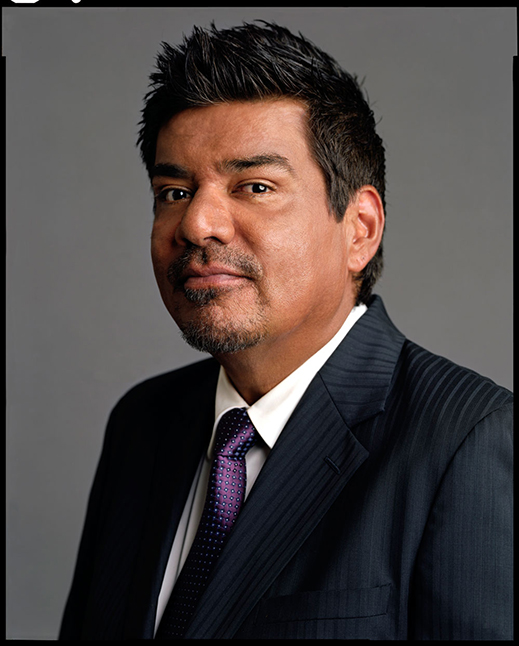
George Lopez. Photographer: Timothy Greenfield-Sanders
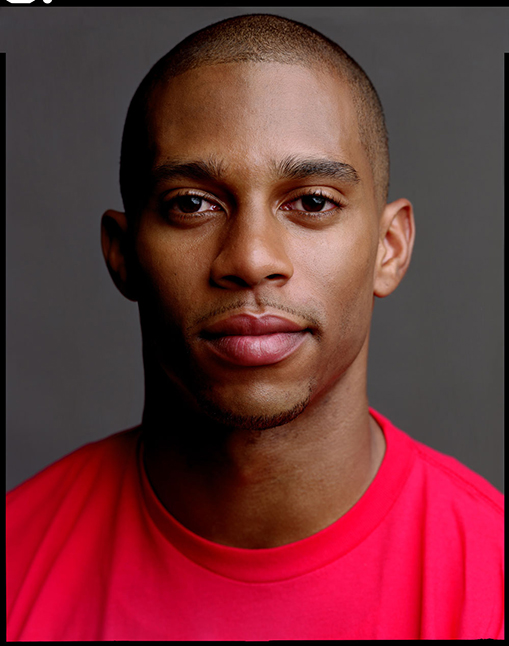
There are three basic positions for someone’s head and face in a portrait.
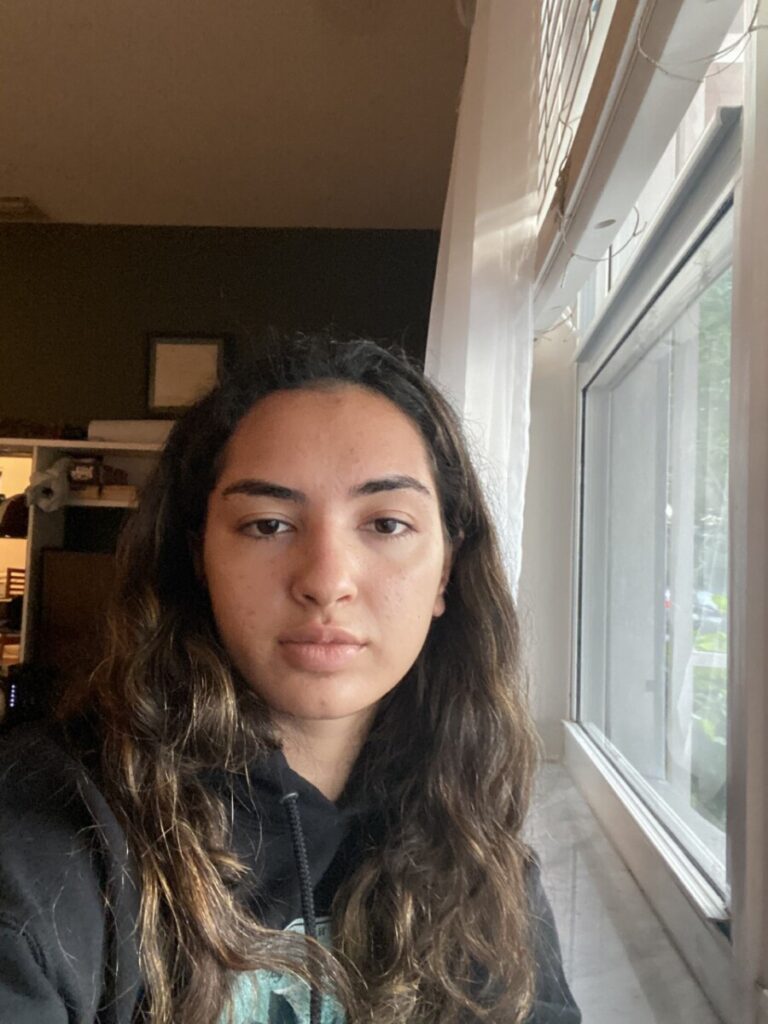
Front view
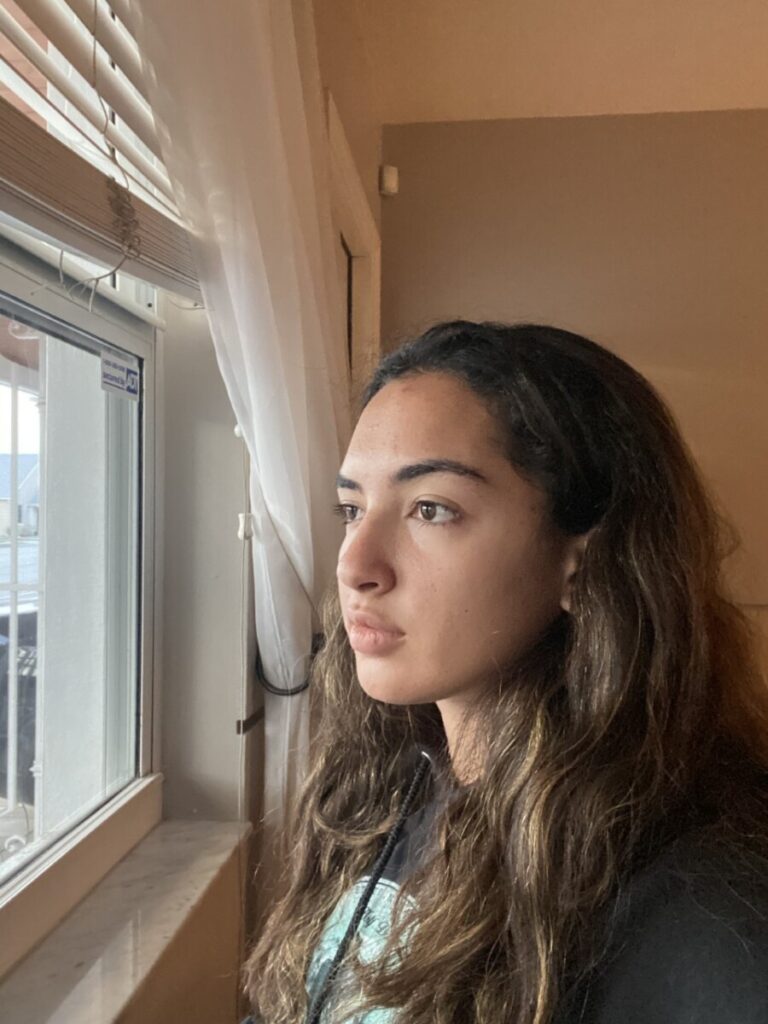
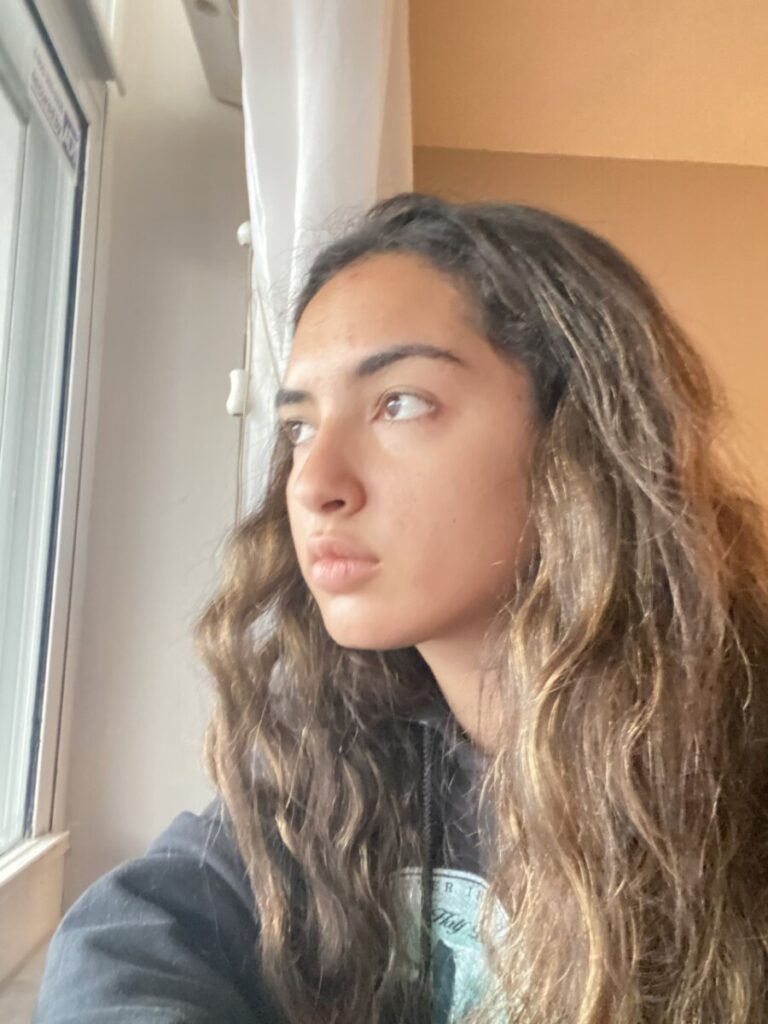
3/4 view
Profile
Front view. Photographer: Celeste Sloman
Three-quarter view. Photographer: Celeste Sloman
Profile. Photographer: Nadav Kandar
Expression
For family photos a smile is a must but not so for a portrait. It is however important that your subject look comfortable. It is your job as the photographer to talk with your subject and make them feel comfortable.
Focus
When shooting a portrait, the subject’s eyes must be in focus. Full stop. period.
Generally, portraits are shot with shallow depth of field to separate the subject from the background. Be careful to have enough depth of field so that the subject’s face from what is closest to the camera to what is farthest is in focus.
Photographer: Philip-Lorca diCorcia
Photographer: Helene van Meene
If you are shooting with a cameraphone that has portrait mode, it will blur what it calculates to be the background to simulate shallow depth of field. You can also use an app such as Focos to simulate shallow depth of field.
Wide Angle Distortion
Wide Angle Distortion is created when using a wide-angle lens AND the camera is very close to the subject. The object close to the lens appears abnormally large relative to more distant objects, and distant objects appear abnormally small and hence more distant – distances are extended.
Focal length and proximity to the camera affect how a person’s face looks in a photograph. A wide focal length and proximity between the subject and the camera create wide angle distortion and will distort a person’s features.
Photographer: Chip Simons
Think about selfie sticks. What are they for but to get the camera away from your face? This makes the photograph look more complimentary to the subject. This is really important with a cameraphone because it has a wide angle lens. The center of the lens and the sensor cannot be very far apart given the thin design of cellphones.
Inspiration
Photographer: Kris Nevaeh
Photographer: Kris Nevaeh
Photographer: Kris Nevaeh
Photographer: Kris Nevaeh
Photographer: Kris Nevaeh
Photographer: Larry Sultan
Photographer: Abbie Traylor-Smith
Photographer: Rashida Z
Photographer: Rashida Z
Lab Exercises
Please complete the following lab exercises, creating a post on Openlab with the category indicated to share your results.
Direct light or hard light – the rays of light are nearly parallel and strike the subject from one direction creating hard edged dark shadows with little detail. Examples: a spotlight, sun on a clear day, or a bare flash
Alex Webb
Diffused light or soft light– the rays of light are scattered and coming from many directions. It appears even and produces indistinct shadows. Examples: overcast daylight, a light covered with tracing paper or other translucent material.
Jim Richardson. Scotland.
Directional/Diffused Light. This light is a combination of directional and diffused light. The light is partially diffused yet it appears to come from a definite direction and creates shadows. The shadows are less harsh and contain more detail than in direct light. More subtle transition between light and dark areas. Examples: window light, sunlight on a hazy day, sunlight on a partly cloudy day or sunlight bouncing off a reflective surface.
Light Direction
Front light comes from in front of subject from the camera position and the shadows fall behind the subject not concealing any details.
Michael Christopher Brown. 2013.
Side Light comes from 90 degrees to the camera. it adds dimension and texture to the subject.
Andres Feininger, 10/29/1948
Backlight comes from behind the subject towards the camera.
app such as Focos to simulate shallow depth of field and/or portrait mode
Focus
Depth of Field-The distance between the nearest and farthest points that appear in acceptably sharp focus in a photograph. Depth of field can be shallow or extensive. While the term includes the word depth, depth of field refers to focus.
Shallow depth of field is commonly used in portrait photography to separate the subject from the background and in food photography.
Dawoud Bey
Andrew Scrivani
Extensive Depth of Field
Extensive depth of field is often used in landscape photography and photojournalism.
Richard Misrach
Sebastio Salgado
The depiction of space
Perspective-the representation of a 3-dimensional space on a 2-dimensional surface by converging lines, diminishing scale and/or atmospheric perspective.
Aperture is the size of the opening that allows light to hit the camera’s sensor when the photograph is taken.
Aperture values are expressed in numbers called f-stops. A smaller f-stop number means more light is coming into the camera and will create shallow depth of field. A larger f-stop number will let less light into the camera and create extensive depth of field.
The full stops for aperture are: F2, f28, f4, f5.6, f8, f11, f16, f22, f3
Focal Length is the distance from where the light converges in the lens to the sensor. If it is a short distance then the lens is a wide angle lens and shows a lot of the scene. If it is a long distance, the lens is a telephoto lens and it magnifies the scene. Wide angle lenses create extensive depth of field while telephoto lenses create shallow depth of field.
Camera-to-subject distance is how far the subject is from the camera. If everything is far from the camera, it is easier to achieve extensive depth of field. If the main subject is very close to the camera and the background elements are far from the camera, it is easier to achieve shallow depth of field.
Camera Phones and Depth of Field
Camera phones have a fixed aperture. For example, the aperture of the iPhone 7 is f1.8. This is one of the things that makes cameraphones so good in low light. You might think this wide open aperture would make it easy to get shallow depth of field with a cameraphone. However, the other factors involved make it quite challenging to achieve shallow depth of field with a cameraphone.
When you look at a phone, you can see the challenge for focal length. Focal length is the distance between where the light converges in the lens and the sensor and there just isn’t that much space. Even for cameraphones, we use the size of 35 mm film as the standard when discussing focal length. So the iPhone 11 has three lenses that are the 35 mm equivalent of 13mm, 26mm and 52mm. Earlier phones with one camera have one focal length. If working with a camera phone with more than one lenses, use the telephoto choice to create shallow depth of field.
Camera to subject distance is the factor that gives you the most control of depth of field when working with a camera phone. To create shallow depth of field bring the camera as close as possible to the subject. Allow for some actual space behind the subject
It is the small size of the sensor that makes cameraphones so good at achieving extensive depth of field. It is also the main reason it is so hard to get your cameraphone to achieve shallow depth of field.
Sensor size-the smaller the sensor the easier it is to achieve extensive depth of field. Bigger sensors allow for shallow depth of field.
Bokeh-Bokeh comes from the Japanese word boke (ボケ), which means “blur” or “haze”, or boke-aji, the “blur quality.” Bokeh is pronounced BOH-Kə or BOH-kay.
— From http://www.nikonusa.com/en/learn-and-explore/article/h0ndz86v/bokeh-for-beginners.html
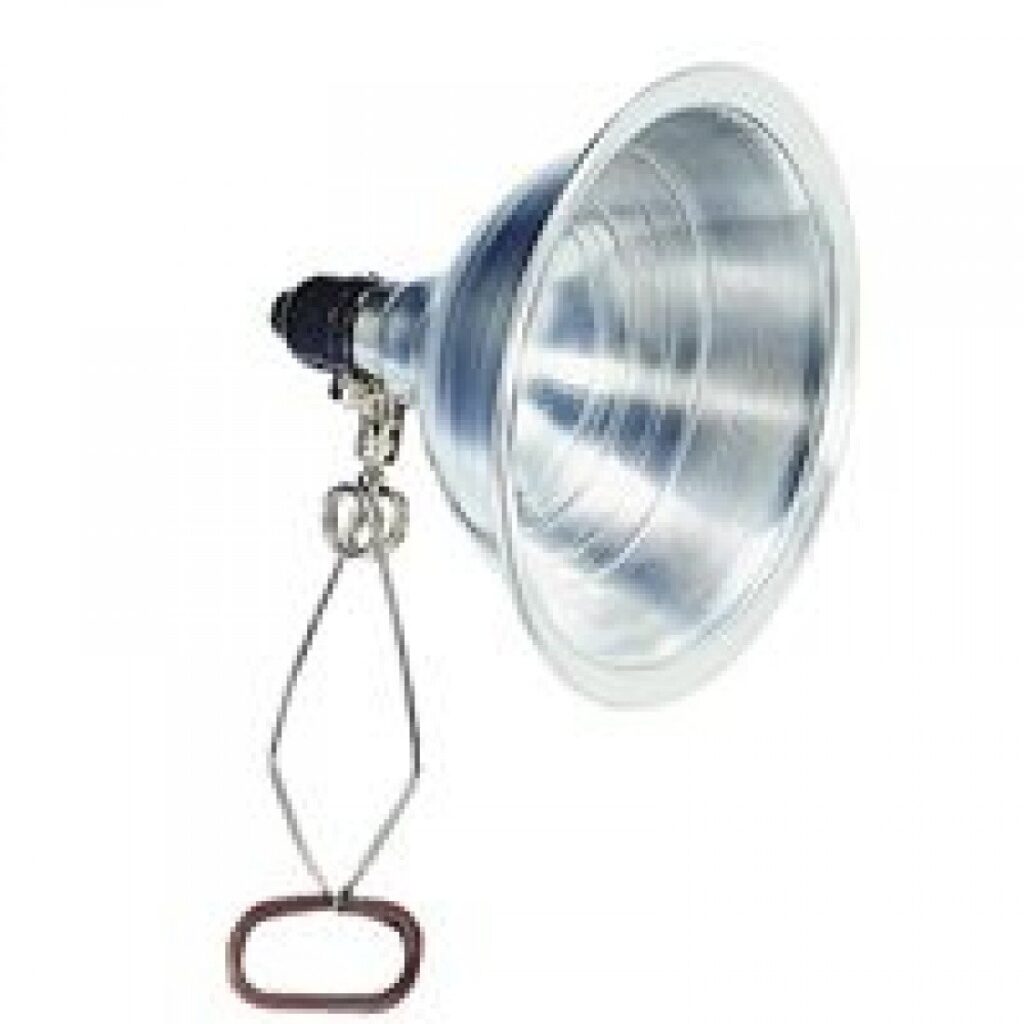
a window that provides bright light or a clamp light. You should be able to get one if you don’t have one at your local hardware store for around $10. If you don’t have a bright window to work with, a clamp light will make the rest of the semester better as it get colder and be harder to work outside.
Review: Light quality-direct and diffused, exposure compensation
Light and Dark
The word photography is rooted in Greek meaning “ writing with light “ One of the main concerns of photographers is how light illuminates a scene or subject. While we focus attention on light, it’s easy to not pay attention to shadows. Shadows, although dark, can be as dynamic as light. The shadows shape light, define texture, and act as compositional elements.
Contrast: The measure of difference between bright areas (highlights) and dark areas (shadows) in a photo
High contrast : Large difference between highlights and shadows. Mostly lights and darks without many mid tones
Photographer: Daido Moriyama
Low contrast : Little difference between lights and darks. Mostly mid tones.
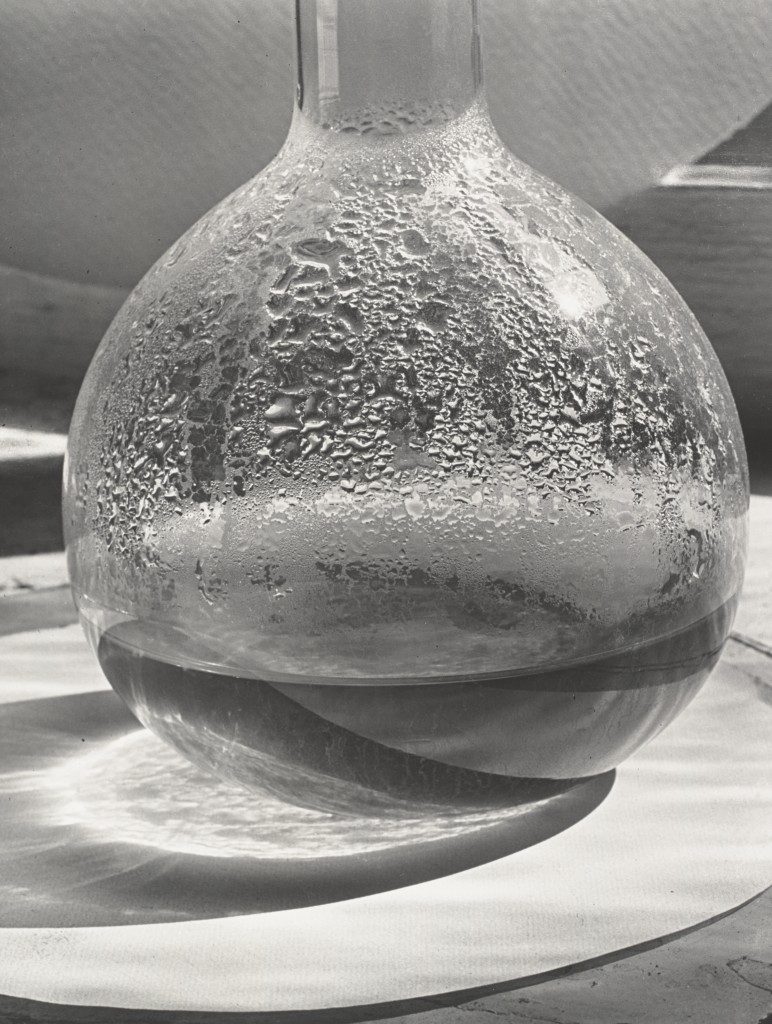
Sweating Glass, 1931, Photographer: Alma Lavenson
Shadows – dark areas in photo that can range from black with no detail to dark tone with detail
Uses of light and shadow: Light and shadow are complementary elements in photography. The quality and direction of light affect how a subject looks while producing shadows in various forms
Contrast and Drama : Shadows can be used to create contrast to produce a dramatic effect. Attention of the viewer is drawn to tonal contrast which can not happen without shadows. In this interplay of light and shadow, the lighting effect is enhanced by the shadows.
Shadows can be used to direct the viewer’s attention. Shadows can be be shapes that may be used as compositional elements to direct attention to the center of interest in a photo. Also shadows can surround a light area to make it a center of interest.
Reveal form: Using shadows will give form to subjects and make them look more three dimensional. The shadows don’t necessarily need to be black for this to happen. As long as one part of subject is light and one part is darker the photo will look more three dimensional. For dramatic effect, direct light will produce dark shadows. But for some subjects, dark hard shadows can be distracting or cause loss of detail. For subjects where detail is important, using partially diffused light will make soft shadows that will show form and maintain detail.
Reveal texture: Side light with shadow will show texture
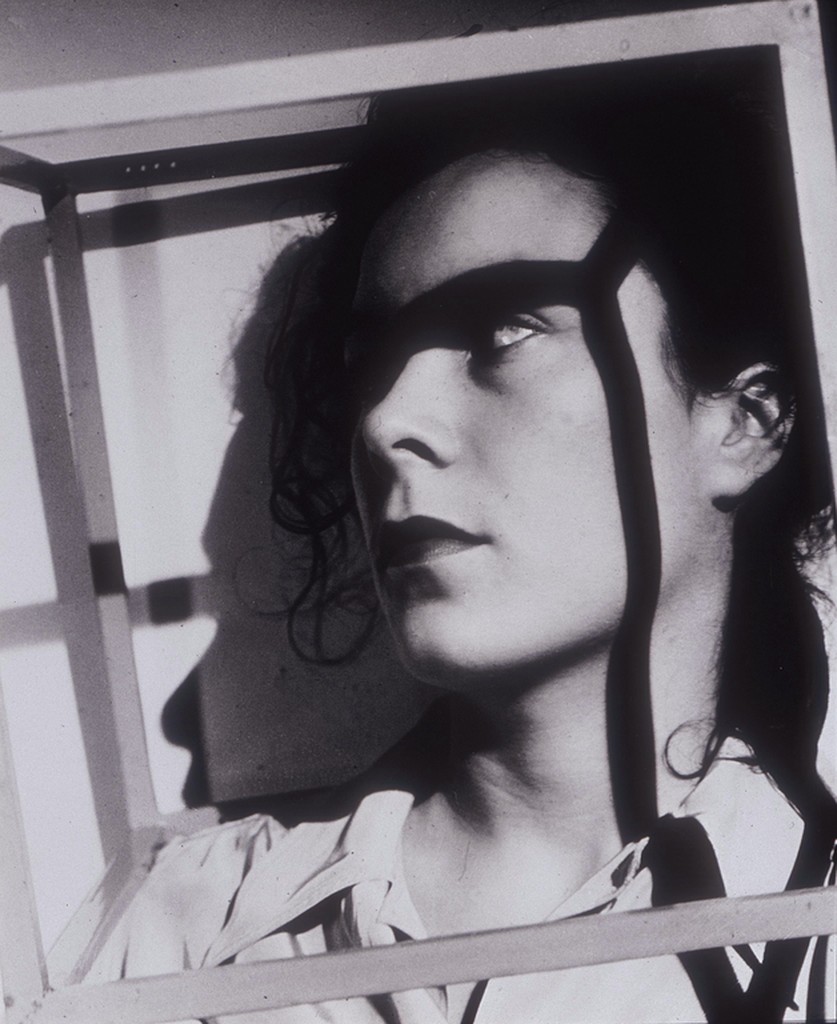
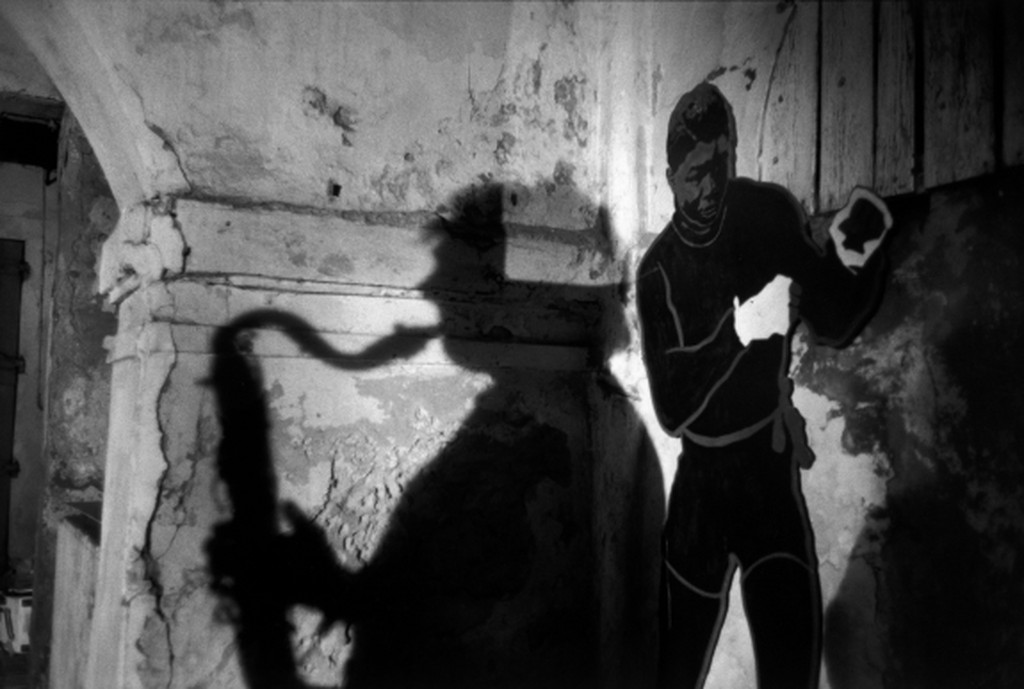
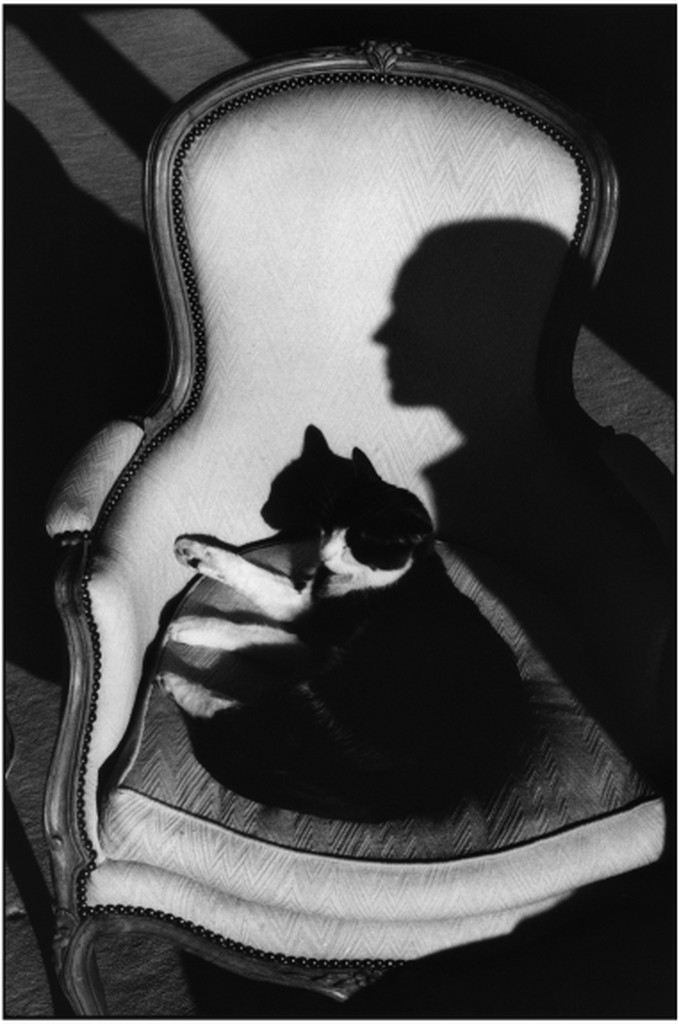
Shadows can be shapes and patterns that can be used to complete a composition.
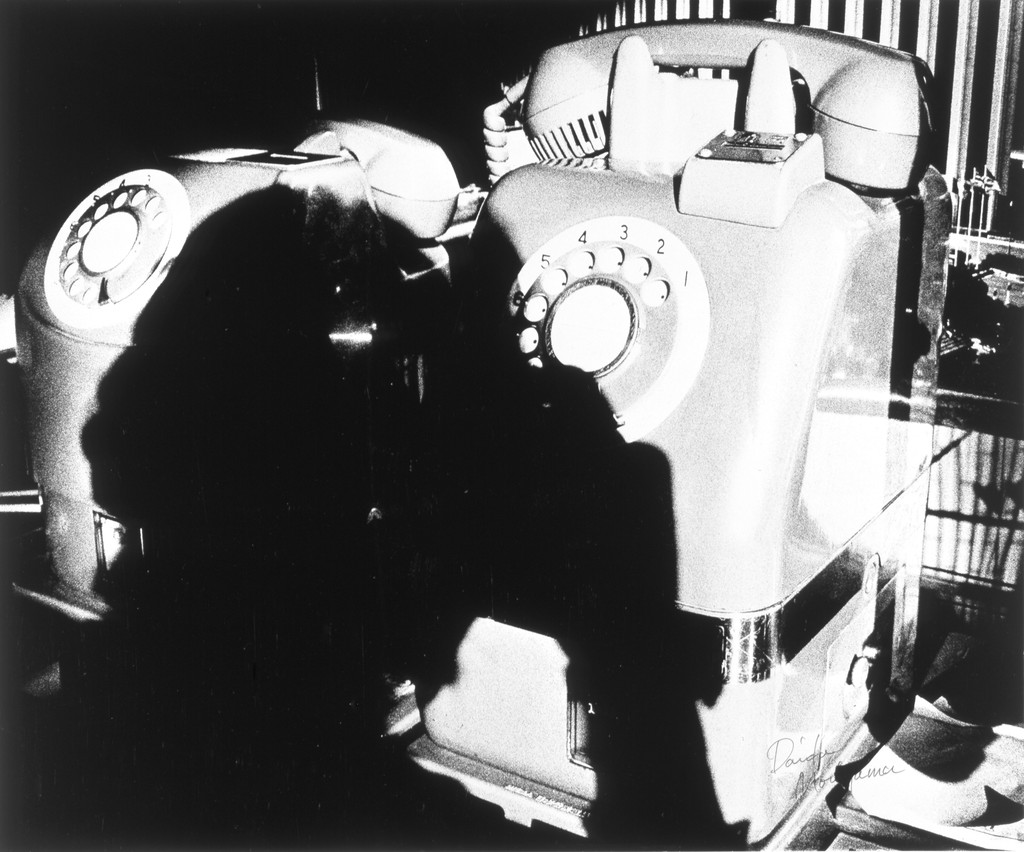
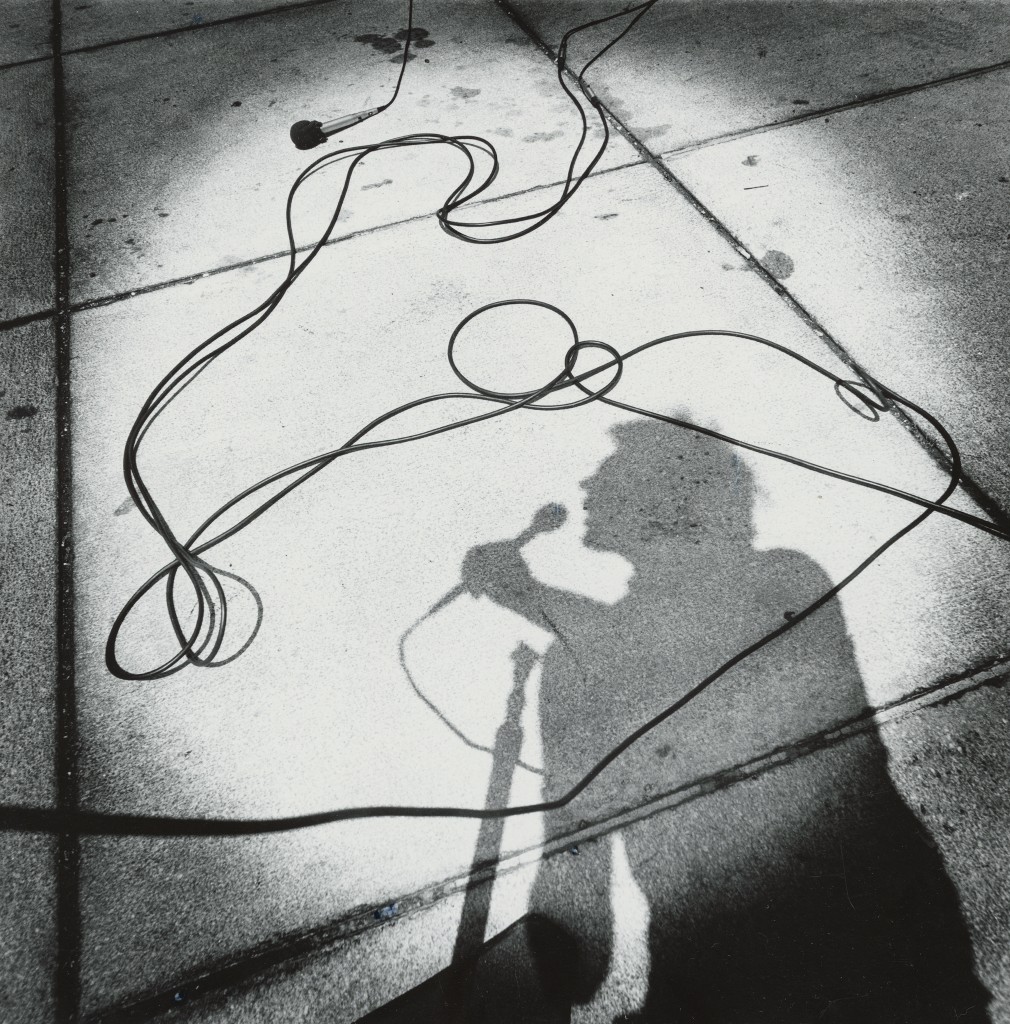
Calls & Messages 10:5, 1974 Photographer: Arthur Tress
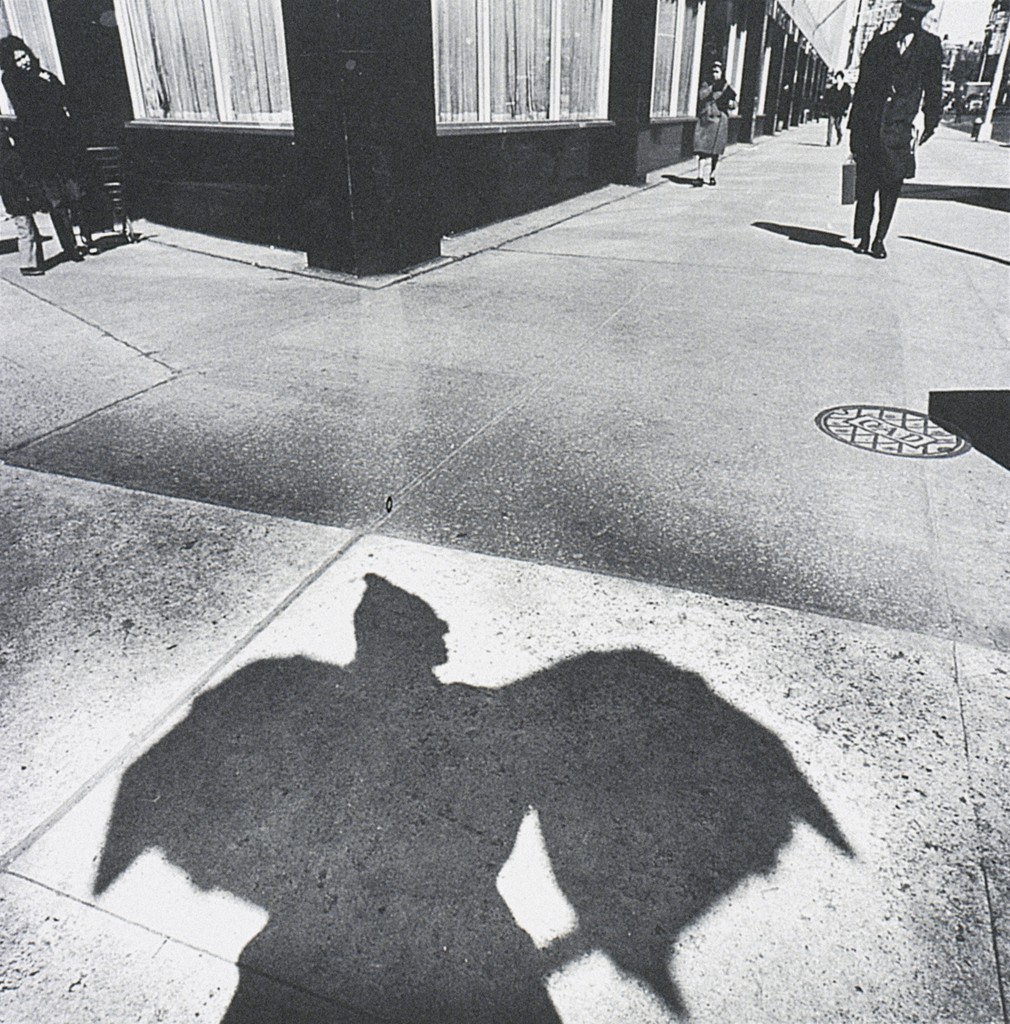
Shadow as Bird of Prey. 1973. Photographer: Arthur Tress.
Young Buddhist novice and his shadow. Laos. 2008. Photographer: Abbas.
WESTERN AFRICA. 1993. Tour of the jazz musicians Trio. Photographer: Guy Le Querrec
GERMANY. 1933. Herbert List.
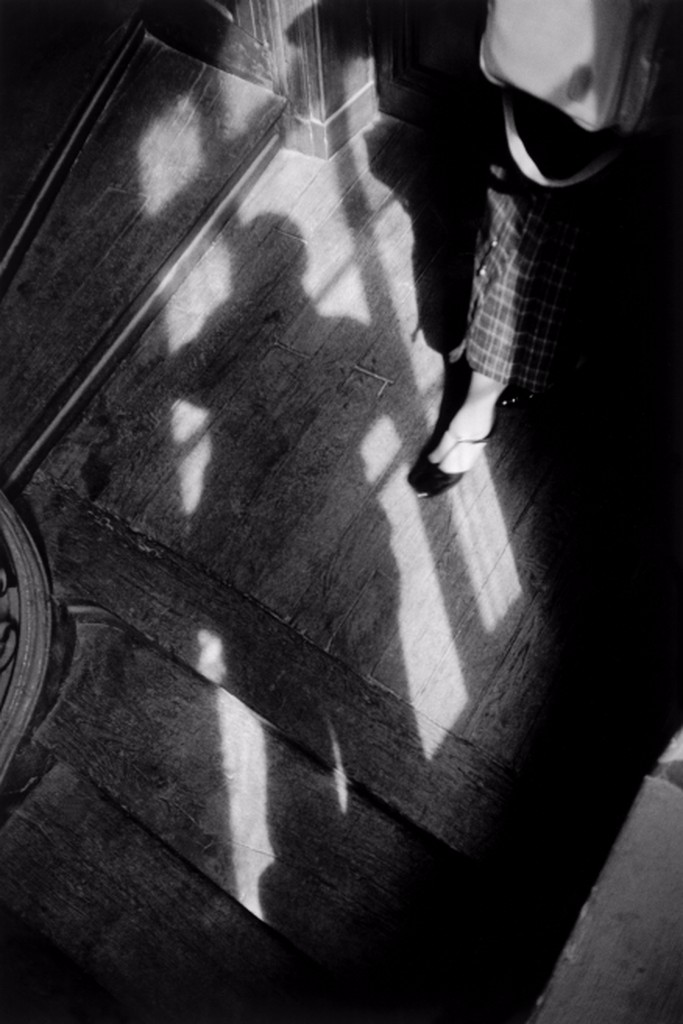
EUROPE. 1989. “Our cat Ulysses and Martine’s shadow”. 1989. Photographer: Henri-Cartier Bresson
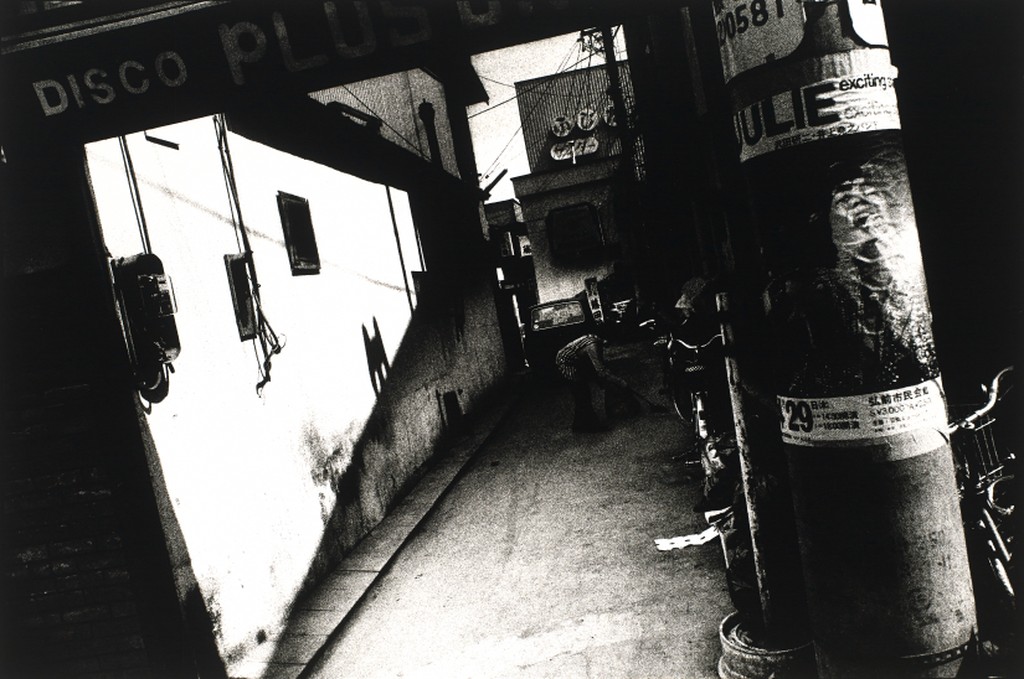
Photographer: Daido Moriyama
ITALY. 1936. Photographer: Herbert List
How light falls on your subject is key to using shadows in photography. The best direction for a combination of light and shadow will be light coming from the side. For dramatic effect photograph when the light( direct light ) is at a lower angle which will produce longer dramatic shadows. For less dramatic effect, use diffused light.
Exposing for photos that contain light and dark areas you will need to use exposure compensation. If there is large dark areas in the photo, the meter will over expose the light areas. In this case you need to use exposure compensation to lower the level of the lighter areas.
Find a subject. It could be a bridge, a dog or a person, a tree, a flower or something else altogether. (Try to stay away from street furniture.) Take a series of photos of that subject from different angles and with different cropping until you get two photos of the same subject that really look different.
The goal is to take two photographs of the same subject that are different in composition and mood. Make your subject look big in one and small in another, symmetrical and asymmetrical, cute and fierce, pretty and ugly, strong and delicate just with the crop and angle of view that you use.
Repeat for a minimum of 10 subjects. Select a range of subjects from huge such as a bridge to small such as a bee.
Once back in the classroom, download your photos and create an album in Flcikr with your final 10 pairs of photos.
Select the two photos of your most radically transformed subject and upload medium versions of them to a post on OpenLab with a description of the angles and other compositional devices you used to transform the subject.
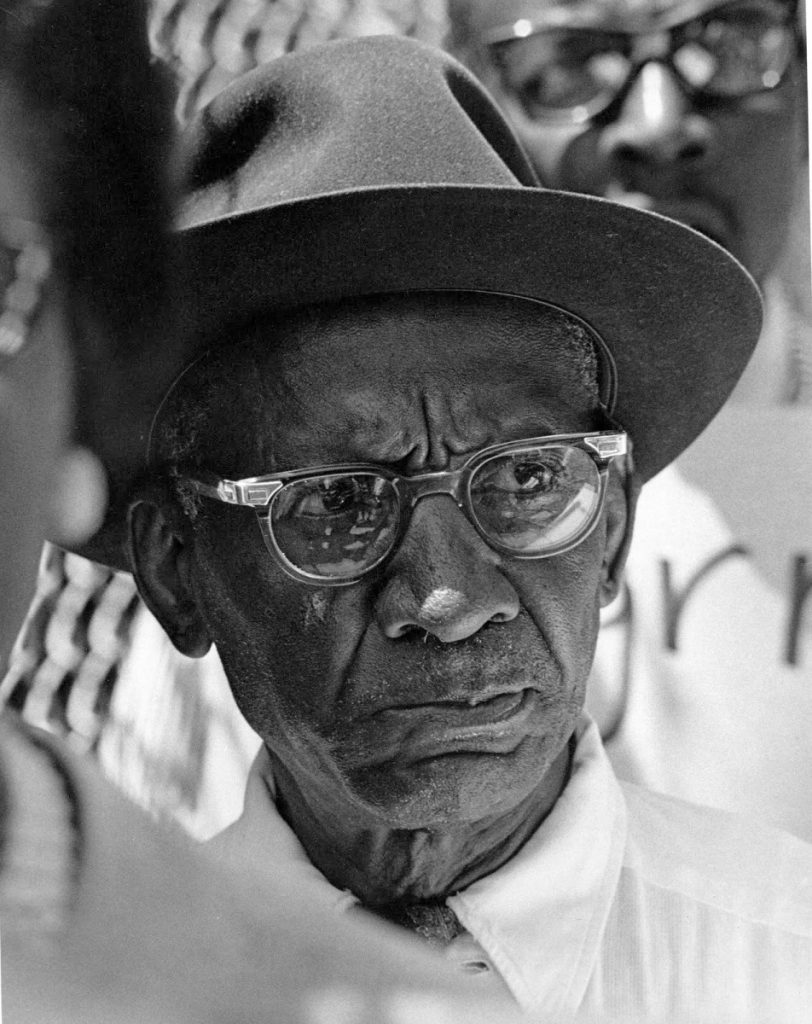
Born out of Queens, New York, Dawoud Bey is an American educator and photographer who has had much experience in taking photos of his neighborhood from the streets of New York. In his interview, he talks about his Night Coming Tenderly, Black project and how they were a way of telling a part of history that hasn’t really been told–or, in his words, making the “invisible visible”. To find his voice when it comes to photography, Bey utilizes black-and-white photography to convey the message that despite the different backgrounds, there is more complexity to African Americans than what any history book can show, despite their day-to-daily lives. One of his photos, which features a black-and-white landscape of a house in the middle of a forest, is a perfect example of what Bey’s purpose is when it comes to his photos. By giving us a photo of this house in the middle of nowhere, Bey showcases a perspective of what being was like throughout history– turning the viewers into a part of the experience of what the slaves see when they was hiding in the shadows. Bey tells a story better than what any history book can convey EMOTIONALLY, and this is further highlighted when he talks about his hearing loss, showcasing just how important the eyes are when beholding works such as this.
Carrie Mae Weems is another American photographer, and just like Bey, she also emphasizes having a voice towards a specified subject. In her interview, she talks about her Kitchen Table Series project, and how her photos is not only a way to communicate a message for women everywhere, but also a message to communicate to everyone in regards to family dynamics and relationships around a domestic space–that being the kitchen table. One photo, being a picture of a man sitting on the table with the woman standing in the background, showcase her description perfectly, as the image fits the “battling dynamic between men and women” description that Weems was talking about. By taking photos of people in the same setting, Weems created a voice that gives women to use to speak out against the social imbalance between themselves and the men in their lives.
Both Carrie Mae Weems and Dawoud Bey used their photography works to create the message for them that art can tell more of a story than what words can do. Bey recreates history by using photos to deliver a voice that gives African minorities another layer of complexity and a chance to view them in a more colorful light. Although Weem uses that same process of recreating a setting for African Americans, her targets were more specific to women when it comes to relationship dynamics. Both photographers used an image to combat stereotypical beliefs, in a manner to change a point of view. I believe that that is what Bey means when he wanted to “re-shape the world”; photography has the power to convey emotions, understanding, and even relatability in a sense that mere words can only go so far to affect the mind. It is true what the old saying goes: “A picture is worth 1000 words.”
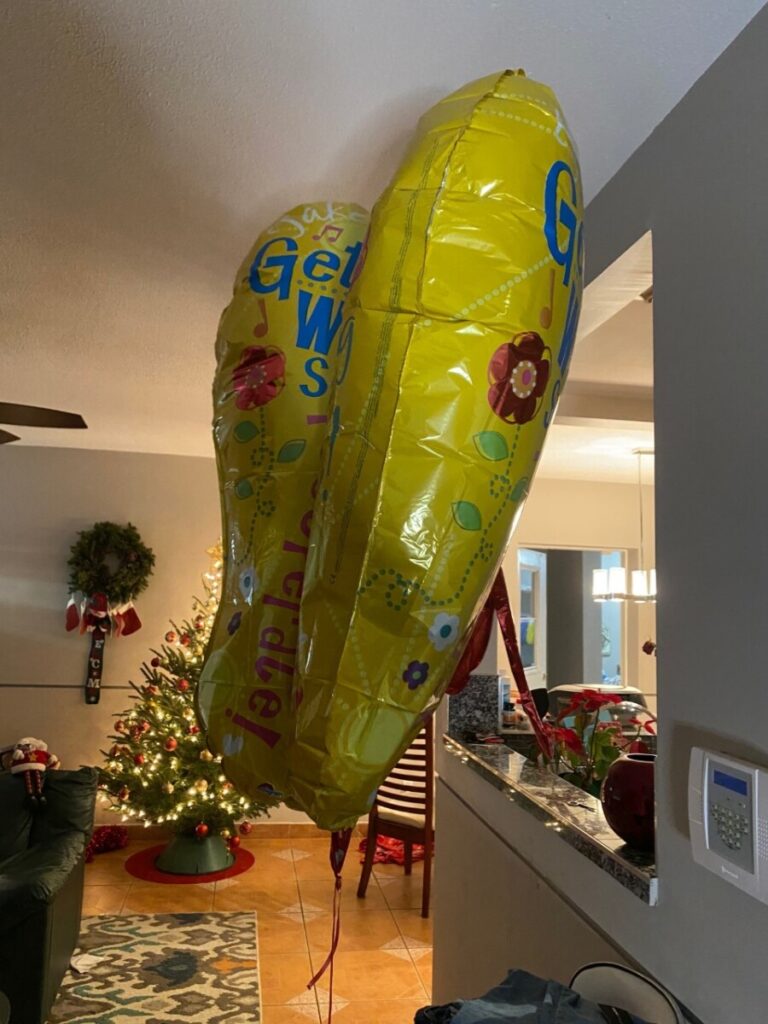
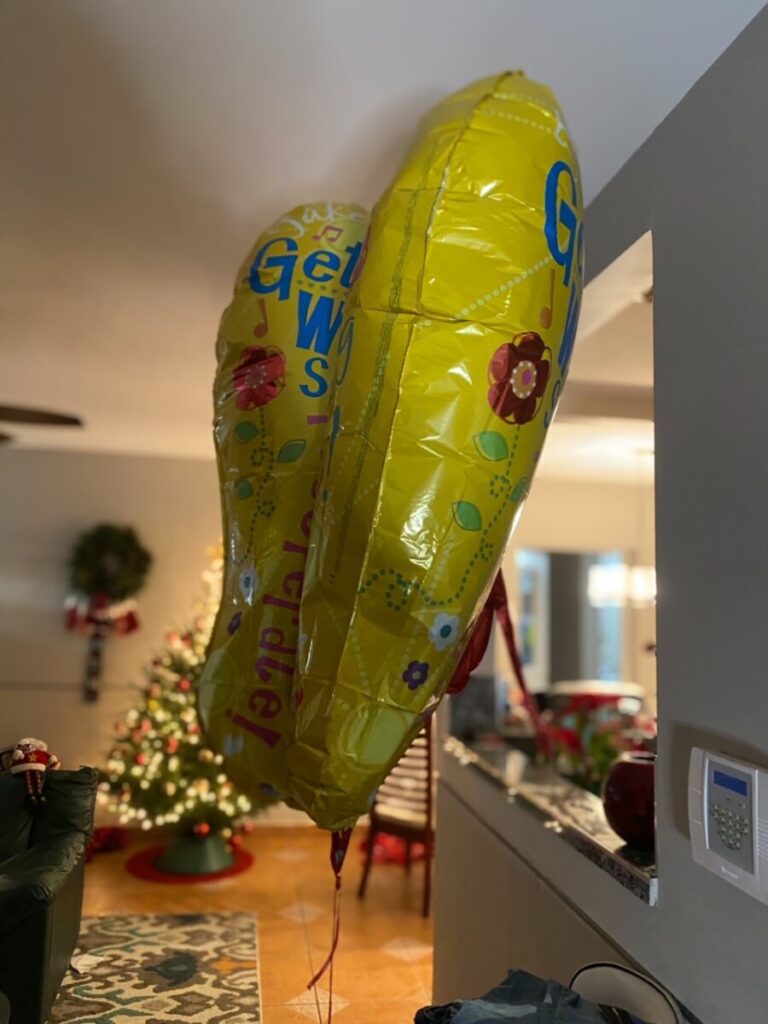
I captured the original photos on my iPhone then I put them into the Focos app. It was fun seeing how the app adjusted the images, for some it focused on objects that I didn’t expect it to, like the couch in the last image.
For the first image I tapped on the elf hat so the focus went there and blurred the background. For the second image I tapped in the background so it would focus it and blur out the hat.


Recent Comments