Robin Michals | COMD 1340 Photography 1 OL89 | FAll 2020

Author: rmichals (Page 1 of 11)

Lab: Week 2 – Angle of View

Find a subject. It could be a bridge, a dog or a person, a tree, a flower or something else altogether. (Try to stay away from street furniture.) Take a series of photos of that subject from different angles and with different cropping until you get two photos of the same subject that really look different.

The goal is to take two photographs of the same subject that are different in composition and mood. Make your subject look big in one and small in another, symmetrical and asymmetrical, cute and fierce, pretty and ugly, strong and delicate just with the crop and angle of view that you use.

Repeat for a minimum of 10 subjects. Select a range of subjects from huge such as a bridge to small such as a bee.

Once back in the classroom, download your photos and create an album in Flcikr with your final 10 pairs of photos.

Select the two photos of your most radically transformed subject and upload medium versions of them to a post on OpenLab with a description of the angles and other compositional devices you used to transform the subject.

Category: Lab: Week 2- Angle of View
Quiz 2

4 pts. Please put your photos and your written answers in a text file, convert to PDF, and email it to me: rmichals@citytech.cuny.edu

Due: Dec 8, 9am.

Each question is worth 1 pt.

  1. Define depth of field in your own words. Take and include with your answer a photo that uses shallow depth of field without using either portrait mode or an app like Focos.
  2. State the difference between direct and diffused light. Take and include with your answer an example of each one.
  3. Broad and short light are two classic portrait styles. What makes them similar and what makes them different? Take and include a photo of each one in your response.

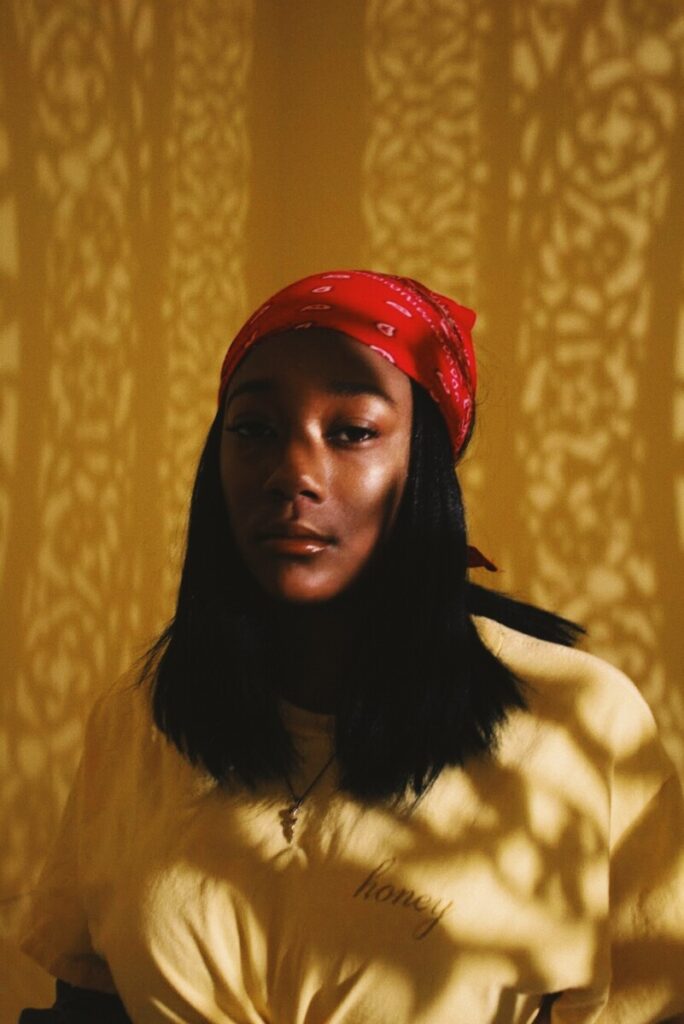
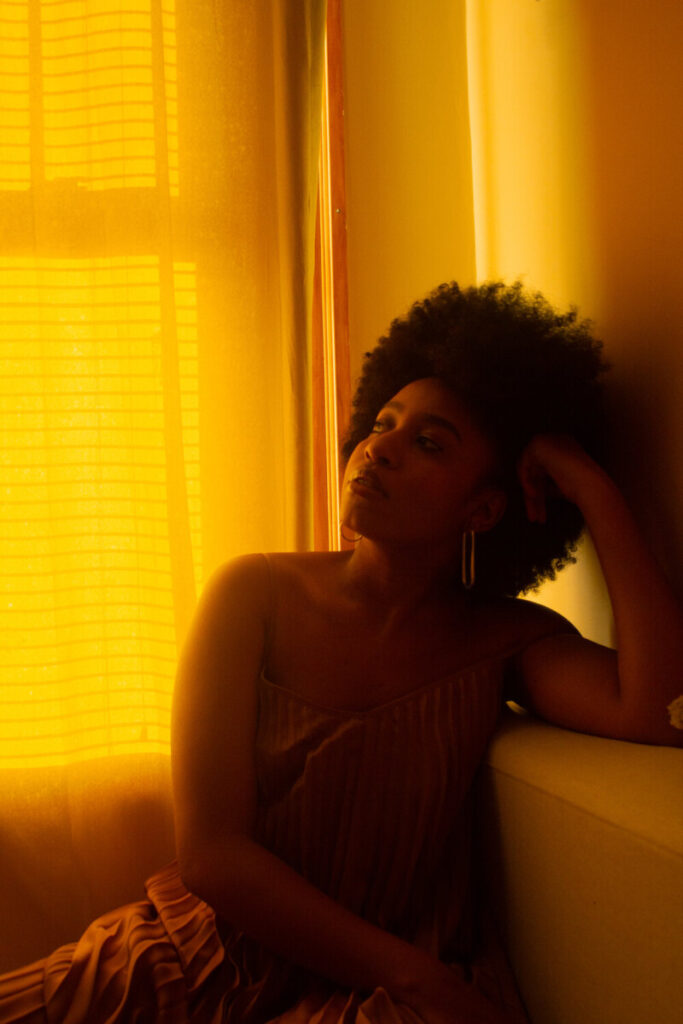
4. Compare and contrast these two portraits taken by Kris Nivaeh. Use at least 4 vocabulary terms from the class for full credit.

Lab: Week 14 – Local Corrections

Select one of the photos that you will include in your final project that needs some local as well as globl corrections.

First make the global corrections.

Then identify what is the most important thing in your photo. Consider how to best direct our attention there.

Then using the adjustment brush and or the graduated filter, make the needed local corrections.

Put a before and after version of your file with local corrections into a gallery block in a post on OpenLab. Include a list of the global and then local corrections that you made to the file.

Category: Lab: Week 14 – Local Corrections

Lab: Week 14 – Review Global Corrections

Pick any photo that you will be including in your final project presentation.

Please consult Week 7’s topic page on Global corrections for more detail.

Make global corrections:

  1. Crop and adjust the geometry
  2. Adjust the white balance if necessary under the color tab
  3. Adjust the exposure using the histogram under the light tab
  4. Under effects, adjust the clarity.
  5. Under color, adjust vibrance.

Put the before and after versions of your photo in a gallery block into a post on OpenLab. Include a list of the adjustments you made to the photo.

Week 14 – Digital Darkroom: Local Corrections

Needed for this class

  • Lightroom
  • final project files

Review Global corrections

Global corrections adjust the entire file. In Lightroom classic, this includes everything in the basic panel: White balance, Tone and Presence. In the Lightroom/Photoshop App, it includes the controls under Light, Color and Effects.

Local corrections

After you make global corrections, sometimes you will want to make corrections to part of your image. Generally, the brightest part of the image commands the most attention. Sometimes that is not where you want your viewer to look first so shifting the exposure of parts of your image can create the image you want.

Selective Edits is a premium feature. You should have access to it if you have an account.

The two main tools for local adjustments are the adjustment brush and the graduated filter.

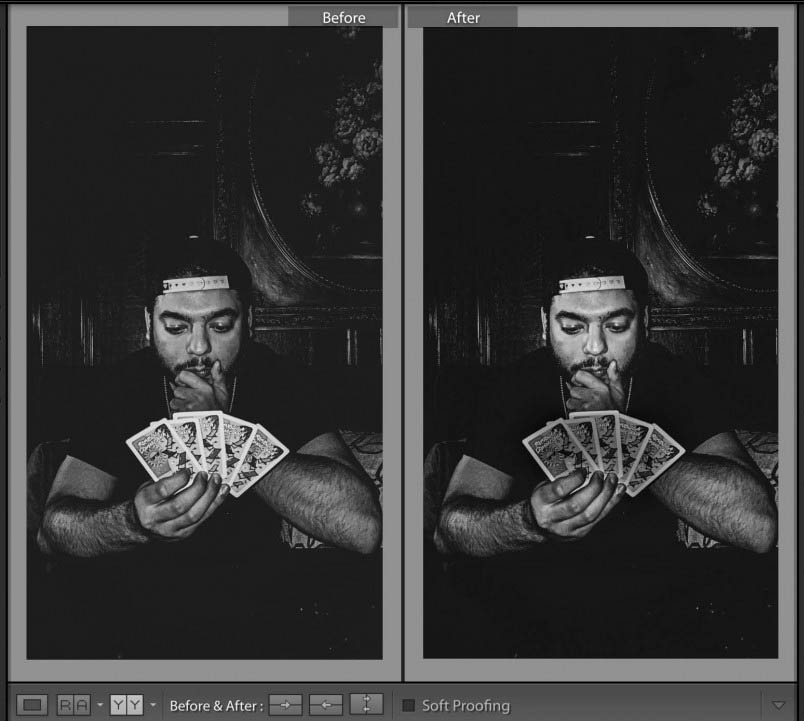
The important thing in this photo by Bryan Rodriguez is the face of the card player. However the cards are brighter and demanded too much attention. Using the adjustment brush, I darkened the cards. Creating a second adjustment, I lightened the face of the card player a little more. The goal was to bring more attention to the person’s face and less to the overly bright cards.

Lab exercises

Review Global Corrections

Local Corrections

Homework

Final Project

Due next week, December 15th:

3 albums each of a minimum of 30 photos

1 album of the 10 best photos of the 90 total, adjusted in Lightroom

a 3-5 min presentation of the final project – projected from the album on Flickr.

Presentation Guidelines

  1. Start by introducing yourself and your project. One big picture sentence such as, ” I photographed variations on the theme of windows with most of the photos taken in downtown Brooklyn.
  2. If you are showing 10 images, you have about 30 seconds to describe each photo. Tell us what your intention was, what interested you about the photo we are looking at, and give us information we may need to know to understand the photo. Tell us what makes it visually interesting ie the use of shallow depth of field or some other feature.
  3. Your presentation will improve if you practice.
  4. Do not tell us about what you did to the photo in Lightroom.
« Older posts

© 2024 Photography I

Theme by Anders NorenUp ↑