Robin Michals | COMD 1340 Photography 1

Author: rmichals (Page 5 of 8)

Week 6 – Digital Darkroom – Global Corrections

Terms

Aspect Ratio-the proportion of the width of the image to the height of a 2D image

Clipping-the intensity of the light falls outside of what can be recorded by the camera and there is a loss of detail.

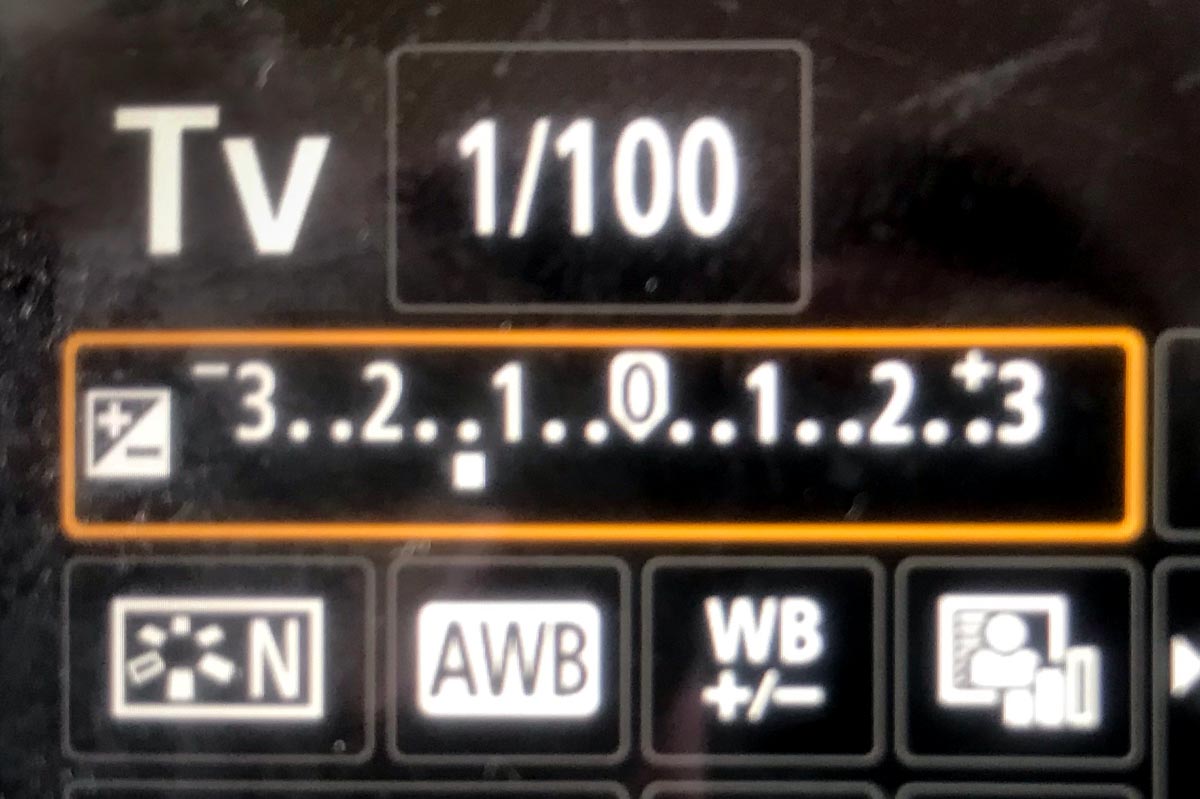
Exif Data-information stored by the camera in the file.

Gamut-range of colors

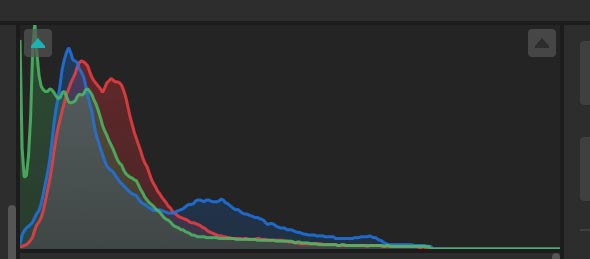
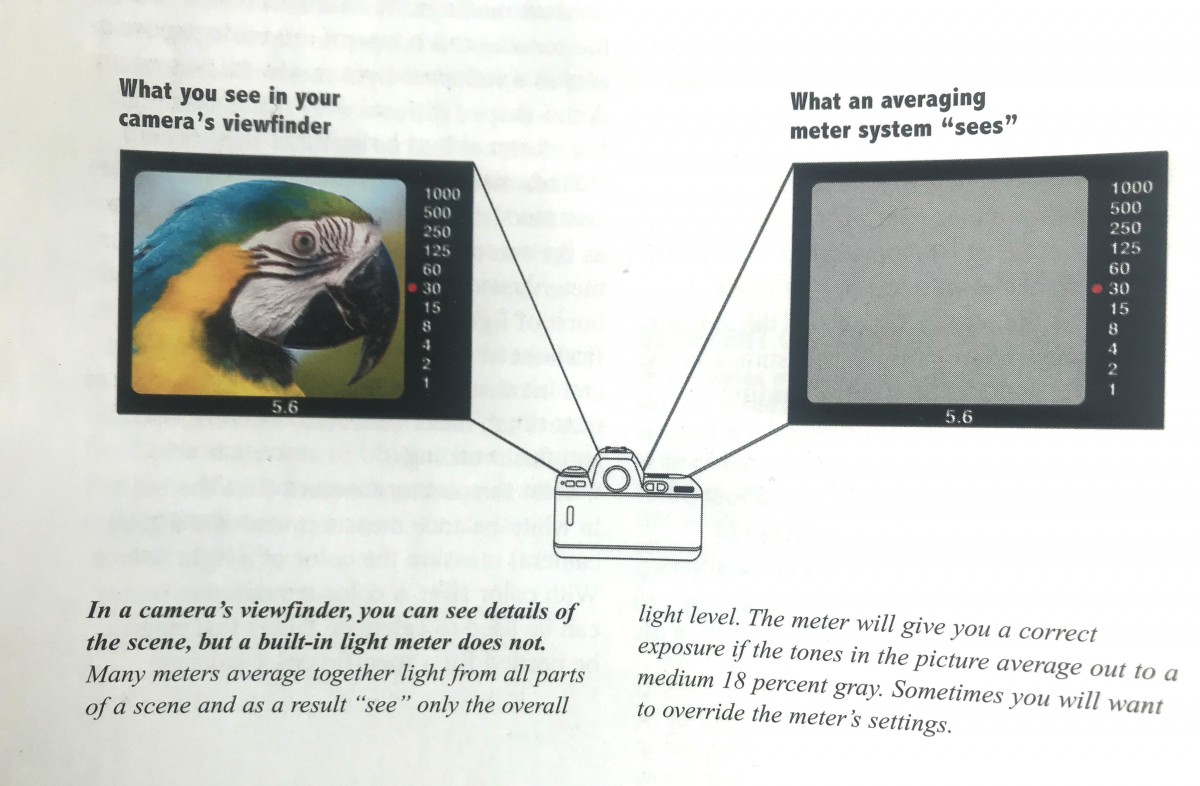
Histogram- a graphic representation of the tones in an image. A spike of data on the left side indicates underexposure, on the right overexposure.

Non-destructive Editing-adjust the image without overwriting the original image data. Instructions are written to a sidecar file that tells the software how to interpret the image.

White Balance-the setting that adjusts for the color temperature of the light and that will make a white object appear white or a gray object a neutral value

Global Corrections

Global corrections adjust the entire file. In the Lightroom CC, it includes the controls under Light, Color and Effects. In Lightroom classic, this includes everything in the basic panel: White balance, Tone and Presence.

Using the Histogram

The histogram is a graphic representation of the tones in the photograph. It is a guide to exposure decisions. Most images look best when there is a full range of tones from black to white in the image. But there are no iron clad rules.

To access the histogram in Lightroom, from the keyboard select: Command 0

Or get it from the three dots on the right menu bar.

From the top of the histogram, there is a triangular button on both the left and right. Toggle it to turn on/off show clipping of the shadows on the left and the highlights on the right.

To maximize the the tonal range, adjust a photo to have some tones that are totally black and totally white but only a few so that you don’t lose detail in either the shadows or the highlights.

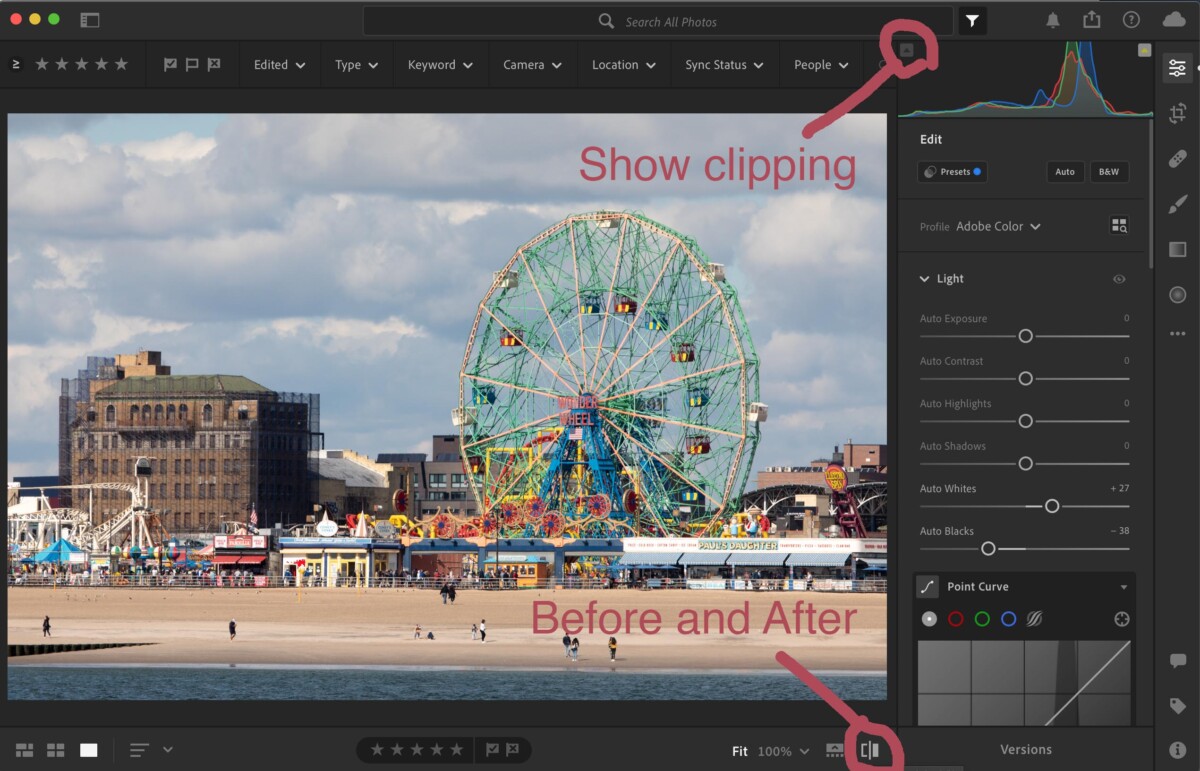
Another way to toggle between before and after besides the button at the bottom of the interface is the backslash key.

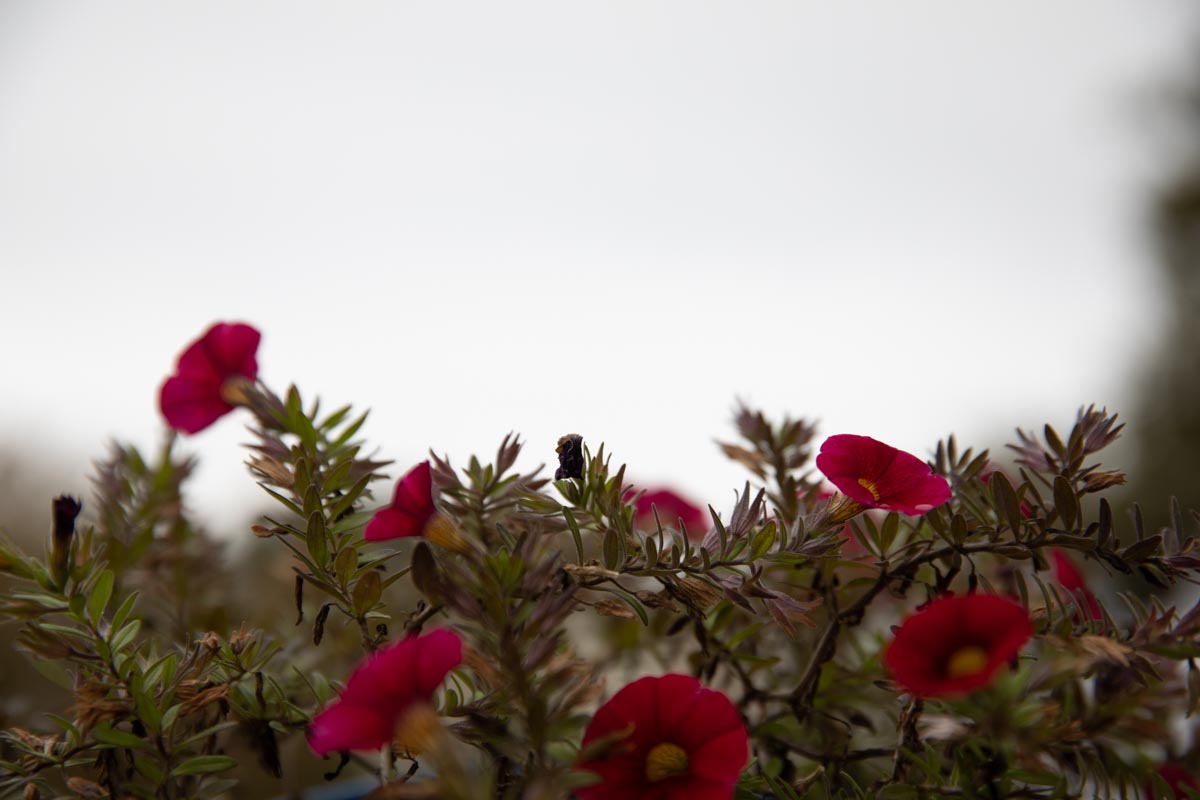
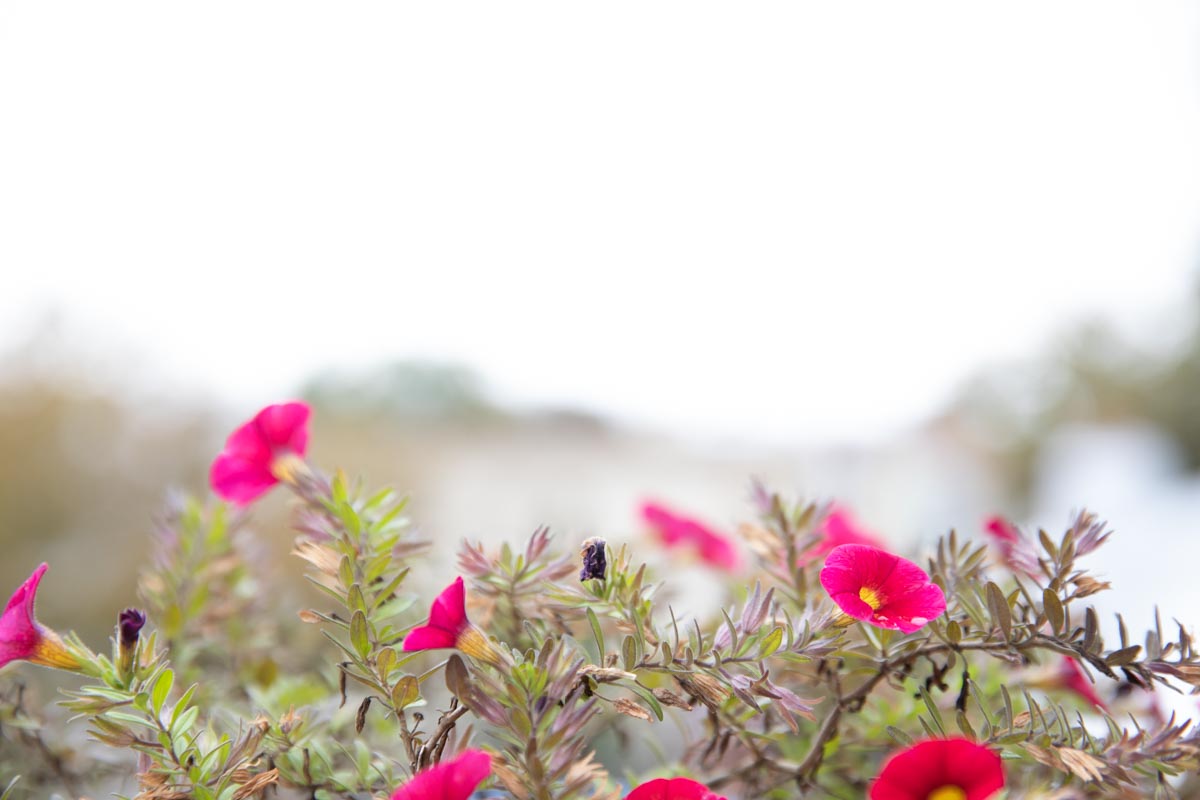
Looking at the histogram, we can see that there is not a true black or white. To raise the contrast of the image and use the full tonal range, use the following adjustments:

  • Select show clipping on the top left of the histogram. Adjust the blacks slider to the left until you see bright blue flecks on your image.
  • Select show clipping on the top right of the histogram. Adjust the whites slider to the right until you see bright red flecks on your image.

Most images improve with:

  • shadows slider to +50 add detail to the dark areas
  • the highlights slider brought to the left to bring detail into the highlights.

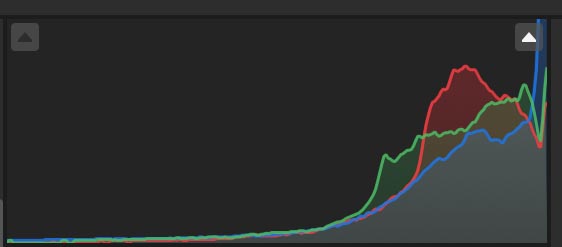
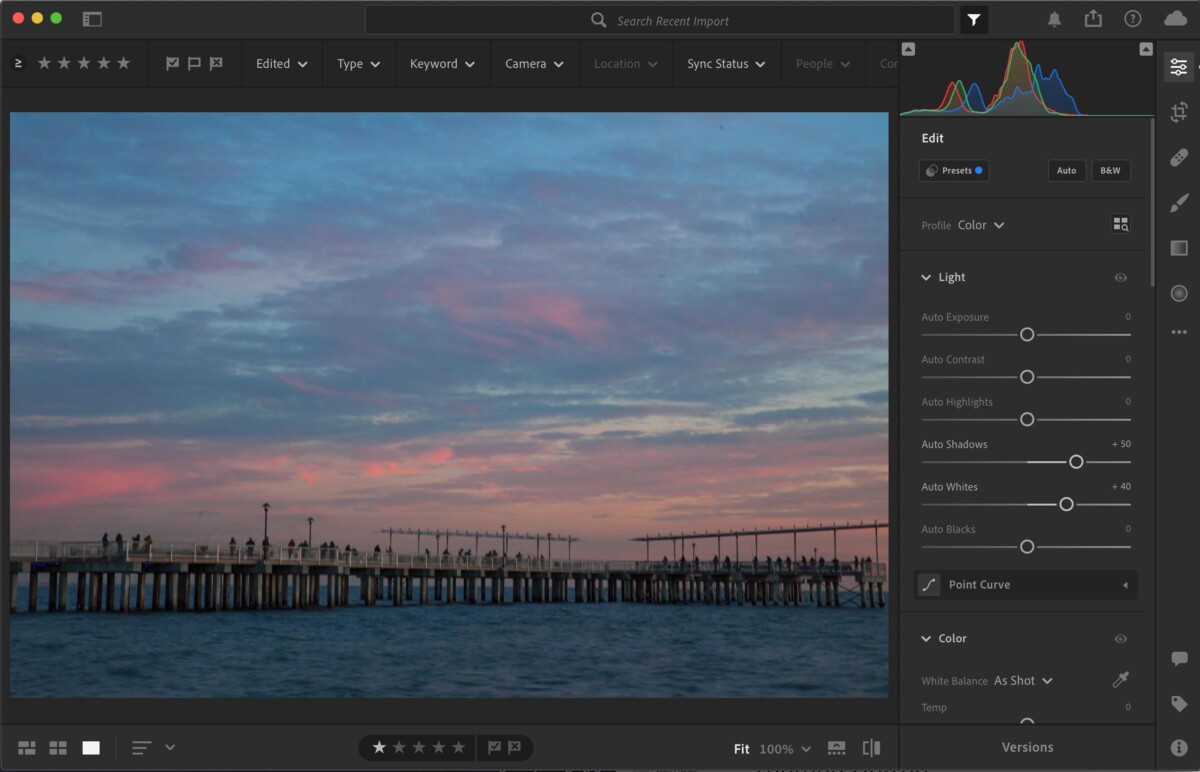
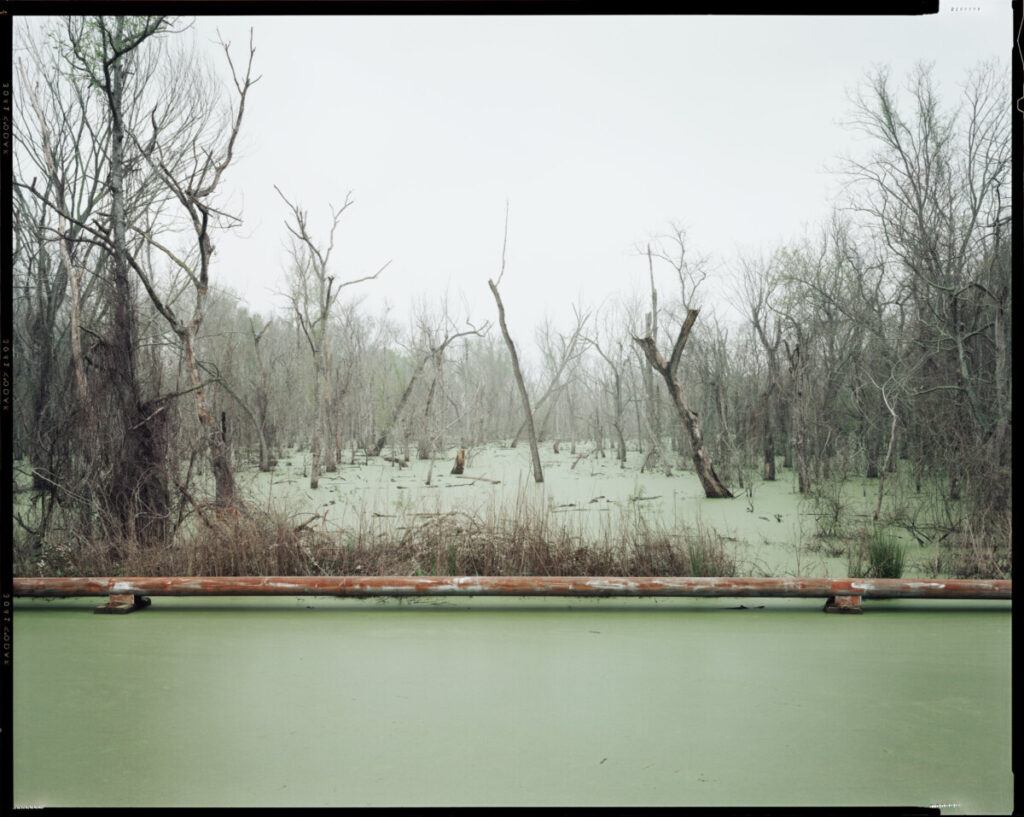
In this photo of the pier in Coney Island, the histogram shows that is underexposed. But we also know that it is an evening scene and that there is nothing in the photo that should be bright white.

Lightroom Workflow:

  1. Optics: enable lens correction. If there is architecture or a strong horizon line, geometry>upright>auto
  2. Crop.
  3. Light
    a. Exposure slider-use to adjust the overall tonality
    b. Set black point using show clipping
    c. Set white point using show clipping
    d. Use shadows slider to brighten mid tones.
  4. Color or white Balance
  5. Effects – Adjust clarity (mid tone contrast)
  6. App: color – Adjust vibrance and or saturation
  7. Detail panel – Sharpen-amount at least 50

Lightroom CC Resource

Lightroom Classic Resource

A few tips for Lightroom Mobile:

  1. To access the histogram, tap on the image with two fingers. If you can’t really see the histogram background, brighten the display.
  2. To see the image before your corrections, press on the image.

Lab Exercises

Global Corrections

Homework

Midterm Project

Lab: Week 6 – Global Corrections

Make global adjustments on each example:

Photo credits from left to right: Marcel Roman, Peter Carnival, Alan Castillo Perez, Joel Barbecho

Working with your partner, select your partner’s single best photo. Tone it in Lightroom. Your partner will also adjust the same photo. Compare your results. Now, reverse it. Your partner picks their favorite of your photos. And you both adjust it.

For full credit for today’s lab, put your corrected versions of 6 final photos in an album on Flickr: the first four photos are from the exercise – everyone is correcting the same ones, the last two are unique to you and your partner.

Midterm Project

Portrait of a place-Select a park or playground near you. You will take photographs in the same location two weeks in a row. Photograph your location at two different times of day or in two types of weather to capture the place and the people who use it in a series of 8 final photos.

Complete project and presentation due October 11. 10 pts.

  1. 40 photos in an album labeled Shoot 1 on Flickr due October 4 at 12 noon.

Portrait of a Place-Your shots should cover a wide range of approaches: long shots to close ups, people including at least one person in motion, animals and plants. Each photo should use light and composition in compelling ways. Show the full range of the techniques that we have tried in class.

2. Second set of 40 Photos in an album labeled Shoot 2 on Flickr due October 11 at 12 noon.

3. 8 final photos adjusted in Lightroom in an album labeled Midterm on Flickr due October 11 at 12 noon.

4. A brief presentation- 3 to 5 minutes – to the class of your project on Oct 11.

Lab: Week 5 – Exposure and Meter Challenges

Look for and photograph in places that are both darker and lighter and use exposure compensation to get the look you want.

  • Take at least 10 shots that are lowkey – most of the tones are dark
  • Take at least 10 shots that are highkey – most of the tones are light

Backlight

Backlight is one of the most common challenges for the camera meter.

Take at least 10 photographs of your classmates or other subjects against the sky.

• Use negative exposure compensation to darken the subject to a silhouette.

• Use positive exposure compensation to brighten the subject and over expose the background.

Landscape/cityscape photos

The sky is much brighter than the ground. Take at least 10 photos showing a range of location shots of DUMBO, the park, the skyline with and without the sky. When your composition includes the sky use positive exposure compensation to take a second shot in which the ground and the buildings are well exposed ie brighter and the sky itself is overexposed.

Post your 5 best lowkey hots, 5 best highkey shots, 5 backlit shots and 5 cityscape photos to an album on Flickr.

Send your best of each to the class group.

Week 5 – Exposure

Bees

Photo credits: Top, left to right: Tina Gunasekera, Julian Georgi, Jabez Brisueno

Bottom: Fawziah Akhter, Brianna Brand, Alan Castillo

Light Quality

Light is either direct or diffused.

Direct light: the light strikes the subject from one angle and creates sharp shadows. Sunlight is an example of direct light.

Graduation, New York. 1949
Photographer: Roy DeCarava

Diffused Light: the light hits the subject from many angles and creates soft shadows. The light is diffused on an overcast day or in the shade.

Mother and daughter pausing in the ruins, which was still their home. Claremont Parkway. 1976-82.
Photographer: Mel Rosenthal

Photo credits: Left-Joel Barbeco, right-Alan Castillo

Measuring the Amount of Light

Exposure is the amount of light that comes into the camera to create the photograph.

Exposure is made up of three components:

  1. ISO-Sensitivity to light.
  2. Shutter Speed-the length of time that the camera’s shutter is open during the exposure.
  3. Aperture-how wide the cameras lens opens to allow the light to come in.

All three are measured in stops. Each full stop of light represents that the amount of light has doubled or reduced by 1/2.

How your Camera Meter Works

Acronym: TTL – Through the Lens

The meter in your camera is a reflected-light meter.

A reflected light meter averages the tones in the scene and selects the aperture and shutter speed values that will make the whole scene medium gray.

Watch from :45 to 1:34 for an explanation of how your camera meter works.

What your camera meter "sees"
What your camera meter “sees” From Photography, 10th Edition, Stone, London, Upton, P. 70

Challenges

There are certain predictable situations that will fool your meter.

  1. Backlight – a common example is a person against a window or against the sky. Add exposure to get the right exposure for the main subject and allow the background to be overexposed.

2. Landscapes with sky. The sky is brighter than the ground and to get a good exposure of the land portion of your photo, often you need to over expose the sky.

3. Snow

How to control exposure

With a camera: Use Exposure Compensation set to plus to increase the light and set to minus to decrease the light.

Exposure compensation scale
Exposure compensation scale set here to minus 1.3

Exposure Compensation-a way to force the camera to make an exposure either lighter or darker than the meter reading. Good for backlight or extremes of light and dark.

With a cameraphone: Touch the area where the main subject is and then drag the little sun icon up or down to increase or decrease the overall exposure.

Using Exposure for Creative Effect

Sometimes, you don’t want the tones in your image to average out to a medium gray. You want to tones to be low key-mostly dark or high key-mostly light.

Red Jackson at a window
Red Jackson. 1948.
Photographer: Gordon Parks
Eleanor, Chicago. 1947.
Photographer: Harry Callahan

Lab Exercises

Exposure and Meter Challenges

Homework Due Next Class

Midterm Project

Review for Quiz 1: Composition, shutter Speed, Motion Capture, Aperture, Depth of Field, Perspective, Exposure, How the Meter works, Exposure Challenges

Upcoming Schedule

October 4 – Quiz 1, Lightroom, Midterm Project Support

Oct 11 – Midterm Project Presentations

Oct 18 – Outdoor portraits-Brooklyn Bridge Park

« Older posts Newer posts »