Contents
Guest Speaker
Terms
Aspect Ratio-the proportion of the width of the image to the height of a 2D image
Clipping-the intensity of the light falls outside of what can be recorded by the camera and there is a loss of detail.
Color Profile-the data for a digital device, such as a printer or monitor, which describes its gamut, or range of colors. Used to match the gamut from one device to another.
Exif Data-information stored by the camera in the file.
Gamut-range of colors
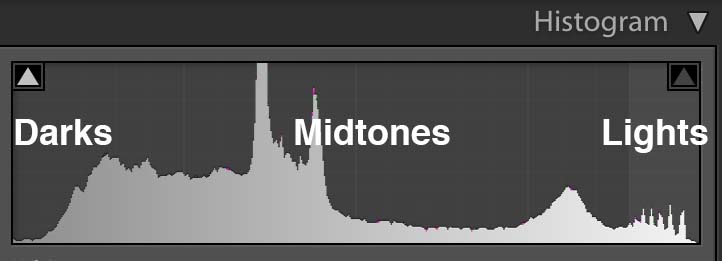
Histogram- a graphic representation of the tones in an image. A spike of data on the left side indicates underexposure, on the right overexposure.
Neutral Value-RGB values are equal or gray
Non-destructive Editing-adjust the image without overwriting the original image data. Instructions are written to a sidecar file that tells the software how to interpret the image.
White Balance-the setting that adjusts for the color temperature of the light and that will make a white object appear white or a gray object a neutral value
Global Corrections
Global corrections adjust the entire file. In the Lightroom CC, it includes the controls under Light, Color and Effects. In Lightroom classic, this includes everything in the basic panel: White balance, Tone and Presence.
Using the Histogram
The histogram is a graphic representation of the tones in the photograph. It is a guide to exposure decisions. Most images look best when there is a full range of tones from black to white in the image. But there are no iron clad rules.

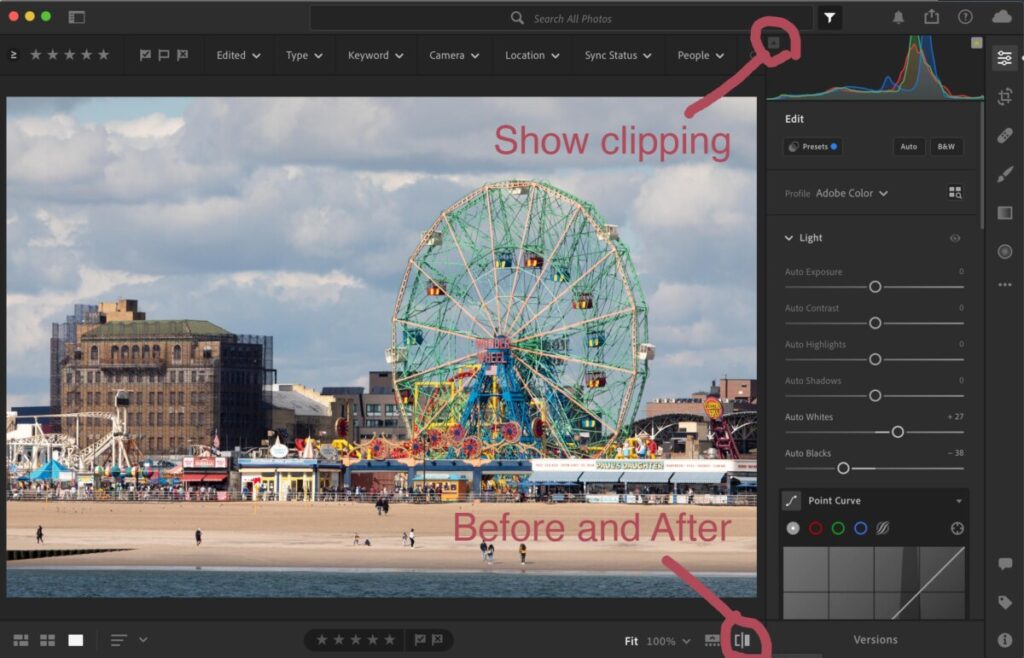
To access the histogram in Lightroom, from the keyboard select: Command 0
Or get it from the three dots on the right menu bar.
From the top of the histogram, there is a triangular button. Toggle it to turn on/off show clipping.
To maximize the the tonal range, adjust a photo to have some tones that are totally black and totally white but only a few so that you don’t lose detail in either the shadows or the highlights.
Looking at the histogram, we can see that there is not a true black or white. To raise the contrast of the image and use the full tonal range, use the following adjustments:
- Select show clipping on the top left of the histogram. Adjust the blacks slider to the left until you see bright blue flecks on your image.
- Select show clipping on the top right of the histogram. Adjust the whites slider to the right until you see bright red flecks on your image.
Most images improve with:
- shadows slider to +50 add detail to the dark areas
- the highlights slider brought to the left to bring detail into the highlights.
In this photo of the pier in Coney Island, the histogram shows that is underexposed. But we also know that it is an evening scene and that there is nothing in the photo that should be bright white.
Lightroom Workflow:
- Optics: enable lens correction. If there is architecture or a strong horizon line, geometry>upright>auto
- Crop.
- Color. Adjust the white balance if necessary.
- Light
a. Exposure slider-use to adjust the overall tonality
b. Set black point using show clipping
c. Set white point using show clipping
d. Use shadows slider to brighten mid tones. - Effects – Adjust clarity (mid tone contrast)
- App: color – Adjust vibrance and or saturation
- Detail panel – Sharpen-amount at least 50
Lightroom CC Resource
Lightroom Classic Resource
A few tips for Lightroom Mobile:
- To access the histogram, tap on the image with two fingers. If you can’t really see the histogram background, brighten the display.
- To see the image before your corrections, press on the image.


Leave a Reply