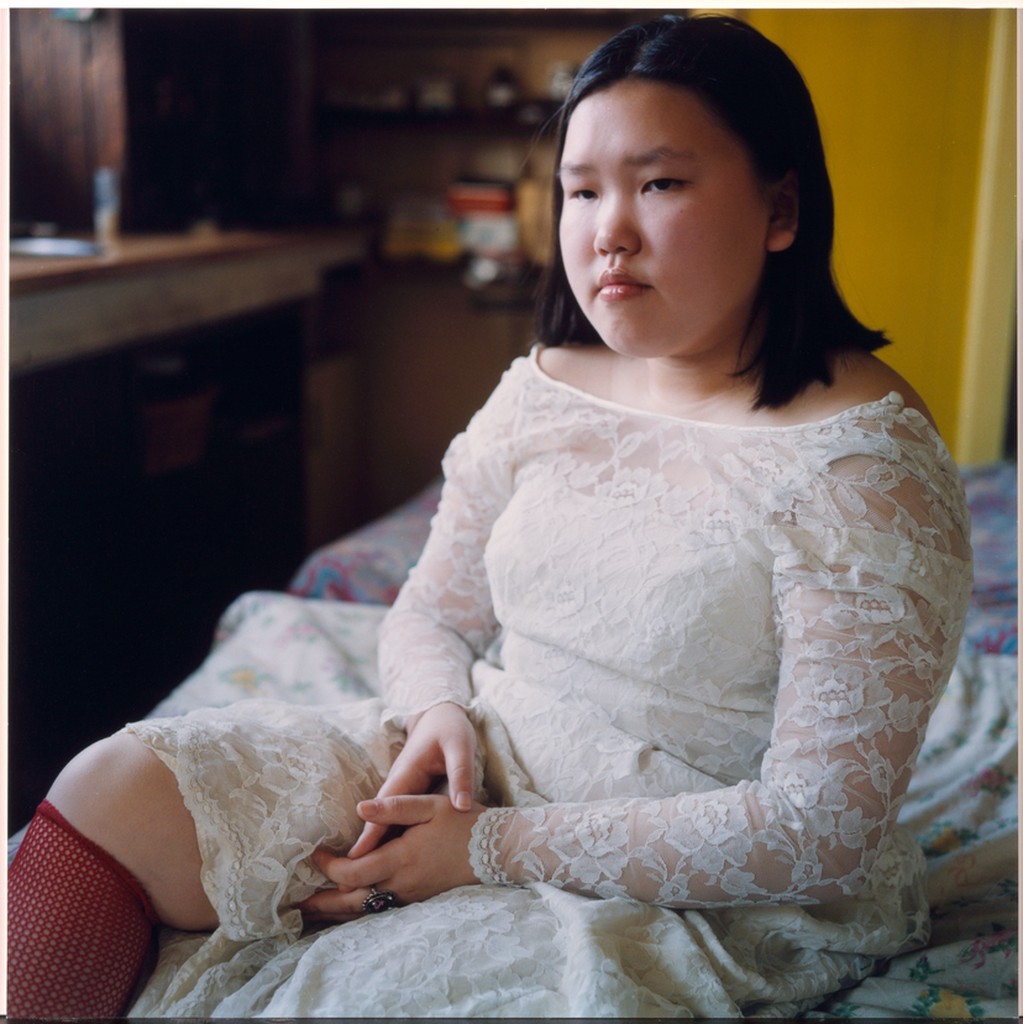
There are three basic positions for someone’s head and face in a portrait.
Front view
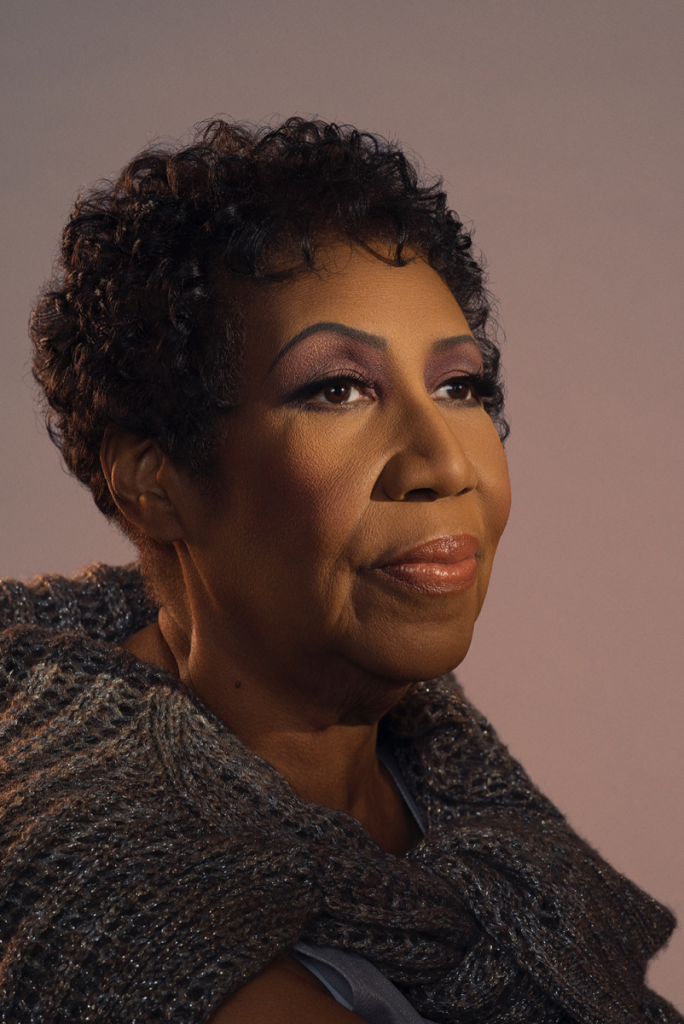
3/4 view
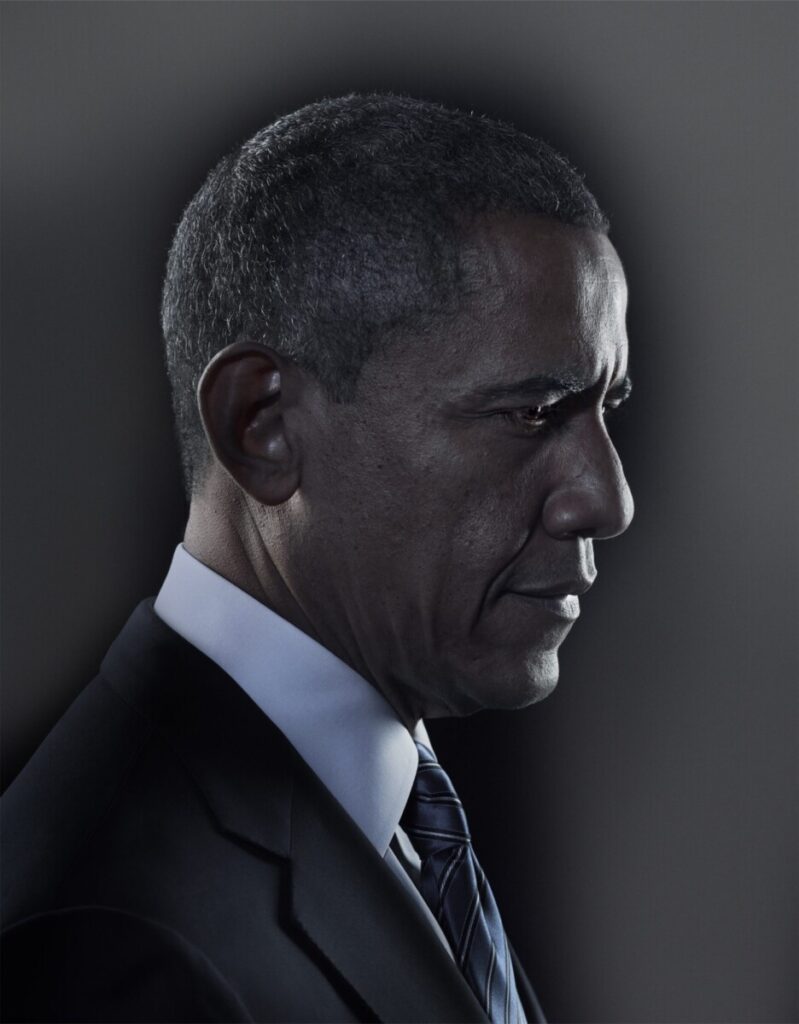
Profile
Front View By: Celeste Sloman
Three quarter view By: Celeste Sloman
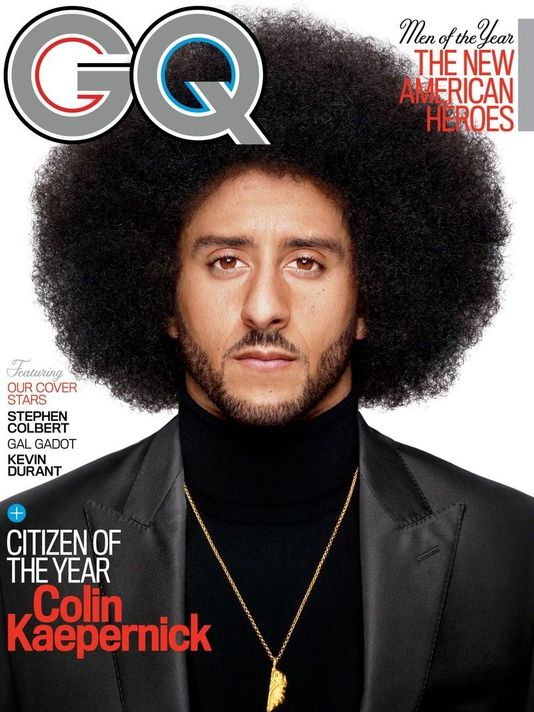
Profile By: Nadav Kandar
Expression
For family photos a smile is a must but not so for a portrait. It is however important that your subject look comfortable. It is your job as the photographer to talk with your subject and make them feel comfortable.
Focus
When shooting a portrait, the subject’s eyes must be in focus. Full stop. period.
Generally, portraits are shot with shallow depth of field to separate the subject from the background. Be careful to have enough depth of field so that the subject’s face from what is closest to the camera to what is farthest is in focus.
By: Phillip-Lorca diCorcia
By: Helene van Meene
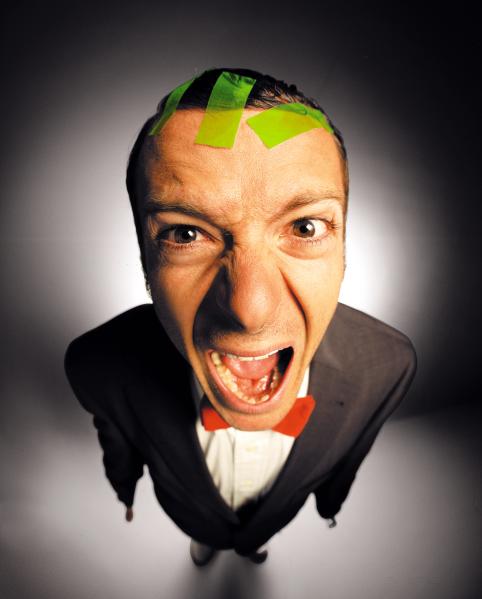
Wide Angle Distortion
Wide Angle Distortion is created when using a wide-angle lens AND the camera is very close to the subject. The object close to the lens appears abnormally large relative to more distant objects, and distant objects appear abnormally small and hence more distant – distances are extended.
Focal length and proximity to the camera affect how a person’s face looks in a photograph. A wide focal length and proximity between the subject and the camera create wide angle distortion and will distort a person’s features.
Photographer: Chip Simons
Think about selfie sticks. What are they for but to get the camera away from your face? This makes the photograph look more complimentary to the subject. This is really important with a cameraphone because it has a wide angle lens. The center of the lens and the sensor cannot be very far apart given the thin design of cellphones.
A model if possible or you can take self-portraits
Portrait Lighting Styles
There are a 5 basic lighting styles for portrait photography. Each style is defined by how light falls on the face. The examples below were all shot with lights in a studio but you can replicate these patterns with window light.
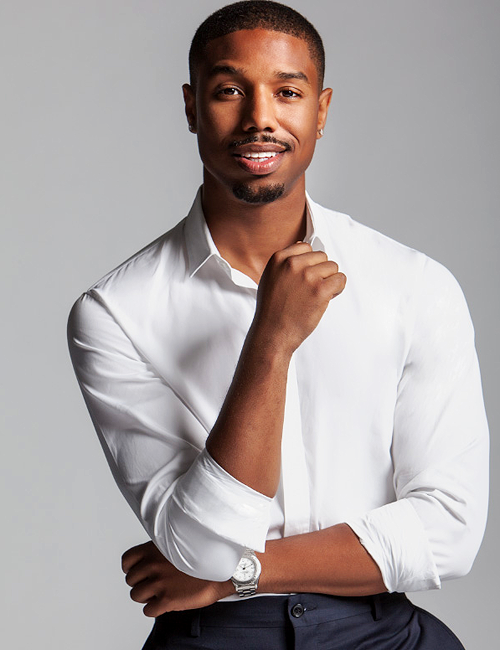
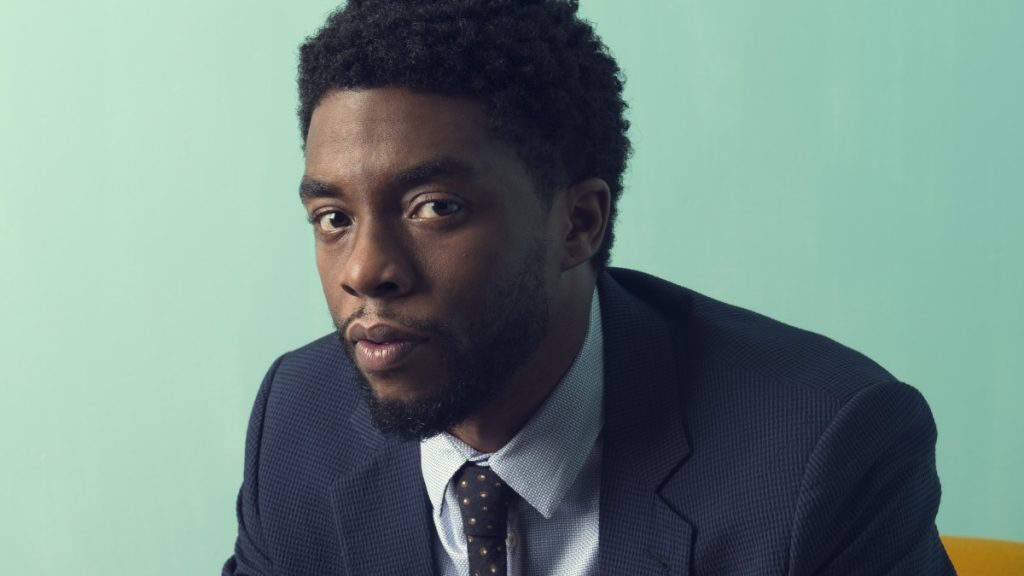
Rembrandt Light – the model is face forward, main light is at 45 degrees and casts a light on the opposite side of the face to form a triangle on the cheek.
Michael B. Jordan. Photographer: Peggy Sirota
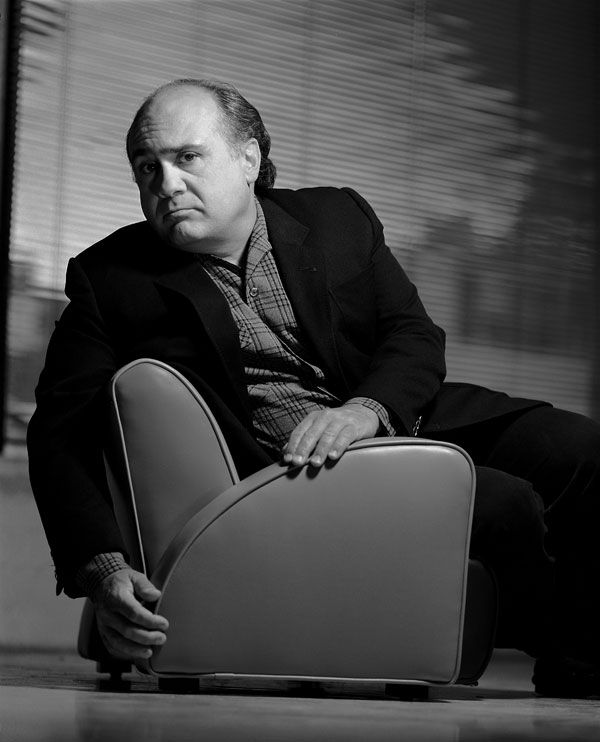
2. Broad Light-model’s face in 3/4 view-light falls on the side of the face with the visible ear. Good for controlling the reflections on glasses.
Danny Devito. Photographer: Gregory Heisler.
3. Short Light-model’s face is in 3/4 view, the light falls on the side of the face with where the ear is not visible
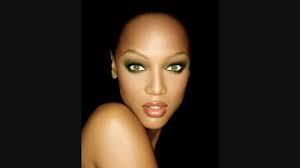
4. Butterfly Light, Clamshell or beauty or glamour light-model is face forward, front light.
Tyra Banks. Photographer: Matthew Jordan Smith
5. Split Light-model is face forward, the main light is at 90 degrees to the camera and falls on one side of the face.
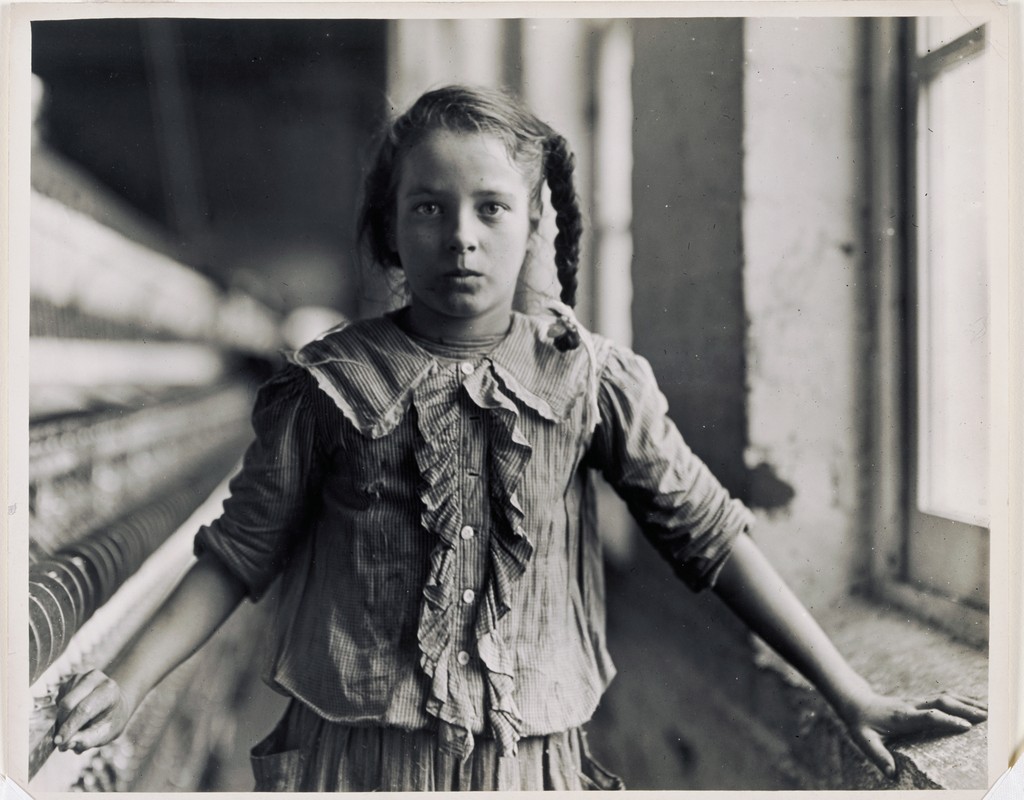
Lewis Wickes Hine (U.S.A., 1874–1940), One of the spinners in Whitnel Cotton Mfg. Co. N.C. December 1908.
When we shoot portraits in the studio, we can move the lights around the model. When shooting a portrait with a window, we have to ask the model to move their position in relation to the window.
This video shows how to use a window to create Rembrandt, split, broad and short light.
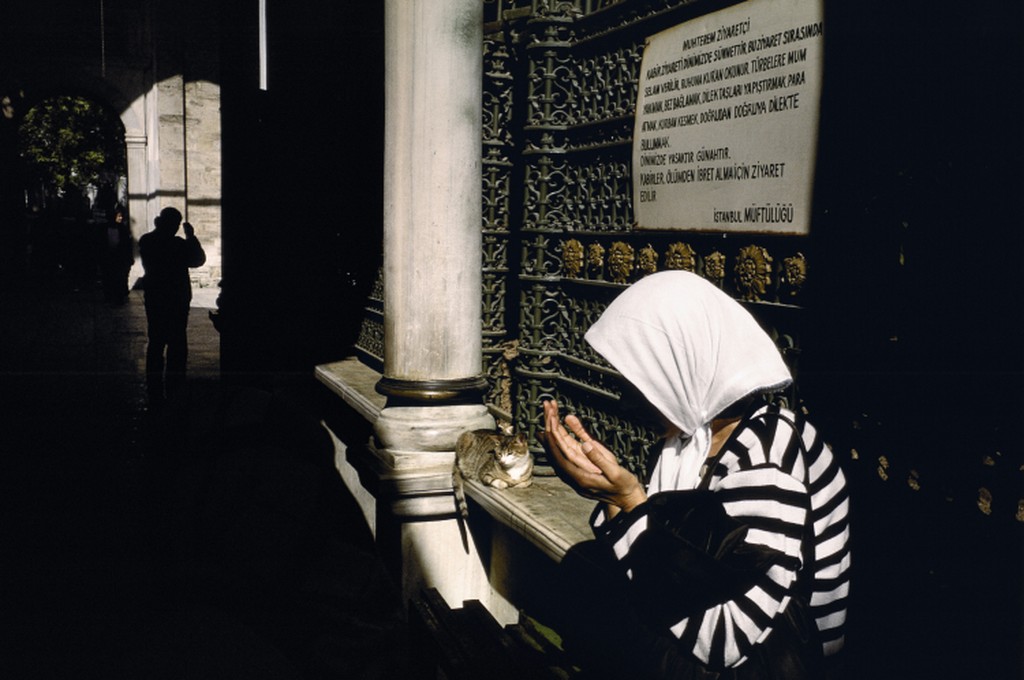
And while not exactly a portrait, window light is terrific for creating silhouettes.
To create a silhouette, have the subject stand close to the window and aim the camera towards the window. Set the exposure for what is outside the window so the subject is very underexposed.
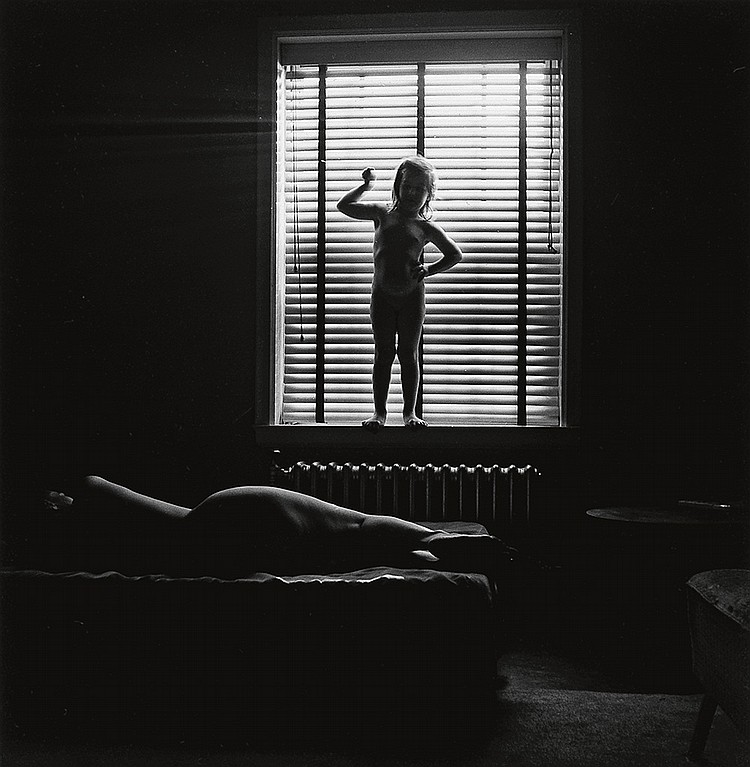
Eleanor and Barbara. Chicago. 1954. Photographer: Harry Callahan.
Lab Exercises
Please complete the following lab exercises, creating a post on Openlab with the category indicated to share your results.
Direct light or hard light – the rays of light are nearly parallel and strike the subject from one direction creating strong hard edged dark shadows with little detail. This type of light is characterized by quick transitions between the light areas and dark areas of the photo Examples: a spotlight, sun on a clear day, or a bare flash
By Jason Peterson
By Angel Ferrara
Alex Webb 2001
Diffused light or soft light– the rays of light are scattered and coming from many directions. It appears even and produces indistinct shadows. Examples: overcast daylight, a light covered with tracing paper or other translucent material.
By Chantal Gomez
By Kimba Alleyne
Directional/Diffused Light. Soft light
This light is a combination of directional and diffused light. The light is partially diffused yet it appears to come from a definite direction and creates shadows. The shadows are less harsh and contain more detail than in direct light. More subtle transition between light and dark areas.
Examples: indirect window light, sunlight on a hazy day, sunlight on a partly cloudy day or light bouncing off a reflective surface,
Robert Maplethorpe
Light Direction
Front lighting: Subject is placed so the light is in front of subject and the shadows fall behind the subject not concealing any details
Spain1992 by Alex Webb
France 2005 by Bruce Gilden
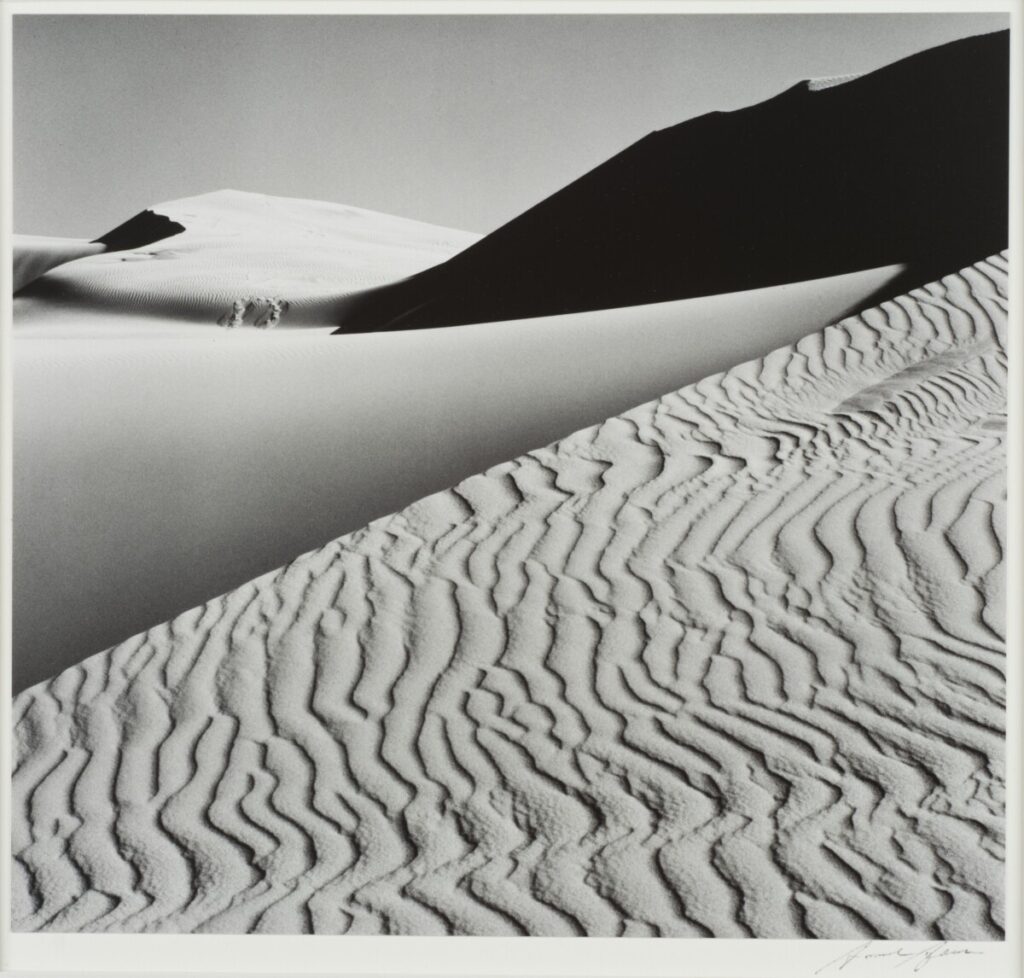
Side lighting: Subject or light is placed so the light hits from the side creating shadows and depth in the image. Direct side lighting will emphasize texture. When shooting with side lighting, watch where the shadows fall. Making small adjustments in position can create more interesting shadows.
Dunes 1963 by Ansel Adams
Back lighting: The light comes from behind the subject. Although this creates dramatic images, if not exposed properly a silhouette will result.
Shutter Speed is the length of time that the sensor is exposed to light to create the photograph. It is measured in seconds or fractions of a second.
The full stops for shutter speed are: 30”, 15”, 8”, 4”, 2”, 1”, . sec, 1/2,1/4., 1/8, 1/15, 1/30, 1/60, 1/125, 1/250, 1/500, 1/1000, 1/2000, 1/4000, 1/8000
When shooting with a cameraphone and the Lightroom Photoshop app, you can set the shutter speed of your cameraphone between 1/10,000 and 1/4 sec.
Doubling the time, doubles the amount of light that reaches the sensor.
A good rule of thumb when shooting with a camera is: Any shutter speeds slower then 1/60 require the use of a tripod. When shooting with a cameraphone, you will need a tripod to shoot at 1/15 or slower.
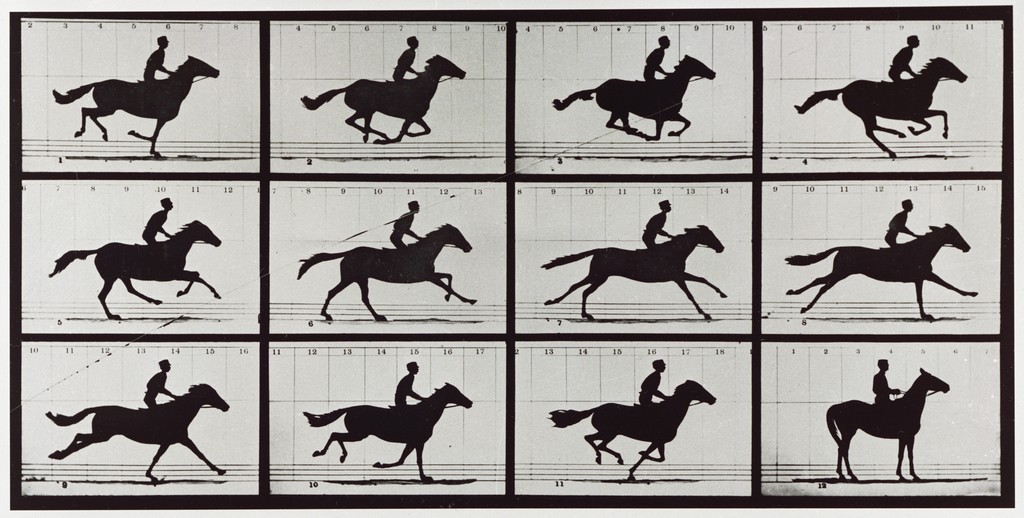
Capturing of Motion
Your choice of shutter speed will change the way motion is captured in the photograph.
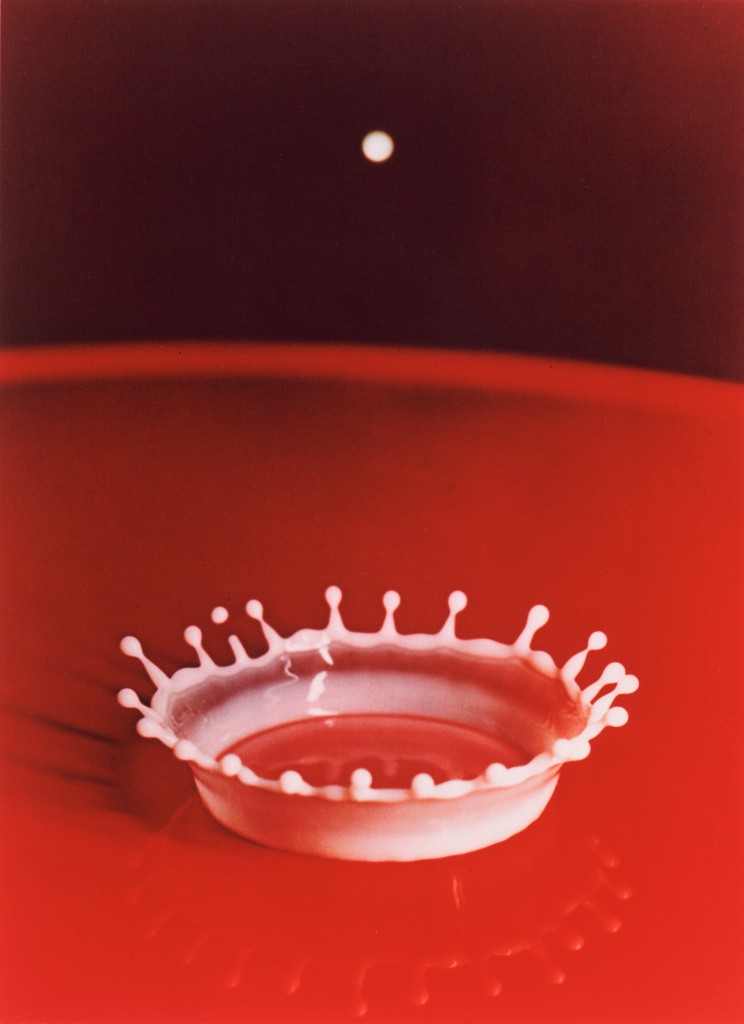
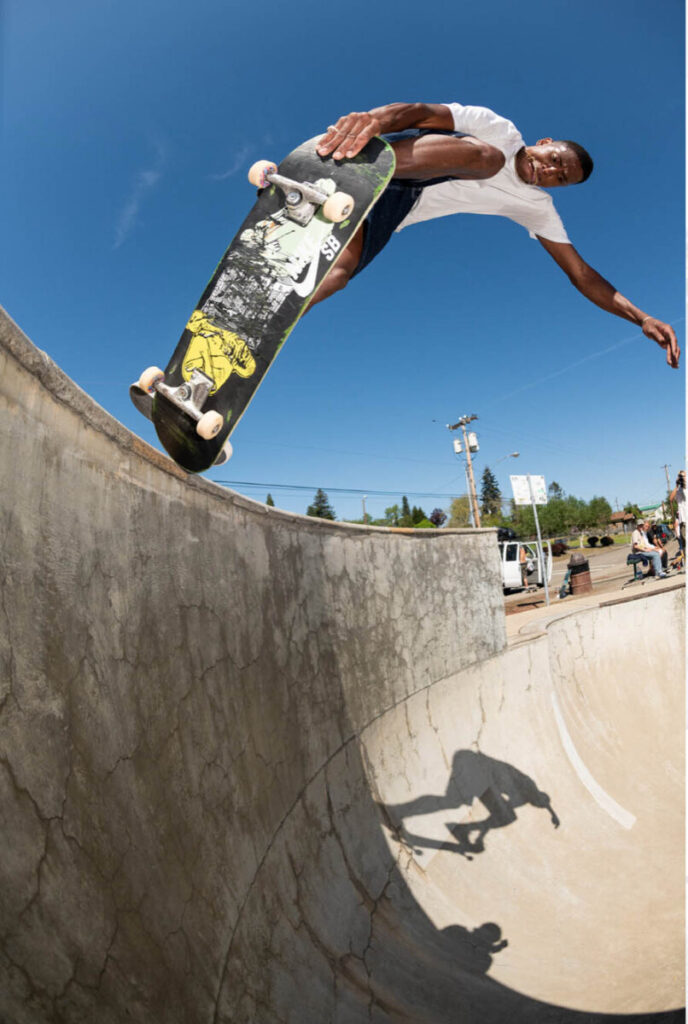
Frozen Motion-Motion is stopped and captured in the frame with a fast shutter speed.
Galloping Horses. Edward Muybridge1878
Milk Drop Coronet, Harold Edgerton1957
The Catch1/10 /82. Walter Looss
Photographer : Joe Brook
Photographer: Joe Brook
How to freeze motion:
Use a shutter speed of 1/ 500, 1/1000 or faster
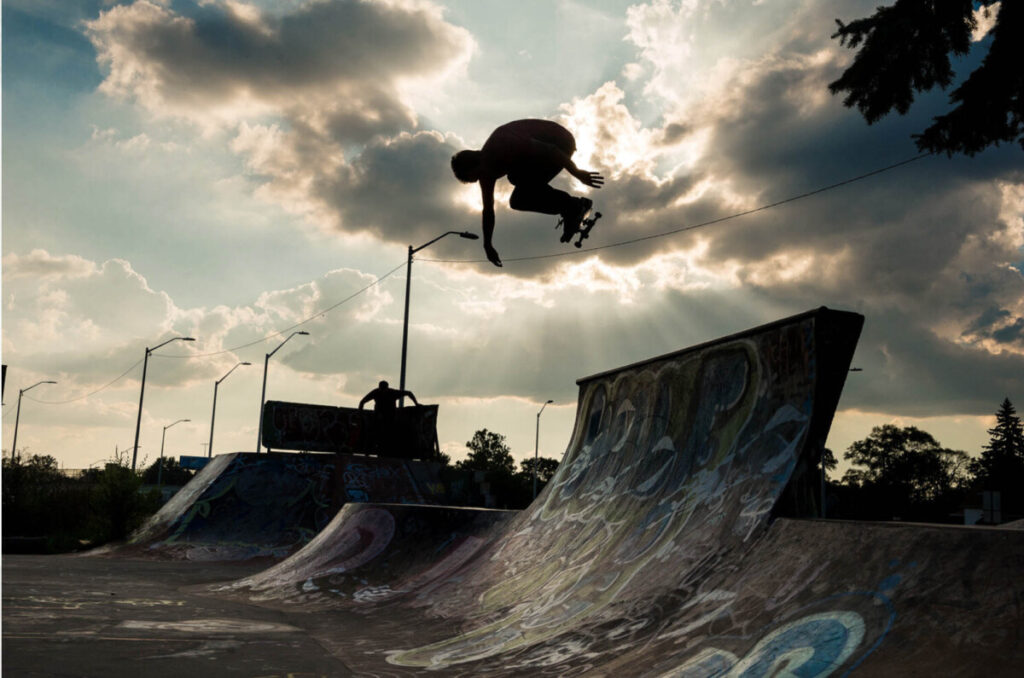
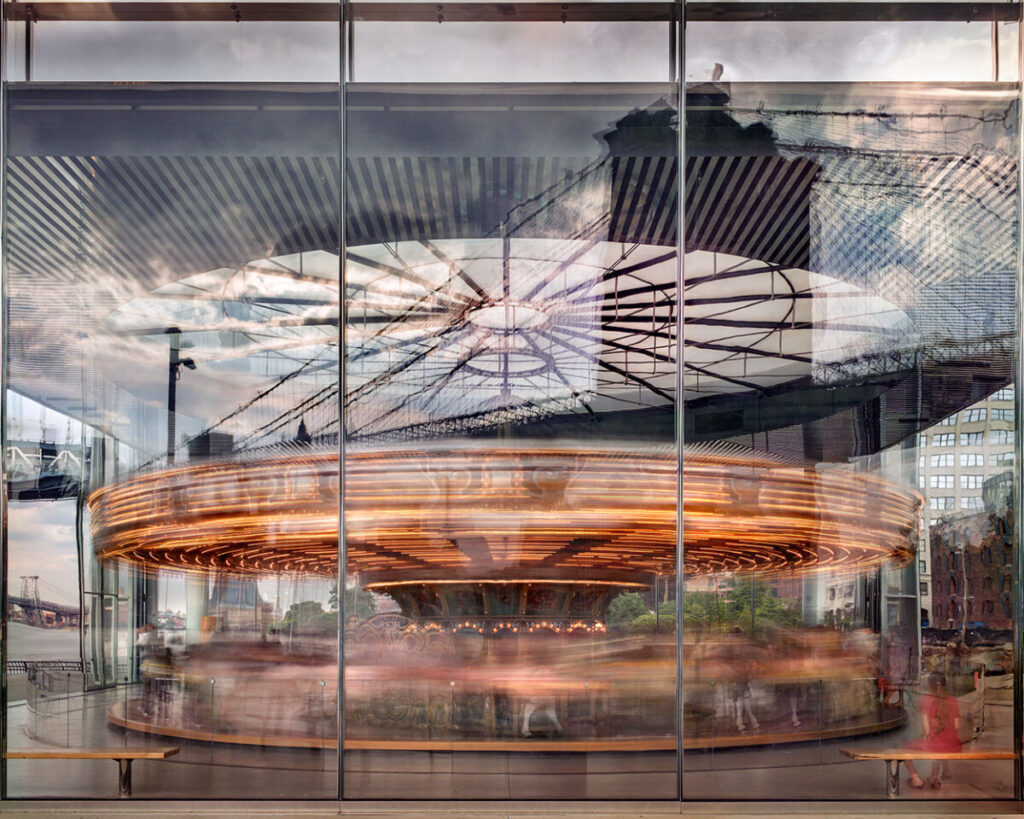
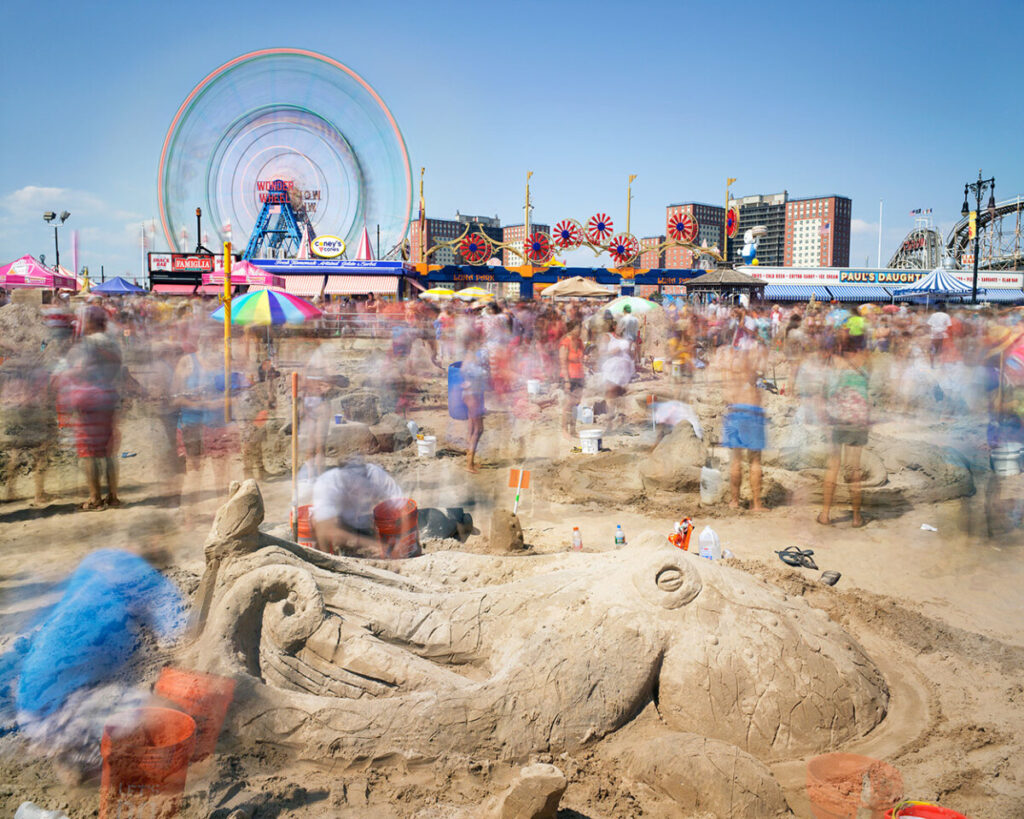
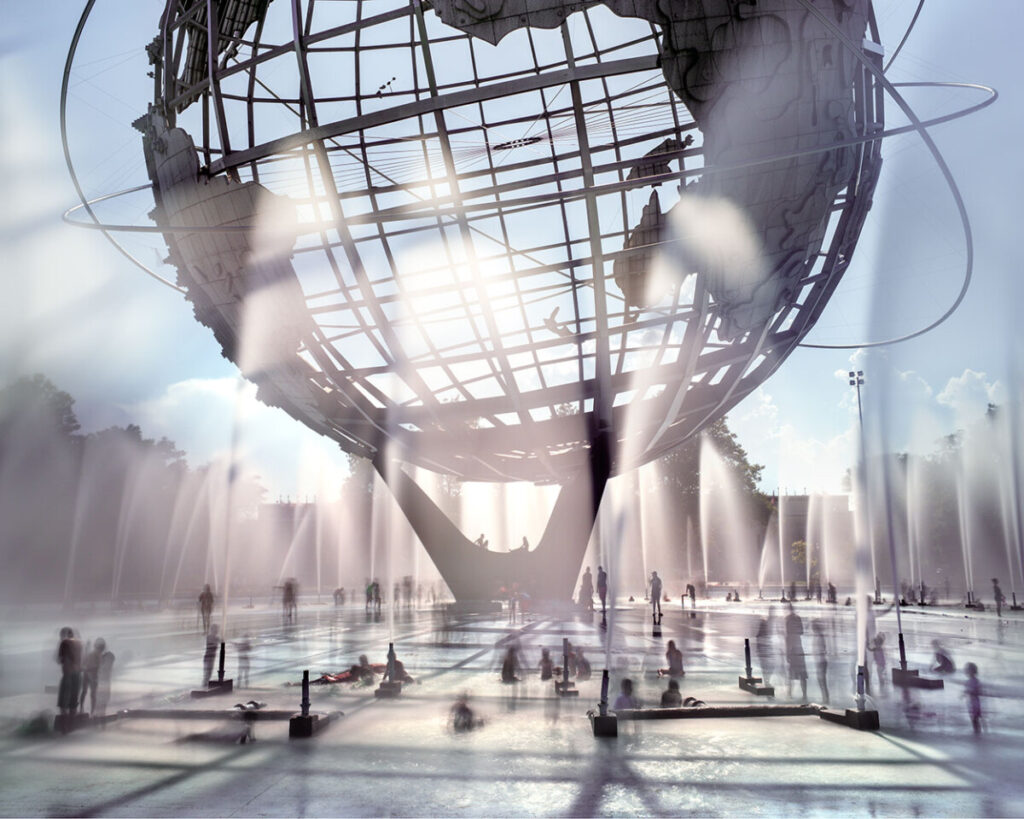
Blurred motion-moving elements blur with a longer shutter speed.
Mathew Pillsbury
Mathew Pillsbury
Mathew Pillsbury
How to blur motion:
Use a slower shutter speed – 1/4 sec to 30″ or even longer
Direction-if the subject moves parallel to the picture plane there is more visible movement than if the subject moves toward or away from the camera.
Focal length-a subject will appear blurrier when photographed with a telephoto lens than when photographed with a wide-angle lens.
Timing
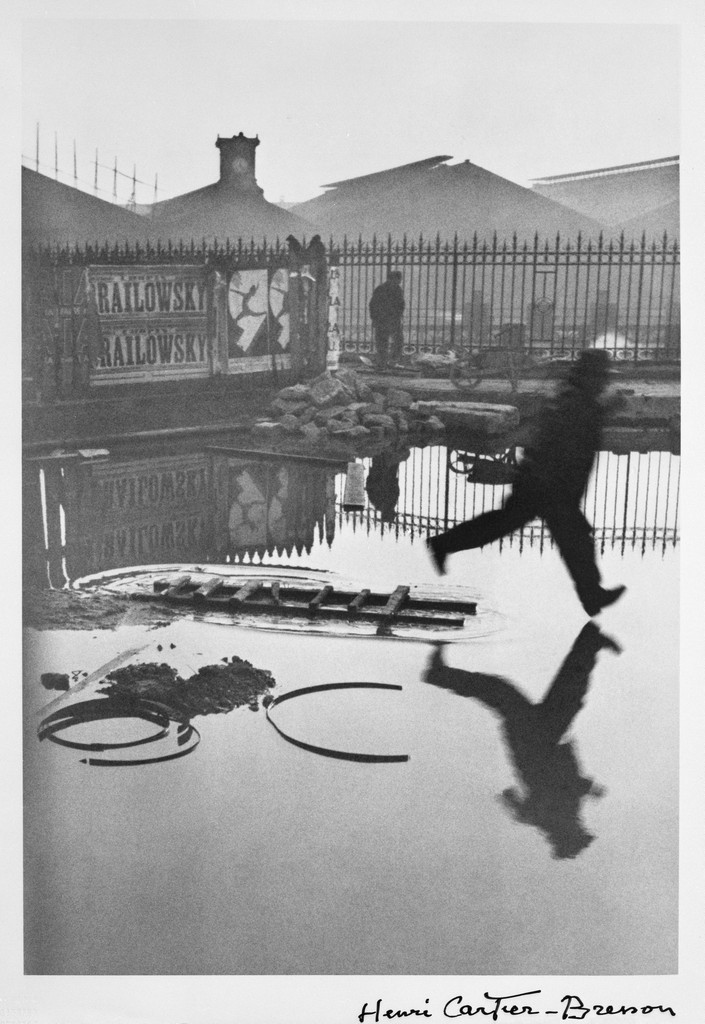
The exact moment that you take the picture is as important as how long the shutter speed is. This is often called:
The Decisive Moment: A term coined by Cartier Bresson- “the simultaneous recognition, in a fraction of a second, of the significance of an event as well as the precise organization of forms which gives that event its proper expression.”


Recent Comments