Author: Ken Pelka (Page 10 of 15)
Find a piece of black card and a piece of white card. (Something flat that is black or white will do.) Take a picture of each one filling the frame with either black or white using automatic settings.

Next, photograph each one so that the black one looks black and the white one looks white. This accomplished using exposure compensation.
The black card will be over exposed for black and you need to decrease exposure to make it black
The white card will be under exposed for white and you need increase exposure
Put all four images (auto exposures and corrections) in a post using an image gallery. Label images
Include a short description of your process. What did you use for the white and black surfaces? Describe in your own words why the black and white versions look so similar when shot with automatic settings? What did you do to get the black card to look black and the white card to look white.
Post to student post/lab/lab4 meter
Needed for this class
- Camera or cameraphone
- White and black cards or paper
Light Quality
Light is either direct or diffused.
Direct light: the light strikes the subject from one angle and creates sharp shadows. Sunlight is an example of direct light.
Photographer: Roy DeCarava
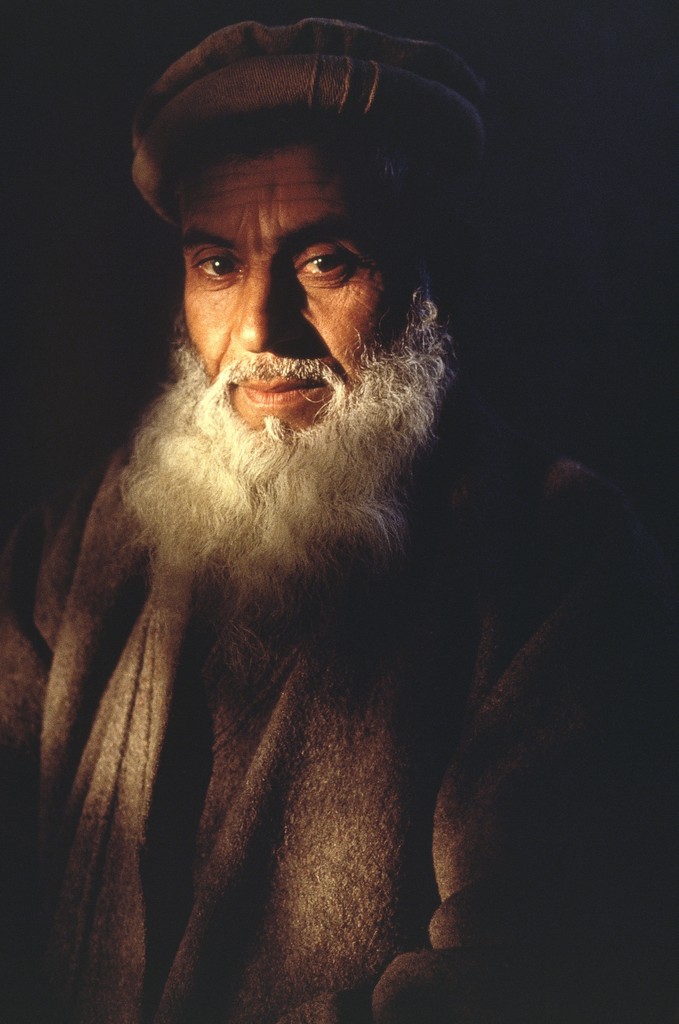
Diffused Light: the light hits the subject from many angles and creates soft shadows. The light is diffused on an overcast day or in the shade.
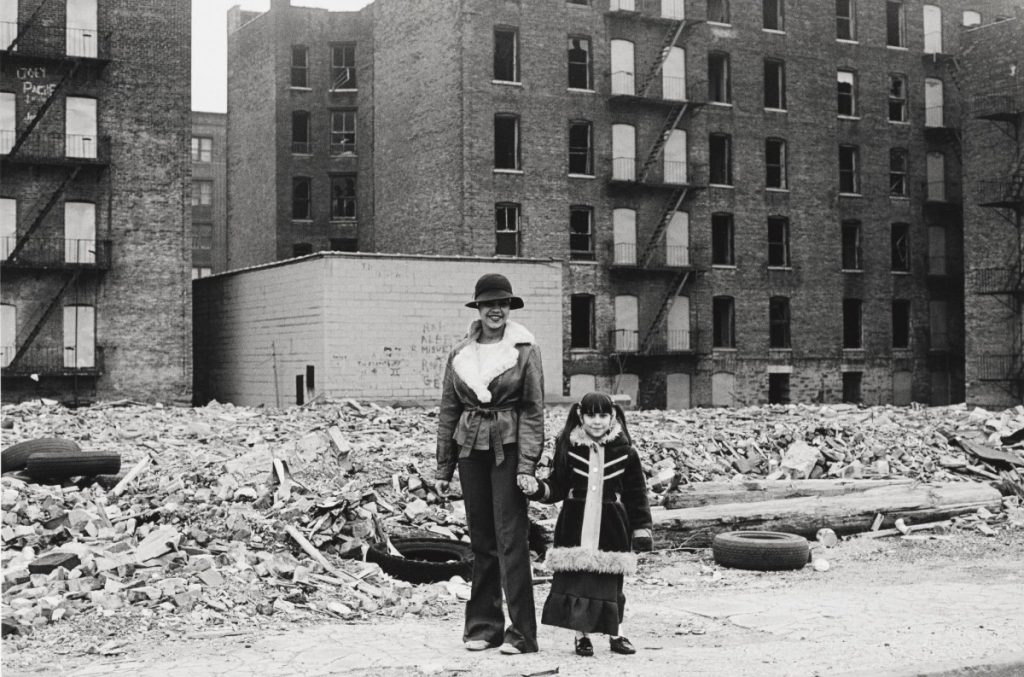
Photographer: Mel Rosenthal
Measuring the Light
Exposure is the amount of light that comes into the camera to create the photograph.
Exposure is made up of three components:
- ISO-Sensitivity to light.
- Shutter Speed-the length of time that the camera’s shutter is open during the exposure.
- Aperture-how wide the cameras lens opens to allow the light to come in.
https://images.app.goo.gl/paiAeMEtVoyr123z8 Aperture, shutter speed, iso
All three are measured in stops.
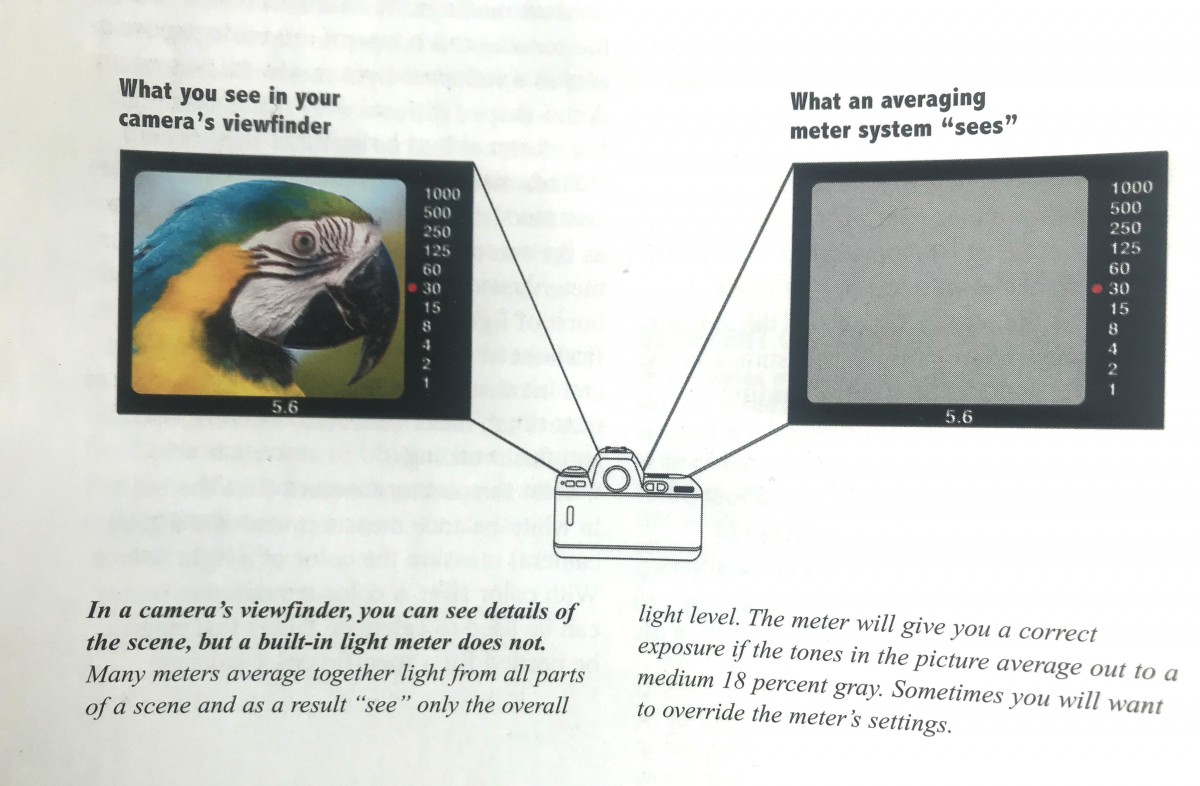
How your Camera Meter Works
Acronym: TTL – Through the Lens
The meter in your camera is a reflected-light meter.
A reflected light meter averages the tones in the scene and selects the aperture and shutter speed values that will make the whole scene medium gray.
Watch from :45 to 1:34 for an explanation of how your camera meter works.
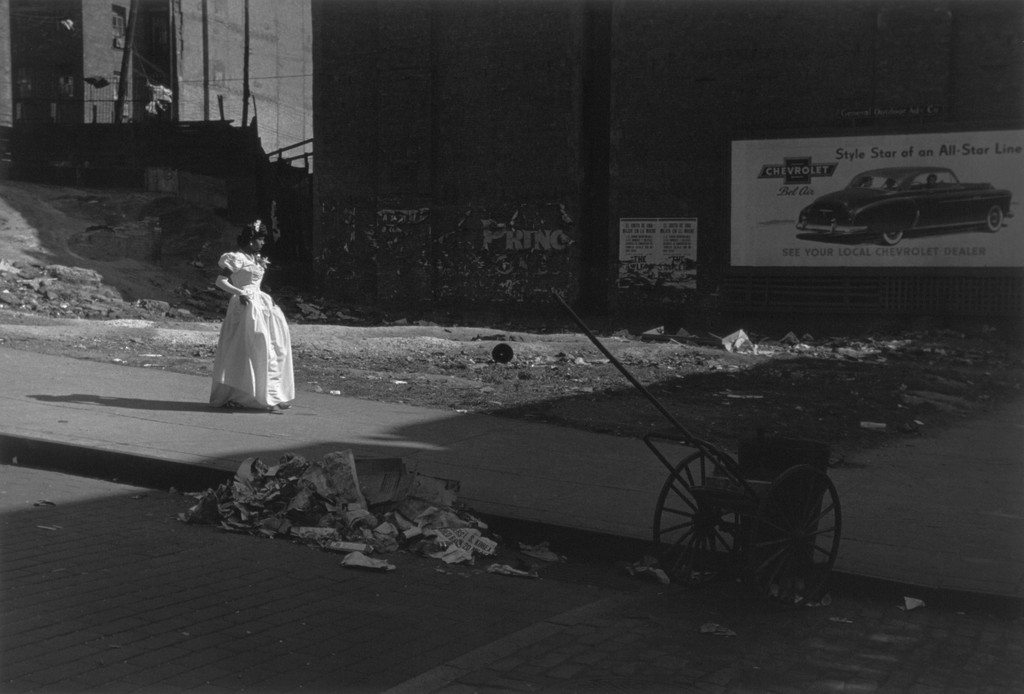
Using Exposure for Creative Effect
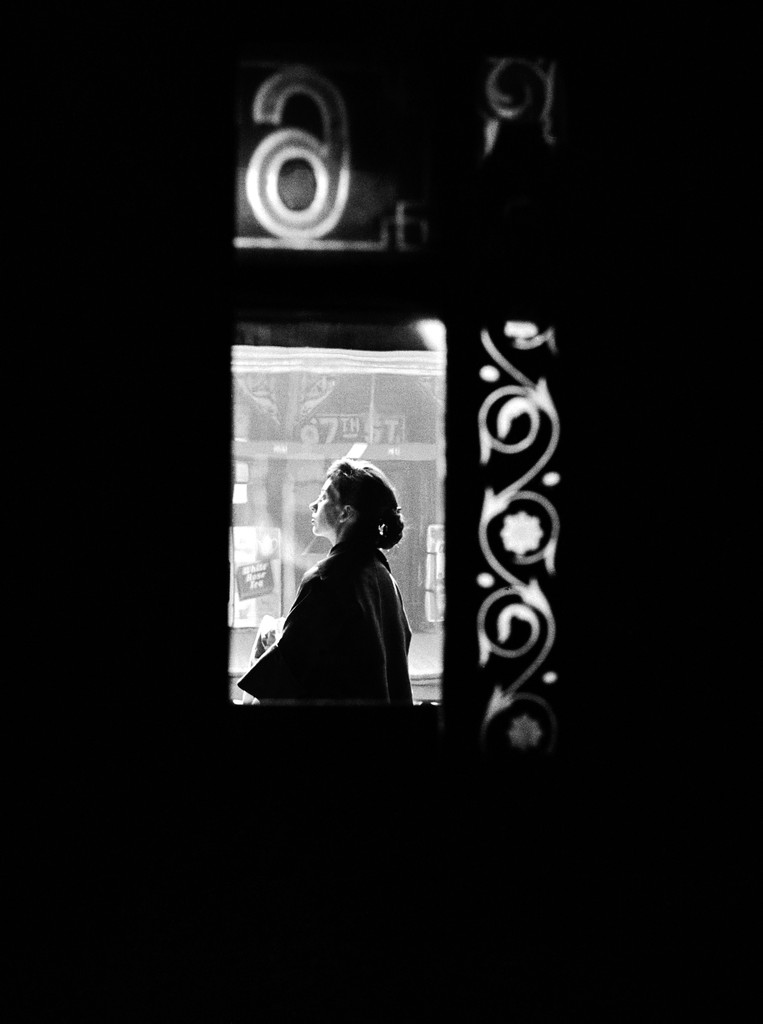
Sometimes, you don’t want the tones in your image to average out to a medium gray. You want to tones to be low key-mostly dark or high key-mostly light.
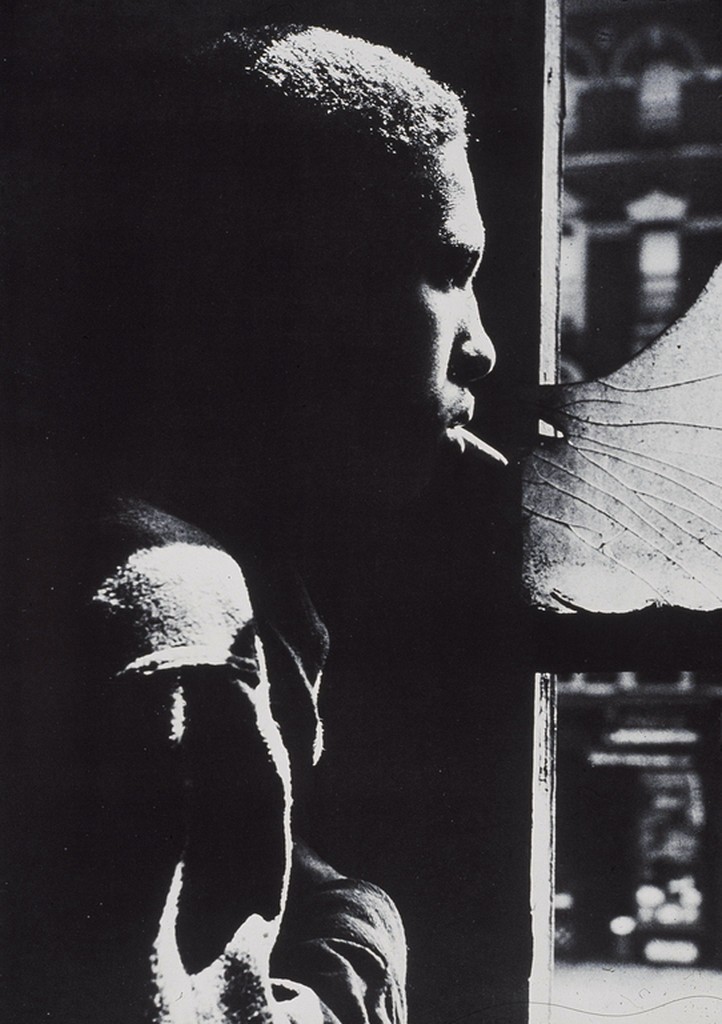
Photographer: Gordon Parks
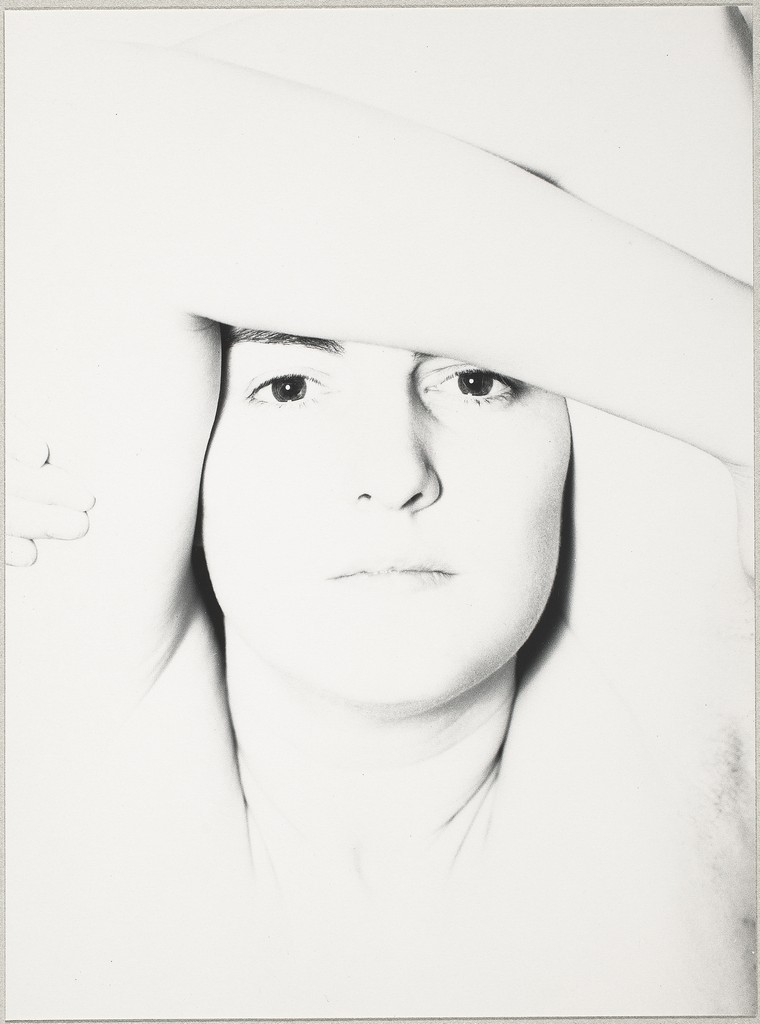
Photographer: Harry Callahan
How to control exposure
With a cameraphone: Touch the area where the main subject is and then drag the little sun icon up or down to increase or decrease the overall exposure.
With a camera: Use Exposure Compensation to take the two photos.
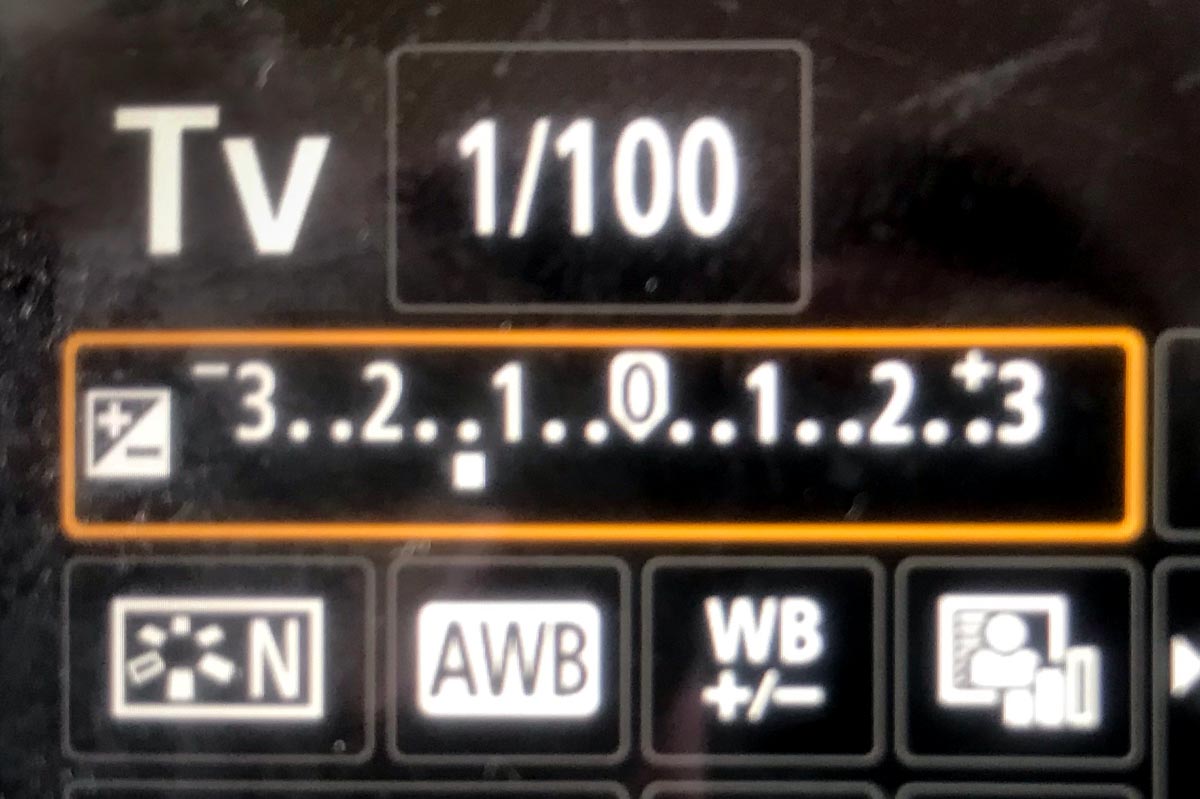
Exposure Compensation-a way to force the camera to make an exposure either lighter or darker than the meter reading. Good for backlight or extremes of light and dark.
Lab Exercises
Lab Exercise: How your camera meter works
Lab Exercise: Using Exposure for Effect
Due Next Class:
Homework: Light and Exposure Due 3/7
Discussion 4: Visual response to another students photo Due 3/7
Go to to our flickr group. Look at the photos of other students by choosing different members. Pick one photo from 2 different students that you like.(2 different photos) For each photo chosen make a new photo (one not previous shot) that utilizes some compositional element of the other student’s photos. For each student work choose a different compositional element to use for inspiration for your new photos. The subject matter of your photo must be different than the other student’s photo.
Select the other students work from Homework3
Make a post using image gallery, label other student’s work and the compositional element and your photo.
Post should contain a photo from 2 students with your 2 responce photos
Post -student post/discussion 4
As a reminder, subject of your photo can not be the same as the other student’s work.
You must go outside and make new photos using the chosen compositional elements. You can’t use previous taken photos
Make a standing pile of crumpled pieces paper. Using direct light ( bright light from the clip lamp), adjust the the light so there are different levels of lights and darks in the papers. Light from the side works well.
A) Photograph the paper with dark background, with the paper pile itself having different lights and darks.
- Frame and compose shot with some background visible
- Focus and shoot ( this will be an average light reading)
- Make the image darker by using exposure compensation. On your cellphone, press the part of the scene in the light and that you want to be in focus. Then pull the little sun icon down to make the scene darker until the light areas show detail. If working with a camera, use negative exposure compensation to get the scene to be dark with more detail in light areas
- Shoot 3 exposures: 1. average reading, 2. slightly darker, 3. darker
- One of these darker exposures should produce dark areas with some detail in light areas
B) Repeat A but move in closer to make a different composition
C) Photograph paper pile with a light background
- Frame and compose with some background visible
- Focus and shoot ( this will be an average light reading)
- Make the image lighter by using exposure compensation On the cellphone move the icon up. With a camera, use positive exposure compensation. There should be some detail in darker areas but the light areas shouldn’t loose detail
- Shoot 3 exposures : 1. average reading, 2. slightly lighter, 3. lighter
- One of the lighter exposures should show light area as light with detail and dark area with some detail
D) Repeat C but move in closer to make a different composition
Upload all images to flickr Lab4 album
In a post Pick the best image from A and B. Explain what you did. Why do you feel this is the best. Use image gallery. Photos should be next to each other. With explanation underneath
In same post,Pick the best image from C and best from D.Explain what you did. Why do you feel these are the best. Use image gallery. Photos should be next to each other. With explanation underneath
Post to student post lab 4 effect


Recent Comments