Category Archives: Homework

Shoe

For this shoot I use my DIY studio I use a soccer shoe and directed the light in as many different ways as I could. This shoot was a little hard due to the light being a little bigger than the shoe it seem as some of the shots come out similar even if the light was in different sports. I corrected the white balance on photoshop as my camera wasn’t cooperating with the light. The detail on the front of the shoe was the most interesting part of the composition.

DSC_0233

Sneakers


PA130034


The second homework is base on the sneakers with a few colors suchas blue, white and orange  to make a simple sneaker look better depending on the position on the light or the position of the camera. This is one sample of the sneaker in different position getting the light from the top side of the sneaker to enhance the color at the end of the sneaker. In ohter images since I move the light away the sneaker dark color was even more darker than the original  position.So I think that I catch the qualitie on the sneaker in this image and the rest.


DIY Studio

For my DIY Studio, i didn’t have some of the materials that the tutorial was showing/asking for, so since i have a lamp that gives a good amount of light, soft like the ones in the studios, I thought that my lamp was great for this mini project at home. I also used left over material from previous classes. I used two white boards and the a black one for back up.

Hw2 Shoe

For my shoe photo shot, I picked my niece’s Converse. I though it looked nice and had a brighter color/ quite cool color in my opinion. The more I moved the foam board closer to it. The light wasn’t much trouble. But it took me some minutes to manually adapt my camera into the new settings. And the result was this shoe =).

#shoe

#shoe

HW1: DIY Studio Diellza Kasimi

Setting up the DIY Studio was fun and challenging. After watching the video I did some research to find photos of DIY studios that would inspire me. I found some very interesting ones that I wanted to share with the class.

27f403dcac12ea01c7405352fd4c5ea92c5e04e7590ee288cecfd5168ad532c30c4611364034c139e8832998d82d5cdaf4e5f9dae15e68f6bd0c6f550f6b6e61a5bab178dfbe80219ff06297e2b7222728e68d42e1600cda577e11a953f1b80e3b4ebc1ebe219eae41d8fe869b67dfd0

My second step was checking what I could find at home. I found a little coffee table, tracing paper, camera and tripod. I needed more supplies so I went to Lowes and got one clamp light for $9 and one light stand that could be adjusted for height and had three adjustable lights too for $29. I bought two A-clamps for around $2. I had no time to look for other things like backgrounds so I decided another day to try out Home Depot. I was able to find different floor slate textures that I bought for less than a dollar. I also got plenty of different free small samples that I could use for future projects maybe or maybe not. I also got a piece of small luxurious moulding for less than a dollar. My final and most challenging step was finding space. I was able to find a corner that has a big window with natural light and on the opposite side a big mirror. For foam boards I’m using some ply wood that has black on one side and white on the other. If I think that I need bigger pieces maybe I will buy those too. So here is what I came up with for right now and I could dream very soon that I will have a set up like the pictures above 🙂 Pictures below taken with a camera phone. Sorry for all the pictures could delete them after this assignment.

photoimage-1image

DIY Studio

imageThis is my DIY photography studio and is still in the prosses of getting better and improving as I experiment with the light and find a better placement. To start I had no idea how to accomplish this and try to get a few ideas from whatever I had available at home. First I found a light that’s been in my closet for a few months that I’ve never use before it was exactly what I needed according to the few blogs and videos I watched. It also came with a clamp that was really helpful to keep it in place. Next I needed some type of stand and I didn’t seem to find any and opt to use a chair as a temporary placement. I also needed some type of backdrop and I notice that I had a few rolls of left over Christmas wrapping paper. My idea is to use the blank side as a back drop and revers it to the color side as a color backdrop. This paper can also be use as a diffuser as is thin and can be warily place around the light. In this picture there’s also a black cardboard that can be place anywhere to use as contrast or just to experiment with a few color. A few of the challenges I think I will encounter are the fact that I don’t seem to find any other stands for the light and also the type of light that I can use as there are different lightbulb to choose from and plan on getting a few different ones to experiment with the light. One thing that I forgot to include was a small tripod that can be place in front of the chair and easily move around with no need to adjust the other elements also a morrow to use a reflection to be combine with the light and create different types of light on the subject . I have a few more ideas to increase the quality and variety of photos that can be taken in this small studio that need more materials such as getting more lights. 

DIY Studio

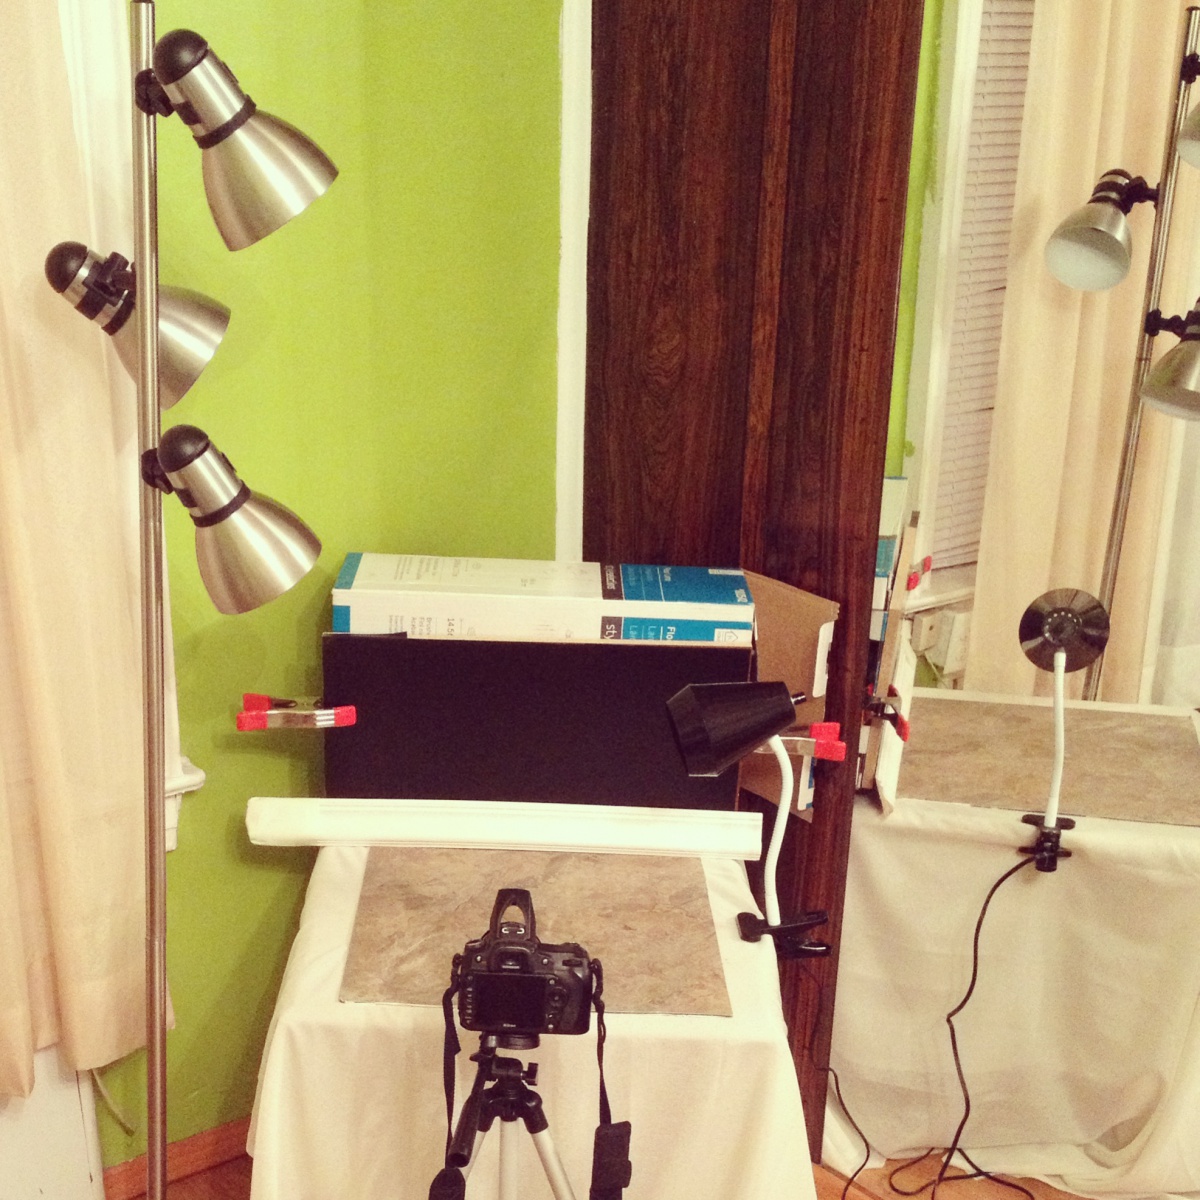
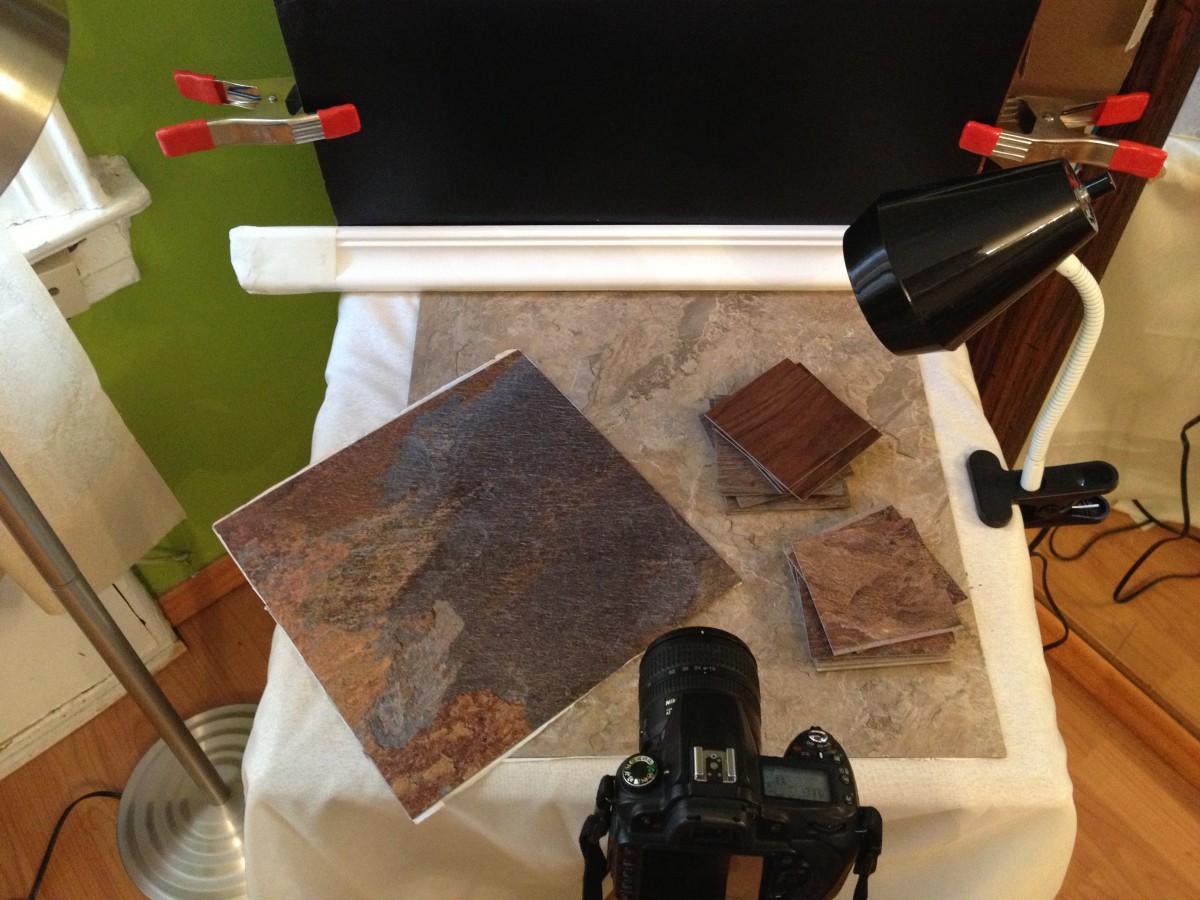
After hearing about the DIY studio, I was thinking of buying it online or something. I’m thinking how the hell am I going to built this, but as I was thinking its a lot cheaper just making my own than buying one. The first thing was to look for a location for the studio itself, which wasn’t that hard, I had to move some furniture around. Getting the broads was pretty easy but

as I was looking at the items that I need to buy I had no idea what was an a-clamp (but there was a picture next to it.) I was going to go to a hardware store which they also cut wood, think I was going to buy a stick so I can use it as a stand for the light. But then I remember that I have a light stand. I still brought a light clamp just incase. which I feel I have more control of directing the light where I want.

The last thing was the tripod, I couldn’t find my old one so I had to buy at bestbuy, the closet electronic store.

At the end of the day, it all turn out okay. It was a lot easier to make than I thought and I can’t wait to use it.
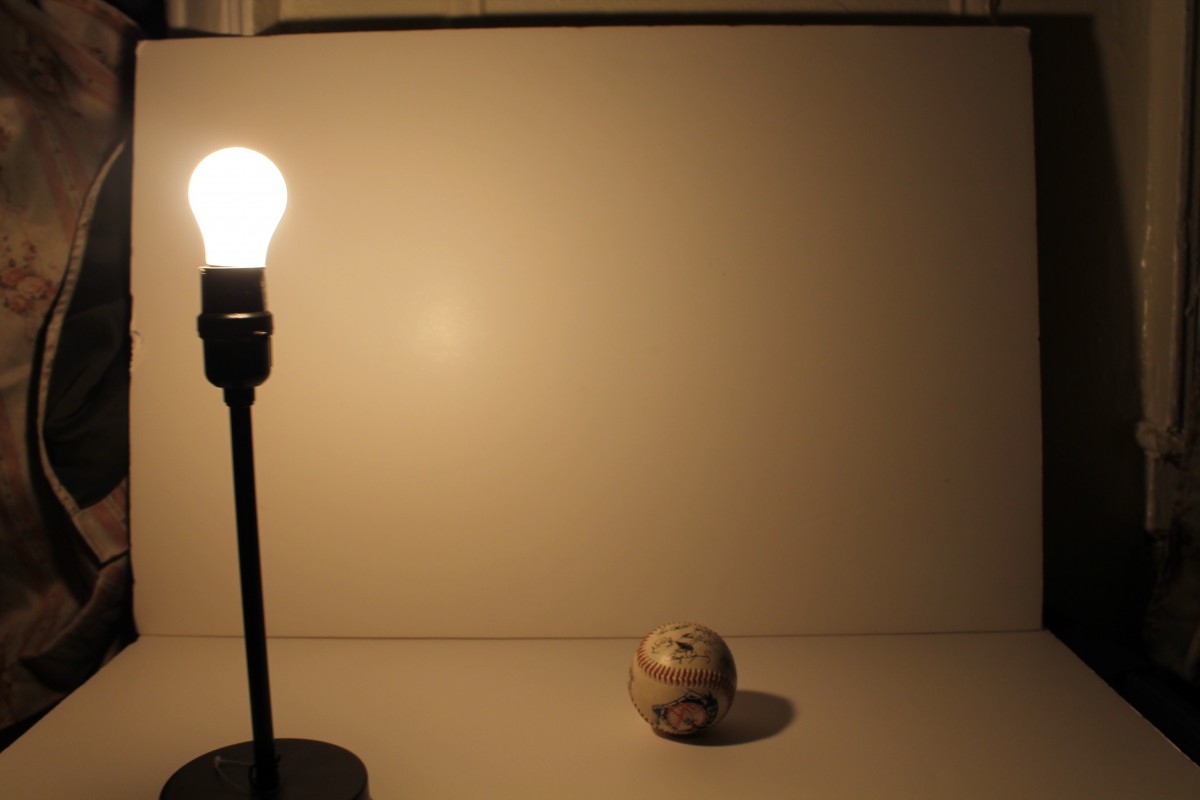
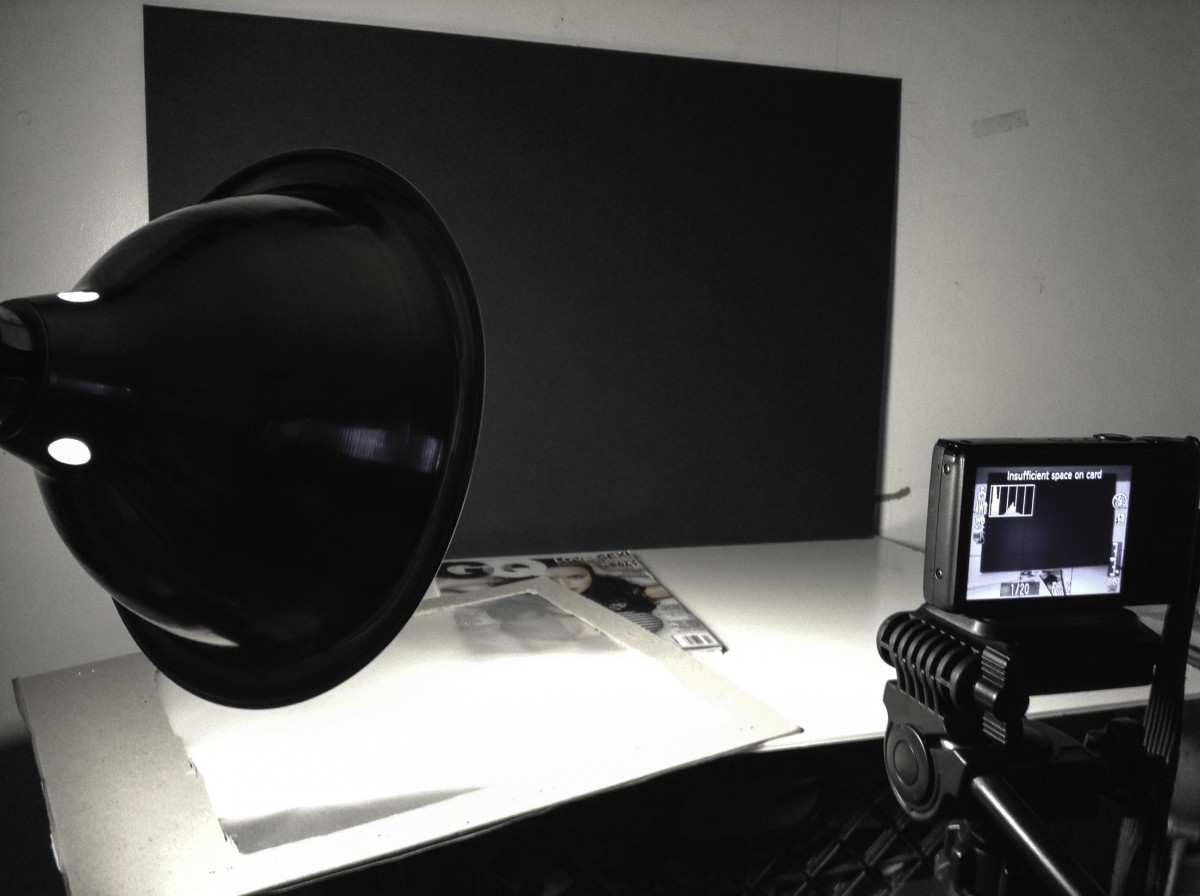
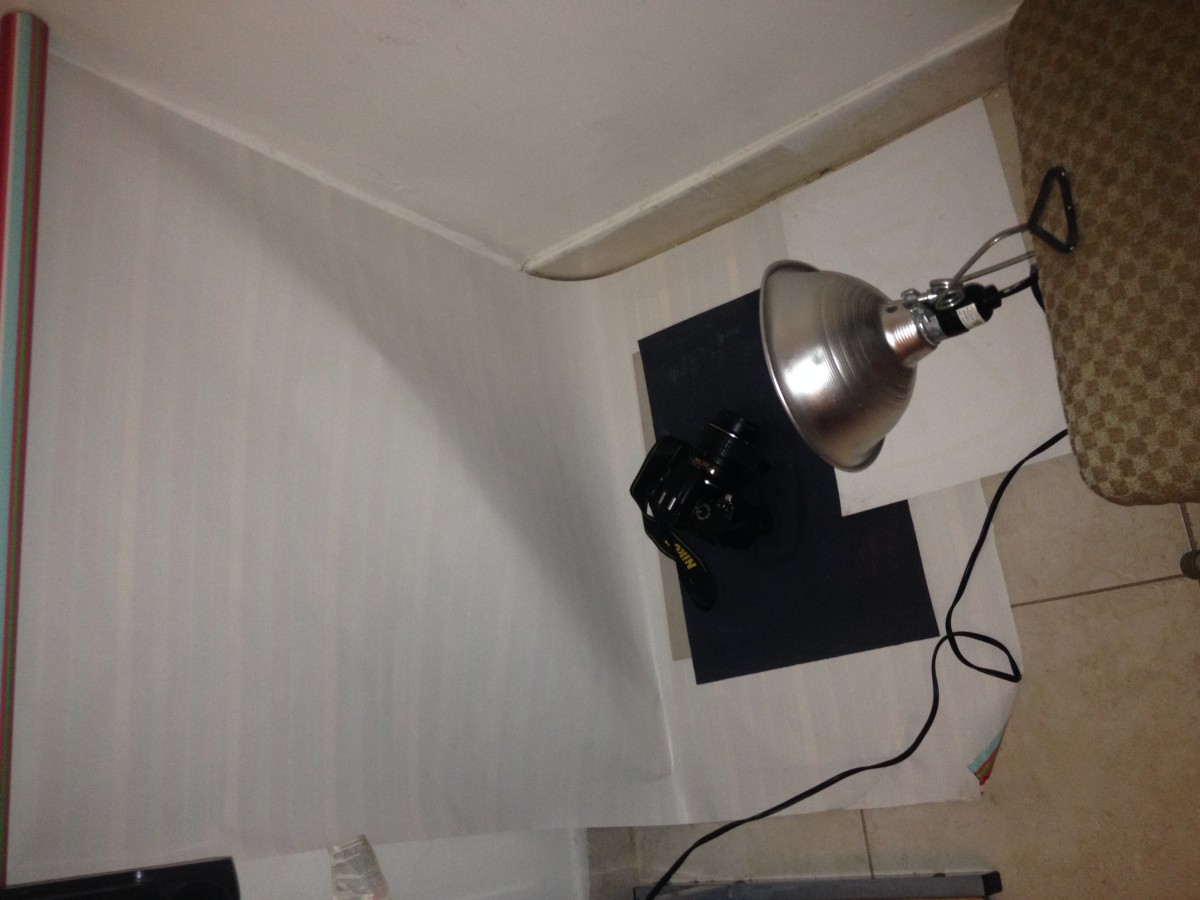
Photo Feb 01, 11 27 48 AM_1

Angelo Pena’s DIY studio setup

Angelo_Pena


I’m pretty used to doing this with my camera, minus the tripod ad the light, so it felt natural to me. The only thing that was bothering me was what type of light to get. I needed to replace the one in my room and I wanted a daylight bulb, however, that light would affect my final image if I got let’s say a bright white or a soft light, so I decided to get a daylight bulb for my set up too. I light the effect it gives. I own many figures like the one in may image, smaller and even larger than that one and daylight light to me presents figures the best. The lamp I got actually saves me a lot of time because even though there’s no diffusion made by me, the lamps head actually is the diffuser. As you can see in both shots(left by hand, right in the tripod), there aren’t any harsh shadows. I tried making some but the images never came out well or just too dark, even with a fill(which I do not have shown). Overall, now with the tripod and the lamp, I’m much happier taking pictures in my “studio”.

DIY Home Photo Studio

After hearing about setting up a home photo studio, I was at first stressed out about the whole situation; but after speaking to a few of Professor Michals’ old students I calmed down and started planning. First thing I had to do was to figure out a location for my studio. At first I figured my room would work perfectly, All that was need was moving my junk off the desk and placing everything on top, so therefore after getting home that Tuesday night I would begin creating my home studio but soon realized I couldn’t move around with a camera in my tiny room ! Therefore I had to move to my second option which is the dining room. The dining room was a perfect spot theres a large space and big table, the only thing I would be giving up is my privacy and not being bothered my anyone. Second part of my planning was to either build the studio or purchase a light box. My first choice was to build the studio over this past weekend but after speaking to a former student of the professor, he explained how buying the light box from Amazon is a much easier solution than to build it. However luckily he offered to give me his studio because he no longer needed it. After hearing the great news and having a massive amount of weight off my shoulders, I made plans to buy a tripod. My search for a affordable tripod however has not started due to my bad memory, but I should be able to purchase one very soon.

Overall my experience with the DIY home studio has been incredibly easy and quite cheap! I only hope that my pictures taken with my home studio will not only help me receive a good grade but also provides some great photos.

DIY Studio

20140202_182353Setting up my DIY studio was probably the most challenging homework assignment that I’ve ever had to do. I managed to get most of the items together this weekend. I’ve set up a corner on my attic. I used a round, glass table I found in the attic for placing my props on. Using the ring clamps I purchased from True Value, I hung a dark, solid sheet I’m using as the backdrop. I’ve my clamp lights (which I also purchased from True Value) hanging on the slanted wood beams of the attic top. I’ve set my camera up with a tripod I found in the attic. I think I’ll throw tracing paper over the clamp lights to use as my diffusion screen. The materials weren’t as big a challenge as arranging the space but luckily that worked out fine. I moved some boxes out of the way to move the table to the center of my DIY area. There were also a bunch of things on the table itself. I moved them all to the other side of the attic across from where I packed the boxes. After attaching my camera to the tripod, I practiced angling the tripod; this way I could get used to it for when I began shooting. I also haven’t used this camera in a while, especially since I got my new phone, which has a pretty good camera. The only other studio I’ve shot in is in school and I’m looking forward to shooting in my new DIY studio.