DIY Studio

photophoto (1)IMG Test Shot 001

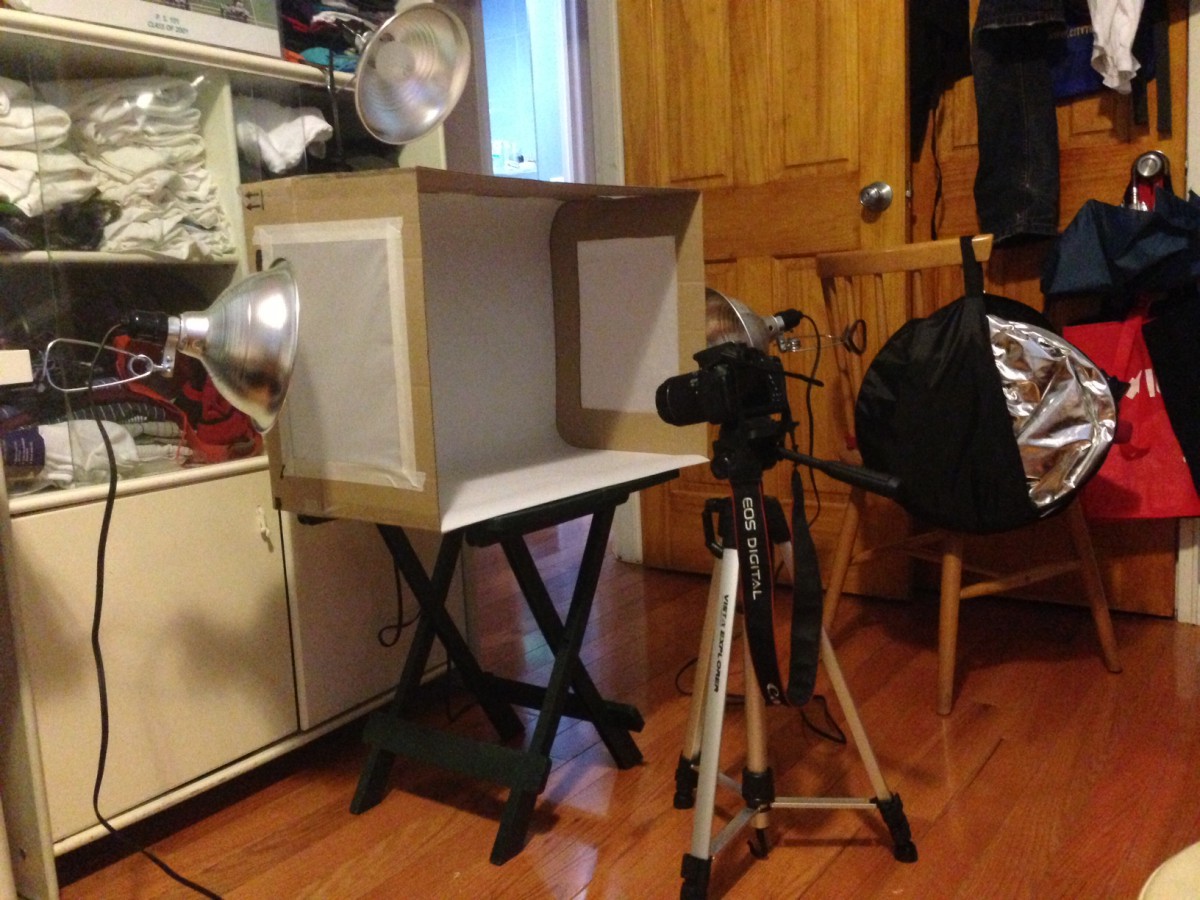
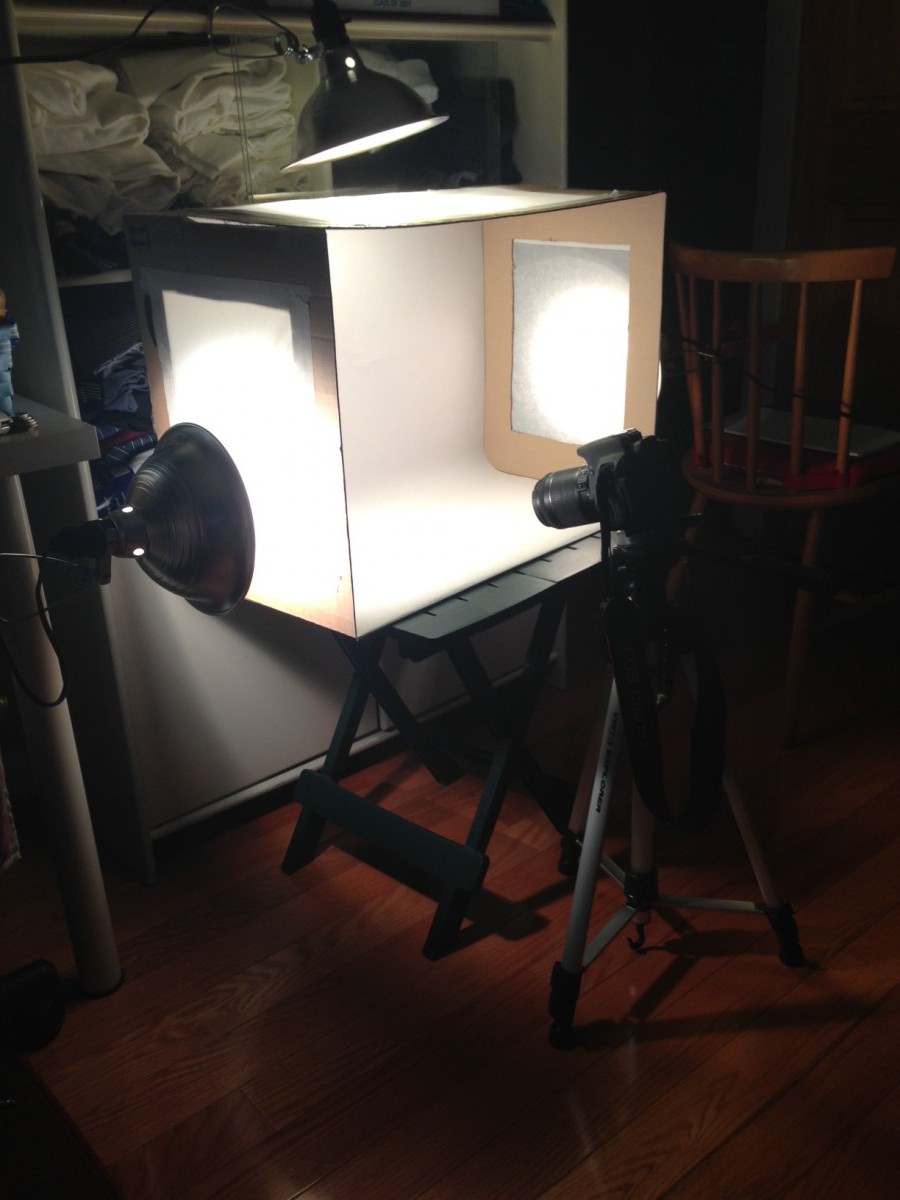
Building a lighting studio can be a challenging. First thing that popped into my mind is how much will it cost to make one? Second thing that popped into my mind is where will I put it? After moving things around in my room, I manage to create a space that is JUST RIGHT for the studio. I even found this fold-able table laying in my closet. Soon after I finish making space for the studio, I realize that I don’t have enough material to construct a box. The cardboard that I have wasn’t big enough and there wasn’t enough foam cord board to use instead. So I decided to put that aside first and move on to other things like reflector and lights. Since I’m more of a online shopper person, I decided to just order a 5-1 reflector kit; which happens to cost no more than $20 + free shipping. When the reflector came, I notice that they placed the reflector in a very huge cardboard box. 10% was the actual reflector and 90% was just the wrapping paper for protection on the items. I took advantage with it and created my studio lighting box. First thing I did was tape the 4 flap area of the box together to extend the box longer. Then I cut out windows for both sides of the box as well as the top (leaving about 2 inch margin). At the end, I putted and taped 3 tracing paper to cover up all the opening windows. And there it was, my studio lighting box. For my background, I have about 50 yards of white roll of paper. This made my life a lot easier because with this roll of paper, I can create a seamless background. The final part of this set up is the lights. I went with buying 3 clamp lights with spotlight bulb, frosted bulb and clear bulb.

Posted in Homework, Uncategorized | 1 Comment

Light

IMG_8828

The idea for this photo came to our group by accident. While doing a different shot, we noticed that we could create an image where the egg was almost completely half lit, half shadow. So to achieve this, we stood the egg up and then moved the light even farther to the side, which created the slim, dark shadow on the left side. We made sure the light was direct and harsh so that the contrast between light and dark would be really evident.

Posted in LL4-Studio Light Basics, Uncategorized | Leave a comment

Egg Shot

IMG_8808

Today we are dealing studio lighting with having an egg our models. What i love about this photo is that its placed in the center. The reflection of the egg was casted due to the light and the table that was laying on. In terms of the lighting, it’s coming toward the side which makes it a side light. The level of the light stand is at a low angle which cause the shadow to extend longer than high angle light stand.

Posted in LL4-Studio Light Basics | Leave a comment

Personal Fav

15708841591_d80563c3a6_n


Due to the direction of the lighting the egg appears to be very smooth. the light is very soft and provides a shadow as well as the eggs reflection. I really like the way it appears in photograph, its almost like we shot a smooth rock versus a textured egg.

Posted in LL4-Studio Light Basics | 1 Comment

egg

IMG_4852

This image is my favorite because of how the camera is at such a low angle the shadow the egg casts is so narrow. The angle at witch the egg is positions gives it this natural circler shape and the shadow is divides the circle half. The egg casts a strong reflection also softens the lighting from the eggs left side making the shadows on the egg soft.

Posted in LL4-Studio Light Basics | 1 Comment

Egg & Light


IMG_9357


Today in class we took photographs of an egg and used one LED light to make the egg look as interesting as possible. This one photo of the egg has a very dramatic feel, its harsh light gives it a strong shadow and gives the eggs a nice glow. The egg was given a spot light from it being side lit making it my favorite photograph I took today.

Posted in LL4-Studio Light Basics | Leave a comment

LL4 Studio Light Basics “the egg”

IMG_9366

In my opinion this is one of the best photos my group took. Direct light is applied in this photo and brings out dark shadows. The egg is sidelit which is why we can see the shadow which the egg cast to the side of it. With the shallow depth of field we get an image that is  sharp overall. The eye-level viewpoint also reveals the inside of the egg because of the light.

Posted in Uncategorized | 1 Comment

Egg

KRoldan_egg


This photograph was taken using a continuous lighting. Since the light is coming in from a low angle, the shadow that was casted was more dynamic. The light is coming in from the side as well, as indicated by the bright area on the egg. The bottom part of the egg is also a bit illuminated, but that is because the light is reflecting off the table. The main reason the white egg is visible on a white background is because of the contrast given by the lights and shadows.

Posted in LL4-Studio Light Basics | Leave a comment

Egg Project

IMG_9357

Today in class we learned about manipulating basic lighting on an egg as our subject. This was a great lesson as it stressed the importance of light upon a subject and how controlling that lighting drastically alters the photograph. One of the best photos me and my group shot was the photograph above, I love this picture because of the drama the light creates with the egg. The egg is placed in a way that the light looks like a spotlight that you see in plays; this then casts half tones on the egg making a beautiful dark shadow behind the egg. The high level of contrast this photograph depicts is why I adore it so much.

Posted in LL4-Studio Light Basics | Leave a comment

Egg Personal Best

IMG_7574

The lighting in this photo is front continuous light. The light has a great reflection on inside of the egg shell and yolk. I suggested that the egg should be cracked and have the yolk left inside so I can get a close up. The light gives a great hard shadow in the back of the egg shells and great detail with the outside of the garlic.

Posted in LL4-Studio Light Basics | 1 Comment