SAVE FOR PRINT
- File -> Save As:
In the dialog box, set “Adobe PDF” as the file type, then click “save” - In the “Save Adobe PDF” popup:
- Choose “high-quality print” from the PDF preset dropdown at the top of the dialog box
- Click the “Marks and Bleeds” section from the list on the left-hand side, then check the box for “Trim Marks” to the right (see image)
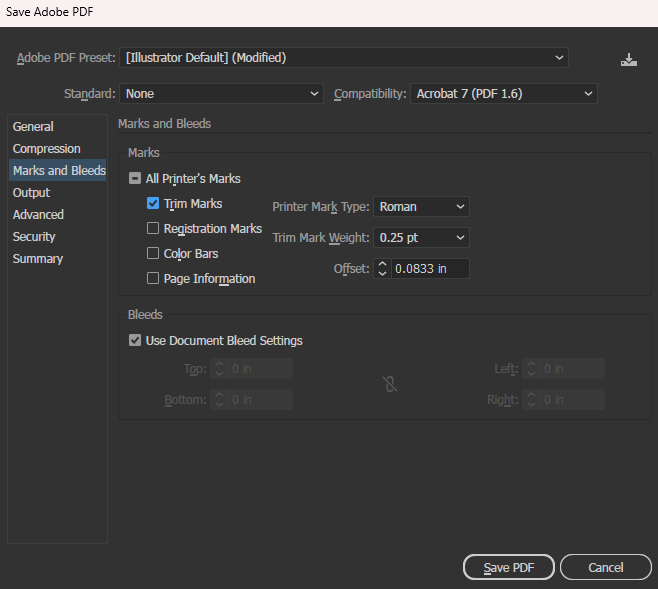
- Click “Save PDF.” Don’t forget to bring the files on a thumb drive when you go to print!
SAVE FOR WEB (posting on OpenLab)
- File -> Export -> Save for Web (Legacy)
- In the top right of the dialog box, select either JPG or PNG-24 as your format; uncheck the “transparency” option for PNGs, and export at 70+ quality for JPGs
- In the “Image Size” section of the dialog box, enter “200” in the Percent field. This will export your image at a higher resolution.
- Hit “Save”
PRINTING IRL
Print on 80-100lb paper, and make at least two copies for safety. Any print shop should be able to handle this with no difficulty, but in my experience independent/neighborhood print shops are more knowledgeable and accommodating than chains like Kinko’s and Staples. Remsen Graphics is close to campus (Court St. between Remsen and Joralemon) and student-friendly; one block north is a combination FedEx-Kinko’s.


Leave a Reply