BACKGROUND
Figure-ground relationships are what let humans recognize objects through vision – distinguishing the subject (figure) from everything around it (background).
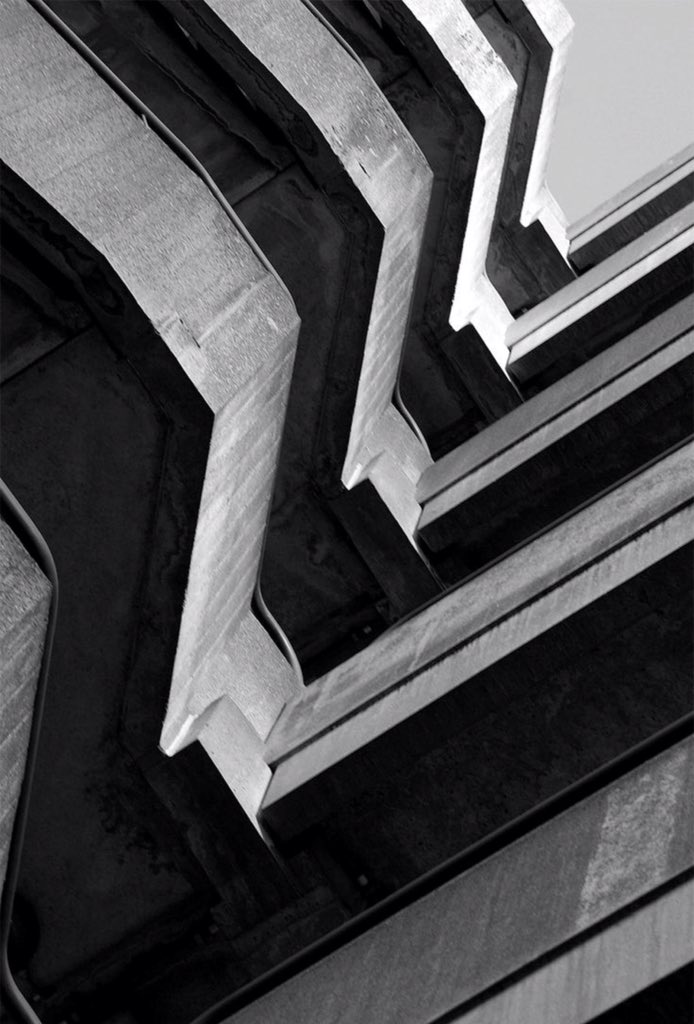
ambiguous figure-ground relationship | photo by Aleksandr Rodchenko
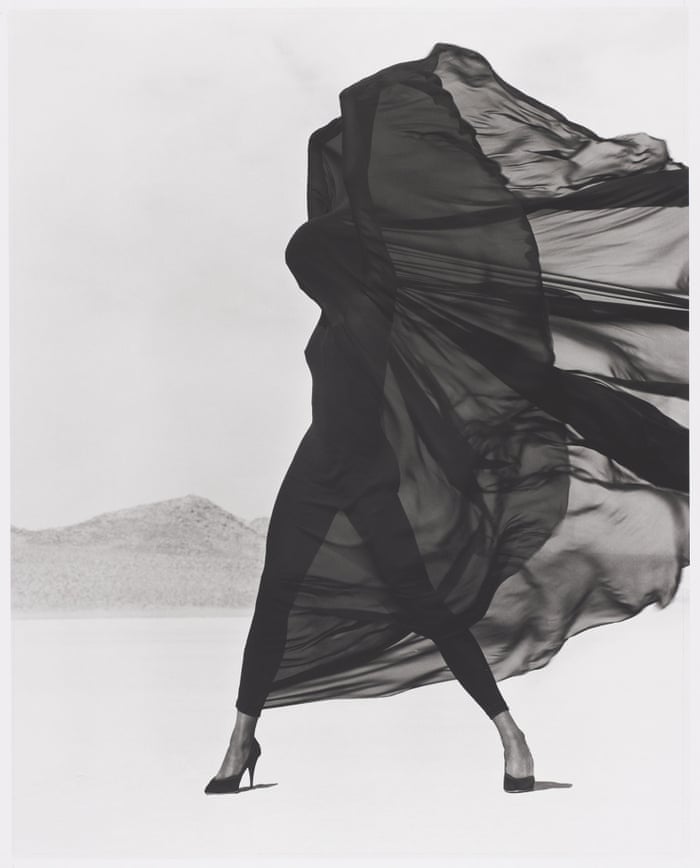
obvious figure-ground relationship | photo by Herb Ritts
Representational images (i.e. pictures of stuff) usually have an obvious figure-ground relationship – we see the difference between the subject and background clearly.
But figure-ground relationships can be made ambiguous – meaning it’s hard to tell which elements are subjects and which are ground – through the lighting and framing of the image.
BRIEF
Take abstract black and white photographs, 3+ with obvious figure-ground relationships, and 3+ with ambiguous figure-ground relationships. You will chose an image from each category and recreate them as abstract, black and white paintings, then present them in class for critique.
STEP 1: DISCOVER
Go for a walk to find visuals that could be used in an ambiguous or obvious composition. Keep an eye out for:
- mechanical/geometric repetition, like stairs, fences and tile
- strong distinctions between light and dark, such as sharp shadows or road stripes
- transparent and reflective surfaces, like puddles and windows
Take as many photos as you want – it’s better to delete the ones you didn’t need than to miss one you could have used!
At the end of this process, choose your top six images:
- three should show an obvious figure/ground relationship
- the other three should show an ambiguous figure/ground relationship
Post to OpenLab:
- Under the “Categories” menu (right hand side), check “Project 1- Lost & Found” and, under that category “Step 1: Discover”.
- Upload the six images of the objects you discovered on your walk. Name them accordingly, “obvious or ambiguous”.
- Include a brief paragraph explaining your choices.
STEP 2: DRAFT
Recreate all six photos as pencil drawings in your sketchbook (1/2 page or larger). Emphasize key visual elements by selectively darkening or lightening areas of the image, and eliminate small, visually irrelevant details.
Post to OpenLab:
- Scan or photograph your sketches. If you photograph them, take the photo parallel to the paper (not angled!) and under strong lighting.
- Upload these sketches, placing and captioning them in your post.
- Under the “Categories” menu, check “Project 1 – Lost & Found” and “Step 2: Draft”
STEP 3: PAINT
Recreate your favorite ambiguous and obvious sketches as black-and-white paintings.
- Using your X-Acto knife, ruler, and a cutting mat, carefully divide one page of acrylic paper in half to make two 9″ x 12″ sheets.
- Use your Artist Tape to make a 1″ border around the edge of each sheet.
- Recreate the outlines of your sketches on the acrylic paper, using a graphite pencil. Make sure not to press too hard – you don’t want to etch lines into the surface of the paper.
- Apply an even black or white wash to the entire page; it should be just thin enough to see your pencil lines under bright light. The color you use will depend on the dominant color in that composition.
- Paint the rest of the composition based on your sketch.
- Remember, work big to small – start with large areas of color, then smaller ones, and fill details in last. If you make a mistake, no worries! Wait 30 minutes for it to dry and paint over it.
STEP 4: PRESENT & CRITIQUE
You will present your paintings mounted on an illustration boards – I will demonstrate this process in class.
- Buy a 15 x 20″ black, cold-press illustration board at an art supply store and have it cut into two 13″ x 10″ pieces (this is a free or very low-cost service at most places).
- Lightly mark points 1/2″ from the sides near each corner of the board.
- Apply spray mount to the back of your painting (OUTDOORS!!!) and carefully align the paper with the points marked on the board.
- Cut a sheet of tracing paper to ~15″ x 10″. Align the bottom edge of the paper to the bottom edge of your illustration board, then fold the extra over the top. Tape this to the back of the illustration board; this provides a protective cover for your painting in transit.
Post to OpenLab:
- Scan or photograph your finished, mounted paintings.
- Upload the paintings to OpenLab.
- Write a brief paragraph describing the composition of each image.
- Under the “Categories” menu, check “Project 1 – Lost & Found” and “Step 4: Present”
DUE DATE: FEBRUARY 14
This project is originally designed by Jenna Spevack. This version was revised by Paula Rennis, then further adapted by Jake Wright.