Select one of the photos that you will include in your final project that needs some local as well as globl corrections.
First make the global corrections.
Then identify what is the most important thing in your photo. Consider how to best direct our attention there.
Then using the adjustment brush and or the graduated filter, make the needed local corrections.
Put a before and after version of your file with local corrections into a gallery block in a post on OpenLab. Include a list of the global and then local corrections that you made to the file.
Global corrections adjust the entire file. In Lightroom classic, this includes everything in the basic panel: White balance, Tone and Presence. In the Lightroom/Photoshop App, it includes the controls under Light, Color and Effects.
Local corrections
After you make global corrections, sometimes you will want to make corrections to part of your image. Generally, the brightest part of the image commands the most attention. Sometimes that is not where you want your viewer to look first so shifting the exposure of parts of your image can create the image you want.
Selective Edits is a premium feature. You should have access to it if you have an account.
The two main tools for local adjustments are the adjustment brush and the graduated filter.
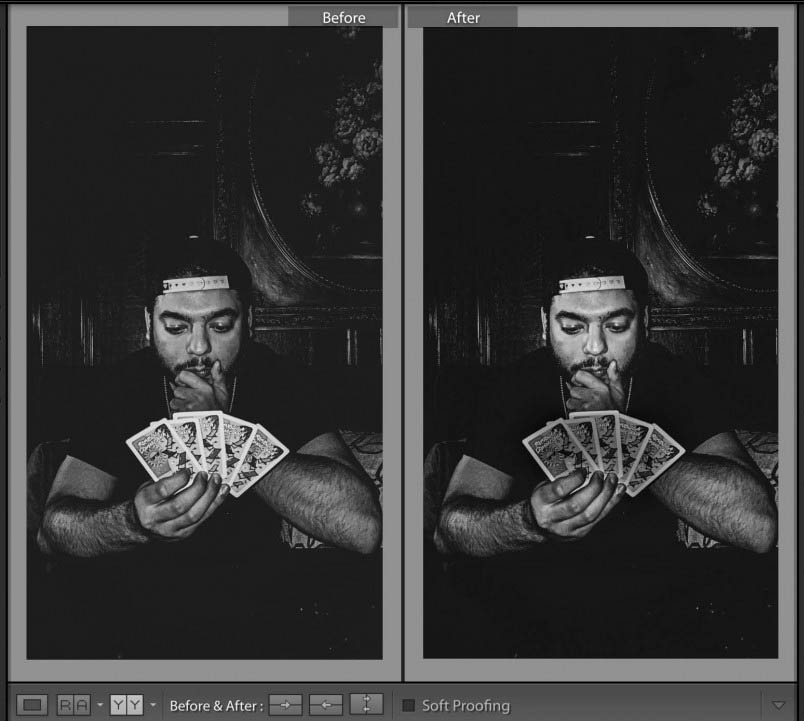
The important thing in this photo by Bryan Rodriguez is the face of the card player. However the cards are brighter and demanded too much attention. Using the adjustment brush, I darkened the cards. Creating a second adjustment, I lightened the face of the card player a little more. The goal was to bring more attention to the person’s face and less to the overly bright cards.
1 album of the 10 best photos of the 90 total, adjusted in Lightroom
a 3-5 min presentation of the final project – projected from the album on Flickr.
Presentation Guidelines
Start by introducing yourself and your project. One big picture sentence such as, ” I photographed variations on the theme of windows with most of the photos taken in downtown Brooklyn.
If you are showing 10 images, you have about 30 seconds to describe each photo. Tell us what your intention was, what interested you about the photo we are looking at, and give us information we may need to know to understand the photo. Tell us what makes it visually interesting ie the use of shallow depth of field or some other feature.
Your presentation will improve if you practice.
Do not tell us about what you did to the photo in Lightroom.
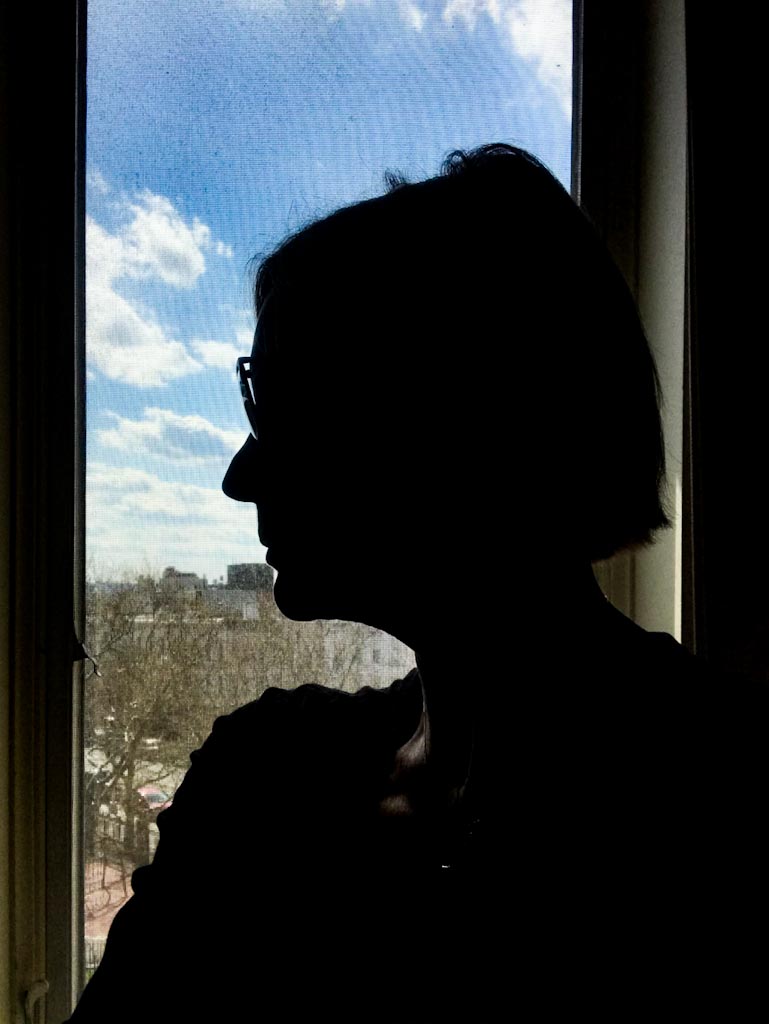
While not a traditional portrait lighting style, windows are great for creating silhouettes.
Create a profile silhouette of yourself in front of a window.
If you are working with a cameraphone, this will take a bit of coordination. Set the exposure for out the window. Bring your result into Lightroom (mobile or classic).
Lightroom App
At a minimum:
Straighten it with Geometry. Under Light, bring down the blacks.
Lightroom Classic:
Use Transform to straighten. In the basic panel, make the blacks darker.


Recent Comments