Project 2 – Texture & Pattern
Starts: September 16th – Hand in Date: October 14th
OBJECTIVE
To create 2 black & white compositions with lines and 2 black & white compositions with typefaces. Showing texture on one and pattern on the other, based on the 2 photographs selected.
The compositions need to follow same structure, flow, rhythm, repetition, light and contrast as the photographs chosen.
Materials: Sketchbook, pencils, eraser, inking pens (different thicknesses), Minimum of 3 Bristol Boards smooth surface 9x12in. Minimum of 2 Bristol boards smooth or ultra smooth surface 14x17in (for final presentation) ruler, t-square or triangle with numbers, tracing paper, scissors, exacto knife, removable tape and Double Tack.
Concepts: Line, type, rhythm, movement, repetition, structure, variety, pattern, texture, unity, synthesis, simplicity.
Technical Skills: Thumbnail sketching, drafting, working neatly with inking pens, exacto-knife, ruler and triangle. Mounting.
Design Process:
Step 1. Observe & Describe.
Step 2. Define with Line.
Step 3. Define with Type.
Step 4. Develop in ink.
Step 5. Deliver & Critique.
Step 1. Observe & Describe
Choose 2 Photographs from the selection that Paula offered: 1 Texture, 1 Pattern
Write
-
- Compose a minimum of 2 paragraph description of the images you selected.
-
- Describe the photographs in terms of mood, feeling, texture, pattern, line, surface, shape, rhythm, flow, movement, contrast, light and balance. Keep these descriptions handy, you will need them to achieve your goals.
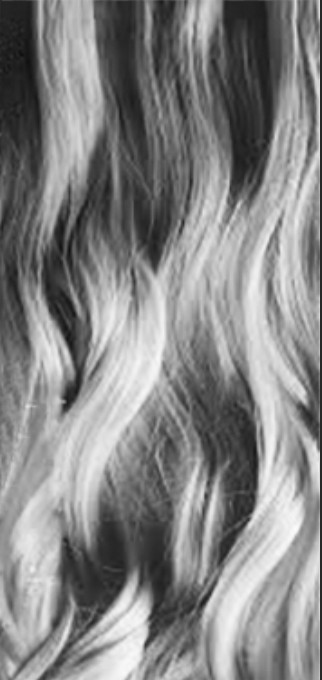 Sample of “Texture” selected image.
Step 2. Define with Line
-
- With a pencil on tracing paper over the “Texture” photograph sketch filling up spaces. USING LINES ONLY.
-
- Pay attention to the contrast (darkness and lightness) to define what kind of line character and style you would use.
-
- Take a look at the line thickness and how you will distribute them on the surface to achieve the same contrast shown in the picture.
-
- Make different variables and decide which sketch represents better the qualities of the original photograph.
-
- Repeat same procedures with the “Pattern” photograph.
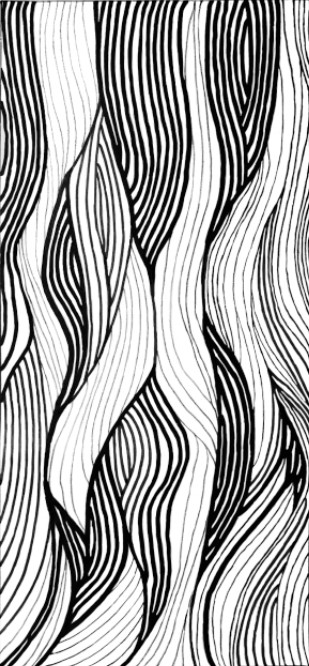 Sample of “Texture” selected image, defined with lines.
Step 3. Define with Type
- Tracing with pencil over the “Texture” photograph, sketch typefaces filling up the spaces. USING TYPE ONLY.
- Pay special attention to the contrast (darkness and lightness) to define what kind of type character and style you would use (Serif, Sans Serif, Script character, etc in Regular, Light and/or Bold style).
- Take a look at the typeface size and how you will distribute/space the type on the surface to achieve the same contrast showned in the picture.
- Make different variables and decide which sketch represents better the qualities described of the original photograph.
- Repeat same procedures with the “Pattern” photograph.
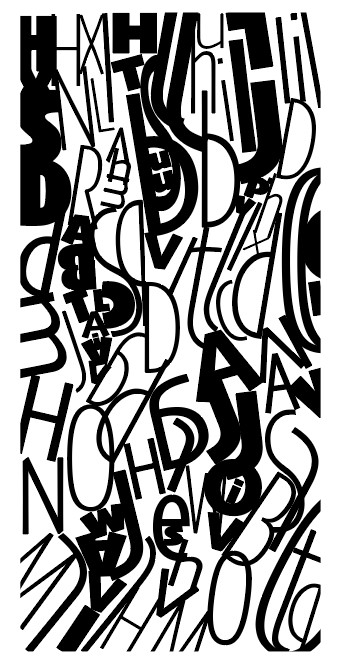 Sample of “Texture” selected image, defined with type.
Step 4. Develop in ink.
- With inking pens of different thicknesses (if needed) trace over your pencil sketches of “Line”, “Type”, “Texture” and ”Pattern“ to develop and refine ink compositions.
- They all need to achieve the same characteristics of the photographic images you’ve selected. Mood, feeling, flow, rhythm, contrast.
- Pay special attention to the contrast (darkness and lightness) to define the line character and style, the type character and style you would use to obtain the same feeling as the photographs.
- Make different variables and decide which one represents better the qualities of the original photograph.
- Make a final selection.
As a final result, you should have:
– 1 Ink composition using line, showing texture.
– 1 Ink composition using line, showing pattern.
– 1 Ink composition using type, showing texture.
– 1 Ink composition using type, showing pattern.
Document
• Under Categories (on right hand side), choose “Project 2- Txture & Pattern” “Step 4 – Develop in ink”. Post your images. Upload final pencil sketches followed by the final ink compositions to clearly show your creative process.
Write
• Compose and refine the paragraphs describing the photographs and the compositions you’ve created.
• Make sure that both descriptions (on photograph chosen and your design, achieve your intended goals)
• Post your selected images.
• Add written composition to the images.
• Comment on at least 1 other student’s post.
Step 5. Deliver & Critique.
Deliver – Follow layout template
• On a white 14x17in board mount your Ink designs following the sketch/placement below.
• Instead of tracing directly on the 14x17in board you can choose to mount separately the 4 compositions with Double Tack (double sided adhesive paper). Please DO NOT USE Elmer’s glue.
There will be in class instructions to learn the mounting process because could be very involved and the result needs to be neat.
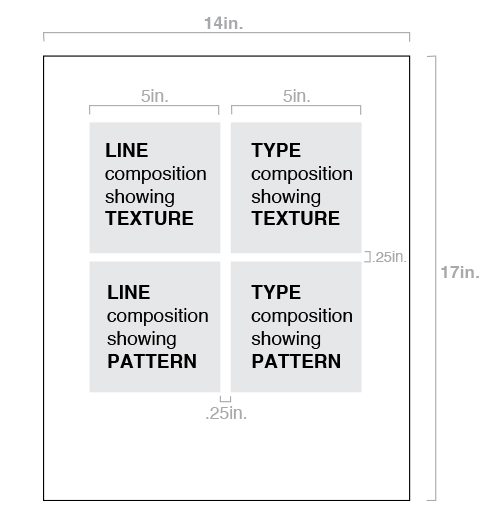
- Board 14x17in. Smooth or ultra smooth surface. Not less than 100lb. (270gr).
- Use it vertical.
- Center compositions left to right.
- Leave a bit larger margin on the bottom of the page for balance.
- Protect your work with tracing paper.
- Do not print your name on the front.
- Print your name and date on the back.
Critique
• Be prepared to present, discuss and analyze your finished work in terms of design process, concept, craft and what you’ve learned.
• State your name, what you are presenting, which parts are successful and why, which parts are unsuccessful and why.
• Your peers and the professor will provide feedback. You will have an opportunity to revise your work based on the feedback and improve your grade.
Documentation and Feedback
• In OpenLab, Under Categories (on right hand side), choose “Project 2 -Txture & Pattern”, “Step 5 – Deliver”. Post your final designs.
• In the post, document your thoughts about this project. Think about what you learned, what you could have done better (Planning, material use, craft) and how you will apply what you learned to your next project.
• Consider and respond to the comments made in class during the critique.
• Comment on at least 2 other student’s post.

