Overview
Type Challenges are design assignments and discussions
Instructions
- Make a new post:
- Go to the DASHBOARD ->POST ->ADD NEW
- ADD title “Yourlastname_Firstname_TC_OpenLab_Setup“
- Then right under the plus sign, start typing to answer the questions: What is your favorite typeface? Why?
- Add an image:
- Design a name tag for yourself. Try to use expressive lettering to convey who you are or how you feel. You can sketch or use any application you want.
- Take a photo of yourself, insert it into your name tag. The name tag should be saved as a jpeg so you can upload it to your OpenLab post. Name the name tag “lastname firstName_tag.jpg”.
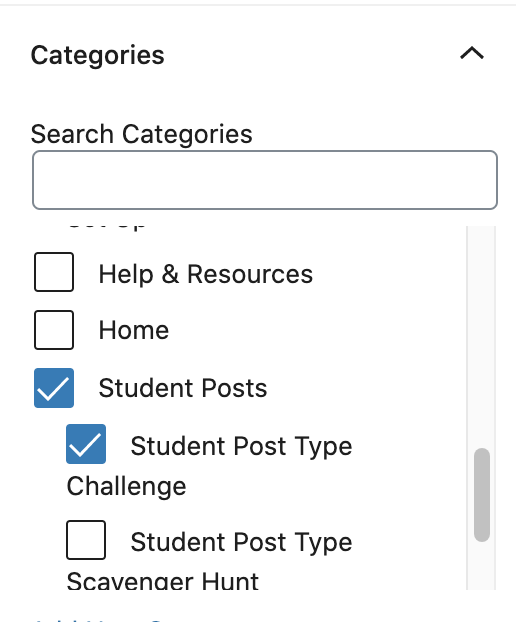
- Categories
Under the GEAR to the right of the screen, go to DOCUMENT ->CATEGORIES, then check the following categories: “Student Post” and “Student Post Type Challenge“
Due Date
- 11:30PM the night before next class
Resources
How to Use OpenLab
Adding a Post:
- In the WordPress Dashboard, click on the tab Posts -> Add New to create a new post
- Add a title in the title box at the top.
- Add an image (Add -> Media) or formatted written content using the Post Editor.
- Add the relevant Category (choose from the existing list).
- Click Save Draft for later or click Publish to publish immediately.
How to add images to OpenLab
From your mobile device
“Image Size” app Google Play https://play.google.com/store/apps/details?id=de.vsmedia.imagesize&hl=en_US
“Image Size” IOS App Store https://apps.apple.com/us/app/image-size/id670766542
Resize Images in OpenLab
Most digital cameras and phones are likely to be set to take images that are vastly larger than a user of a computer screen is likely to need
https://openlab.citytech.cuny.edu/openroad/image-resizing
Insert Images into a Post
https://openlab.citytech.cuny.edu/blog/help/adding-images-other-media-block-editor/
Create a Gallery in a Post
https://openlab.citytech.cuny.edu/blog/help/adding-an-image-gallery/
Edit a Gallery in a Post
https://wordpress.com/support/wordpress-editor/blocks/gallery-block/
How to create an image for web usage
https://helpx.adobe.com/photoshop-elements/using/optimizing-images-jpeg-format.html
Optimize a JPEG for online
JPEG is the standard format for compressing photographs.
• Open an image in Photoshop and choose File -> Save For Web.
• Choose JPEG from the optimization format menu.
• Specify the compression level: Choose quality option medium from the pop‑up menu under the optimization format menu. The higher the Quality setting, the more detail is preserved in the optimized image, but the larger the file size.
• View the optimized image at several quality settings to determine the best balance between quality and file size.
• Select Progressive to display the image progressively in a web browser; that is, to display it first at a low resolution, and then at progressively higher resolutions as downloading proceeds.
• To save your optimized image, click OK. In the Save Optimized As dialog box, type a filename, and click Save.


Leave a Reply