Adding images & other media
PLEASE NOTE: Each site has a size limit and unnecessarily large images can take up more of your space than you’d like. If you are sharing many large images, we suggest hosting them with an external storage solution, such as Google Drive, Dropbox, or Flickr, among others. Instructions for embedding externally hosted images is below. You can also read our guide to sharing large files on the OpenLab. If you’re uploading images it’s important to optimize them as much as possible before you upload; you can learn more about resizing images here.
Uploading images
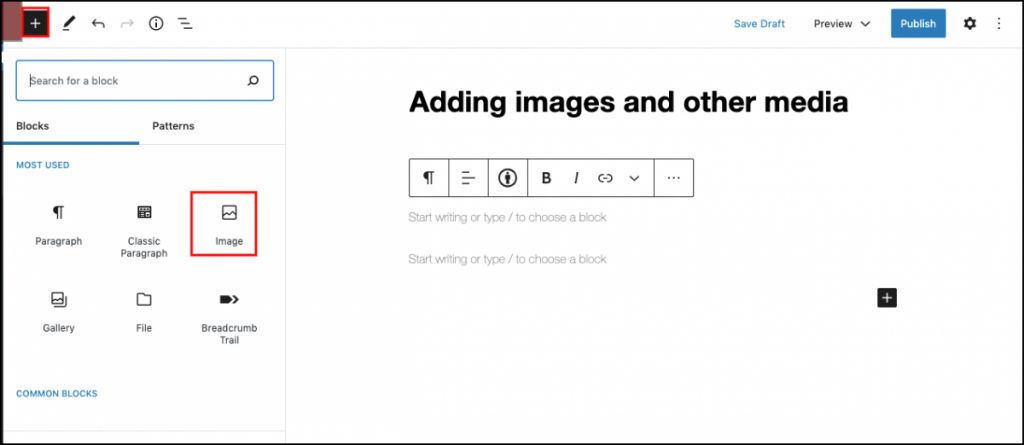
1. To upload images or other media (e.g. pdfs, Word docs, txt files) to a post or a page, go to your Dashboard > Posts > Add New or Pages > Add New. Click the Add block button. A block library will appear: click Image to add an image to your page or post.
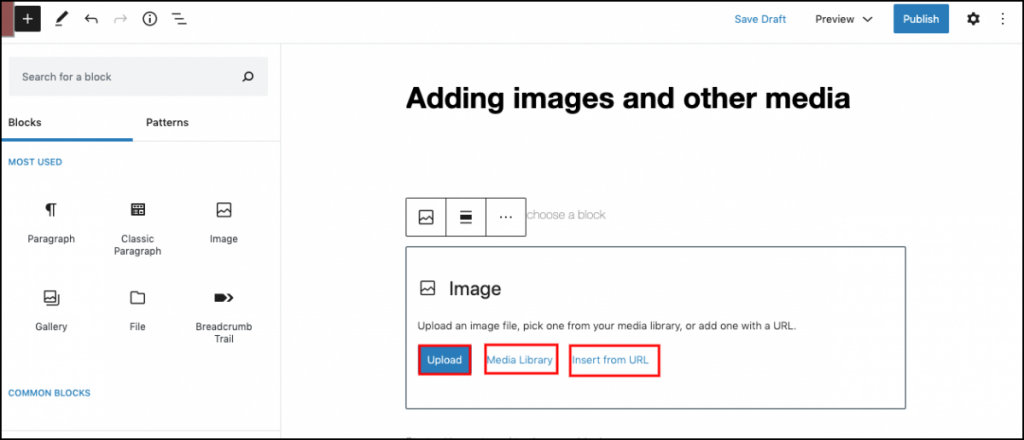
2. You can select files saved to your computer or flash drive by clicking Upload. Then, either drag-and-drop files from saved to your computer or select a file. You also have the option to select an image or other files from your media library by clicking the Media Library tab, or inserting an image from a URL by clicking the Insert from URL tab.
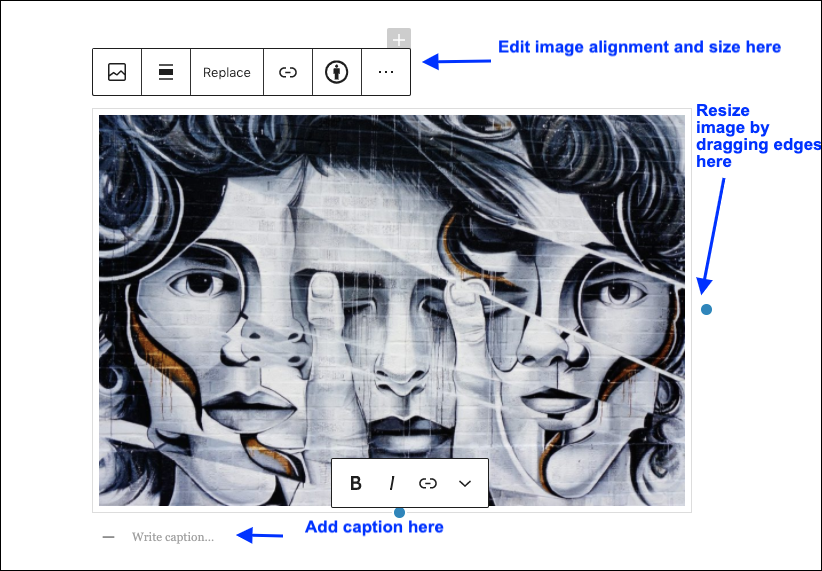
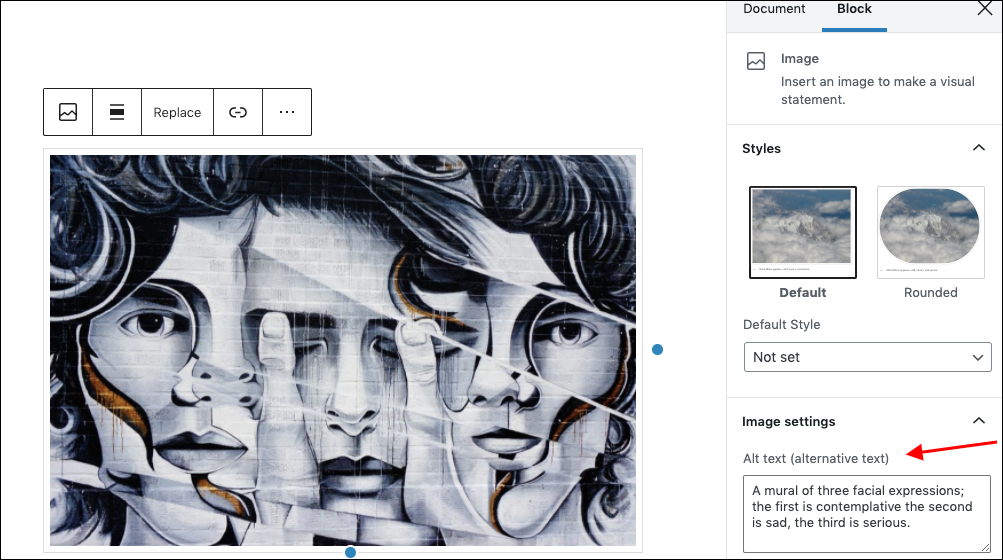
3. Once you have uploaded or inserted your image, you can make adjustments to the file using the options in the block toolbar. You can add a caption to appear underneath the image, change the “Alignment” of the image, and choose between the default rectangular style and a rounded image style. You can change the “Size” of the image by dragging its edges.
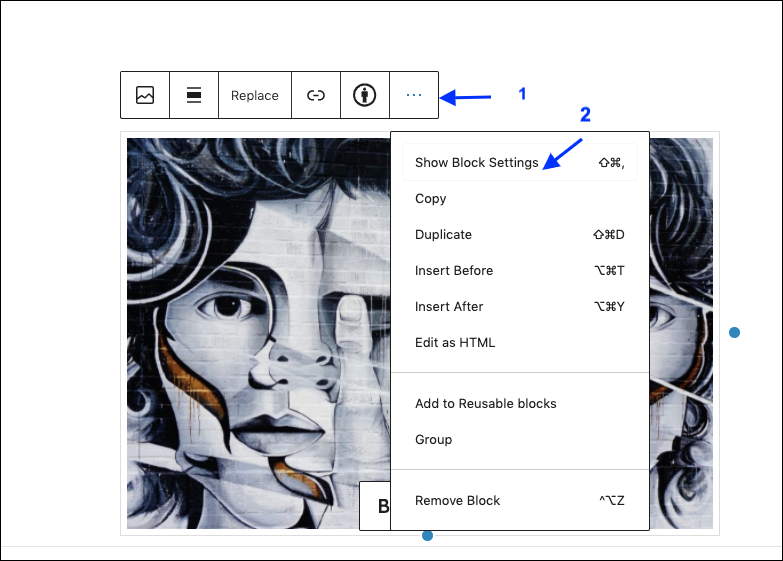
4. It is important to include alt text for your image. To do this, enter your alt text in the designated box in the block settings panel that appears on the left hand side of your screen. If you don’t see the block settings, click the three dots in the block toolbar and select Show Block Settings.
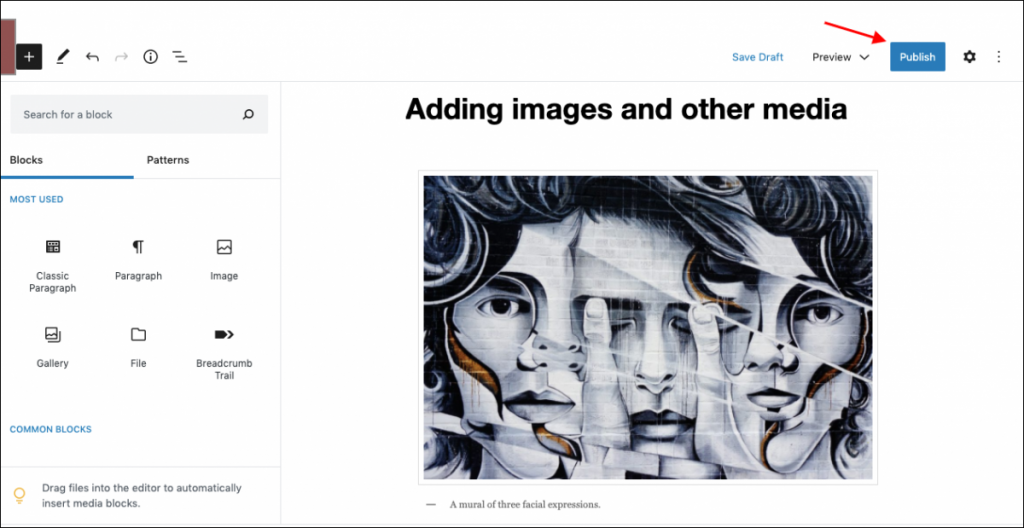
6. After you are finished making adjustments, click anywhere in the block editor away from the image. The image will appear in your post. When you’re finished with the post, click Publish.
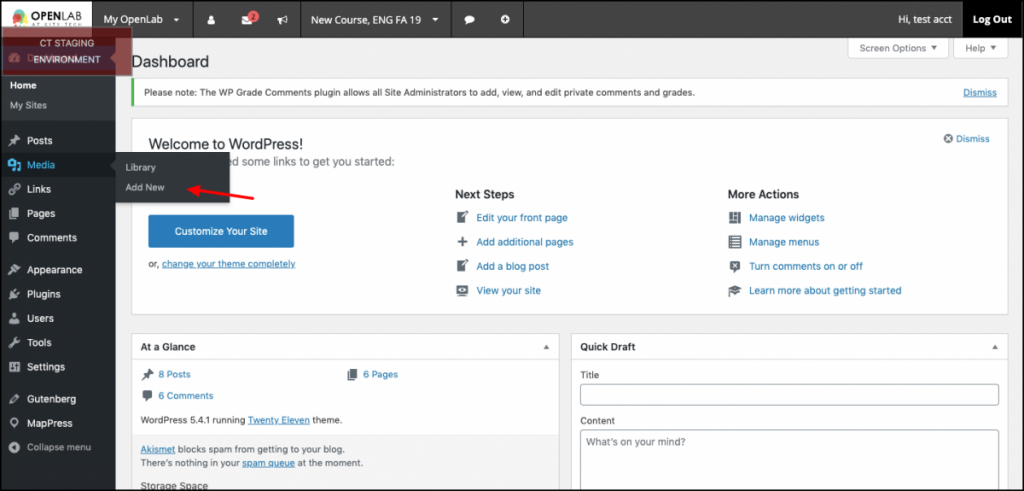
6. You can also add images to your media library to use later in posts and pages. Go to your site Dashboard and click Media > Add New in the left-hand menu.
Embedding externally-hosted images
1. You can also embed images hosted elsewhere (from another site, such as WikiMedia or from your own external storage service, such as Google Drive, Dropbox, or Flickr, among others). On the “Add New Post” or “Add New Page” screen, click the Add block button. A block library will appear: click Image to add an image to your page or post.
2. Click Insert from URL. Paste or type the URL for the image.
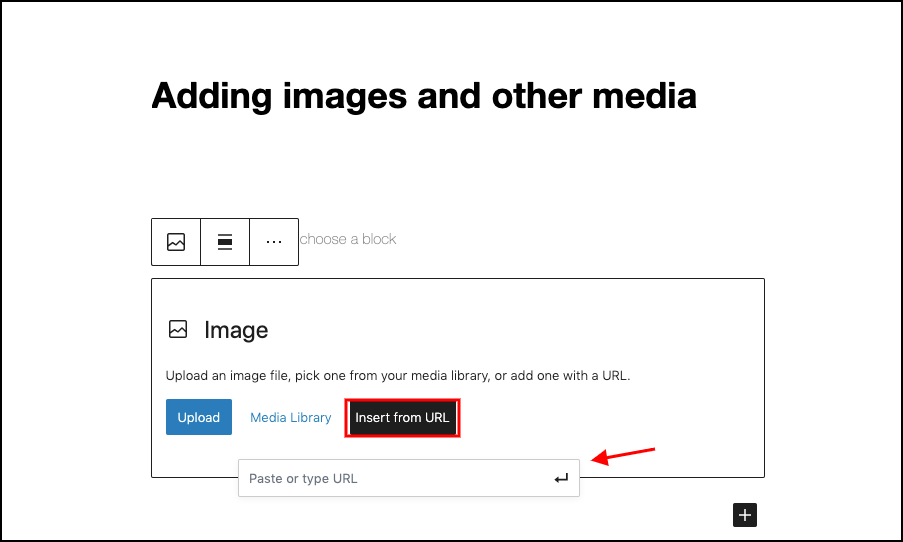
3. Click enter or the black arrow to Insert into Post.
4. Once you have inserted your image, you can make adjustments to the file using the options in the block toolbar. You can add a caption to appear underneath the image and change the “Alignment” of the image.
Embedding images from Flickr
For most sites, such as Google Drive, Google Plus, or Dropbox, it’s easy to find an image’s URL. It’s a little trickier on Flickr, so we’ve included instructions below.
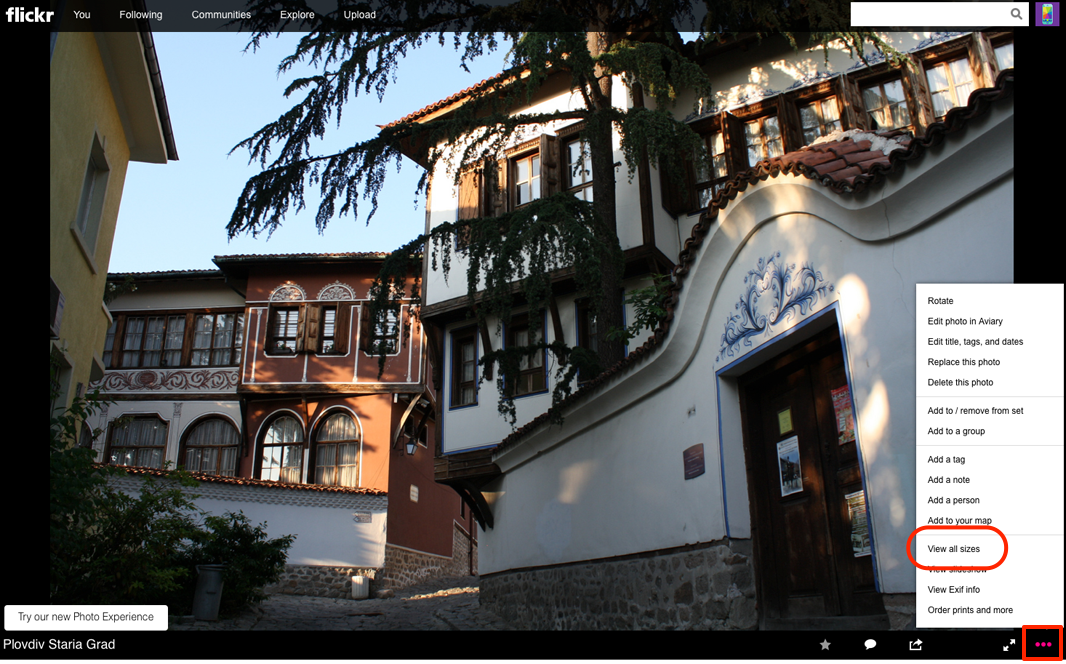
1. To get an image URL, you need to View all sizes of the image. Right click on the image itself, or click on the icon to view more options (three dots, at the far right-hand side). Choose View all sizes.
2. Choose the size you want, and right click on the image. Choose Copy Image Location (the wording may vary depending on your browser — you just want to copy the image link or URL).
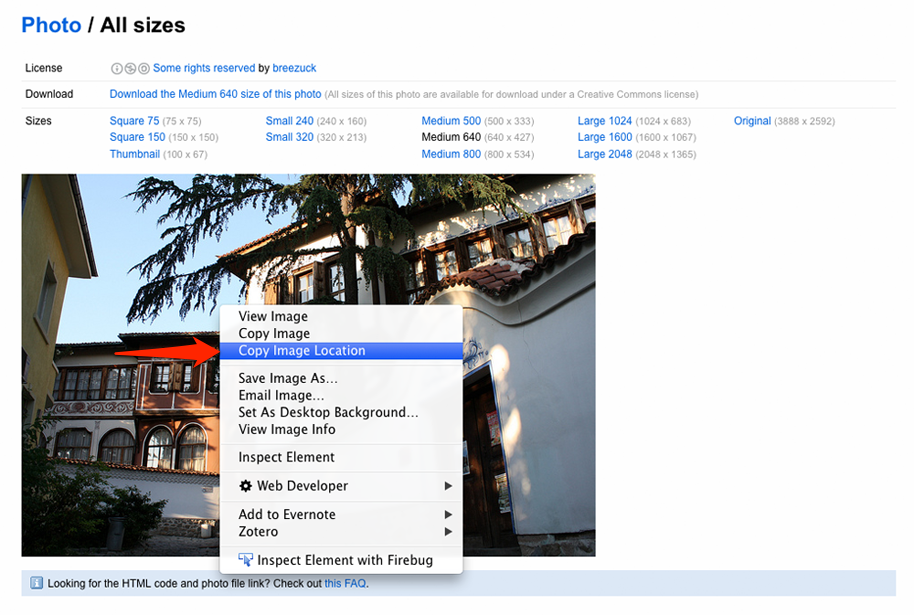
3. Paste the URL into the “Insert from URL” page, described in step 1 above for embedding externally-hosted images and follow the rest of those directions.
As always, be sure you are following copyright or Creative Commons guidelines for all images you use. For more information read about Following Copyright Guidelines for Images.
Uploading other media
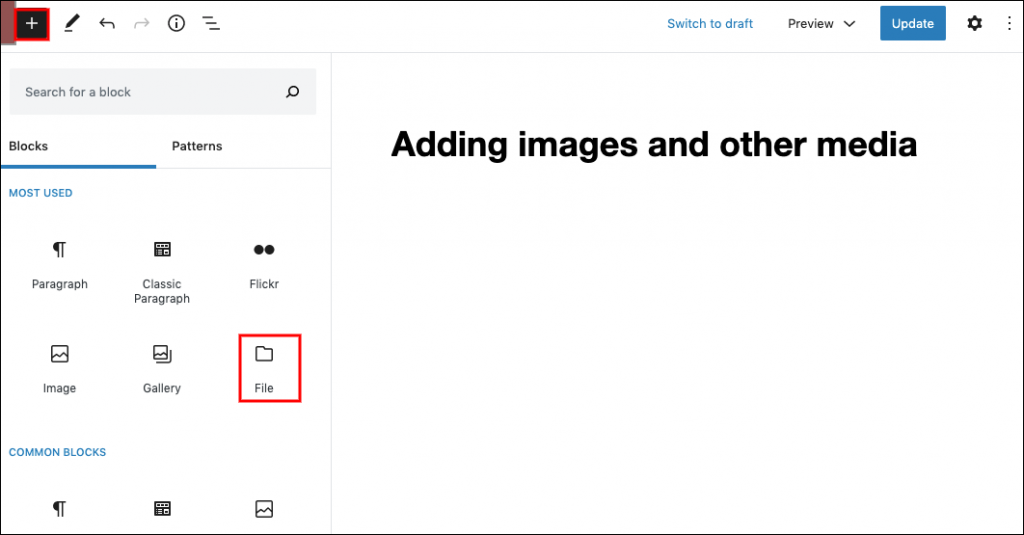
1. To upload other media (e.g. pdfs, Word docs, txt files) to a post or a page, go to your Dashboard > Posts > Add New or Pages > Add New. Click the Add block button. A block library will appear: click File to add a file to your page or post.
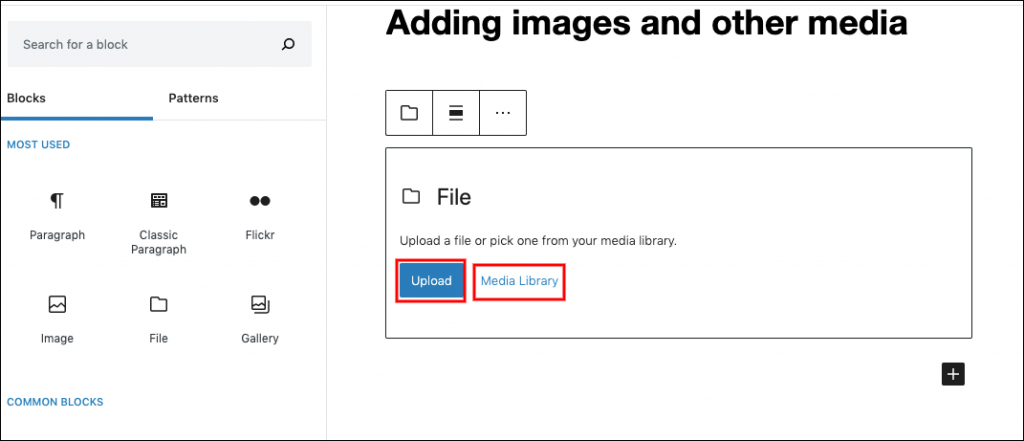
2. You can select files saved to your computer or flash drive by clicking Upload. Then, either drag-and-drop files from saved to your computer or select a file. You also have the option to select files from your media library by clicking the Media Library tab.
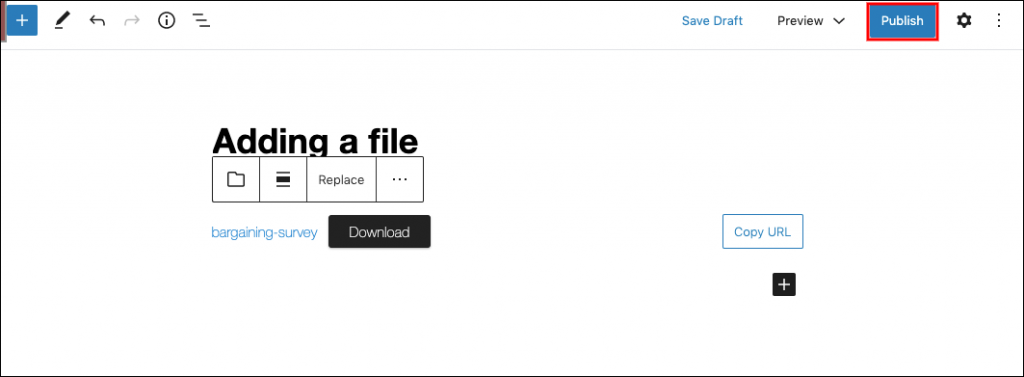
3. The link to the file will appear in your post. When you’re finished with the post, click Publish.
4. You can also add files to your media library to use later in posts and pages. Go to your site Dashboard and click Media > Add New in the left-hand menu.
Looking for Classic Editor help? You can find it here: Adding images & other media (Classic)


