Objective
Create a black-and-white portrait that uses patterns of varying densities instead of shades of gray.
Step 1: Source
Find a high-quality portrait photograph to use as the basis for your assignment. You can take your own, or use a professional photograph. Convert the photo to black and white, then post to OpenLab tagged with “Project 2: Pattern Portrait” and “Step 1: Source”
Recommendations for images:
- high contrast (range between darkest/lightest areas) on face
- taken from the collarbone/shoulders up (like an ID photo)
- clear distinction between subject and background (check the hair especially)
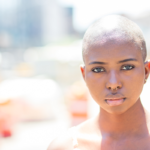
-

- YES: this an ideal image. There is strong contrast between the subject and background, and a high dynamic range (difference between light and dark) across his face.
-

- NO – there is very little contrast on the left side of the subject’s face, which makes the features challenging to define and flattens the appearance of the illustration.
-
- NO – highlights on the subject blend with the blown-out background, which would result in a portrait with a seemingly misshapen head and neck.
Step 2: Convert
Use Illustrator’s Image Trace interface to convert your photo to a 6-color vector graphic (black, white, four shades of gray), then clean up/adjust the results using the pen tool. Post to OpenLab tagged with “Project 2: Pattern Portrait” and “Step 2: Convert”.
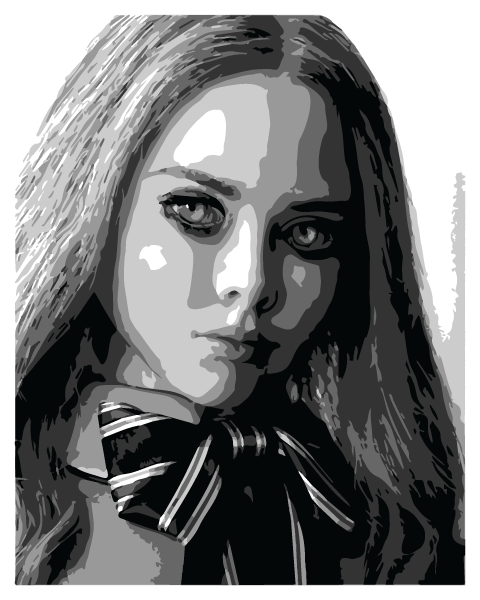
Portrait at the end of Step 2
- Create a new Illustrator document, sized 8″ x 10″ at 300ppi
- Place your photo in Illustrator (file -> place), making sure it’s scaled to fill the entire artboard. (click and drag on the white squares in the corners to resize; hold the shift key to scale it evenly)
- Use the “image trace” interface to convert your image to vector paths (object -> image trace -> make). You may get a warning about tracing proceeding slowly; it is safe to ignore this.
- Open the “image trace” window (window -> image trace), then choose the “6 color” preset from its dropdown menu.

- “Expand” your image (object -> image trace -> expand). This converts the image to vector paths – geometric shapes we can manipulate and edit.
- Ungroup the expanded vector paths so you can select them individually (object -> ungroup).
- Separate each color into its own group of shapes. Click on a vector shape, then all other objects of the same color (select -> same -> fill color), then group the objects (object -> group). Repeat this until all six colors (black, white, four shades of gray) are grouped together.
- Export your image as a .jpg, using the high-quality preset (file -> export -> save for web (legacy)), then post to OpenLab.
Step 3: Palette
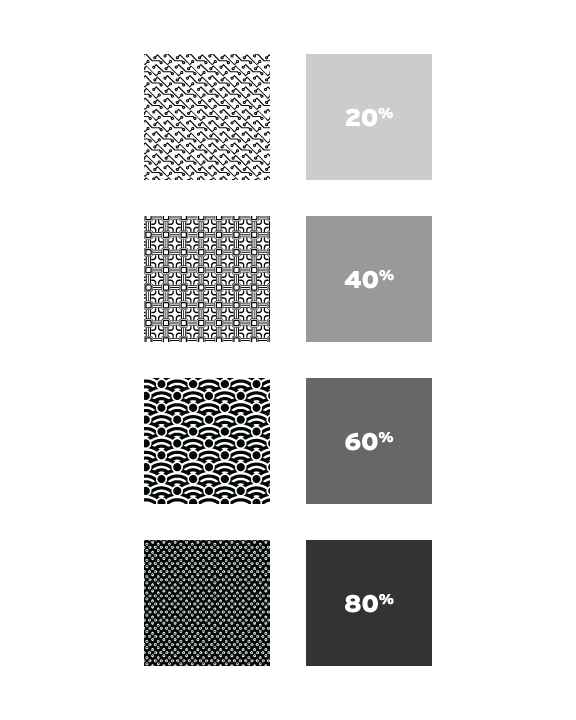
Design four geometric patterns of different densities to replace the four shades of gray in the image. Start by drafting individual tiles or small areas in your sketchbook, then recreate those sketches digitally using Illustrator and make adjustments so they repeat seamlessly like the examples below. Use this template to create a simple layout showing a tile of each pattern alongside its corresponding shade of gray (replace the existing patterns, those are examples and placeholders. Post this layout to OpenLab tagged with “Step 3: Palette”.
A completed pattern template for Step 3: Palette
This video/tutorial explains the process of creating patterns in Adobe Illustrator. The specific process and method you use will depend on the pattern you make. Only use black (#000000) and white (#FFFFFF) for the shapes and lines in your pattern.
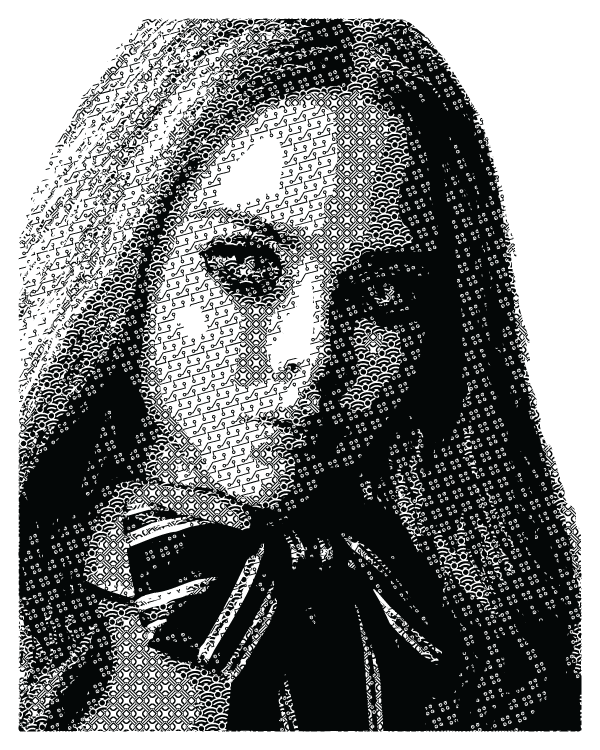
Step 4: Present
Print your portrait on cover-stock paper, then trim to the 8″ x 10″ size (I strongly recommend using cop marks when you prinnt). Mount the print to black illustration board or foamcore for critique. Post the finished piece to OpenLab tagged “Step 4: Present”; bring the printed/mounted copy to class.