
Mockup of a finished project mounted to presentation board
BRIEF
Make four 6” x 6” paintings that recreate the composition (placement of visual elements) of a photograph, using only a small number of individual shapes: 2, 4, 6, and 10 (not including the ground/
background). These paintings will also use four different color schemes: grayscale and one monochrome (single color plus black and white) for each primary color.
PURPOSE
- Gain practical experience using and mixing acrylic paints
- View an image from an abstract perspective, with its visual qualities separated from its real-world context
- Walk through a typical design workflow: research/analysis, drafting, production, finishing
BREAKDOWN
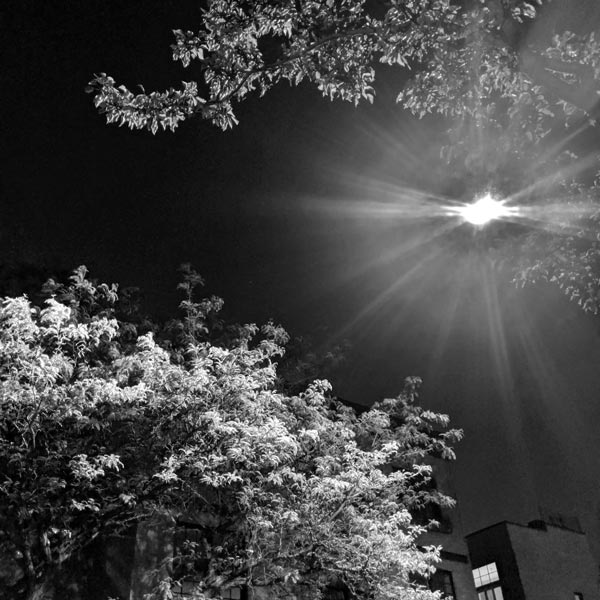
A source image cropped and converted to black and white
Step 1: Choose and prepare your source image
You can start with any photo, as long as it’s one that you took. Crop it to a square (1:1 aspect ratio), then convert it to black and white if necessary.
Step 2: Analyze
Decontextualize the image – forget what it is and see it only as visual elements. Try squinting until you can barely make anything out, or viewing it in a different orientation or from far away. What major shapes (distinct areas of light/dark) do you identify? Are their edges hard/sharp or soft/blurry? Is the geometry precise or organic? Where is the focal point of the image? And so on.
Step 3: Draft
Mark four small (2” x 2”-ish) squares on a sketchbook page. Sketch a highly reduced version of your image in each, starting with only two shapes (not including the background) and working up to 4, 6, and then 10 individual shapes. Adjust and simplify as necessary.
Step 4: Produce
Remove four sheets of Bristol paper from your pad and tape off a 6” x 6” square on each. Mix a wash (about 60% paint to 40% water) from either white or black, depending on if your image is mostly dark or light. Apply one or two light coats of the wash, giving at least 20 minutes to dry in between.
Once the primed paper is dry, lightly outline the shapes of your reduced compositions with a hard (2H or 4H) pencil. Don’t use an eraser if you make a mistake – it tears up the paper fibers, and you’re painting over it anyway.
Paint each composition with a different limited palette: black and white only, then black, white, and one primary (magenta/yellow/cyan) for the others.
Step 5: Finish
Go to an art supply store and get a 15” x 20” black presentation board (~$3), then have them cut it to 15” x 15” (usually 25 – 50 cents).
VERY CAREFULLY peel the tape from your finished paintings. Align your ruler/straightedge just inside the edges of your painting, then use your X-Acto to cut it from the page.
Mount all four paintings to your presentation board, spaced evenly. If your paintings are 6” x 6”, that means they should be 1” from the edges (see the example above). Write your name, class, project, and semester on a small square of paper, then tape or mount it to the back of the presentation board.
Tape two sheets of 11” x 14” tracing paper together, overlapping the sheets so the combined page is ~17” x 14”. Align the bottom edge of the tracing paper with the bottom edge of the presentation board, then fold the top over and tape it to the back to make a protective cover for your work.