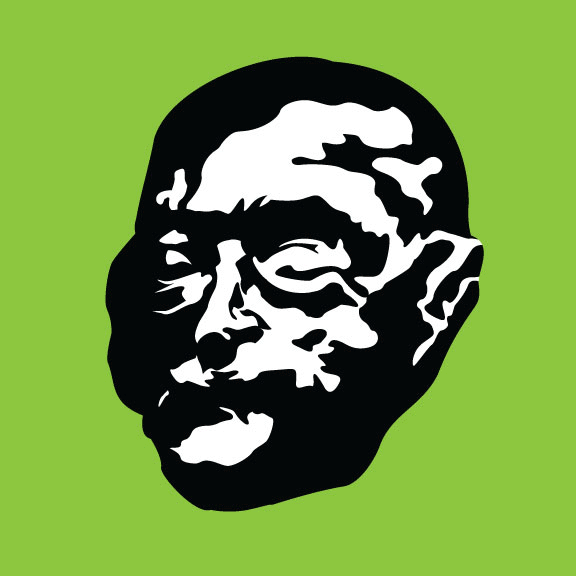
Use Adobe Illustrator to make a simplified, two-color vector illustration based on one of the faces below.
We will start working on this assignment in class on 10/3, and complete it as homework for 10/6.
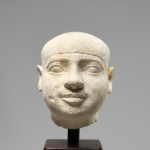
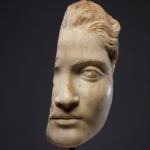
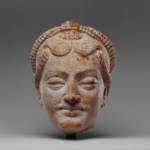
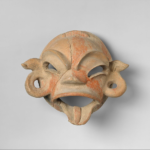
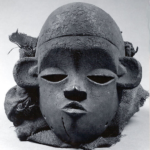
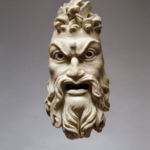
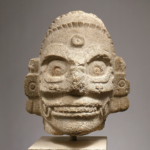
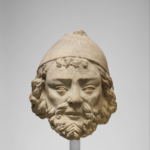
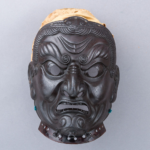
- Choose a face from the gallery above; save and download the image.
- Create a new Adobe Illustrator document, setting the size to 8″ x 8″ in the new document popup.
- Place the image in your Illustrator document (File -> Place). Position the image so the face is centered in the composition. You may want to turn off smart guides at this point (View -> Smart Guides).
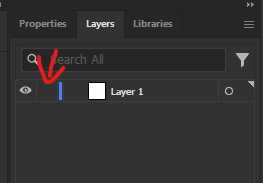
- Create a new layer (using the “+” at the bottom right of the “layers” panel). Then, lock the one with the original image. You can lock or unlock a layer by clicking to the right of the eyeball in the “layers” panel.
- Use the pen tool in Adobe Illustrator to trace the outline of the head on this layer.
- Create a new layer, then lock the the one containing the head’s outline.
- Use the pen tool to threshold the image by outlining dark or shadowed areas.
- Select the shapes you drew for the previous step, then combine them as a group (Object -> Group). Give them a black (#000000) fill and no outline.
- Unlock the layer with the head’s outline. Give it a white (#FFFFFF) fill and no outline.
- Create a new layer below the one with the head’s outline. Draw a rectangle that completely fills the artboard (8″ x 8″), and fill it with the color of your choice, then lock the layer.
- (Big Step) Clean up and simplify your traced shapes, using automatic tools like “simplify” (Object -> Path -> Simplify) as well as the direct select and anchor point tools.
- Export your finished face as a high-quality JPEG (File -> Export -> Save for Web (Legacy)).
- Post the exported image to OpenLab. Title your post “[your name]: Making Faces” and tag it with “Homework: Making Faces”.