- Once you have your design completed and saved in Photoshop, save a copy in .TIFF format (File -> Save As). Use the default .TIFF export settings. (Hit “OK” on the reminder that including layers increases file size.)
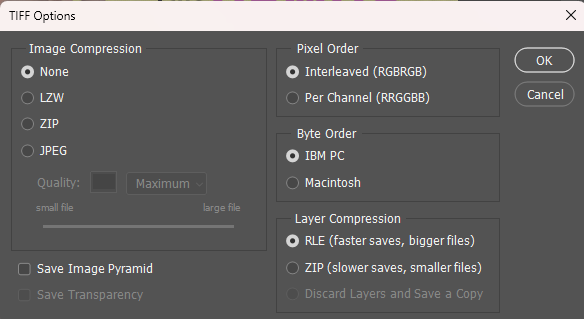
default .TIFF settings
- Open the .TIFF in Photoshop. Select all layers (Select -> All Layers), then combine them (Layer -> Merge Layers) into a single image layer. This keeps the appearance of the composition from changing too much when you convert it to CMYK.
- Convert your image to CMYK (Edit -> Convert to Profile), using the standard Working CMYK color space. You may want to increase the brightness of the image 10-15% to compensate for the darker print colors – you may want to try a few different options to figure out what works best with your printing setup.
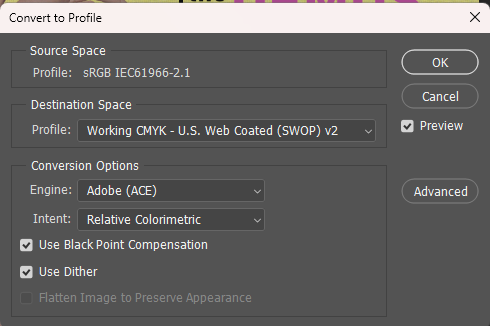
Convert to CMYK with these settings
- Save your .TIFF (File -> Save) and close Photoshop.
- Create a new InDesign document at 10″ x 10″ with a 1/8″ (0.125) bleed.
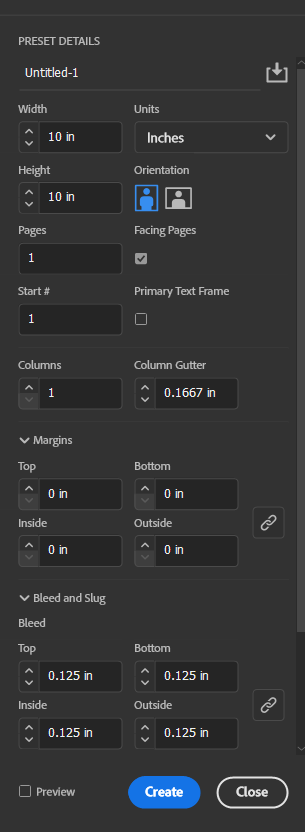
InDesign document settings
- Place your .TIFF file (File -> Place) in the InDesign document. You can easily center and scale the content frame in the “Properties” panel (usually at top-right) by entering “5” for the X and Y position, and “10.25” for Width and Height:
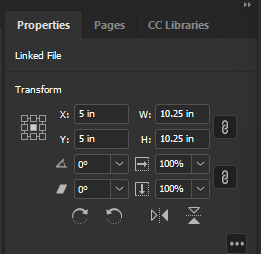
properties tab settings for scaled and positioned album art
- Make the content scale down to fit the centered and adjusted frame (Object -> Fitting -> Fit Content Proportionally).
- Export your InDesign document as a PDF (File -> Export). After you confirm the file name/location and click “save”, you will see the PDF Export menu.
- Use the “High Quality Print” preset (usually the default). In the “Marks and Bleed” section, check “crop marks” and “bleed marks” as well as “Use Document Bleed Settings”, then click Export.
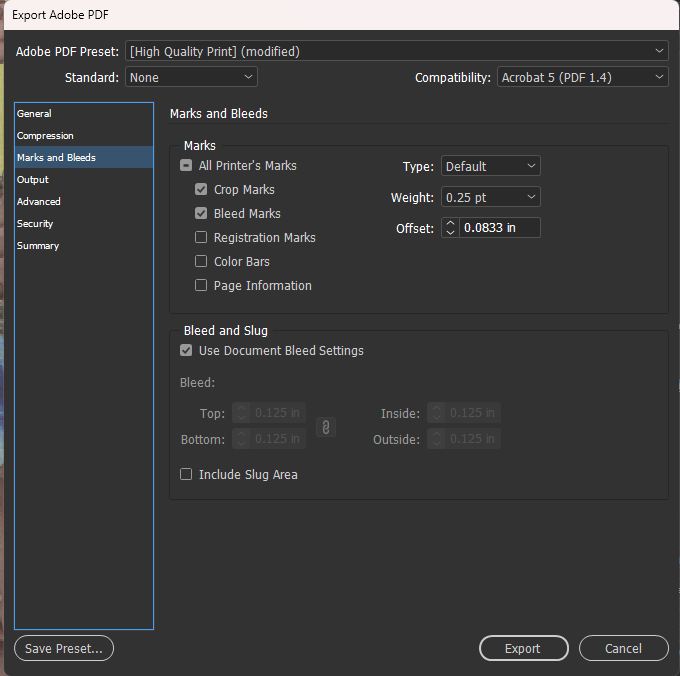
Marks and Bleeds settings
- Print your exported album cover on stock (paper) around 90 – 110lb thickness. You can use glossy or matte paper, whatever you think best presents your work. Don’t forget to mount it to black illustration board or foamcore!
Spring 2023 | prof. Jake Wright
© 2025 COMD1100 Graphic Design Principles 1
Theme by Anders Noren — Up ↑


Leave a Reply