Faculty: This example post demonstrates how you can provide instructions for each assignment. It uses the category “Assignment Instructions” and can be found under Activities > Assignments in the site menu. Use the suggested outline below to structure your assignment posts.
Overview
Up Close & Personal: Photo Study Guides
We begin our course by starting with our own faces! Take 12 color photos of your face in the 4 positions and 4 lighting schemes below. Through these study guides you will learn how your own face relates to universal facial proportions and how your own features distinguish you as the unique and individual you are.
The 4 views:
- Classical
- Full-frontal (facing forward)
- Three-quarter (rotate face and body slightly)
- Profile (rotate face and body to side view) The craziest face you can make(!)
The 4 lighting schemes:
- Top light, also known as “overhead”
- Bottom light for that spooky, film noir, dramatic look
- High side light, slightly in front to reveal a triangle of light on the shadow side, also
- Only for crazy face: any high-contrast lighting of your choice
Learning Outcomes
- To understand the proportions of a face by first studying your own.
- To learn how your own face relates to other faces
- How is it similar?
- How is it different?
- To learn how the form of a face is defined by light and shadow.
- To see what values are at work when a color photo is converted to B&W
- To discover the power of light and shadow to express mood and emotion.
- To create a baseline reference for future life portrait drawing
- To be able to see what values are behind the colors in your face.
Instructions
What you will need:
- Cell phone or camera with focal length, if available, at 50mm or above to avoid distortion
- Tripod for camera, if available
- Lamp (avoid flashlights, phone lights, or flashes)
- Stool or low-backed chair
- 2 people to help, if available
- 1 to shoot photo to avoid “funhouse mirror” perspective of arm-distance selfies
- 1 to hold and adjust lamp angle.
How to:
- Before beginning, remove jewelry, earrings, studs, and glasses.
- Pull or tie hair back to show ears, neck, and forehead.
- Sit before a plain wall or tack up a sheet to create a plain background.
- Sit up straight and keep head level to show you at your best and to avoid distortion.
- Control light by turning off ceiling lights and closing blinds.
- Position lens level with eyes. Measure distance from floor to eyes and floor to lens. Move the lens to match the height.
- Photograph top of head to just below clavicle; Avoid cropping.
- Once camera is positioned, use this height for most shots. A tripod helps.
- Adjust light on face to create strong light and shadow for each light direction.
- Adjust stool distance from wall to adjust cast shadows on wall.
- Photograph the first 3 views for a total of 9 color photos.
- For view 4 shoot the craziest faces you can make!
- Exaggerate emotion and gestures.
- Try tilting face back or forward.
- Include hands if you wish.
- Use any lighting to create strong shadows to accentuate drama and mood.
- Select your favorite 3 to post with your other views.
- Create an additional set of black and white images and save for future homework.
- Print out your images in black and white on ordinary paper for in-class exercises before next class.
- Make several extra copies of the profile, 3⁄4, and front views in classical lighting. We will actually be drawing on these prints.
- If possible, print several favorites on photo paper for greater clarity.
Submission
Create a new post with an image gallery containing the drawings you created for this assignment.
- To create your post, visit OpenLab Help> Writing a Post
- Title your post with “Screen name” + “Assignment 1”. Example: “Miguel – Assignment 1”
- IMPORTANT: Be sure to check the category “Assignment Posts” when creating your post. Visit: OpenLab Help > Adding Categories and Tags.
- IMPORTANT: Be sure to use the tag “Assignment 1” when creating your post. Visit: OpenLab Help > Adding Categories and Tags.
- To add an image gallery, visit OpenLab Help > Adding an image gallery
- Add well-lighted, thoughtfully composed images of your drawings to an image gallery.
- Add a written reflection.
- Document your thoughts about this assignment. Think about what you learned, what you could have done better, and how you will apply what you learned to your next drawing.
Due Date(s)
- 4 pm the day before Class 2 es or schedule
Resources
- Examples of “Face Photos in Strong Shadow,”
- Article: Canvas, “Self-Portraits Versus Selfies,”
- Article: “Selfie vs. Self-Portrait,” Academy Art U News
- Examples of expressions from Bodies in Motion
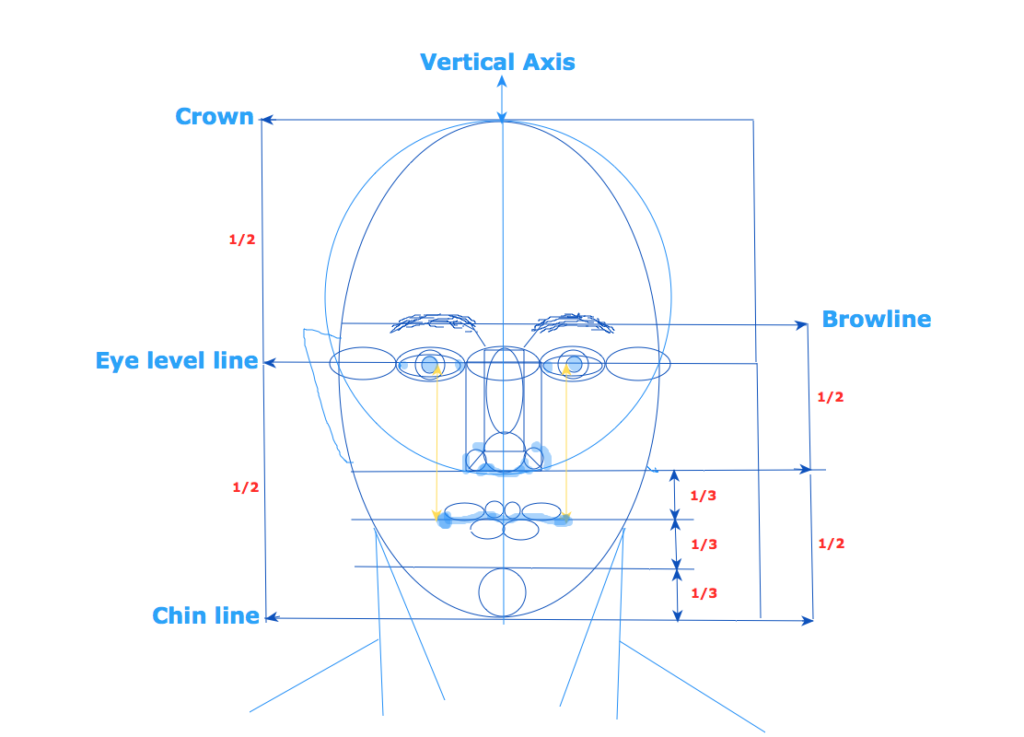
Simplified Whiteboard Full-Frontal-Face-Diagram
Student Examples
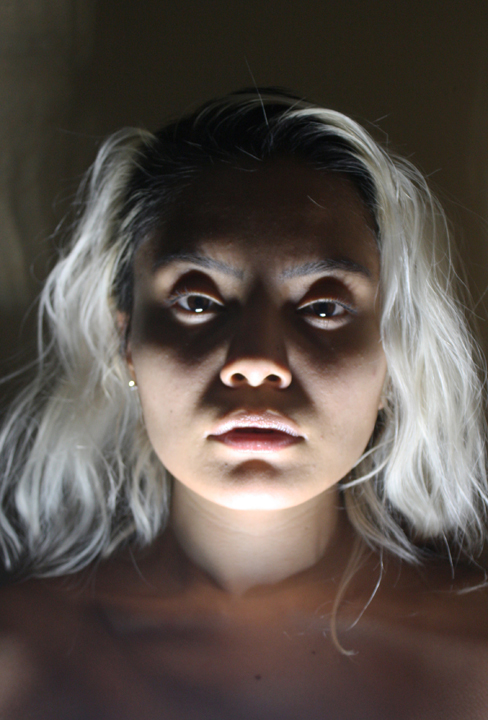
With permission: Ashley Leon (bottom light frontal view) 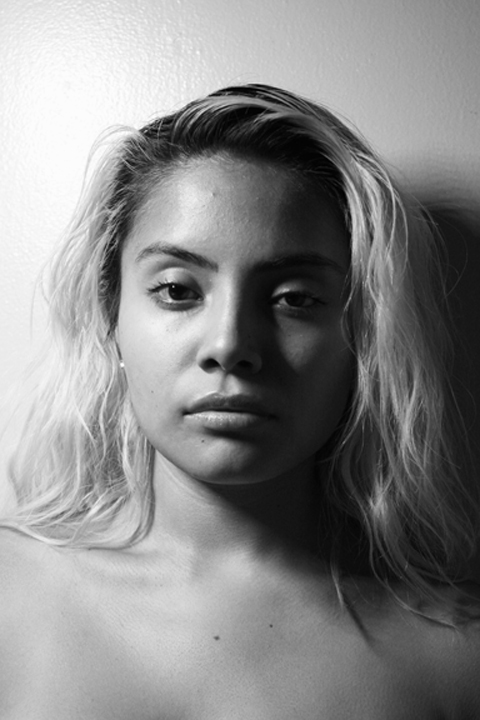
With permission: Ashley Leon_ (classical-lighting-frontal-view) 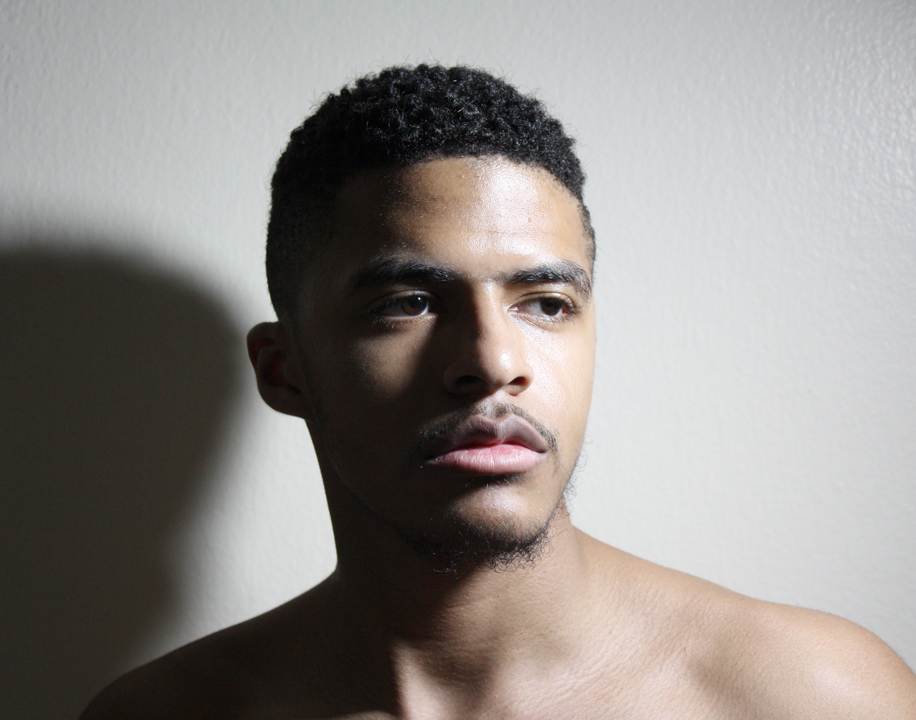
With permission: Jamal Taylor (classical-light-3_4-view) 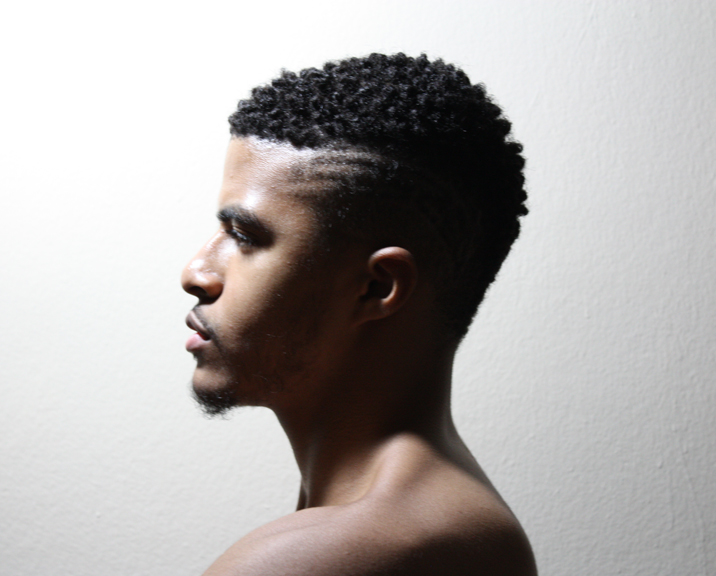
With permission: Jamal Taylor (top-light-profile-view) 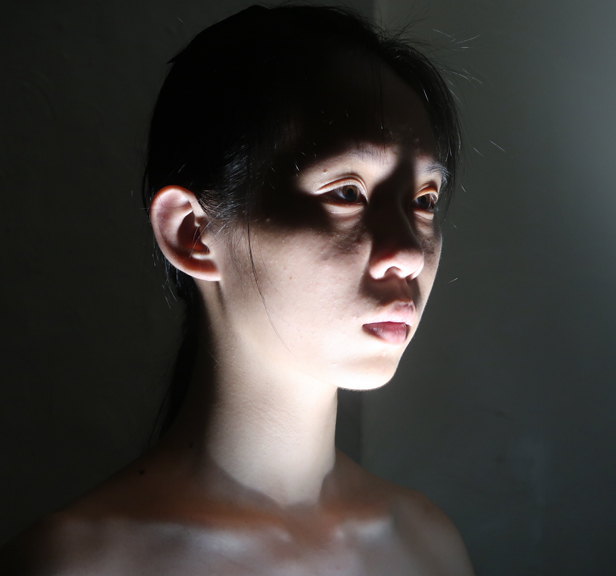
With permission: Yuxin-Yang (3_4-view-bottom-light) 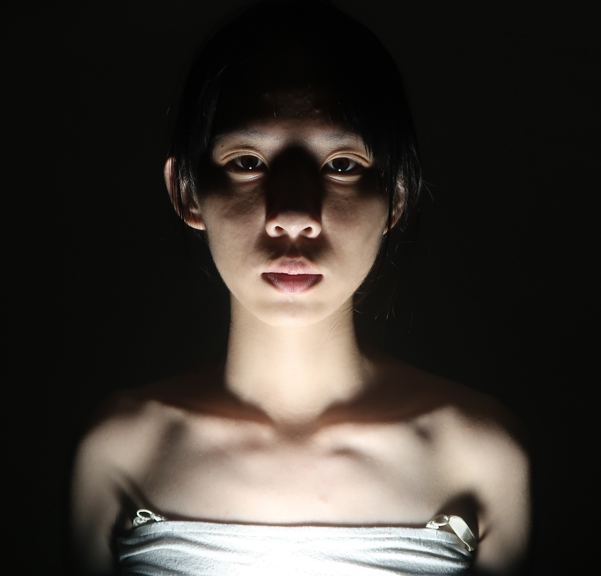
With permission: Yuxin Yang (bottom-light-frontal-view)


Recent Comments