Categories and tags: For authors
Categories and tags are keywords or phrases that are added to posts to help to organize information on a site. Categories are usually more broad, like the table of contents of a book, and tags are more narrow, like a book’s index.
Categories can only be created by a site admin, but can be added to a post by any site member. If you don’t add a categories to a post, the default category, “Uncategorized,” will automatically be added.
Tags can be created and added to a post by any site member.
Categories
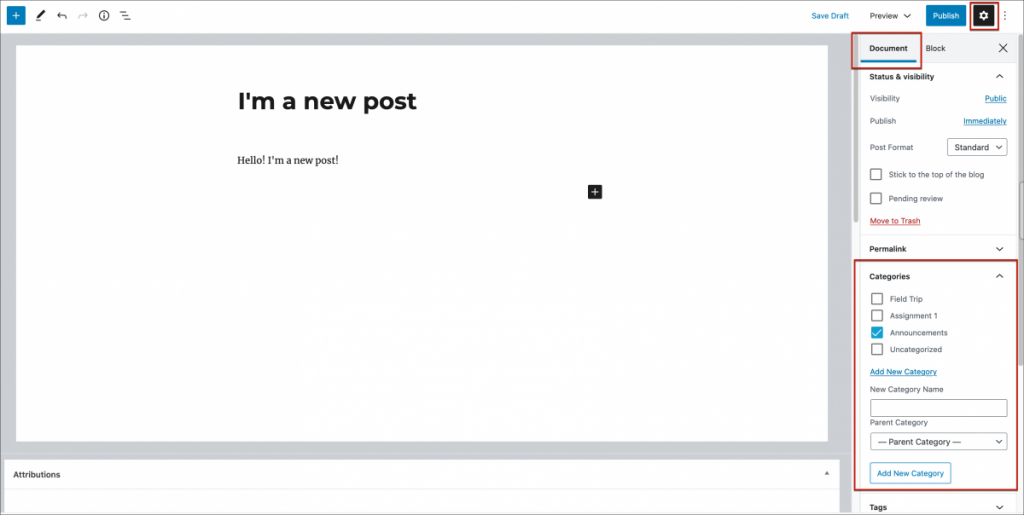
1. You can add a category to your post by creating a new post or editing an existing post. You’ll find categories in the Document settings sidebar panel. Be sure you’re viewing the Document rather than Block tab, and if you don’t see the settings sidebar, click the gear icon at the top of the page, to the right of the Publish button. To add a category, check the box next to the appropriate category in the Categories section. You can also add categories here, by clicking Add New Category at the bottom of the Categories section. When you’re finished with the post, click Publish, and the category will be assigned to your post.
2. To edit a post category, edit the post, make any necessary changes to the category, and click Publish.
Tags
1. You can find tags in the Document settings sidebar panel. Be sure you’re viewing the Document rather than Block tab, and if you don’t see the settings sidebar, click the gear icon at the top of the page, to the right of the Publish button. To add tags, type in the tag or tags of your choosing into the text box in the Tags section, and press the enter or return key. After you publish the post, the tags will be added to your post. If you would like to remove an assigned tag, click the “X” that appears next to the tag, or use your backspace or delete key.

Looking for Classic Editor help? You can find it here: Adding Categories and Tags (Classic)


