Adding columns to display content
You can use columns to organize your content in a post or page.
Adding the columns
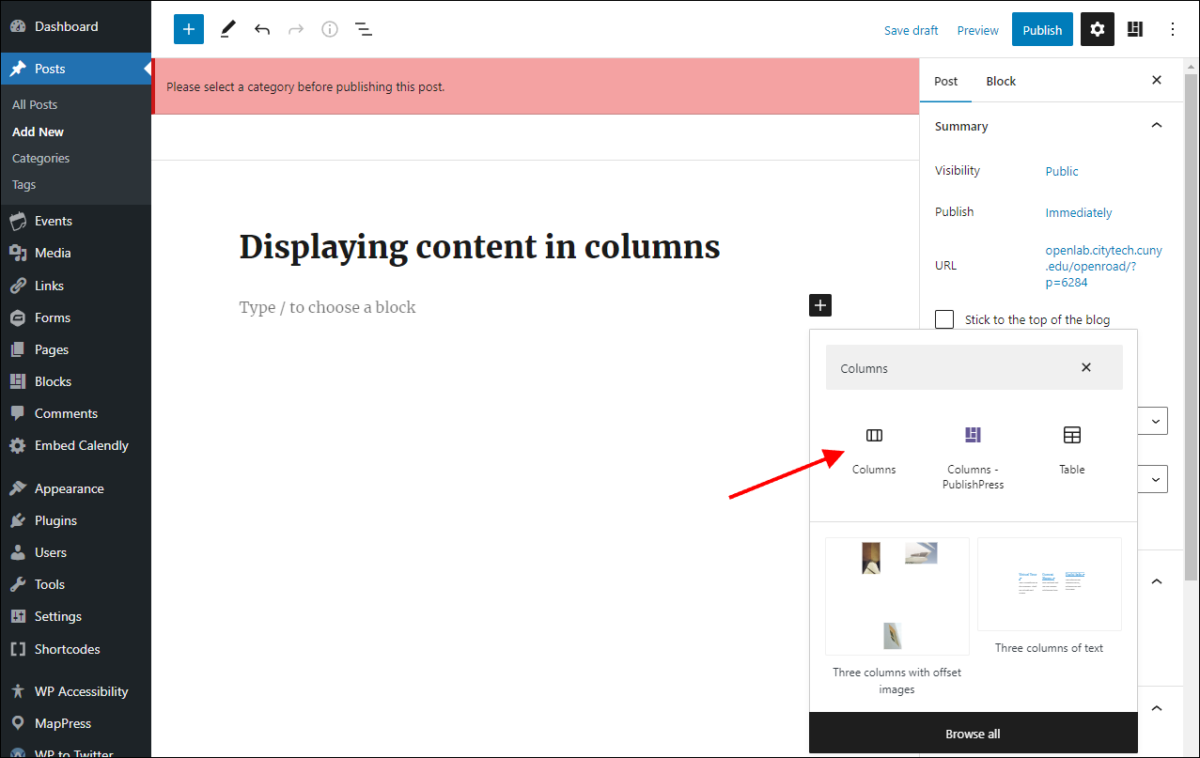
1. In your post or page editor, add a new block and type “Columns” in the search bar. Choose the Column option once it shows up.
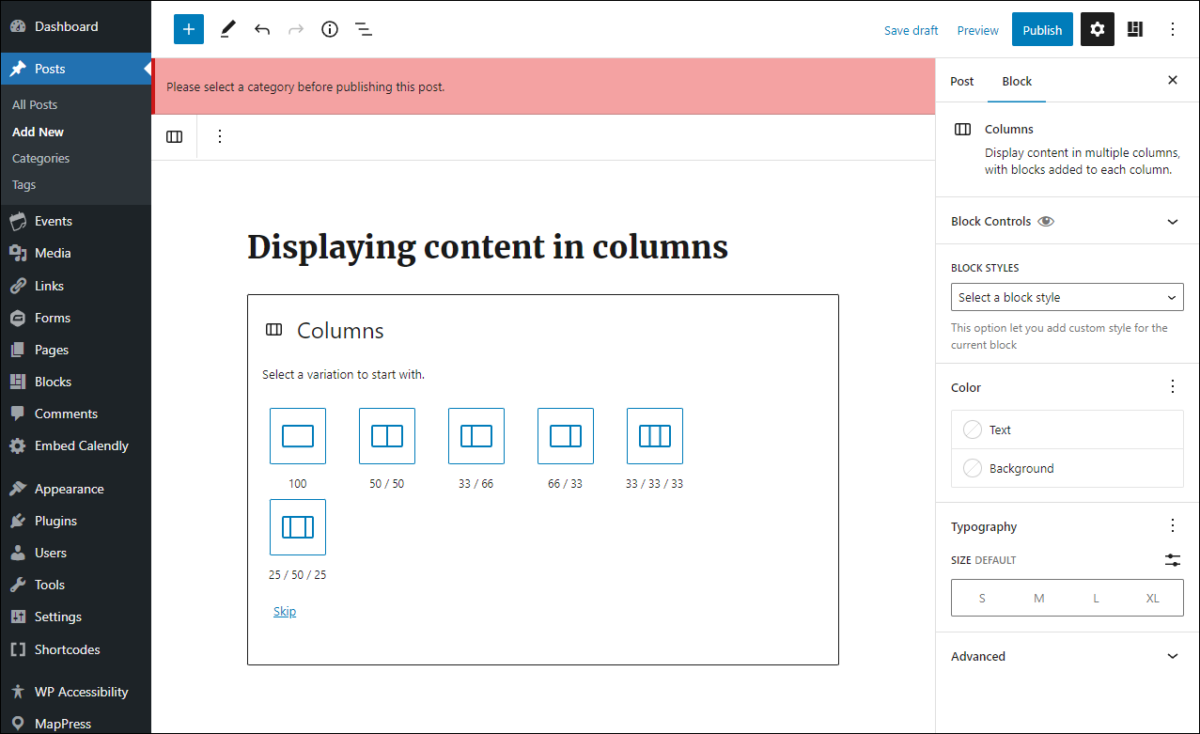
2. Select the desired number of columns and their layout. This can also be skipped and changed later.
Adding content to the columns
1. The columns will be displayed as a set of boxes. The one that is selected and ready to edit will have a plus symbol ( ➕ ) on it. If you want to edit a different one, click on it, and the plus symbol will appear once it has been selected.
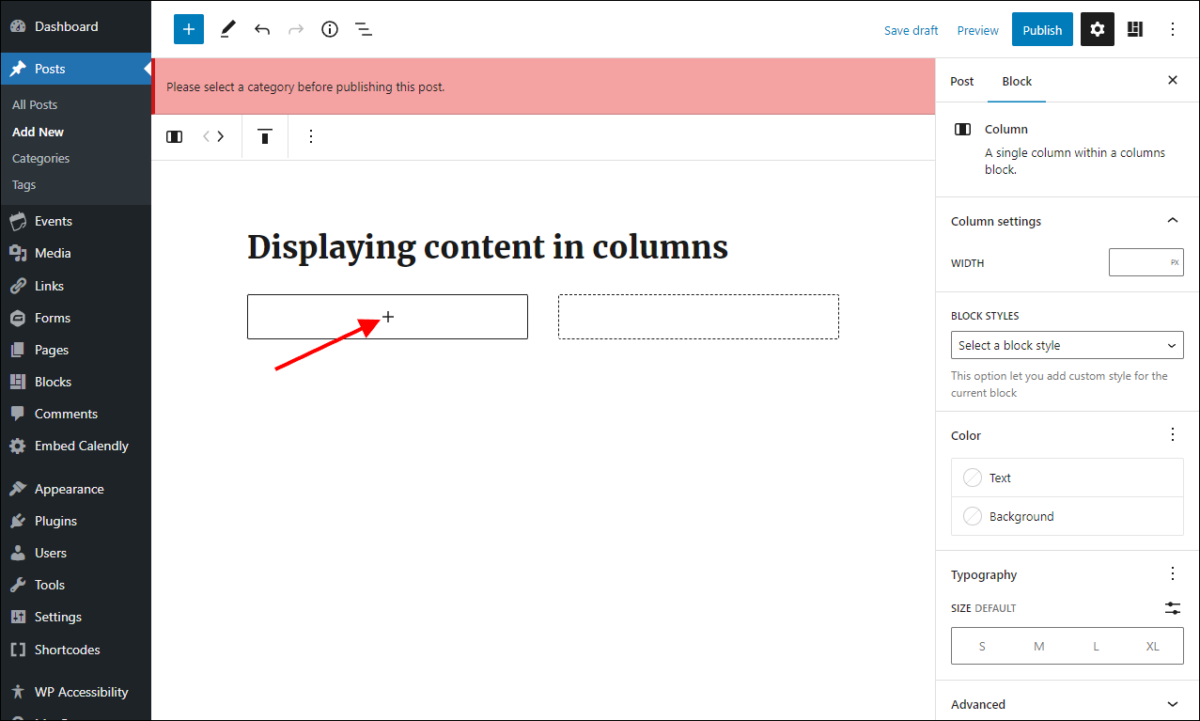
2. Once selected, you can add content to a column by clicking the plus symbol. You can add any kind of content that you can include in a post. Whatever you add will be visually restricted to the column.
3. Click the other boxes to add content to the other columns.
Options
1. When one of the column boxes is selected, a menu will appear at the top with formatting options.
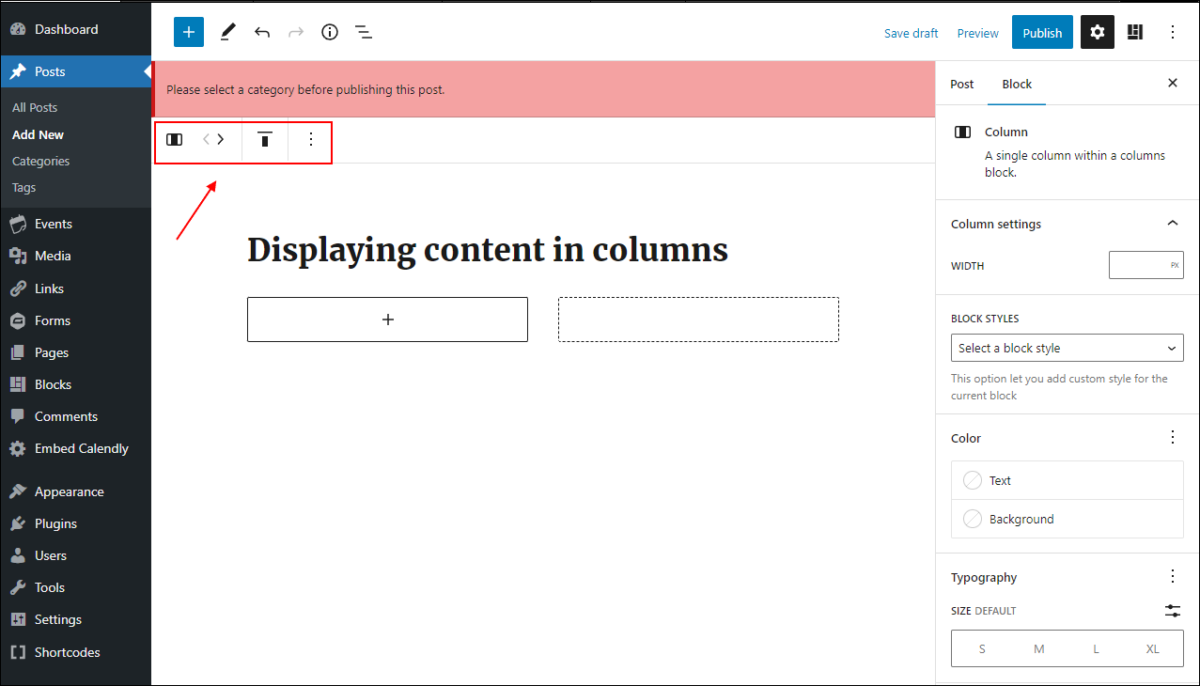
2. Click the arrows (1) to move the selected column box to left or right.
3. Click the vertical alignment button (2) to choose how the content will be aligned inside the column.
4. Click the three dots (3) for more options, like removing the column or locking it to prevent it from being changed.

Below is an example of what the columns look like after publishing the post.