Faculty: This example post demonstrates how you can provide instructions for each assignment. It uses the category “Assignment Instructions” and can be found under Activities > Assignments in the site menu. Use the suggested outline below to structure your assignment posts.
Contents
Overview
Final Project: The Montage A Concept-Driven Drawing
For your final project, make drawings out of the very illustrations that teach you how to make drawings. Create two montages designed with 25-30 educational figure-based illustrations from our course and online. Fill the pages with images, such as step-step guides, how-to-draw diagrams, skeleton and muscle illustrations, head and body measurements, feet and hands, and facial features—such as eyes, noses, lips, and ears, etc. You may overlap, layer, distance, and change the scale of any of the illustrations, but copy the proportions and techniques of the originals as closely as possible. Make both drawings within margins. Violate the margins by allowing figures or features to “step over” the margins and into the picture planes beyond. Additionally, allow figures to be cropped by the margin lines or paper edges. Be creative, but keep the images believable.
Learning Outcomes
- To transform instructional images into an exciting concept-driven design
- To step beyond the academic training of figure drawing into a new arena ideas
Instructions
What you will need:
- Clipboard
- HB, 2B, 4B pencils 18″ x 24″ white paper Padding
- Sharpener
- Erasers
- Sanding block
How:
- Search through Resources for your favorite examples.
- Research online for other suitable resources.
- Avoid Manga or fashion-based illustrations.
- Draw your favorite resources accurately.
- Keep the proportions, techniques, line quality, and shading of originals.
- Use full range of B pencils.
- Keep pencils sharp for contour-line illustrations
- Allow selected images to “step over” the line and into the paper margin.
- Allow other images to “step behind” the drawing field by cropping at the line.
- Allow selected images to escape drawing altogether by cropping at paper edges.
- Avoid placing objects in corners or allowing them merely to touch an edge.
Margins for 1st drawing (rectangular drawing area):
- Top margin: 2.75″ from top paper edge
- Side margins: 2.5″ from left and right edges
- Bottom margins: 3 ” from bottom paper edge
Margins for 2nd drawing (square drawing area):
- Top margin: 2.75″ from top paper edge
- Side margins: 2.5″ from left and right edges
- Bottom margins: 8.25″ from bottom paper edge
Measure, measure again, and rule even, straight margin lines with light H pencil.
- After drawing, erase portions of the margin lines here and there.
- Allow the negative space of the margin to enter into the drawing fields.
- Erase the margin lines you no longer need, but keep the essence of the square.
Submission
Create a new post with an image gallery containing the drawings you created for this assignment.
- To create your post, visit OpenLab Help> Writing a Post
- Title your post with “Screen name” + “Final Project”. Example: “Miguel – Final Project”
- IMPORTANT: Be sure to check the category “Assignment Posts” when creating your post. Visit: OpenLab Help > Adding Categories and Tags.
- IMPORTANT: Be sure to use the tag “Final Project” when creating your post. Visit: OpenLab Help > Adding Categories and Tags.
- To add an image gallery, visit OpenLab Help > Adding an image gallery
- Add well-lighted, thoughtfully composed images of your drawings to an image gallery.
- Add a written reflection.
- Document your thoughts about this project. Think about what you learned, what you could have done better, and how you will apply what you learned to your next drawing.
Due Date(s)
- 4 pm the day before next class
Resources
Student Examples
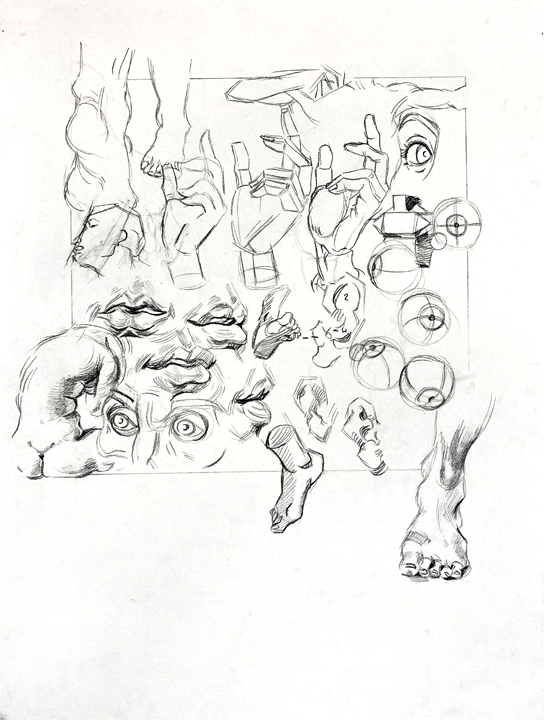
Student Drawing 
Student Drawing 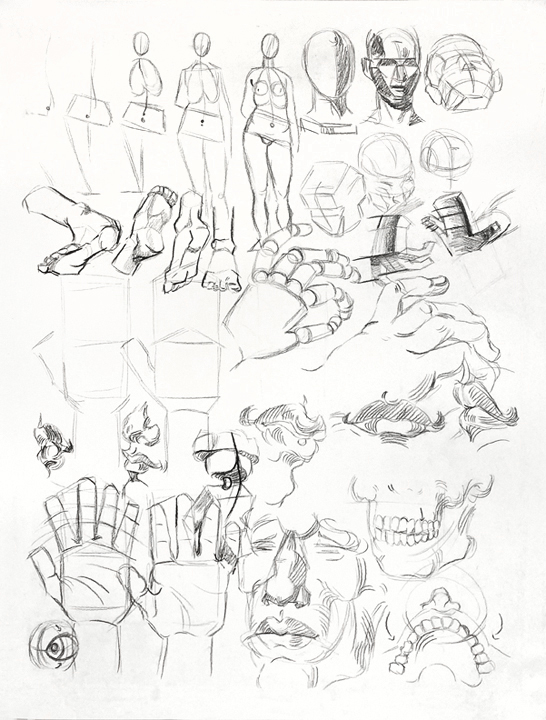
Student Drawing 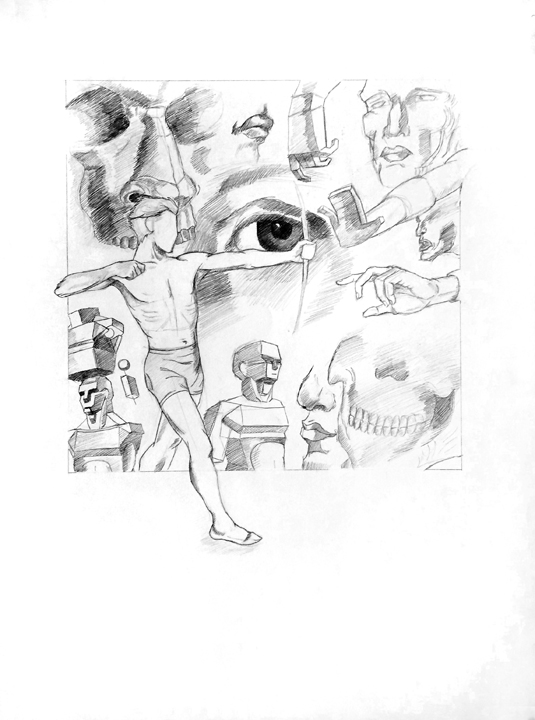
Student Drawing Student Drawing


Recent Comments