Table of Contents
Lesson Overview
- Topic: Types of signals, types of networks, Installation of Raspberry Pi
Content 1 – Computer Basic – Types of Signals
In the electronic world, there are type types of signals, analog and digital. Let’s find the differences between two signals with the images below.


Content 2 – Types of network
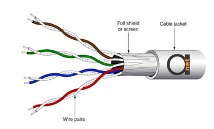
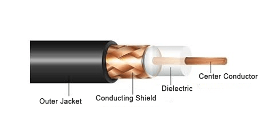
- Wired
- Twisted Pair: Reduce noise, cancel interference
- Coaxial Cable: center conductor and conducting shield
- Fiber Optic
- Wireless
- Radio waves
- AM (Amplitude Modulation)
- FM (Frequency Modulation)
- Infrared (IR): TV Remote control
- Microwave: Satellite (22,300 miles)
- Wi-Fi: 2.4GHz-5GHz band, a standard for internet
- Bluetooth: 2.4-2.48 GHz, a standard for the connection protocol
- Cell communication
- Radio waves

Activity 1 – Setting up Raspberry Pi 3.
- This work should be done on your Windows or Mac computer
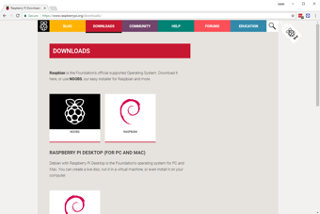
- Download a Raspberry Pi image
- https://www.raspberrypi.org/downloads/
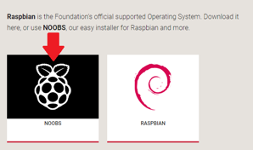
- For beginners – NOOBS (New Out Of the Box Software)
- Others – Raspbian
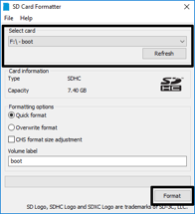
- Format your SD card
- Caution – This will erase all data stored in the SD card
- Visit the SD Association’s website and download SD Formatter for Windows or Mac.
- Insert your SD card into the computer or laptop’s SD card slot.
- In SD Formatter, select your SD card (VERY CAREFUL), and the format the card.
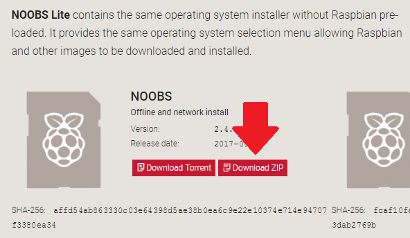
- Extract NOOBS from the zip archive
- Find the downloaded archive — by default, it should be in your Downloads folder.
- Extract the zip file using 7Zip app.
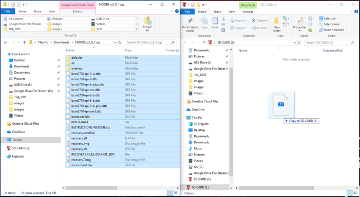
- Copy the image files into the SD card – share your USB SD card reader with your classmate
- Insert the SC card into Raspberry Pi and follow the instruction.
- Write the bootloader image into the SD card.
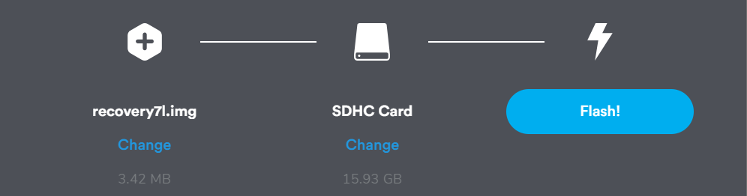
- Download and install balenaEtcher
- Build a bootloader as shown in the below image.
- Select Raspbian Image
- Select your SD Card Drive
- Finish
Activity 2 – Connect to your Raspberry Pi
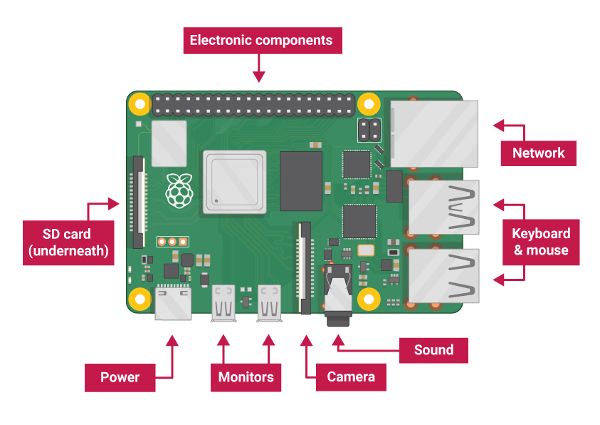
- Plug the USB cable to your desktop computer USB port and connect it to your Raspberry Pi power port
- You should see a red LED light-up on the Raspberry Pi
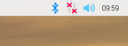
- Your monitor will show the below icons
Activity 3 – Install Raspberry Pi OS ninth the SC card
- Check the box for Raspbian, and then click install
- This process will take a few minutes.

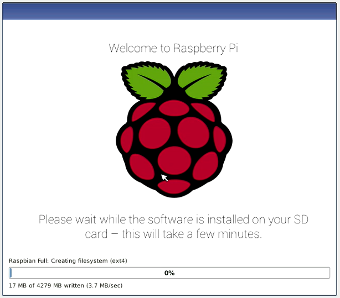
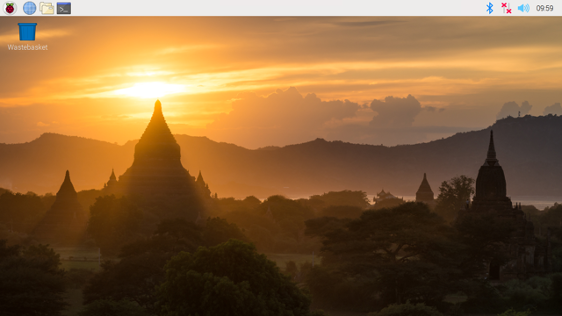
- After a few seconds, the Raspbian Desktop will appear
Activity 4 – Finish up the setting
- WiFi connection
- Click the WiFi icon
- Select “CityTech-WiFi” network
- Open the web Browser and login the CUNY network using your credential
- Set your Country, Language, and Timezone
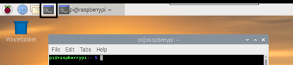
- Open a command window
- Type “sudo raspi-config”
- Select “1 Change User Password”
- Select “Internationalisation Options”
- Change timezone – America-New York
- Change Keyboard Layout – Generic 105 key (Intel) PC
- Select Update
- Finish
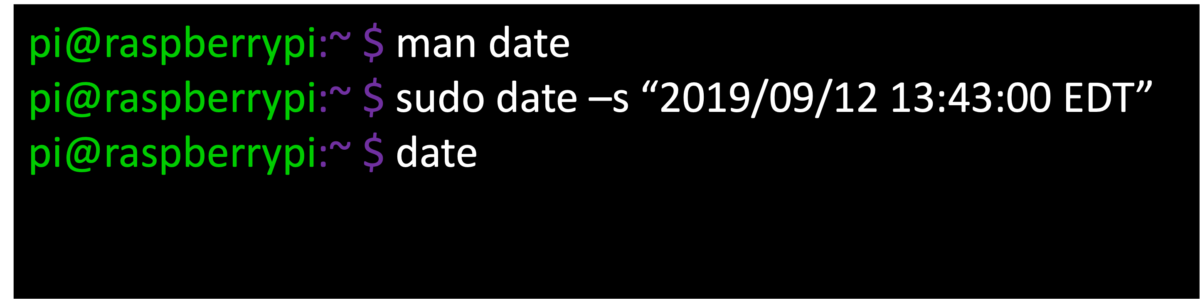
Activity 5 – Update date and time with the command
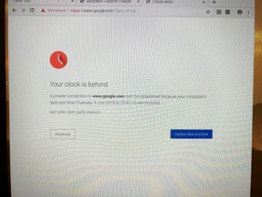
- If you face this error while WiFi setting, you need to tell that your system is wrong!
- Use date command
- Open a terminal window -> “man date”
Activity 6 – Turn on & off Raspberry Pi
- In order to safely turn off your Raspberry Pi, you will need to let your Pi know you are turning it off.
- Turn on – Just plug in the power cable
- Turn off –
- Menu -> Shutdown
- Terminal

Closing – Exploring Raspberry Pi
- Raspberry Pi is a mini-computer, which has almost identical functions to Windows computers.
- Internet Web Browser – Chromium
- Office Software
- Spreadsheet – LibreOffice Calc
- Presentation – LibreOffice Impress
- Word – LibreOffice Writer
- Game
- Accessories
- Help
- Preferences