Robin Michals | COMD 3330 OL98 Fall 2020

Author: rmichals (Page 7 of 11)

Midterm Project

Due Oct 20th. 14 pts.

Select from one from these two projects:

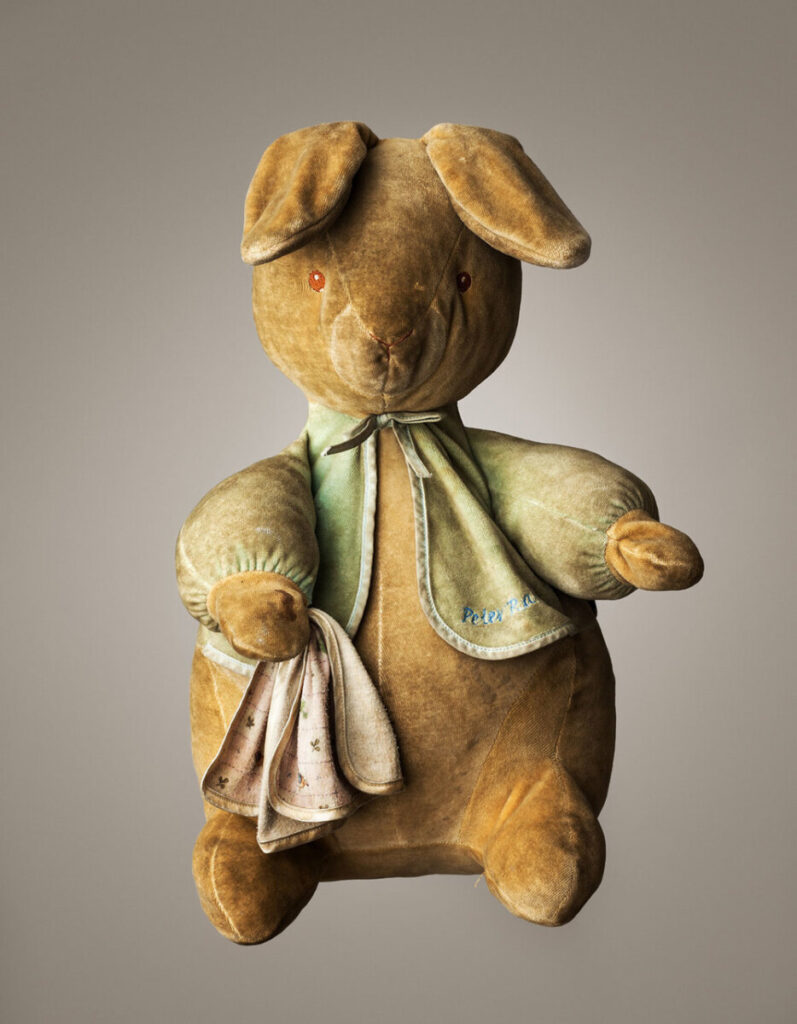
  1. Emotions-using a single doll or stuffed animal, create a series of 8 final photos that illustrate the following emotions: joy, excitement, surprise, sadness, anger, disgust, contempt, fear.
  2. Portrait of a place-Select a park or playground near you. Photograph there at different times of day to capture the place and the people who use it in a series of 8 final photos.

Deliverables for both projects:

  1. 40 photos in an album labeled Shoot 1 on Flickr due Oct 13th at 6 pm:

Emotions-10 versions of the first 4 emotions: joy, excitement, surprise, sadness

Portrait of a Place-Shoot in your location at 2 different times of day and or in different weather. Your shots should cover a wide range of approaches: long shots to close ups, people including at least one portrait (take it in shade), animals and plants. If you have a tripod, make at least some of your photos in the blue hour – 20-30 min after sunset or once it is dark. Each photo should use light and composition in compelling ways.

2. 40 Photos in an album labeled Shoot 2 on Flickr due Oct 20 at 6 pm.

Emotions-10 versions of the second 4 emotions: anger, disgust, contempt, fear and in addition any revisions you deem necessary.

Portrait of a Place – Shoot at your location at different times of day and weather.

3. 8 final photos adjusted in Lightroom in an album labeled Midterm on Flickr due Oct 20th at 6 pm.

4. A brief presentation to the class of your project on Oct 20th.

Lab: Week 5 – Childhood

Continuing to work with the same stuffed animal, create two photographs-one that illustrates the idea of a happy childhood and a second that illustrates the idea of a difficult childhood. Convey most of the difference in emotion between the two photos with the lighting. You may also add a background and props. Consider the angle of view and framing as well.

Post your two final photos in a gallery block on OpenLab with a description of your process. How did you light the scene? What background did you add? If you used props, why did you select them.

No stereotypes. Keep it fresh.

Please post by 8:45.

You will be asked to comment on one classmates work. Please include the greatest strength of their work and one thing you think could be improved.

Category: Lab: Week 5 – Childhood

Week 5: Lighting-Direction

Needed for this class

  • a camera or cameraphone
  • a small stuffed animal maybe 4 or 5 inches tall.
  • a light – a $10 clamp light from the hardware store will be fine. That is what I used for the examples. You may also need an extension cord
  • 1 or better yet 2 pieces of white poster board. You may also use a white sheet or towel to create a white surface.

Terms

Ambient Light-The light that is already there sometimes called available light

Continuous Lights-Always on, may be incandescent, halogen, fluorescent, LED

LED-Light Emitting Diode-super energy efficient

Lighting direction: front, side, back

Quality-direct, diffused

Color Temperature-describes the color of the light. Cool colors are above 5000K and warmer temperatures are below. Meaning the RGB values are equal.

White Balance-the means to adjust the color temperature so that grays and whites are neutral

Resource

Photography Lighting Lesson-Remember the Egg- Joe Edelman

Inspiration

Lab Exercises

Lighting Direction

Childhood

Homework

Midterm Project

Lab: Week 5 – Lighting Direction

Find a small stuffed animal to work with. Clean off a surface so that the only thing in the photo is the stuffed animal. Put down a piece of white poster board or if you don’t have a piece of poster board, look for something white such as a sheet or towel. A white background reflects light. Keep it simple.

Put your camera or camera phone on a tripod. That will leave your hands free to move the light around. Use the camera or cameraphone’s timer.

Use one light. Turn off the other lights. Holding the light more or less just out of the frame, move it around to get different effects. Keep the light as close to the subject as possible. Pay attention to the edge of the light. Where you place the edge of the light will allow you to control the tone of the background and what parts of your stuffed animal will stand out.

Try:

  • Front light
  • Side light
  • Top Light
  • Under lighting
  • Silhouette – point the light at a white background and leave some space between the subject and the background.

Post your results in a gallery with a description of your process.

Category: Lab: Week 5 – Lighting Direction

HW 4: Freezing Motion

Working outside in the day, freeze the motion of athletes and bike riders, dancers, jumping dogs. Try at least two different types of subjects ie soccer players and bikers, kids on swings and dancers. Capture the decisive moment. The soccer player when their leg is fully stretched out in a kick, a bike rider doing a wheelie. Don’t be shy. Fill your frame with the action.

Use a fast shutter speed. If using a camera, use predictive focus AI Servo or AF-C . Use back button focus.

If using a cameraphone, use lightroom or other app that lets you set the shutter speed.

Post 20 shots of two different activities to an album on Flickr for a total of 40 shots. Please don’t include all of the times you missed: shots out of focus, the back of receding bike riders, etc. Just your best work.

Due October 6, 6pm.

« Older posts Newer posts »

© 2024 Photography II

Theme by Anders NorenUp ↑