
Objective: Our objective in this weeks lab is to open the hardware provided (in this case, a Linksys switch + power adapter) and examine & document some of the core components contained within
Equipment: 1x Linksys SRW2008 MP 8 Port Gigabit Switch; 1x power adapter
Tools: Screwdrivers (flat / Philips), Insulated prybar, Digital camera/phone, Safety glasses
Inputs/outputs – Switch: 8 gigabit ports, 1 serial port, 2 mini GBIC connectors, Power Adapter: 48V DC 3.1A
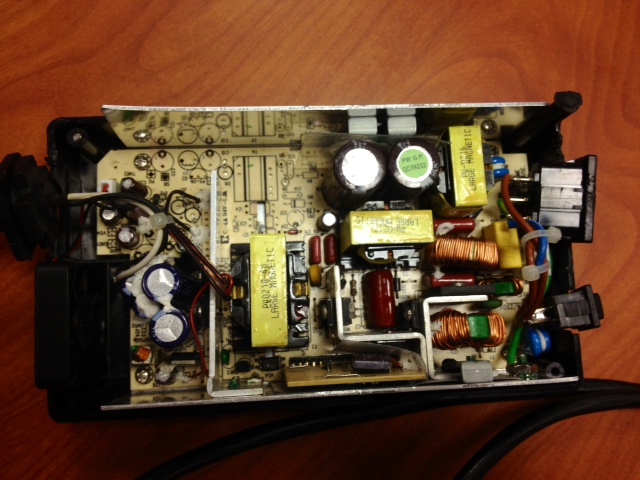
We began by using a flat head screwdriver to remove the rubber feet on the power supply. That didn’t work (due to screws stripping easily, apparently this PS is not meant to be modified/taken apart ). Encountering some difficulty and with considerable elbow grease was applied, we ended up cracking it open with a Craftsman insulated prybar. Extra precaution was taken & insulated hardware used as to not come into contact with charged capacitors as the PS unit had been recently unplugged.
A picture was taken of the PS’ guts and various electronic components noted: PCB [printed circuit board], capacitors, resistors, heat sinks, etc.
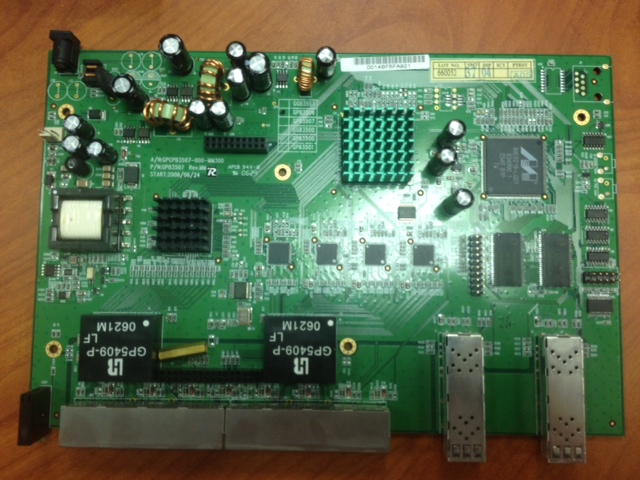
Moving on to the Linksys switch, the front bezel was popped open via the flathead screwdriver & a standard Philip’s head was used to open the SRW2008 MP completely revealing the main internal components (motherboard + daughterboard). Again we obtained digital photos of the inside and due to time constraints, ended our lab there.

Conclusion: We disassembled the Linksys network switch and matching power adapter, albeit with a little more difficulty than anticipated. Nothing a pry bar, safety goggles and some primitive grunting can’t handle.

