
I will be showing you how to place a tag to an already existing post that you’ve created. Tagging is great ways to organize your diarrhea of thoughts that you’ve posted, which are also known as blogs. You first must be registered with the City Tech Open Lab website and “joined to a course. You will find this once you’ve signed in under “My Open Lab ”. For my class purposes, we will go to “Advanced technical writing” course that I am enrolled in. The same should go for anyone with an account on Open Lab and their respective courses. For now you can just follow along.
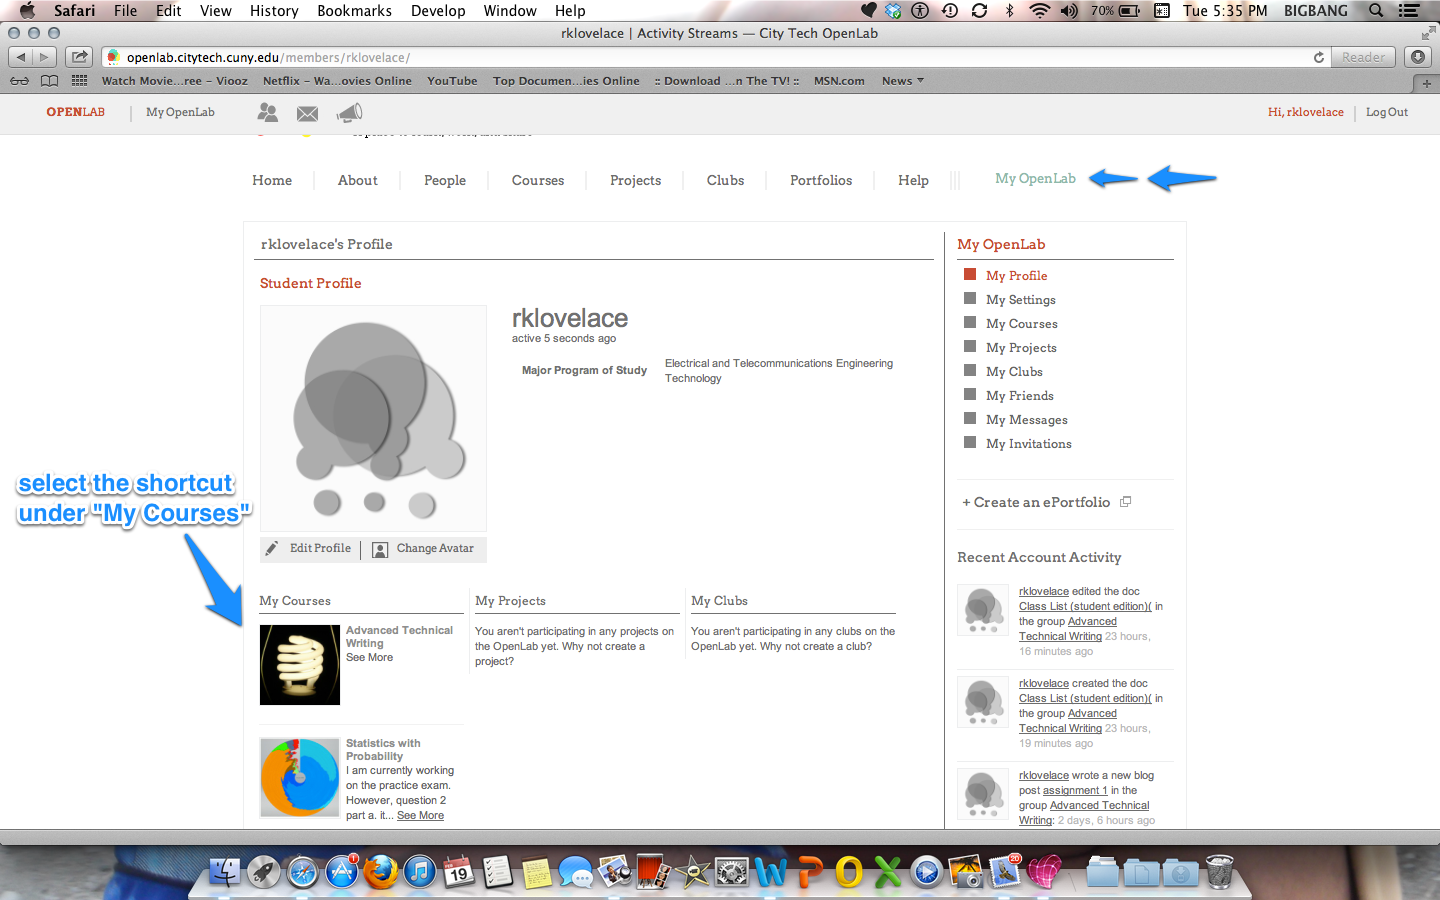
Congratulations!!! You’ve now logged on and are ready to use your City Tech Open Lab it should look something like this… Select your course home page under
My Courses
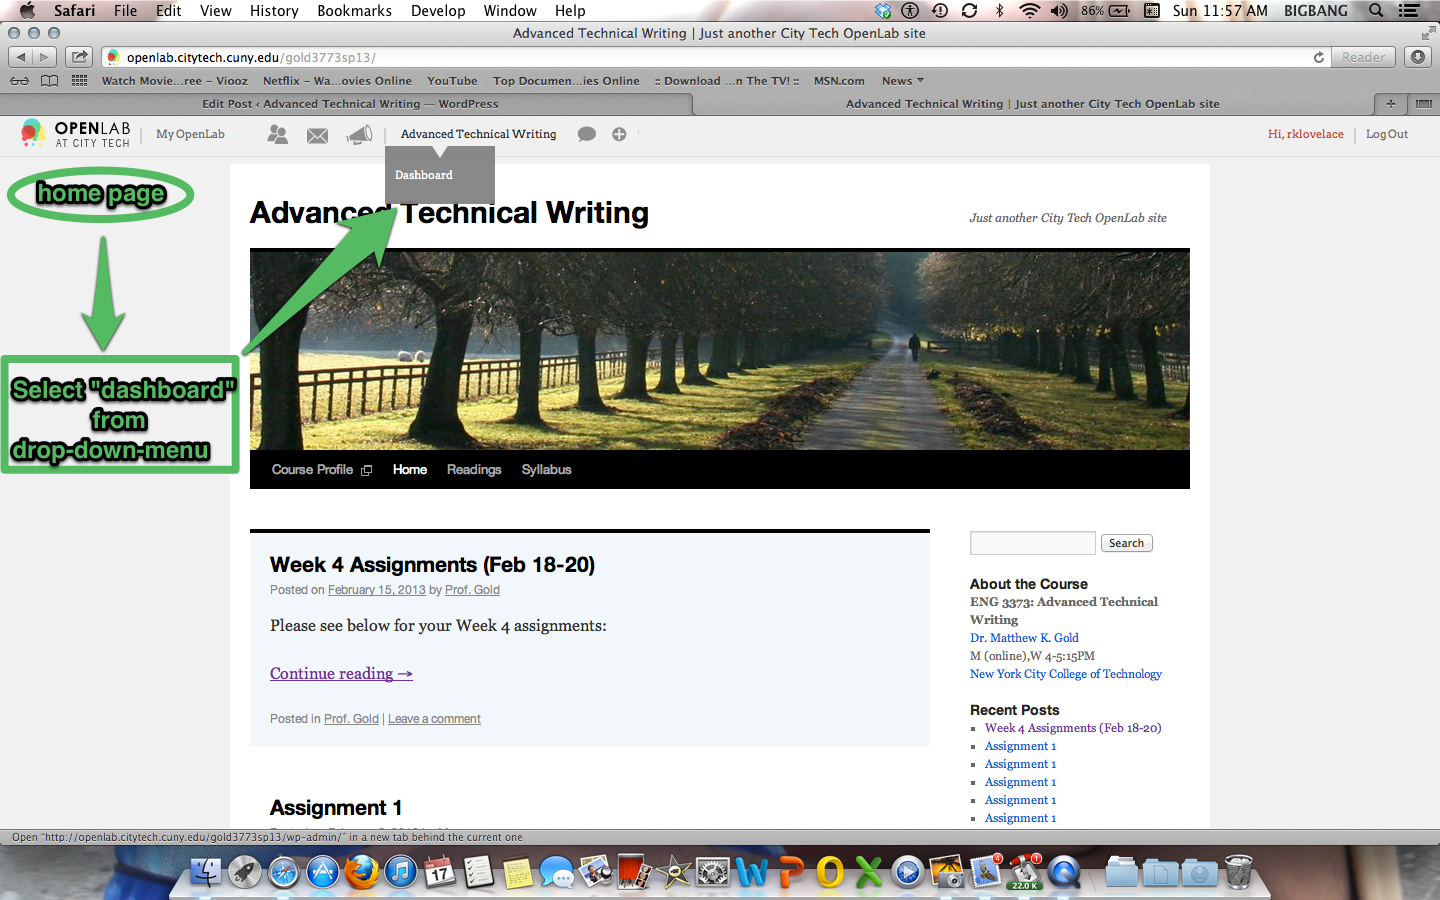
Great!!! You’ve found your course site. Once Dashboard is selected, it should have the same format as depicted below:
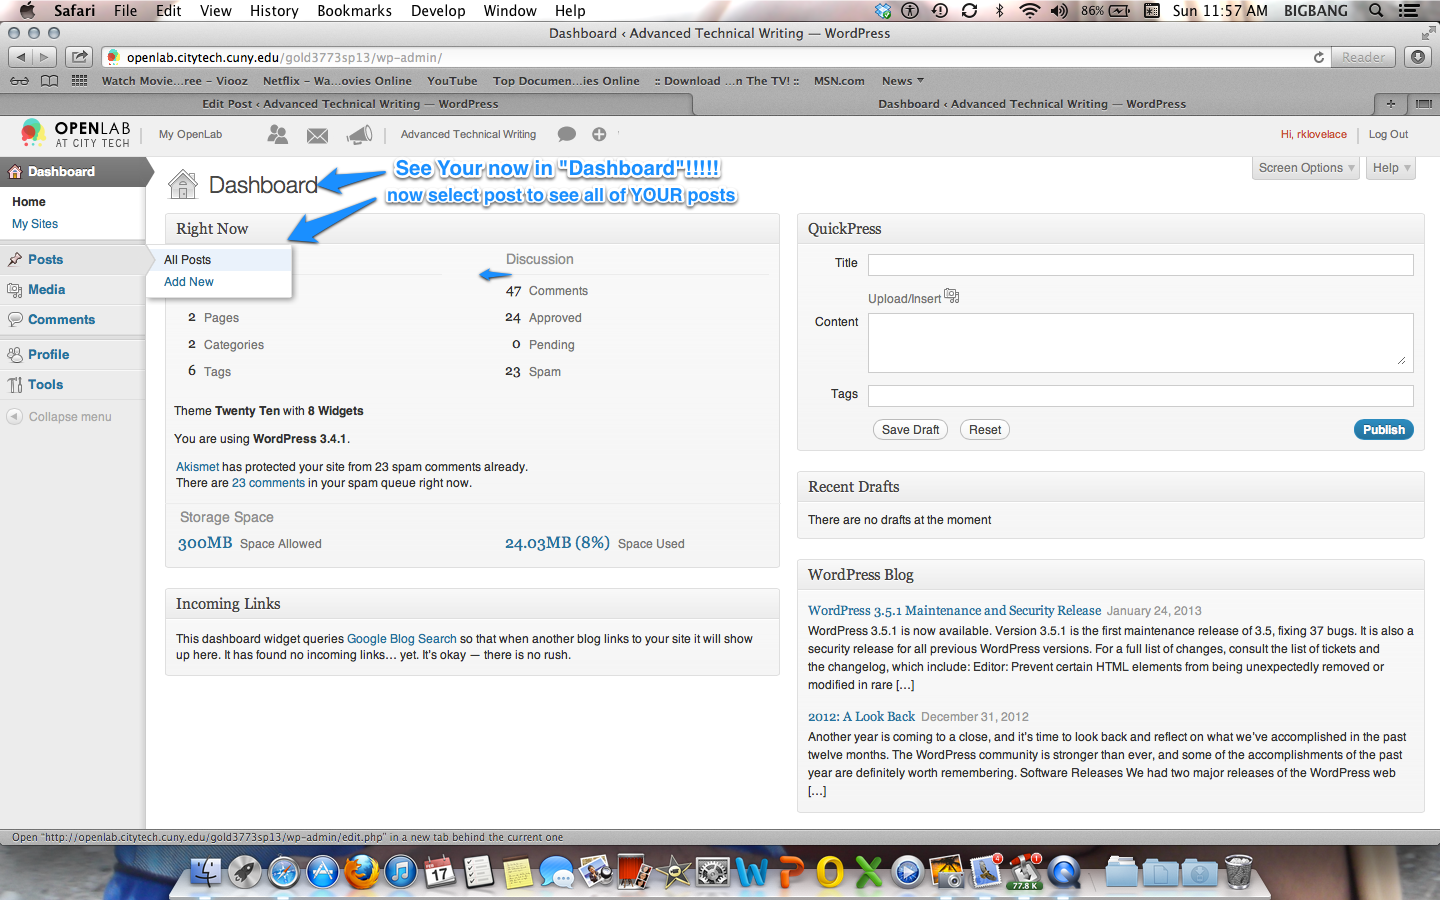
Once you are in the dashboard, Select Post, then All Post. Now you will see the post that you have broadcasted:
You’re doing wonderful!!!
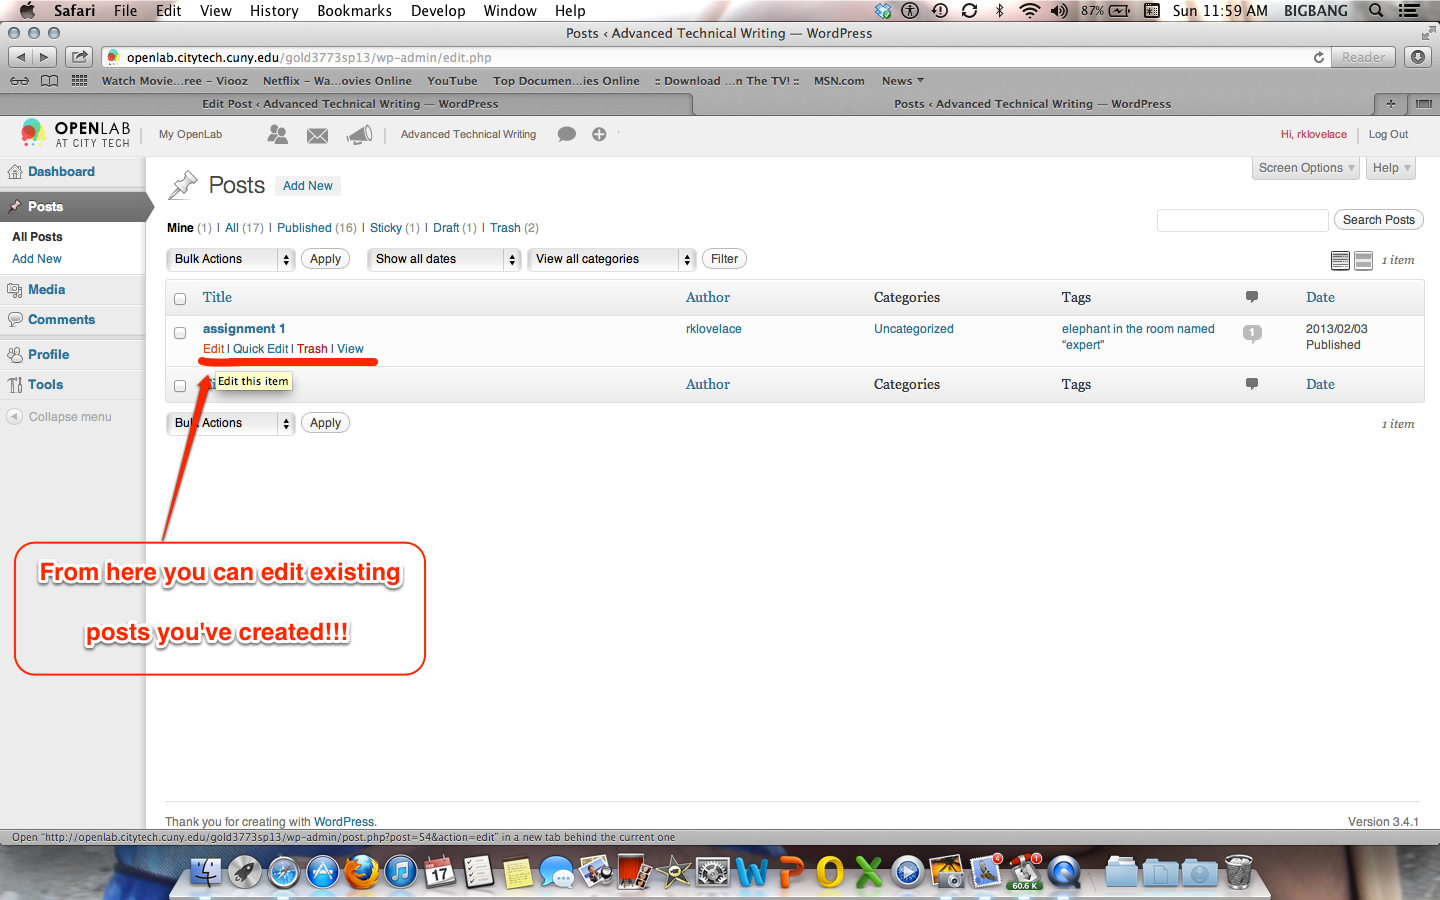
Once All Post is selected you will see the posts that you have created and from here you are able to edit, delete, and view your post. Here we will just edit an existing post to create a tag. Select Edit.
You’re almost there YAAAAAAYYYYY!!!!!!!!
Selecting the edit option will bring you to our final page.
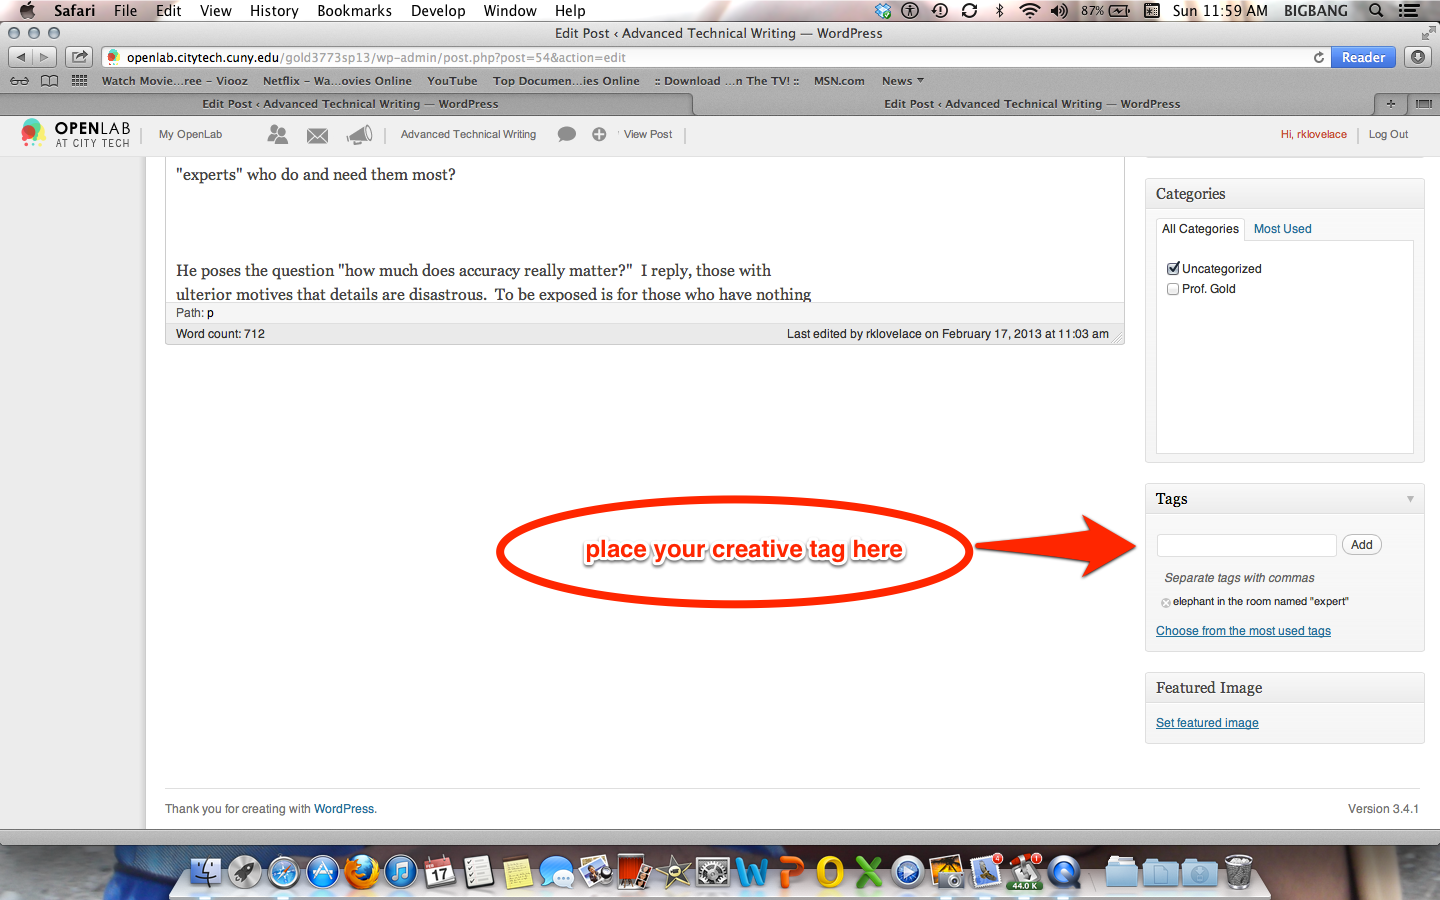
Here we can now add a tag to our works. This will be located at the lower right side of your screen so you may need to scroll down. Simple enough, you’ve just added another notch to your navigation belt…enjoy!!!
~lovelace

