4 pts. Please put your answers in a text file, convert to PDF, and email it to me: rmichals@citytech.cuny.edu
Due: October 27th, 6 pm
Each question is worth 1 pt.
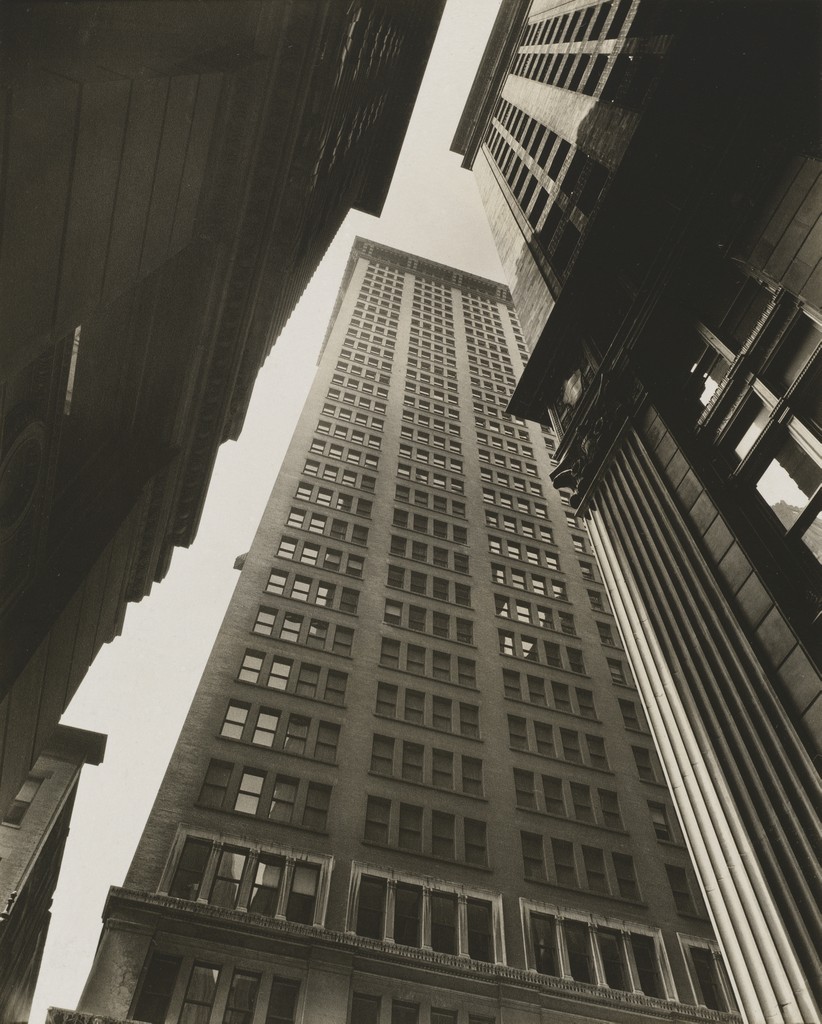
Canyon, Broadway and Exchange Place. 1936. Berenice Abbott
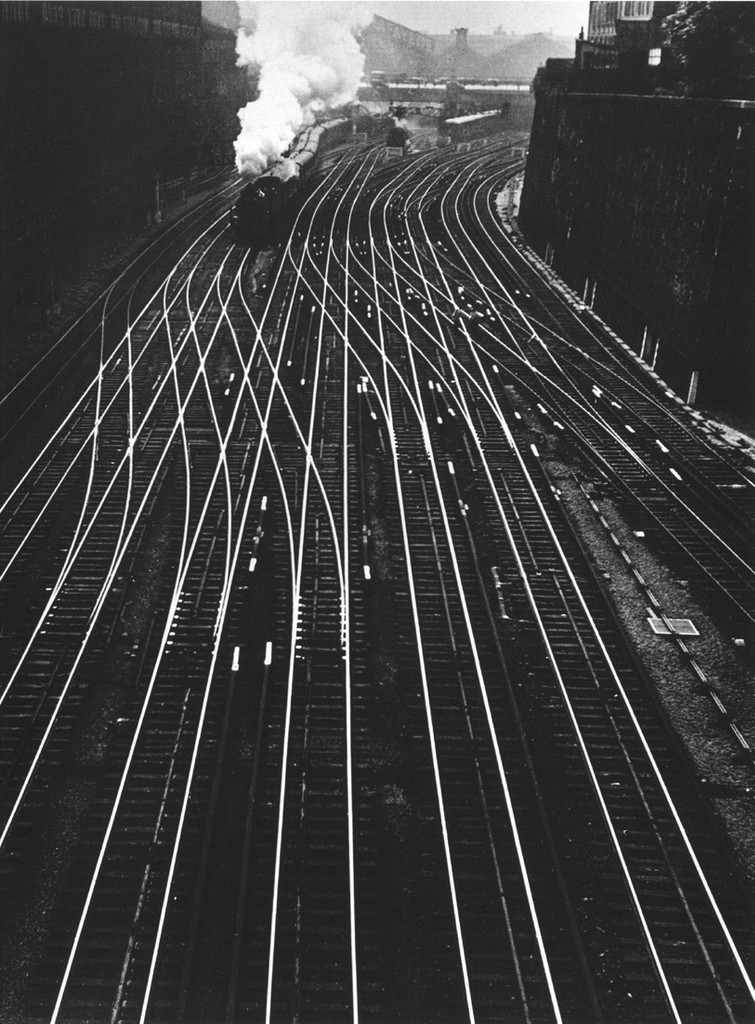
Saint Lazare Train Station, 1932. Ergy Landau.
Compare and contrast these two photos to discuss angle of view and explain how a three dimensional space is represented on a two-dimensional surface.
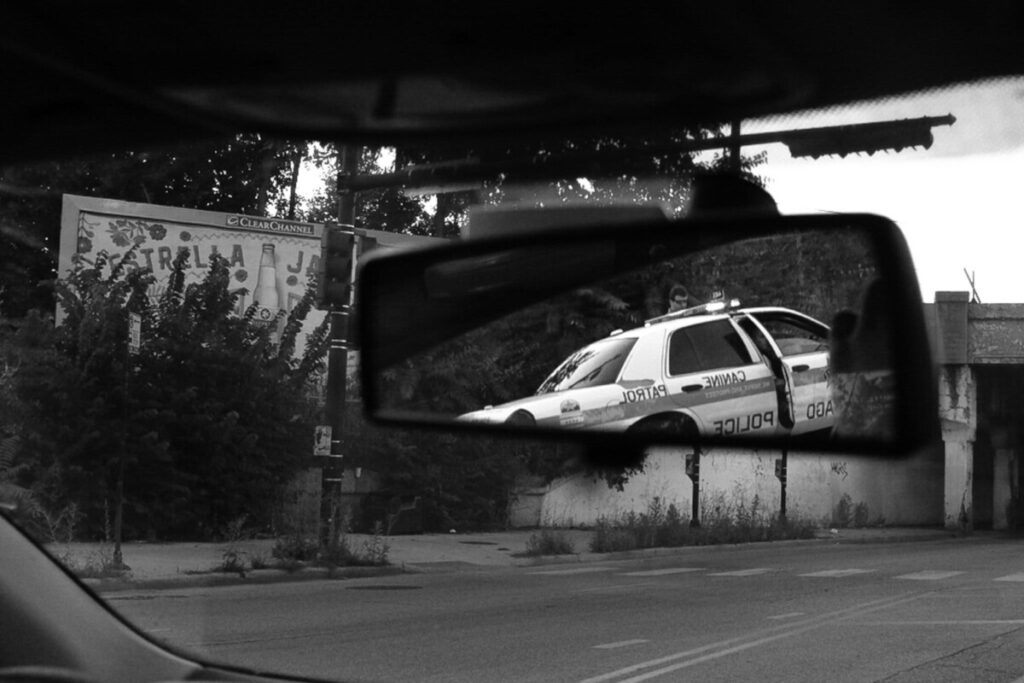
Sebastian Hidalgo.
A police officer in the process of stopping a speeding car in Pilsen.
2. Write a short paragraph about how Sebastian Hidalgo uses framing in the photo above.
3. Create a photograph that has motion blur and a sharp background. Write a short description of what you did to create motion blur with a contrast of sharpness. Include your camera settings or what app you used and the settings of that app and how did you secure the camera so that the still objects in the frame were sharp?
4. Find a simple object (try not to pick anything glass or metal) and place it on a surface such as a table 2 ft from a wall or other plain background. Take two photos of it:
Light it from the front by placing the light near the camera position but so that there is no shadow cast on the back wall.
Light it from above angling the light so that no light falls on the background and the background becomes a solid black but the object itself is well lit.
Please give the presenter the respect of your full attention.
Any comments or questions you have during or right after a presentation should be directly related to your colleague’s photography.
When you comment on your colleagues work, start with the positive. If you have a suggestion for improvement, make that second.
It is very important that the presenter hear from a range of students in the class. Your opinion and judgements are important. Offer your thoughts generously. Do not leave the work of responding to the others in the class.
Conversely, please do not speak over your classmates.
Terms
Framing: How the frame brings together the elements inside the rectangle juxtaposing them, creating relationships between them
Types of shots: how much information is in the frame
a long shot
a medium shot
a close up
an extreme close up.
Frame within a frame – use elements in the frame to enclose the main subject and draw attention to it. A frame within a frame can be a window or door or it can be items in the foreground such as branches.
Angle of View: describes the camera position in relationship to the subject. The angle of view may be:
a worm’s-eye view
a low-angle
eye-level
a high-angle
a bird’s-eye or aerial or overhead view
an oblique angle.
Rule of Thirds – Instead of placing the main subject in the center of the frame, divide the frame into thirds horizontally and vertically and place the main subject at one of these intersections.
Fill the Frame – (get closer) – do not leave empty areas that do not add to the composition and plan to crop in later.
Perspective-the representation of a 3-dimensional space on a 2-dimensional surface by converging lines, diminishing scale and/or atmospheric perspective.
Depth of Field-The distance between the nearest and farthest points that appear in acceptably sharp focus in a photograph. Depth of field can be shallow or extensive. While the term includes the word depth, depth of field refers to focus.
Frozen Motion-Motion is stopped and captured in the frame with a fast shutter speed.
The Decisive Moment: A term coined by Cartier Bresson- “the simultaneous recognition, in a fraction of a second, of the significance of an event as well as the precise organization of forms which gives that event its proper expression.”
Blurred motion-moving elements blur with a longer shutter speed.
The class will have a quiz next week on October 20th.
It will cover the topics discussed to date: the frame and composition, perspective, depth of field, freezing and blurring motion, lighting direction.
Working with your group, write three questions for a quiz covering the topic assigned to your group.
Each question needs to have a part where students demonstrate understanding. Since this will be essentially open book, no question can simply allow for the test taker to cut and paste an answer.
Write one question in each of these three formats:
Define a term and then use it in a sentence.
Compare and contrast two photos (select from any used on any of the class topics pages or taken by students this semester) to discuss XYZ.
Define a term and take a photo that demonstrates that term.
Put your questions in a post with an answer key. Make sure to include the names of everyone in your group.
Aspect Ratio-the proportion of the width of the image to the height of a 2D image
Clipping-the intensity of the light falls outside of what can be recorded by the camera and there is a loss of detail.
Color Profile-the data for a digital device, such as a printer or monitor, which describes its gamut, or range of colors. Used to match the gamut from one device to another.
Exif Data-information stored by the camera in the file.
Gamut-range of colors
Histogram- a graphic representation of the tones in an image. A spike of data on the left side indicates underexposure, on the right overexposure.
Neutral Value-RGB values are equal or gray
Non-destructive Editing-adjust the image without overwriting the original image data. Instructions are written to a sidecar file that tells the software how to interpret the image.
White Balance-the setting that adjusts for the color temperature of the light and that will make a white object appear white or a gray object a neutral value
Workflow-the tasks to be performed and the order of those tasks. When working with Lightroom to optimize the appearance of your photos, the order of the steps makes a difference. Follow the workflow recommended below for the best results.
Global Corrections
Global corrections adjust the entire file. In Lightroom classic, this includes everything in the basic panel: White balance, Tone and Presence. In the Lightroom/Photoshop App, it includes the controls under Light, Color and Effects.
The Histogram
The histogram is a graphic representation of the tones in the photograph. It is a guide to exposure decisions. Most images look best when there is a full range of tones from black to white in the image. But there are no iron clad rules.
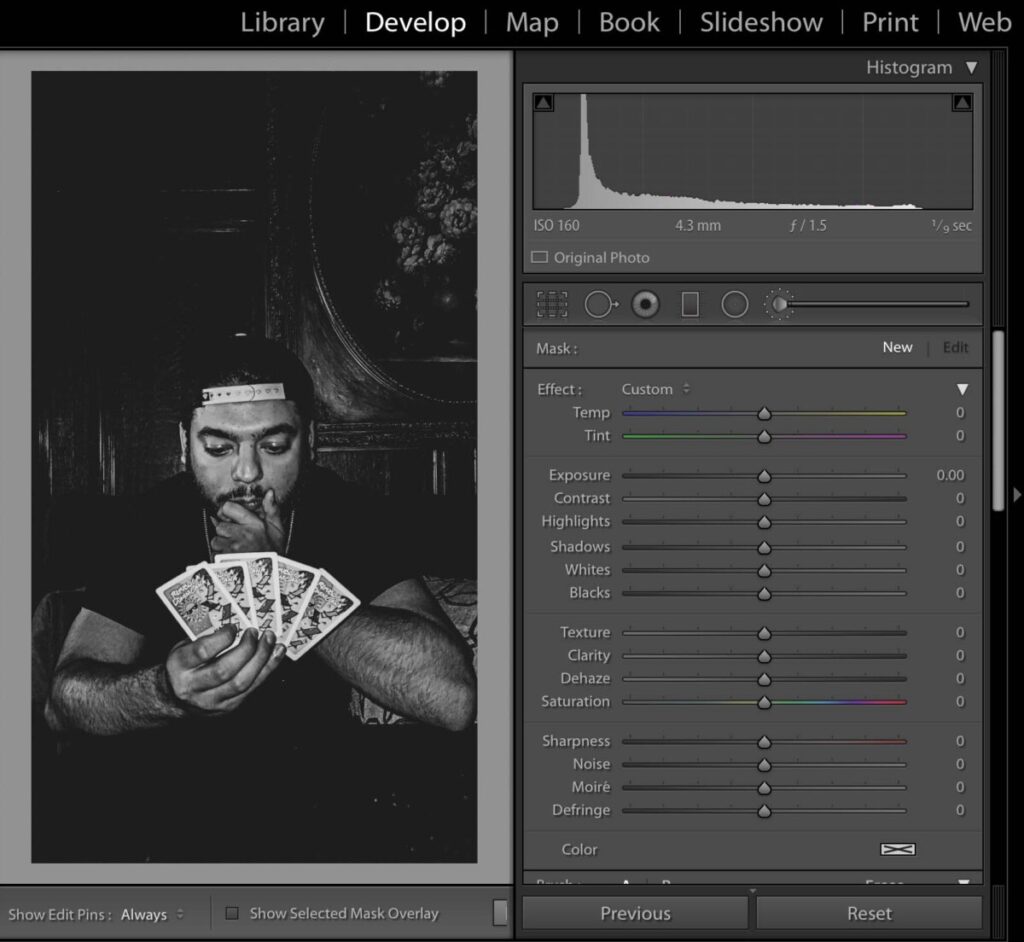
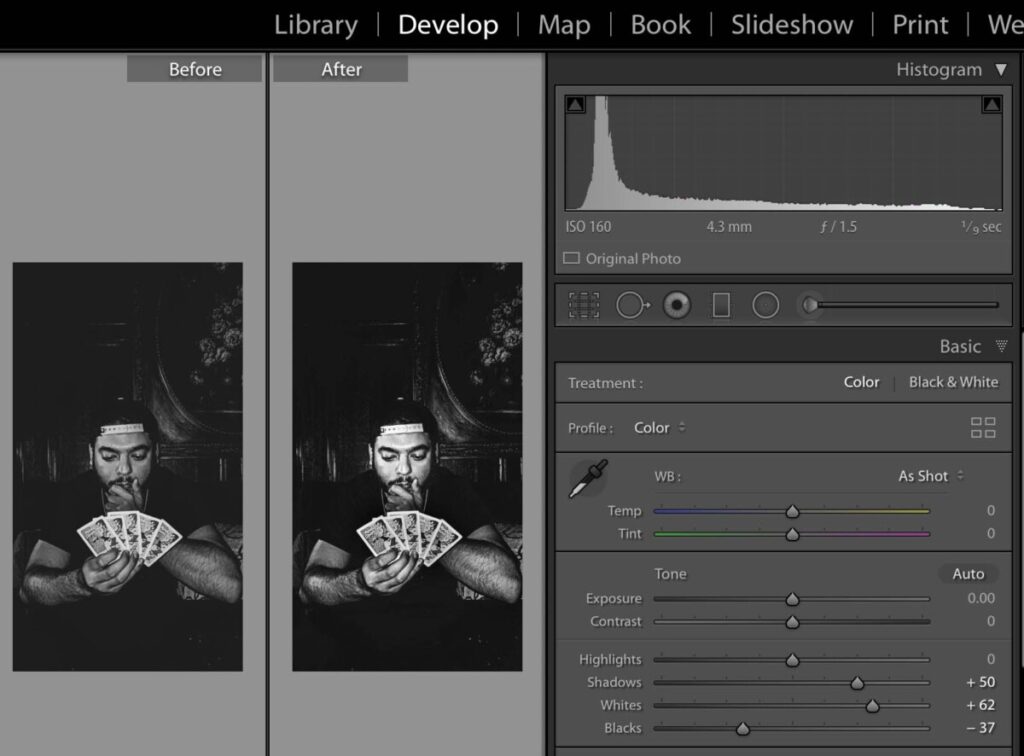
Below is a terrific photo shot by Bryan Rodriguez. The expression of the card player is perfect and you can feel him making a decision about what to play.
Looking at the histogram, we can see that most of the tones are dark. There is no true black or white. To raise the contrast of the image and use the full tonal range, use the following adjustments:
blacks slider to the left until the data hits the left side of the histogram
whites slider to bring attention to the right until the date just touches that aide
shadows slider to +50 add detail to the dark areas
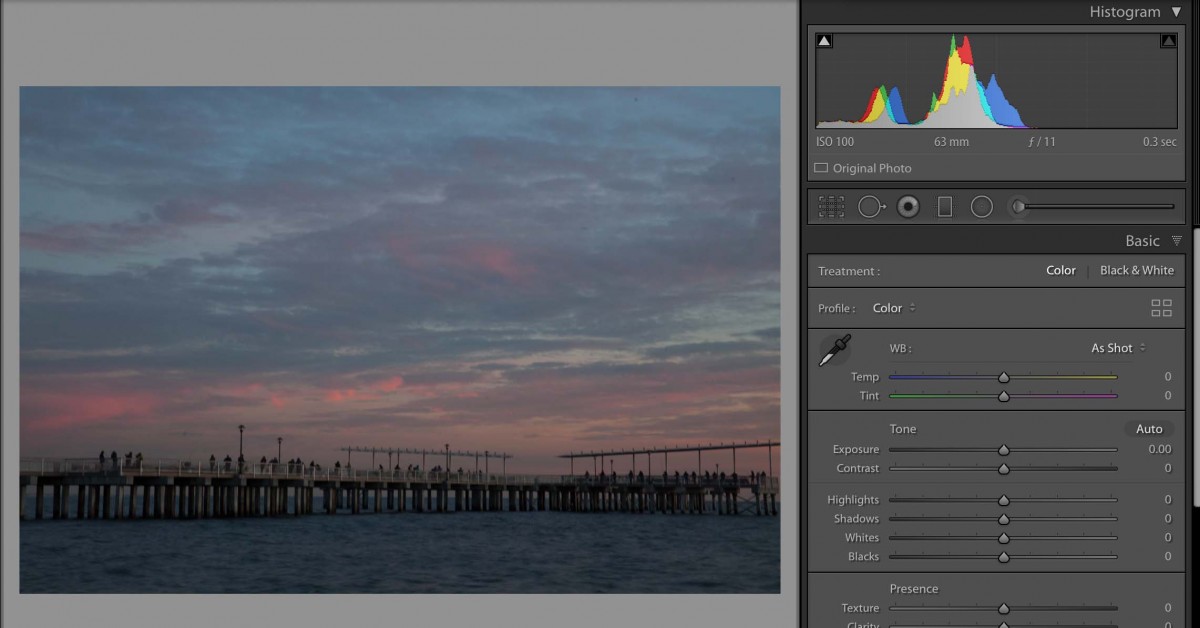
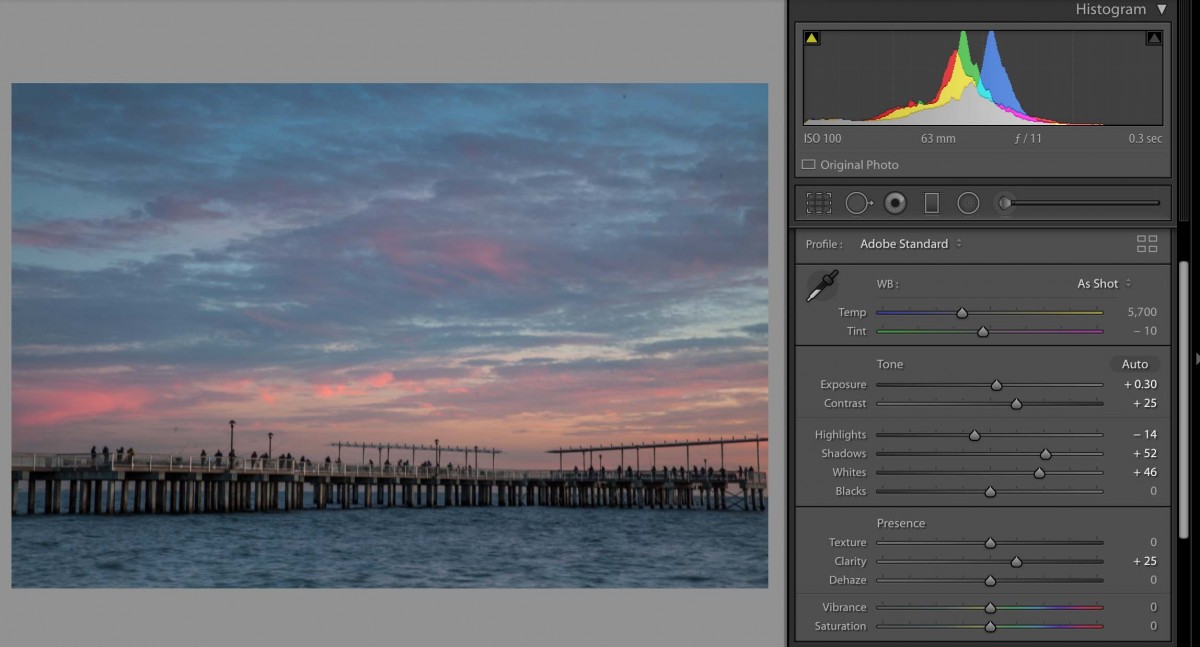
In this photo of the pier in Coney Island, the histogram shows that is underexposed. But we also know that it is an evening scene and that there is nothing in the photo that should be bright white.
A few tips for Lightroom Mobile:
To access the histogram, tap on the image with two fingers. If you can’t really see the histogram background, brighten the display.
To see the image before your corrections, press on the image.
Lightroom Workflow:
Classic: Lens corrections and Transform panels. Correct lens aberrations and Transform, rotate and straighten. App: Optics, geometry.
Classic: Crop. Left below the histogram. Keep the lock on to maintain aspect ratio. App: Crop
Classic: WB on basic panel – Set white balance. App: Color
Classic: Exposure section on basic panel – Read the histogram to set exposure. Most images should have the widest possible dynamic range, meaning that there should be data across the entire histogram. App: Light Both: a. Exposure slider-use to adjust the overall tonality b. Set black point-shift double click. c. Set white point-shift double click. d. Use shadows slider to brighten mid tones.
Classic: Presence section of basic panel – Adjust clarity (mid tone contrast) App: effects
Classic: Presence section of basic panel – Adjust vibrance. App: color
Classic: Presence section of basic panel – Use saturation with care: +10 at most App: color
Classic: Detal panel – Sharpen-amount at least 50 App: detail


Recent Comments