Simple Digital Coloring

Featured

Class-

There is no hard and fast rule on HOW to digitally color.  Digital coloring in infinite and there as many different methods to work as there are artists out there.  I wish you the best of luck in finding the method that works for you.

Here are a few tutorials just to get you started.  If you find some good tutorials, please share them in the class resources!


Coloring Line Art in Photoshop…

Simple animated painted style in Adobe PS:

Heres one for Procreate:

The Color Wheel

1466034999442

YES, you painted one of these in Kindergarden. I know. However the usefulness and knowledge that can come from this tool is limitless. So please let go your preconceptions toward color, and using a color wheel and come into this with an open mind.

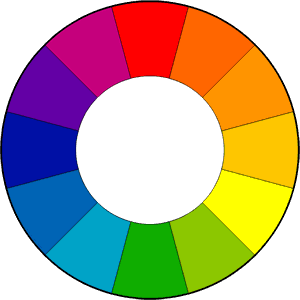
The color wheel is one of the most powerful tools artists and designers have to help us understand and use color effectively.  It is strongly recommended that as you examine the different color schemes thought this post and the following, you look at a color wheel and plot them out.

1466035082557


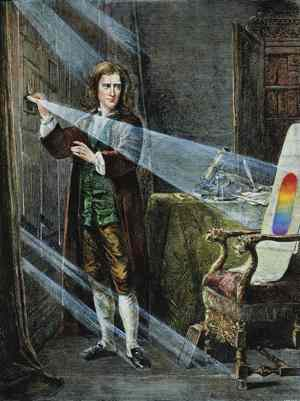
FUN FACT! The first circular color wheel was created by Sir Isaac Newton in 1666. As if the laws of planetary motion and gravity weren’t enough!

1466094968998

Foto: picture-alliance


1466095035989

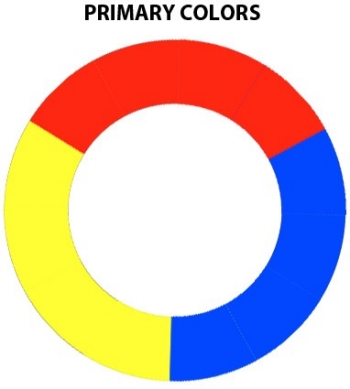
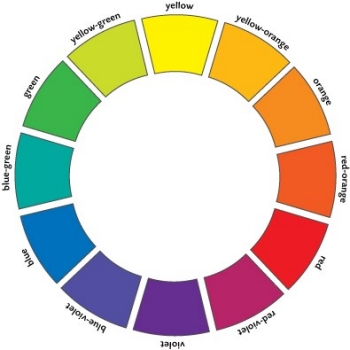
We begin with a three-part color wheel that shows only pure colors, meaning colors which no amount of mixing will result in. These three colors are of course our primary colors: red, yellow, and blue. All other colors are derived from these three hues.


1466095027770

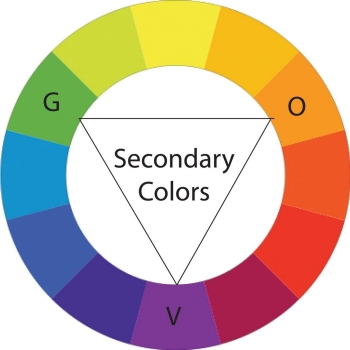
Next we move on to our secondary colors. These are the colors formed by mixing the primary colors with each other: green, orange, and purple.


1466095133395

You can further break down the color wheel into tertiary colors. These are the colors formed by mixing a primary and secondary color: yellow-orange, red-orange, red-purple, blue-purple, blue-green, and yellow-green.


1466095577744

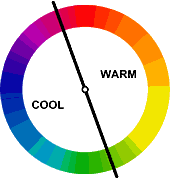
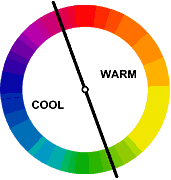
And of course we divide that wheel based on Color Temperature, with warm color opposite cold.


To create a successful illustration, your color palette or scheme needs to support your big idea. It must work to further your narrative and or concept.  If you have already taken Color and Design, you will have worked with various color schemes.   In the next few posts, and in the remaining weeks of class, you’ll look review color theory in detail, and see how those color schemes can influence narrative. We will also look at how they are applied in both fine art and in contemporary illustration
1466095598653

Drawing by Philippe Buchet, Color by Matt Hollingsworth


NOW lets get deeper into some real COLOR THEORY!

Working in Color: The basics

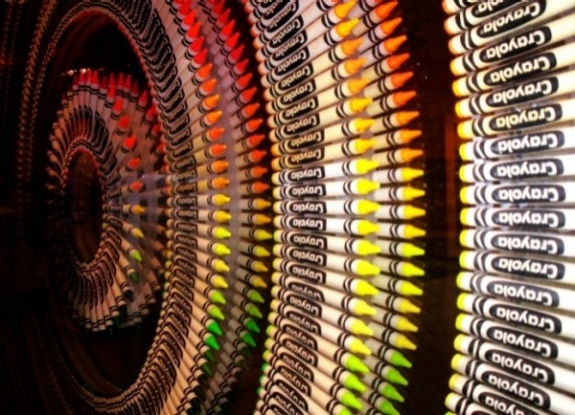
Color is one of the most powerful aspects of making art. Almost everyone who loves to create can remember the childhood excitement generated by a brand new box of crayons!

1466032830041

Everyone has a favorite color, artists and non-artists alike.  Our relationship to color is one of the most powerful relationships we have as a species. It is intrinsically connected to how we relate to our world. And so of course it is one of the most powerful aspects to consider when making art.


Color Temperature

 Much of our relationship to color is based on instinct. For example, we see colors as warm or cool based on our physical response to them.

1466033269032

Warm things are warm colors (such as fire, the sun, hot coals, and in this case hot food.)


1466033283844


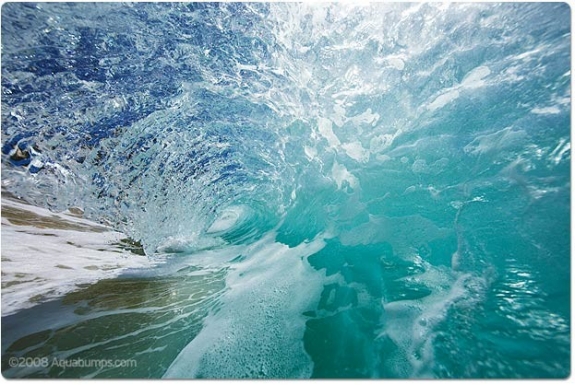
and cool things are cool colors (such as water and ice, which as blue or bluish).


1466033301650


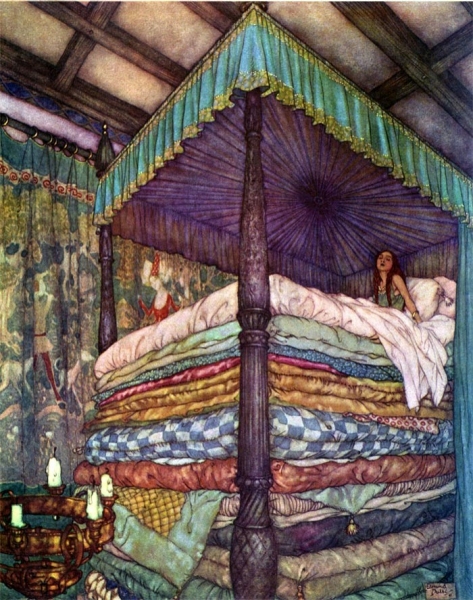
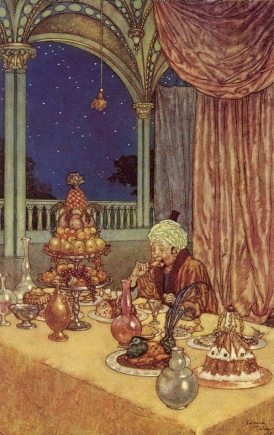
Interestingly warm and cool colors also create a sense of perspective and depth when we look at an image. Warm colors tend to advance towards us, whereas cool colors tend to recede away from us.


In these two images note how early 20th-century illustrator Edmund DuLac uses this trick. In the first image of The Princess and the Pea he creates a sense of incredible height, as the cold blue-purple recedes from the viewer, effectively raising the height of the bed canopy. And in the second one, A Palace of Wonder, a sense of depth is created between the warmth of the interior space and the cold dark outside.

1466033989719 1466034009733


COLOR AND CULTURE

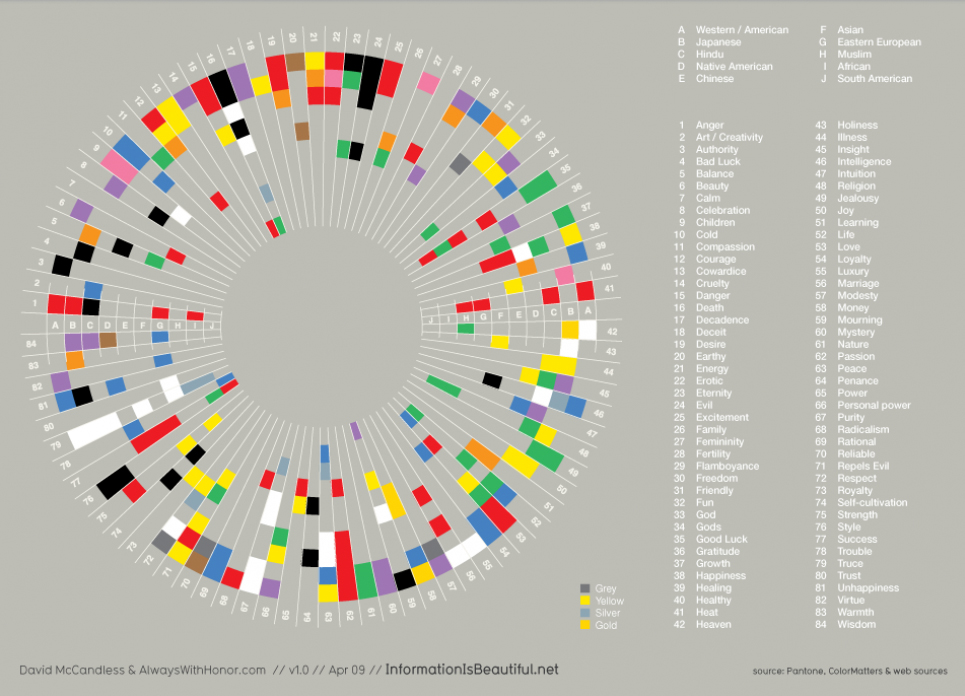
However, a great deal of our reactions to color are not innate, they are in fact cultural. For example Black and Death are associated in many Western cultures, in many Eastern cultures it is associated with white—its direct opposite.

Take a look at this info-graphic. Note how many color associations change, depending on where you are in the world. However also note how HOT and COLD or Color’s Relationship to Temperature do not.

It is however important to understand your target market and the culture that they come from, because culture has a strong influence on the development of cultural-color associations in childhood building the adults eventual perceptions of color.

It is however important to understand your target market and the culture that they come from, because culture has a strong influence on the development of cultural-color associations in childhood building the adults eventual perceptions of color.


Throughout this module and the next we will look at these basic reactions we all have to color and learn to compose in color effectively. We will build on what we have learned regarding composition, concept, point of view, and value and we will see how we can use these reactions to color to aid us in our ultimate goal, telling a great story through narrative illustration.


However, before we can do that lets be sure we have down the basics.

NEXT STOP: The Color Wheel

Master Study : The Art of Albrecht Dürer

As the only way to represent value in printed books was through the use of line, we can easily see how the art of printmaking and that of pen and ink illustration are deeply linked.

To see an amazing example of this idea in action, let’s look at the German Renaissance printmaker Albrecht Durer (1471–1528). Durer demonstrated the true mastery that could be achieved in inked and printed line art. Through expert understanding of line and value, he created depth, volume, and mood.

As you examine the following images, take careful note of Dürer’s use of hatching, crosshatching, and stippling in these images. Consider the incredible sense of volume achieved, and the quality of light, created through masterful use of line.

Pen and Ink Illustration: an Introduction

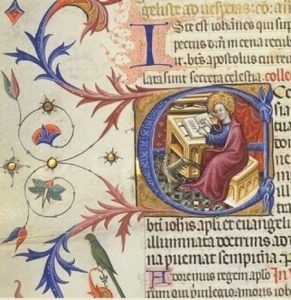
We can trace pen-and-ink illustration’s roots back to the very earliest illuminated manuscripts.

An illuminated manuscript is a manuscript in which text is supplemented by additional decoration. The earliest known examples come from the Byzantine Empire, from 400 to 600 CE.

1472596584762

Illuminated manuscript

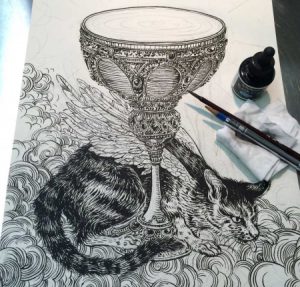
But regardless of the antiquity of the medium, pen and ink are used all the time by contemporary illustrators, with a spectrum of different results.

1472596592999

Yuko Shimizu Work Process Shot

Illustration and the Art of Printing

Illustration’s development has paralleled the art of printing and reproduction, with very specific moments in history periodically reinventing our medium. We can boil these moments down to a few landmark inventions:

  • the printing press
  • color lithography
  • photography
  • digital printing
  • digital media

Arguably, the invention of the printing press is still the most important thing that has occurred in the history of our art form.

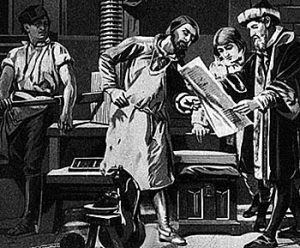
press

When Johannes Gutenberg invented the printing press, developing a movable type system in Europe between the years of 1440 and 1450, he completely revolutionized the world of human communication. He also initiated the marriage between illustration and publishing that still exists today.

1468354318083-1

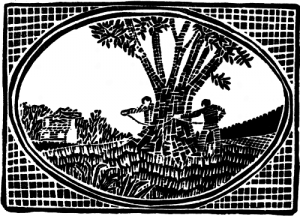
Just as type could be reproduced for print, so could images. The invention of illustrating by means of cut woodblock followed closely the invention of moveable types for printing.

1468354339982

Early Chinese woodblock print

It’s important to note that Chinese were the first by far to use woodblock printing, with the earliest known work dating back to before 220 CE. However, in Western illustration the first woodblocks date from the beginning of the 15th century and the invention of Gutenberg’s press.

Gutenberg added illustrations—usually woodcuts—to his printed books. Very soon after that, books with woodcut illustrations became commonly available.

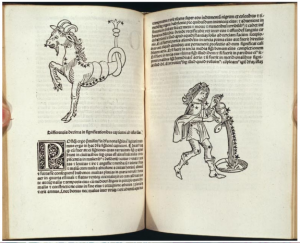
These illustrations were limited to black ink on white paper, forcing illustrators to render subject matter and to represent dimensionality using only lines, leading to the development of hatching in the pages shown here.

1468354365186

Illustrations by Erhard Ratdolt, 1488, in a book written by Persian astrologer Albumasar

Wet Media Techniques, Part 1: Ready, Set, Paint!

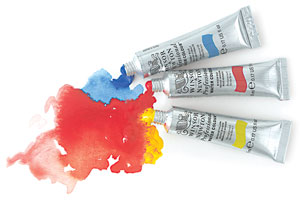
00319-group-8-2ww-m

Successfully working in Wed Media depends on applying  specific principles. There are habits you can develop and things to set up ahead of time that will make all the difference.

Painting in any water-based medium depends on the interaction among four key factors:

  • the absorbency of the paper
  • how wet or dry the paper is
  • how much pigment you are using
  • gravity

Begin by setting up your work area properly before you start.

ill_232_v9_m09_p13_angle_1

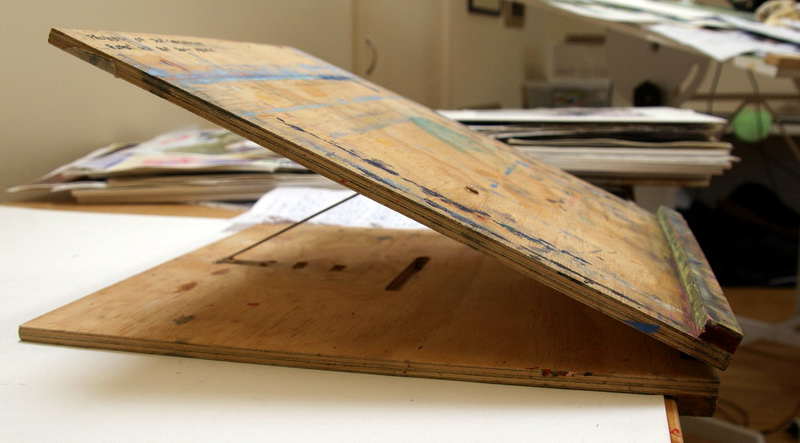
To account for gravity, set your art board at an angle. The steeper the angle, the stronger the force of gravity will be.

This angle is subject to personal preference. Some people like just 20 degrees (equivalent to a couple of textbooks propping up one end of your work surface) while others have a much steeper angle like this:

ill_232_v9_m09_p13_angle_2

  • Have everything you need on-hand. Lots of clean water and paper towels are a must.
  • Try out your colors first. Don’t just blindly jump in.
  • Try your colors at different opacities. See what they look like with different proportions of water to pigment.
  • Try making a glazing chart to understand color interactions. (You’ll learn how to do this on the next page.)
  • Mix colors you know you want to use beforehand and test them on a test strip of paper.

1472600025443


To prevent your work from buckling and warping you should tape your paper or illustration board down with artist’s tape, or work on a watercolor block. This will let the paper block or work board help the paper maintain its shape through repeated applications of wet paint.

1470870755606

Finally, if you’re working on a watercolor block and want to remove your painting, or you need paper for tests and roughs, you should remove your work by inserting a dull knife blade or a credit card into the opening at the top of the block and running it around the perimeter to break the adhesive bond and remove the page.

The Modern Art of Hatching

Print illustration continued to grow as time went on, with advanced technologies allowing for increasingly better image reproduction. Illustrators on both sides of the Atlantic were becoming household names!

1468354909900-1

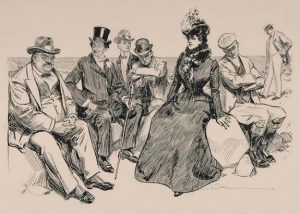
Charles Dana Gibson, At the Beach

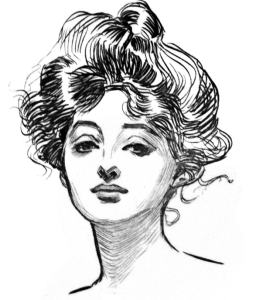
Artists such as Charles Dana Gibson were both depicting and creating the American culture of the time. His pen-and-ink drawings were reproduced in magazines across the globe, and his images found their way into both American homes and the American consciousness. His iconic ink drawing of the “Gibson Girl” was, he said, a composite of “thousands of American girls.” The image shaped the face of American femininity of his generation.

1468354934563

Charles Dana Gibson, The Gibson Girl

During the years between 1865 and 1917, a time known as the “Golden Age of Illustration,” books and periodicals were the world’s major source of entertainment. This stands as the publishing industry’s most dramatic period of worldwide expansion, and of course that expansion can be seen in the incredible use of inking techniques used by the artists of the time.

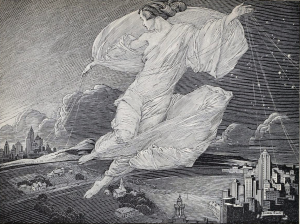
ill_232_v9_m5_p3-booth_1

Franklin Booth, A Continent Is Bridged, originally an illustration commemorating the 25th anniversary of transcontinental telephone service.  Note the similarity in technique to the work of Albrect Durer.

Hatching is as relevant to illustration now as it was at the advent of the print industry, though most artists use the technique in combination with some kind of coloring medium, either traditional or digital.

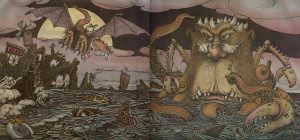
ill_232_v9_m5_p4-mayer_1

Mercer Mayer, One Monster After Another, pen, ink, and watercolor

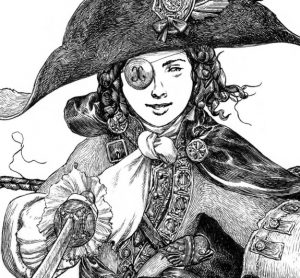
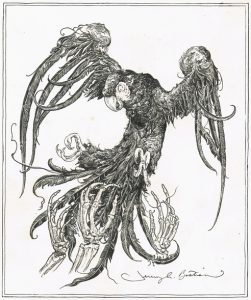
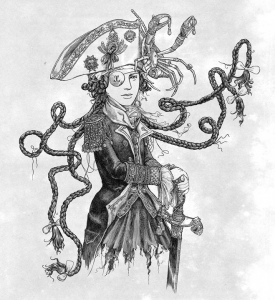
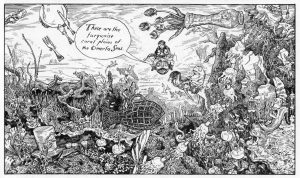
Jeremy Bastian is an American comic book creator and illustrator best known for the book Cursed Pirate Girl. Each illustration is created at a 1:1 scale using a very fine brush and ink. His painstakingly rendered drawings are reminiscent of Dürer in their skillful use of hatching technique, but are perhaps more strongly connected with the pen-and-ink work of the Golden Age illustrators he cites as his influences, Rackham and Tenniel, who we will look at later in this course.

Look at the gallery of Bastian’s work.  When you look at Bastian’s illustrations, take the time to zoom in and really examine his use of line to create value and describe form. Also note how expressive and alive his lines are.

Jeremy Bastian, illustrations from Cursed Pirate Girl

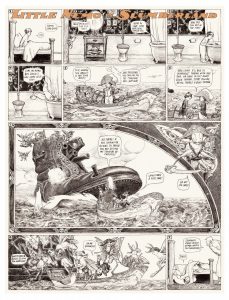
Here you can take a look at a one-page comic created by Bastian for the Eisner-Award -winning anthology Little Nemo in Slumberland, an homage by modern cartoonists to the work of Winsor McKay.

ill_232_v9_m5_p4-bastian_6

Pen and Ink Tools – Part 1

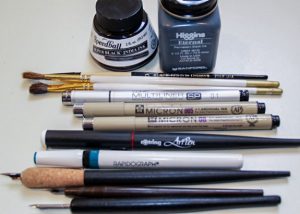
In this class, for the most part we will be using a crow quill (or dipping pen) and/or a brush to make our marks.

1468363604377

However, an almost endless number of pen and ink tools and techniques exist, and it’s highly recommended that you experiment with as many opportunities as possible within this amazing medium. Some substantial differences exist between tools; it’s likely you will prefer some over others. Take the time to experiment and discover your own interests and comforts


In this and subsequent posts, we’ll cover the most commonly used pen-and-ink drawing tools and materials. In addition to the obvious ink-specific tools such as pens, brushes, and paper, you may also need to acquire paper towels, white-out pens (useful for reproduction work), an old toothbrush, and a water jar.


Quills
1468363624880

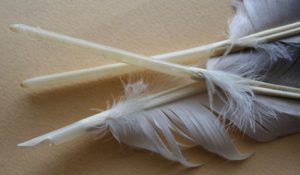
The first pens were made from feathers (quills), bamboo, or reeds. Usually, quills are created from the wing feathers of geese. Other common feathers used for quills come from the crow, eagle, owl, hawk, swan, and turkey. These feathers are carefully treated in order to retain their shape despite frequent wetting and drying. The hollow shaft of the feather acts as an ink reservoir, and ink flows to the tip by capillary action.

Crow Quill
1468363661842-11468363744341


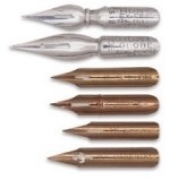
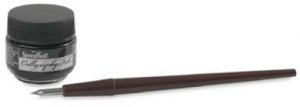
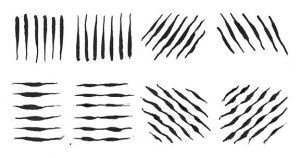
The modern version of the traditional quill—the steel dipping pen, or crow quill—remains widely used by illustrators today. This pen is included in your supply list and is the one recommended for use in this course. A quill pen can produce either very delicate lines or thicker, more dramatic ones. It can also produce lines of varying width. Check out all the varied lines produced by a crow quill in the next image. When you press down on the crow quill, more ink is released, making the line thicker. Apply less pressure, and the line becomes thinner. This allows your line to vary from thick to thin and visa versa without having to change the position of the pen.
1468363702955-1

Aside from the traditional look it gives an image, a crow quill helps to develop hand techniques that are needed for all drawing media. When working with a quill, you must learn to control the pressure that you apply to the nib in order to vary the weight of your lines.

Crow quills are made of both a holder and a nib. The nib is the metal point that you dip into the ink. They come in a variety of sizes and with a variety of point shapes (pointed, angled, or rounded), but all are flexible, have a small hole or reservoir, and are split at the tip, thereby allowing the ink to flow onto the work surface. They also work on the same principle as the feather, sucking up the ink through capillary action. You’re encouraged to experiment with several different types and sizes of nibs in order to see how they all perform differently.

Caring For Your Crow Quill

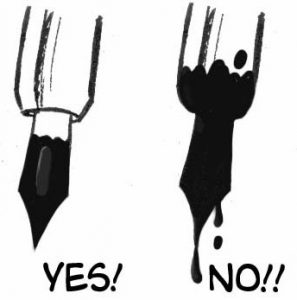
When using your crow quill, don’t dip it into the ink past the nib. Doing so will cause messy, uncontrollable drips on your artwork and will also damage the pen, shortening its life. Dipping in just past the reservoir is ideal.
1468363763964-1


Drawing Pens

1468363823627

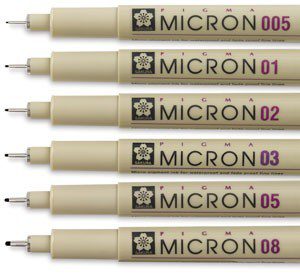
These drawing pens are similar to a felt tip pen, but they use archival ink. Several different brands exist but the most commonly used are the Microns pictured here. Various point sizes make it easy to control line weights. These pens are often used for sketching, particularly for comic book art and illustration. Again, note the consistent line weight and various sizes, each of which is ideal for different purposes. You’re highly encouraged to try using these pens if you haven’t already done so.


Brushes As Drawing Tools
1468363835813

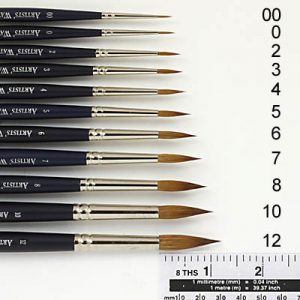
Watercolor brushes and brushes for working in ink are generally the same: they both use water as the dilution and clean-up medium. However, keep in mind that once a brush has been used for inking, it’s difficult to get perfectly clean again, so be careful that leftover ink doesn’t stain your artwork when subsequently using other media. Keep in mind we are specifically discussing drawing here; painterly brush techniques will be covered in later modules.

Brushes used for drawing purposes are generally of a smaller gauge. Though the sizes of brushes you’ll use will vary given the size of your picture (the larger the picture, the larger the brush, in general), good sizes for general inking—such as comic book style illustration—are the number 0 to number 3. These allow for both thicker and thinner lines, but will also give a “drawn,” as opposed to “painterly,” feel.

Also similar to the style produced via crow quill, a brush allows for line width variation based on pressure. For this course, drawing with a brush in addition to the crow quill is recommended. Take the time to practice with both.

Caring For Your Brushes

Don’t dip your brush into the ink all the way to the metal. This will make for a messy drawing tool and will shorten the life of your brush. Clean your brush every time you’re finished using it. If you plan to use it again in a short time, rinse it in water that’s completely clean. Don’t leave your brushes sitting in water for long periods of time, as this will damage your brushes’ tips. In general, it’s better to periodically wash brushes with soap and water, which will not only keep your brushes in good shape but will also ensure their ability to manipulate ink effectively. Don’t use turpentine or other hard solvents to clean, as they’re unnecessary with ink and will deteriorate the hairs on your brush.