Pen and Ink Illustration: an Introduction

We can trace pen-and-ink illustration’s roots back to the very earliest illuminated manuscripts.

An illuminated manuscript is a manuscript in which text is supplemented by additional decoration. The earliest known examples come from the Byzantine Empire, from 400 to 600 CE.

1472596584762

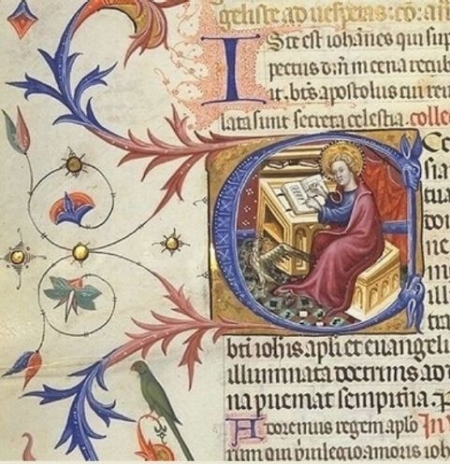
Illuminated manuscript

But regardless of the antiquity of the medium, pen and ink are used all the time by contemporary illustrators, with a spectrum of different results.

1472596592999

Yuko Shimizu Work Process Shot

Illustration and the Art of Printing

Illustration’s development has paralleled the art of printing and reproduction, with very specific moments in history periodically reinventing our medium. We can boil these moments down to a few landmark inventions:

  • the printing press
  • color lithography
  • photography
  • digital printing
  • digital media

Arguably, the invention of the printing press is still the most important thing that has occurred in the history of our art form.

press

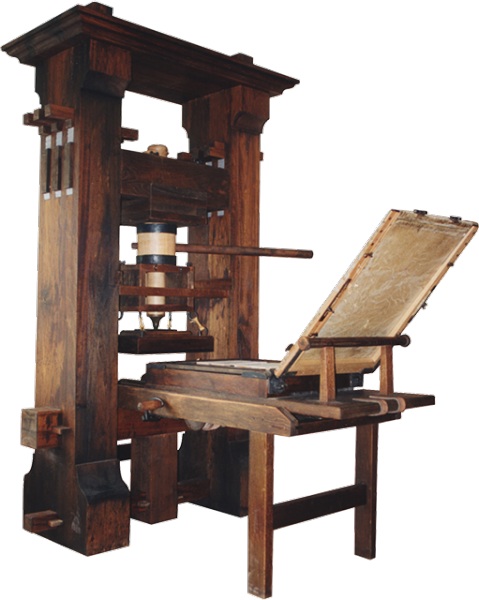
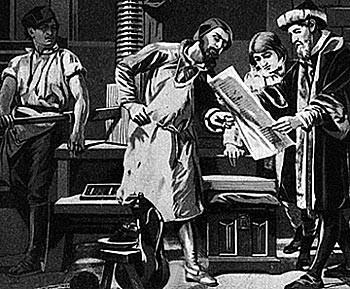
When Johannes Gutenberg invented the printing press, developing a movable type system in Europe between the years of 1440 and 1450, he completely revolutionized the world of human communication. He also initiated the marriage between illustration and publishing that still exists today.

1468354318083-1

Just as type could be reproduced for print, so could images. The invention of illustrating by means of cut woodblock followed closely the invention of moveable types for printing.

1468354339982

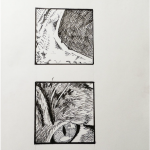
Early Chinese woodblock print

It’s important to note that Chinese were the first by far to use woodblock printing, with the earliest known work dating back to before 220 CE. However, in Western illustration the first woodblocks date from the beginning of the 15th century and the invention of Gutenberg’s press.

Gutenberg added illustrations—usually woodcuts—to his printed books. Very soon after that, books with woodcut illustrations became commonly available.

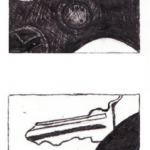
These illustrations were limited to black ink on white paper, forcing illustrators to render subject matter and to represent dimensionality using only lines, leading to the development of hatching in the pages shown here.

1468354365186

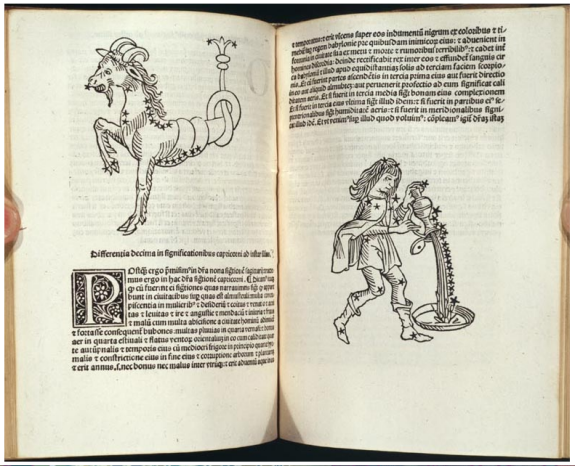
Illustrations by Erhard Ratdolt, 1488, in a book written by Persian astrologer Albumasar

Exercise 2: INK Objects

Exercise 2: Ink Objects

(Part 1 – Pencil)

(Part 2 – ink)


For your second exercise, you’ll have to find photo references for two objects. Choose objects that are very different from one another. They do not need to relate, thematically.

Looking at your references, ink the surfaces and details as realistically as you can with various pens. You must have a minimum of five different textures total for the two objects. Rendering different textures is a good way to explore different ways of inking and becoming familiar with your pens.

PART 1

  1. Find a photo reference for two objects of varying texture, such as a wood-grain surface, basket, mammal, reptile, grass, flower, tree, metal surface, etc. The objects must have very dissimilar surface textures.
  2. Using pencil and paper, sketch from the reference, focusing on its contours. Draw the majority or entirety of the object.
  3. Position and scale your sketches to create interesting positive and negative shapes within the 3-inch square. Enlarge, reduce, rotate, and/or crop each sketch before transferring it onto the Bristol paper to ink.
  4. Bring transferred Drawing to Class

PART 2

  1. Before you begin to ink, preplan the strokes. Mentally organize the shapes that are to be a pattern, texture, or local color/value. You need to decide whether the stroke has a specific function, such as defining a form or creating a surface like fur or scales. No strokes should be random.
  2. Ink two 3-inch x 3-inch squares on one sheet of Bristol paper, per the requirements in the diagram below.
  3. Once Complete UPLOAD to OPENLAB as PART 1)


Assignment 2: Object Staging part 1

Assignment 2: Object Staging

Part 1 Brainstorm, and Thumbnails and Rough Sketches 

Description

For the first stage of this three part assignment, you will create a concept based on one of your objects from the Inked Object Exercise. Your concept must meet the following parameters:


  • Your original object must be visible and central to the new concept.


  • The composition must feature a simple setting with only the props necessary to communicate your concept.


  • The owner of your object must be incompetent, unreliable, eccentric, otherwise not quite normal.


  • You must describe the owner without any visible figures (including the owner).


To gain a better understanding of the assignment, please review the student examples.


For this stage, you’ll brainstorm on the object using the IDEATION Method viewed in class.


Then Sketch a minimum of 20 thumbnails for review. Next class you’ll create a pencil rough and value roughs, in preparation for the final inked illustration.


Specifications

  • Image size: 7″ x 9″ vertical format or 9″ x 7″ horizontal format

Directions

  1. To create a concept, write down all your thoughts about the use of your object. Creating a backstory about the owner can help. Is your owner male, female, young or old? Once you understand your owner, the props that you choose will be consistent. You think differently than everyone else, so don’t censor yourself. Allow your thoughts to run freely.


  1. Loosely and quickly sketch several of your concepts in your sketchbook.


  1. Choose the strongest sketch, and draw thumbnails to compose and stage your concept. What props do you need to communicate the concept? Which setting, environment, and time of day will best support the concept?


Tip:
Keep your composition simple. Use only the props necessary to communicate the concept.
Purpose

The purpose of this assignment is to practice creating concepts, thumbnails, and learn illustration process.

Tools

  • Tracing paper and Sketchbook for thumbnails
  • Pencils
  • Ruler

Due Date

  • The 20 thumbnails are due next week.


Exercise 1: Value Scales & Rendered Form and 3 Value Studies

Exercise 1:  Using a soft graphite pencil, create a value scale as pictured below, then try rendering a simple form to represent lighting and dimensionality using only value. Lastly try shading 3 different value studies for Assignment 1.


First: In your sketchbook do a drawing with a Value Scale of a sphere. 

Create a simple value scale such as the one at the bottom of the study below. Find a cube and a sphere to light and draw. Do a value study from observation. Set up a simple form and a light source. Try to “turn the form” or create volume by using the values in the scale you created.


  • Be sure to use the full range of values.
  • Allow 30 minutes for the drawing and 30 minutes for the value scale. Take your time.


NEXT:

USING your Value Scale as reference.  Create 3 different Value Studies of Assignment 1.

If you are UNPREPARED FOR CLASS and clan’t shade your OWN WORK… here is a value shading Exercise to get you started.


POST to OPENLAB When Complete