However, an almost endless number of pen and ink tools and techniques exist, and it’s highly recommended that you experiment with as many opportunities as possible within this amazing medium. Some substantial differences exist between tools; it’s likely you will prefer some over others. Take the time to experiment and discover your own interests and comforts
In this and subsequent posts, we’ll cover the most commonly used pen-and-ink drawing tools and materials. In addition to the obvious ink-specific tools such as pens, brushes, and paper, you may also need to acquire paper towels, white-out pens (useful for reproduction work), an old toothbrush, and a water jar.
Quills
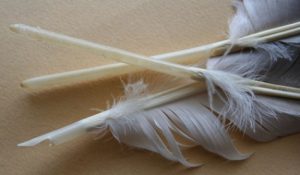
The first pens were made from feathers (quills), bamboo, or reeds. Usually, quills are created from the wing feathers of geese. Other common feathers used for quills come from the crow, eagle, owl, hawk, swan, and turkey. These feathers are carefully treated in order to retain their shape despite frequent wetting and drying. The hollow shaft of the feather acts as an ink reservoir, and ink flows to the tip by capillary action.
Crow Quill
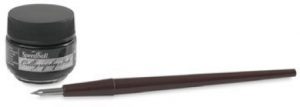
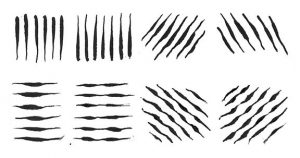
The modern version of the traditional quill—the steel dipping pen, or crow quill—remains widely used by illustrators today. This pen is included in your supply list and is the one recommended for use in this course. A quill pen can produce either very delicate lines or thicker, more dramatic ones. It can also produce lines of varying width. Check out all the varied lines produced by a crow quill in the next image. When you press down on the crow quill, more ink is released, making the line thicker. Apply less pressure, and the line becomes thinner. This allows your line to vary from thick to thin and visa versa without having to change the position of the pen.
Aside from the traditional look it gives an image, a crow quill helps to develop hand techniques that are needed for all drawing media. When working with a quill, you must learn to control the pressure that you apply to the nib in order to vary the weight of your lines.
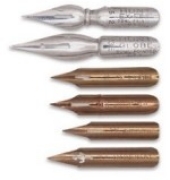
Crow quills are made of both a holder and a nib. The nib is the metal point that you dip into the ink. They come in a variety of sizes and with a variety of point shapes (pointed, angled, or rounded), but all are flexible, have a small hole or reservoir, and are split at the tip, thereby allowing the ink to flow onto the work surface. They also work on the same principle as the feather, sucking up the ink through capillary action. You’re encouraged to experiment with several different types and sizes of nibs in order to see how they all perform differently.
Caring For Your Crow Quill
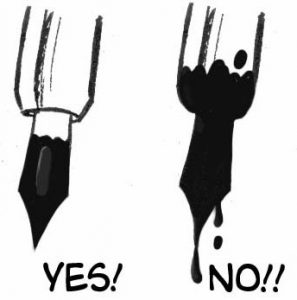
When using your crow quill, don’t dip it into the ink past the nib. Doing so will cause messy, uncontrollable drips on your artwork and will also damage the pen, shortening its life. Dipping in just past the reservoir is ideal.
Drawing Pens
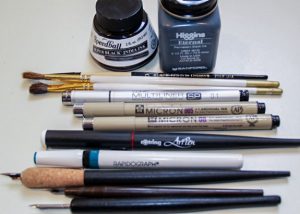
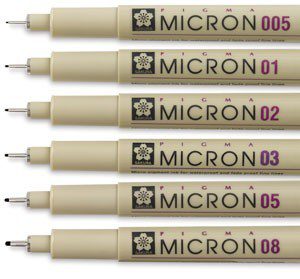
These drawing pens are similar to a felt tip pen, but they use archival ink. Several different brands exist but the most commonly used are the Microns pictured here. Various point sizes make it easy to control line weights. These pens are often used for sketching, particularly for comic book art and illustration. Again, note the consistent line weight and various sizes, each of which is ideal for different purposes. You’re highly encouraged to try using these pens if you haven’t already done so.
Brushes As Drawing Tools
Watercolor brushes and brushes for working in ink are generally the same: they both use water as the dilution and clean-up medium. However, keep in mind that once a brush has been used for inking, it’s difficult to get perfectly clean again, so be careful that leftover ink doesn’t stain your artwork when subsequently using other media. Keep in mind we are specifically discussing drawing here; painterly brush techniques will be covered in later modules.
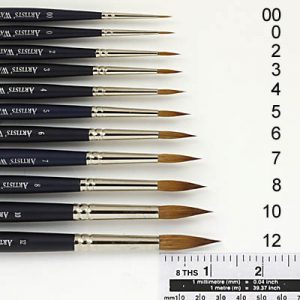
Brushes used for drawing purposes are generally of a smaller gauge. Though the sizes of brushes you’ll use will vary given the size of your picture (the larger the picture, the larger the brush, in general), good sizes for general inking—such as comic book style illustration—are the number 0 to number 3. These allow for both thicker and thinner lines, but will also give a “drawn,” as opposed to “painterly,” feel.
Also similar to the style produced via crow quill, a brush allows for line width variation based on pressure. For this course, drawing with a brush in addition to the crow quill is recommended. Take the time to practice with both.
Caring For Your Brushes
Don’t dip your brush into the ink all the way to the metal. This will make for a messy drawing tool and will shorten the life of your brush. Clean your brush every time you’re finished using it. If you plan to use it again in a short time, rinse it in water that’s completely clean. Don’t leave your brushes sitting in water for long periods of time, as this will damage your brushes’ tips. In general, it’s better to periodically wash brushes with soap and water, which will not only keep your brushes in good shape but will also ensure their ability to manipulate ink effectively. Don’t use turpentine or other hard solvents to clean, as they’re unnecessary with ink and will deteriorate the hairs on your brush.



can you create a wash with crow quil?
NO. You can thin the ink with water so that you are using grey ink but its impossible to create a wash using a crow quill. Try a nice big wash brush for that technique.
thanks for clearing that up. had to make sure
When going over the lines especially my project which has many lines, is it the best to use micro pen with a thicker size?
Ayano, really it depends. The key is to use the RIGHT TOOL FOR THE JOB. So if you need a regular line with no variation then the MICRON is the way to go. But if the line should have some life, then use a brush or crow quill.