What does the Achievement system in WeBWorK do, exactly?
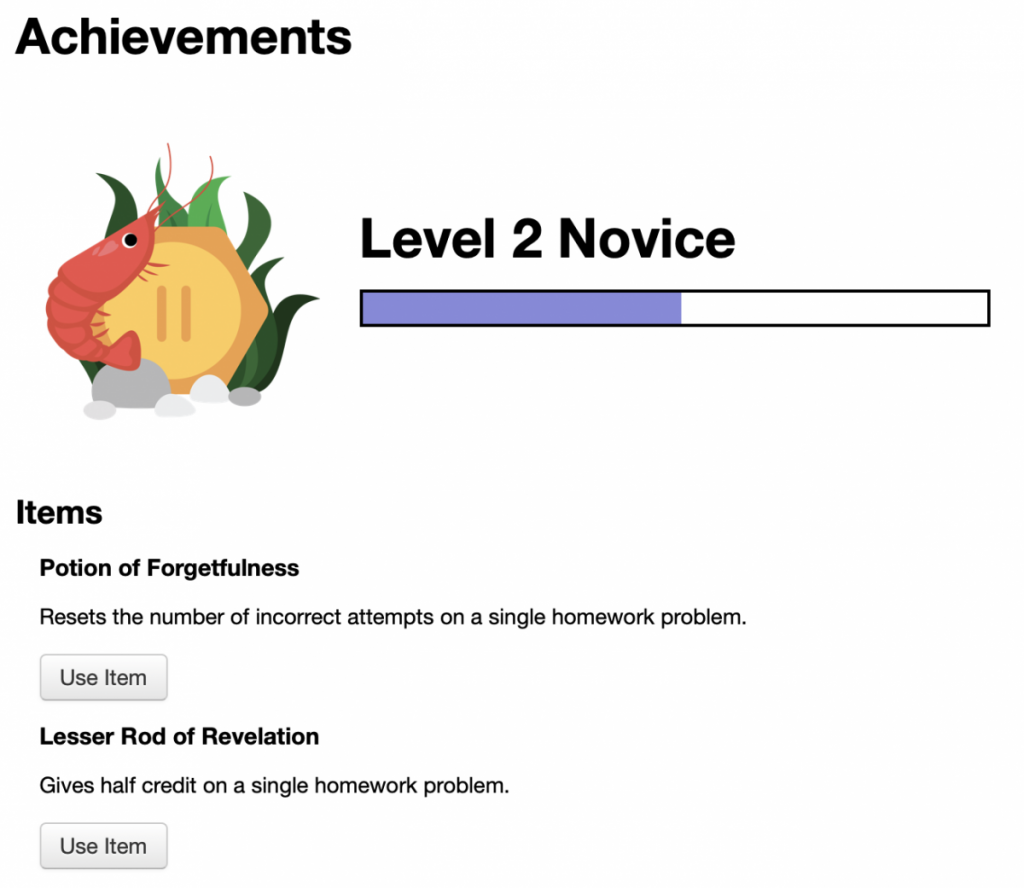
Achievements are a WeBWorK feature designed to reward students for solving homework problems in addition to other, often overlooked, positive student behaviors. For example, students might earn an achievement for solving 3 homework problems in a row without any incorrect submissions, or for solving a problem after taking long break. Earning achievements and solving problems earns students points, and as students gain points, they earn reward items and reach higher levels.

What’s the point of doing this?
Our goal is to use WeBWorK as a platform to deliver immediate rewards for positive student behaviors. In recognizing and rewarding these behaviors, we aim to help students develop long-lasting and beneficial habits of mind and practice. We also aim to keep advanced students engaged and challenged – avoiding the common “I know this well enough” detachment from students who might otherwise be capable of truly outstanding performance. Achievements also recognize and reward students who struggle as well. There are several persistence achievements that target students who struggle with problems.
Both qualitative and quantitative results have been overwhelmingly positive thus far. If you’d like to experiment with achievements in your class, keep reading to receive step-by-step instructions on how to activate them in your WeBWorK section. (Also, please inform Prof. Parker that you’re opting into this experiment.)
How do I activate Achievements in WeBWorK?
First of all – this is a choice that should be made before students begin the course. If achievements are activated mid-semester, it will be impossible for them to earn the necessary points to reach the top levels – which can be really discouraging to students who might really buy into this idea.
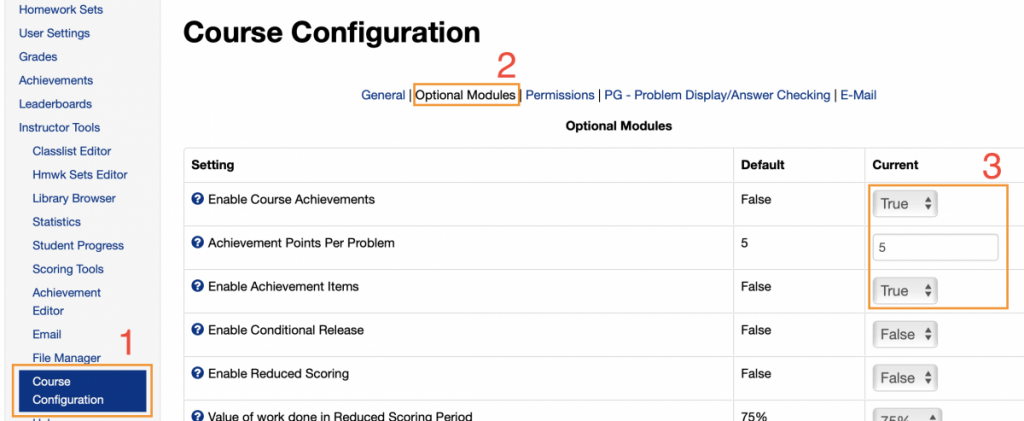
Visit Course Configuration (1); click on Optional Modules (2); then set Achievements and Achievement Items to true (3). Then make sure to click on “save changes” at the bottom of the page!

Now that the achievements are turned on (you might need to refresh the page), you’ll find Achievements Editor has been added to your list of Instructor Tools. Click on Achievements Editor (1); select the Import tab (2); find your course’s achievements file in the first dropdown menu and select all users in the second dropdown menu (3); and then Take action! (4)

That’s it! You’re done!
Well, almost.
If you add new students to your course after you’ve imported these achievements…
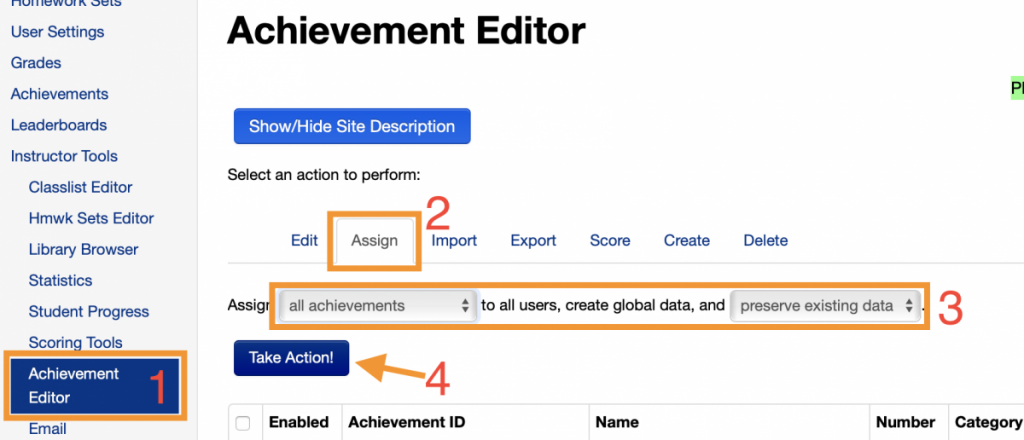
…you will need to assign the achievements to the newly added students! Fortunately this is very straightforward: click on Achievements Editor (1); select the Assign tab (2); select “all achievements” from the first dropdown and “preserve user data” from the second dropdown (3); then Take Action! (4)

Now we’re done.
For real, this time.
Leaderboards
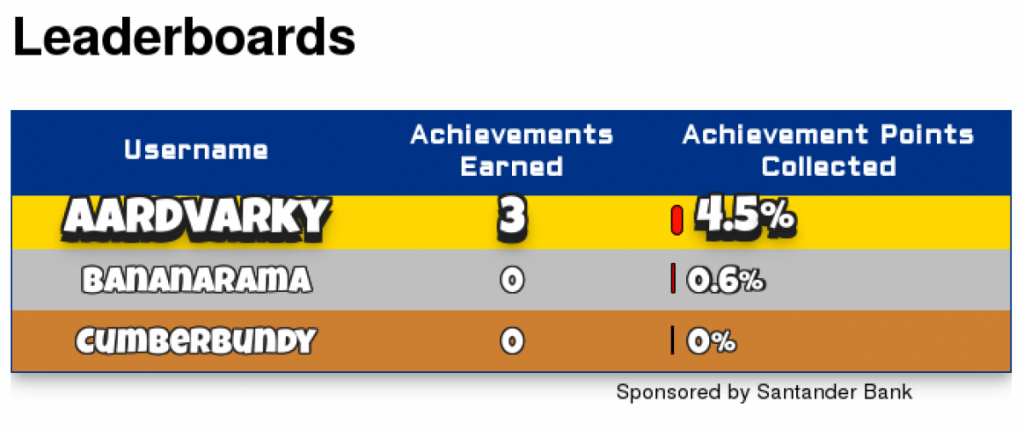
You’ll notice that there’s also a “leaderboards” page that’s appeared in your menu. This is a page where students can see their own progress as compared to their fellow classmates. Students have the option to set a screen name on their “User Settings” page. Whatever name they set here will appear on the leaderboard next to their achievement status. You may want to show this feature to students during class.
If a student happens to set an inappropriate display name, you can change it by editing their user settings from the “Classlist Editor” page. The “comment” field contains their display name, so by editing that field, you can remove any potentially offending display name.
This feature is just for fun, and it introduces the potential for adding a friendly competitive aspect to achievements system. This leaderboard feature was coded by two students from City Tech.


This is great! I can’t wait to see students earning all the different achievements. Thank you for the clear explanations, Andrew!
I am trying this for Spring 2020 Math1475.