So, you’ve got your password and email address set. Now it’s time to set up the course for your students.
In order to populate your course with the students who are enrolled, and the easiest way is to download your roster from MyInfo. If you use BlackBoard or CUNYFirst, you will not get all the student information that we require. Note: CUNY MyInfo will require your PORTAL login credentials, not your CUNYFirst login.
I’ve created an Excel spreadsheet that will automatically generate the spreadsheet you’ll need. Download it here: ClasslistTemplate.xls. Follow the directions included in the file and you should be all set! You’ll need your students’ names, CUNY IDs and their email addresses. All of which you should have gotten when you downloaded your rosters from MyInfo. Paste the columns of information into their appropriate places and the sheet will warn you of any potential problems before you proceed. If you see any cells turn red or purple, then the included instructions will tell you how to fix it. Once all the cells turn green, save the sheet that says “SAVE THIS SHEET AS A .CSV FILE” (as a .csv file, of course!), upload it, import it, and you’re all set!
The following steps are included if for some reason the ClasslistTemplate does not work for you. (In which case, please contact me and let me know, or leave a comment on this page.)
Create a new spreadsheet and copy-paste the necessary information into the columns as follows:
colA: this will be the student’s password (student passwords should match their CUNY ID number)
colB: Last name.
colC: First name.
colD: “c” for all rows.
colE: The student’s CUNY ID number – download your roster from CUNYFirst to retrieve this information.
colF,&G: empty.
colH: student’s email address
colI: student’s login name (I recommend using students’ first initial followed by their last name, no capitalization, no punctuation)
colJ: blank
colK: 0 for all students.
The final outcome should look like this for each student:
Note: make sure that your name is not included in the classlist file.
Save the file as a .csv (comma-separated values) file.
Login to your course on the WeBWorK server.
Find the ‘File Manager’ link on the left side of the page and click it.
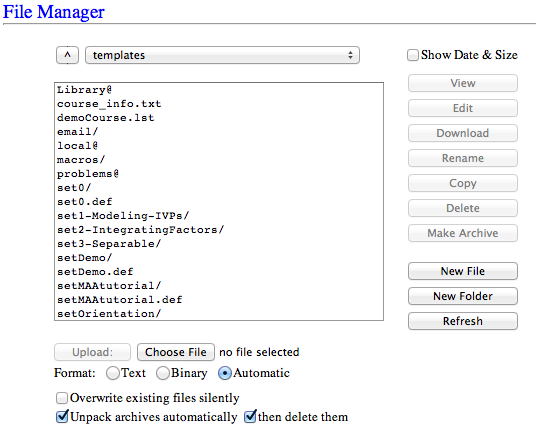
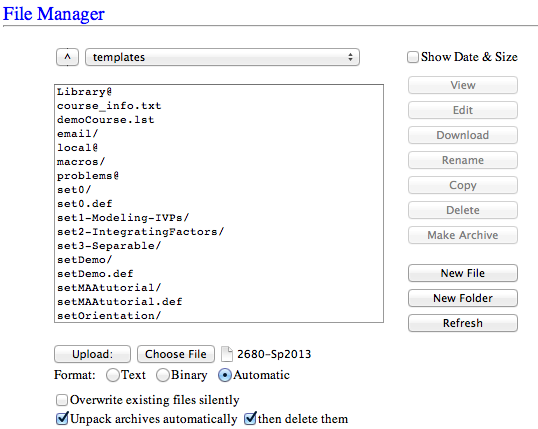
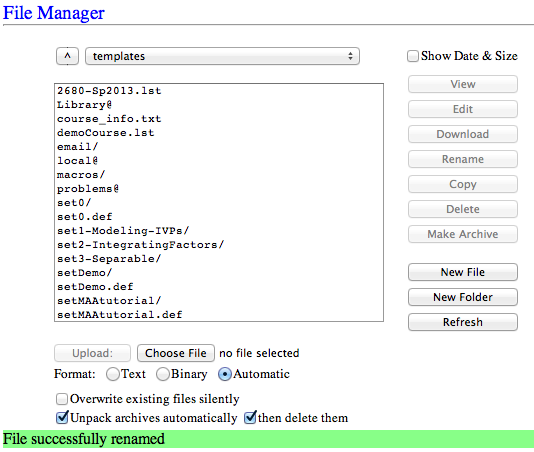
You’ll see a greyed out button for Upload: and next to it a button for ‘Choose File’ or ‘Browse’ – click it and find your .csv file, then click upload (which will no longer be greyed out).
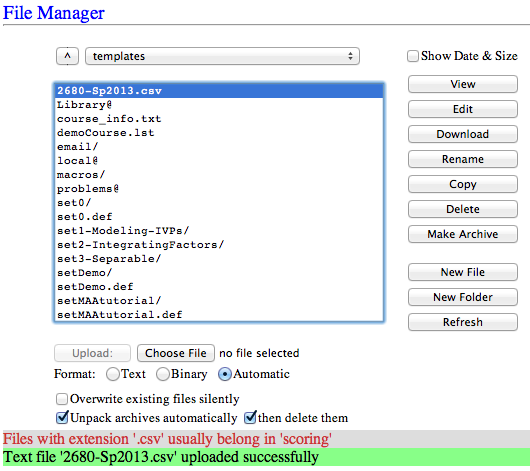
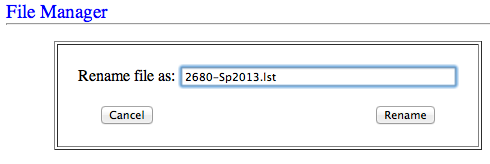
Your .csv file will now appear somewhere in the list of files (you may have to scroll down to find it). Find it in the list, and click it, then click the ‘Rename’ button to the right of the list. Replace the “.csv” at the end of the filename with “.lst” instead.
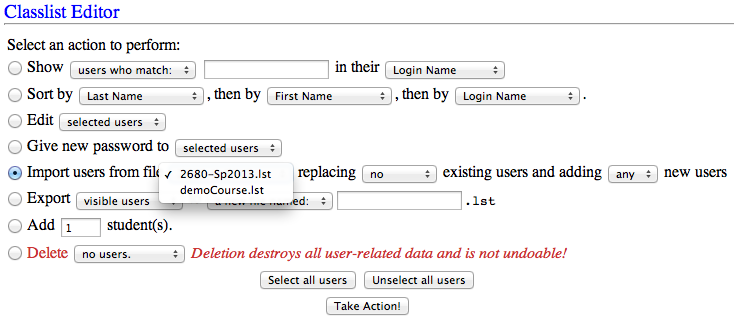
Confirm that the filename is now .lst instead of .csv, then click “classlist editor” in the lefthand column.
Select the circle next to “Import users from …” and select your filename.lst from the dropdown menu, then click “Take Action!”
Congratulations! You should now see all of your students listed in a grid at the bottom of the page.
Inform your students of their login names and passwords – advise them to change their passwords to something they’ll be sure to remember, and change their email to an address that they check regularly (only necessary if you’re planning on sending them email).


Andrew,
Thanks for setting up this space for us – the content here is great (already!). Thanks again for all your hard work on getting WeBWorK up, running, and in use.
Jonas
Great guide! Thanks Andrew.
There are a few things here to bear in mind.
1. When saving the CVS file, make sure the text deliminator is nothing. Some programs (OOCalc for example) default to the symbol “, and webwork hates this.
2. When copying and pasting from Blackboard into Excel or OOCalc, some white space and linebreaks are sometimes copied over. Make sure you clean your cells in the spreadsheet, removing this whitespace (TRIM in OOCalc) and linebreaks.
3. Usernames can’t contain any spaces.
If you have the Last/First names in columns B and C, here’s a function to build the login/pass (paste into column A, row 1):
=LOWER(LEFT(C1,1)&B1)
I’d also add TRIM, because there is sometimes leading and trailing whitespace (at least there was on mine)
=LOWER(LEFT(TRIM(C1),1)&TRIM(B1))
Rockin’! That’s so easy!
Thanks Andrew. Worked like a charm!!!!
If you use CUNYFirst MyInfo instead of blackboard, you get the names, emails and ID #s, all in one shot.
Andrew, thank you for these instructions and for all your work setting up WebWork!
Here’s a formula to break up the lname/fname field into two separate fields for lname and fname; this assumes the comma is the separator.
If you have the lname/fname field in column C then paste
=LOWER(TRIM(LEFT(C1,FIND(“,”,C1)-1))) into column A to get the lname in lowercase without whitespaces
and paste
=LOWER(TRIM(RIGHT(C1,LEN(C1)-FIND(“,”,C1)))) into column B to get the fname in lowercase without whitespaces
Thanks Natan! I’ve updated this post with a Template file that will automatically populate with students’ first and last names, as well as usernames and passwords. They just need to be copy-pasted into a new spreadsheet to create your classlist file!
Righteous 1 !!
Hi Dr. Parker, the instructions are very helpful and clear. This is the first time that I imported students to WeBWork.
When uploading from my mac, I had a terrible time with the first CSV format in the “save as” drop down menu (CSV UTF-8). Instead, look for just the plain CSV format, which worked with little fuss.
There were 2 additional CSV formats to choose from—“Macintosh” and “MS-DOS” —but I did not try those.