Class Info
- Date: Thursday, December 7, 2023
- Meeting Info: In person, Pearl 116, 8:30 to 11:00am, followed by Professor’s office hours from 11:00am to noon in Pearl 116.
- FINAL REFINEMENTS to Projects 01 and 02 due Dec. 13 for Dec. 14.
- NO CLASS ON DECEMBER 12th. Next Tuesday, Dec. 12 is Reading Day—a day to prepare your final work. Your presentation in Class 30 on December 19 is your final exam.
________________________________________________
Topics
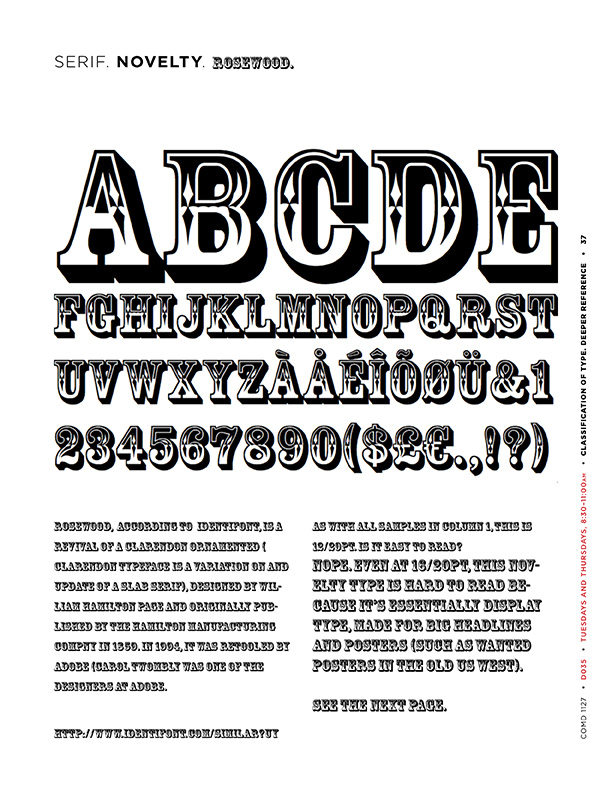
- Classification: A novelty face. In PDF containing all classifications to date.
- Recap of a few useful items to use in InDesign
- Project 3: Completed posters and Social Media Posts done by Class 29 (Dec. 14)
- Prepare for submissions and presentations of Project 3. Complete by Class 29
- Student Evaluation of Teaching. Midway through Class. At around 10:00 am I’ll leave the room for 15 minutes so you can complete SET forms. You will have received an email to your City Tech account. Emails will be sent from NYC College of Technology Course Evaluations. The sender will be from SPSSurveys@scantron.com
_____________________________________________________
Objectives
- Review AND REFINE work to date; complete work.
- Start document for presentation of Project 3
- Touch on animating in AfterEffects.
________________________________________________________
Novelty Typeface. Review all Classifications on your own.
_________________________________________________________________
InDesign Recap
The bulleted items below may be helpful for InDesign.
- Unlock items from a Parent Page on a Child Page:
- Command Shift Click
- Ungroup:
- Command Shift G
- For FITTING objects into your picture box, go to the Menu Item
- Object > Fitting
- then choose your preferred fit—taking care NOT to distort your work.
- Fit Content Proportionally using a KEYBOARD COMMAND
- Command option shift E
- Fill Frame Proportionally KEYBOARD COMMAND:
- command option shift


____________________________________________________________________
PreActivity
A review of your animations done in Class 27.
____________________________________________________________________
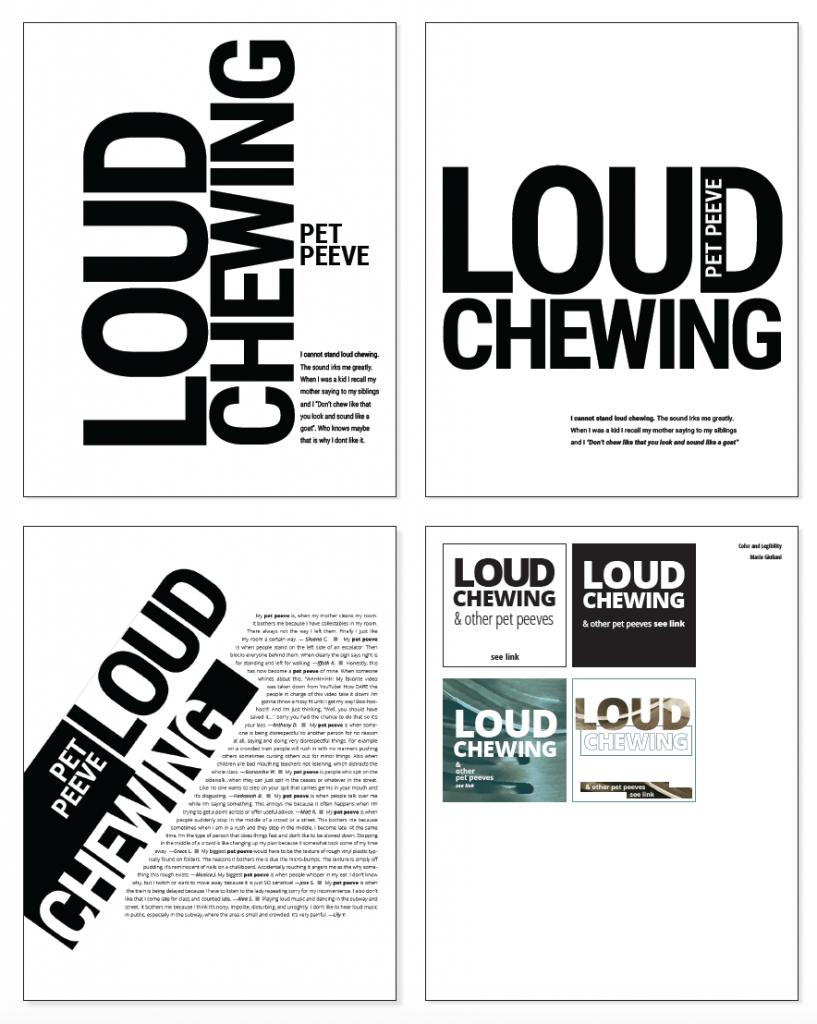
Activity 1. Edit work done to date
- Complete and Refine Poster and Social Media Posts.
- Progress is key. Completed projects without any evidence of process or improvement will reduce your grade.
- Checklist of key principles to include:
- Correct use of the grid (margins, columns, rows, gutters)
- Use of visual hierarchy, presentation and overall design aesthetics
- Use of typefaces (ideally, limit 2 per poster and social media post).
- Applying typographical concepts (alignment, leading pt size, tracking, kerning, etc)
- Color and legibility
- Photograph must have a credit even if it is yours (add credit to right column of social media post). As mentioned on previous classes, all photo or art must be on the public domain, or must have Creative Commons License
- Check speed for GIF (make sure is in a forever LOOP)
- It is OK to introduce color to your posters.
- Keep two of your Social Media posts Black and White.
- We will touch on animating in AfterEffects.
_________________________
Activity 2. InDesign Document containing Project 3
- Complete your InDesign Document to contain all of Project 3.
- Project 3: Includes:
- Three 11x 14 inches posters
- Four 1080 x 1080 pixels/ static social media posts (as specifics of project)
- One 1080 x 1080 pixels social media posting with Type in Motion
Select one of the four posts designed.
Specs:
- Place all work into one InDesign document.
- Specified text, in addition to content listed below, is as follows:
- Annoying! This is a heading but does not need to be as large as the title of your peeve.
- Your peeve
- The text you wrote
- Possibly a definition of your peeve.
- The source of above (a link, OR a name with publication and date). “Found on Google” is NOT an accurate source.
What goes where:
- Page 1
- Poster 11 x 14 Annoying!/ following given grid / Your peeve with your text
- Page 2
- Poster 11 x 14 Annoying!/ following given grid / Your peeve with your text
- Page 3
- Poster 11 x 14 Annoying!/ following given grid / Your peeve with your text using text wrap.
- Page 4
- 11 x 14 Page with 4 square static social media posts and your gif with a link if necessary.
- ALSO upload your gif and, ideally, your compressed movie to Dropbox. We will probably briefly return to After Effects in Class 29.
Activity 2 continued
Pulling Your Social Media Posts into InDesign (page 4)
Use the same InDesign document you’ve used for your poster.
- 11 X 14″
- NO facing pages
- .5″ margins.
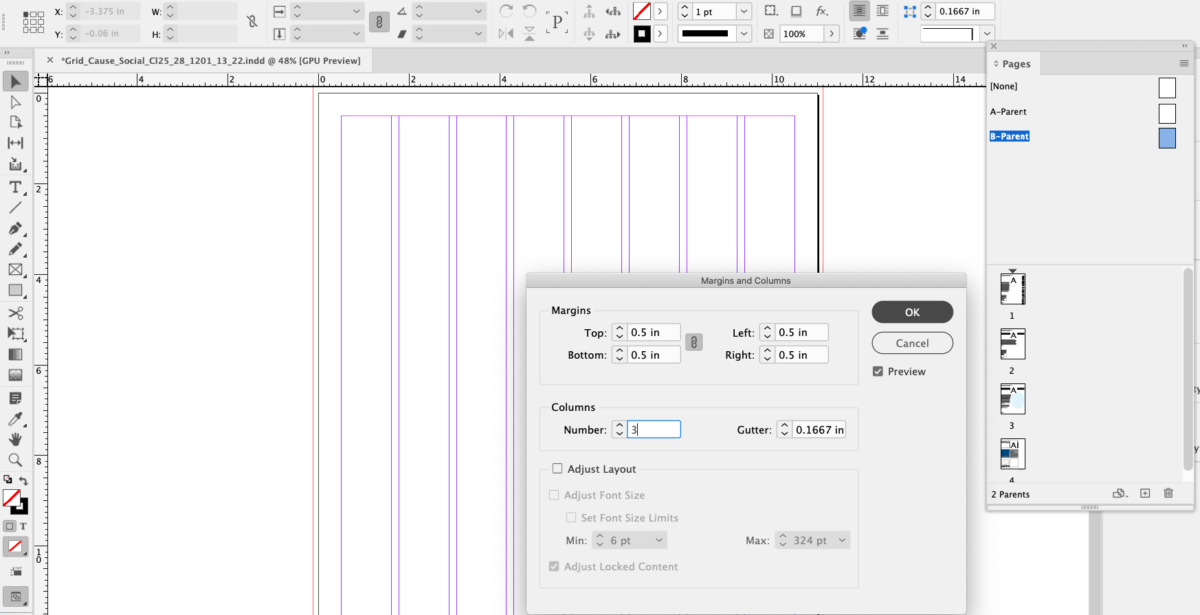
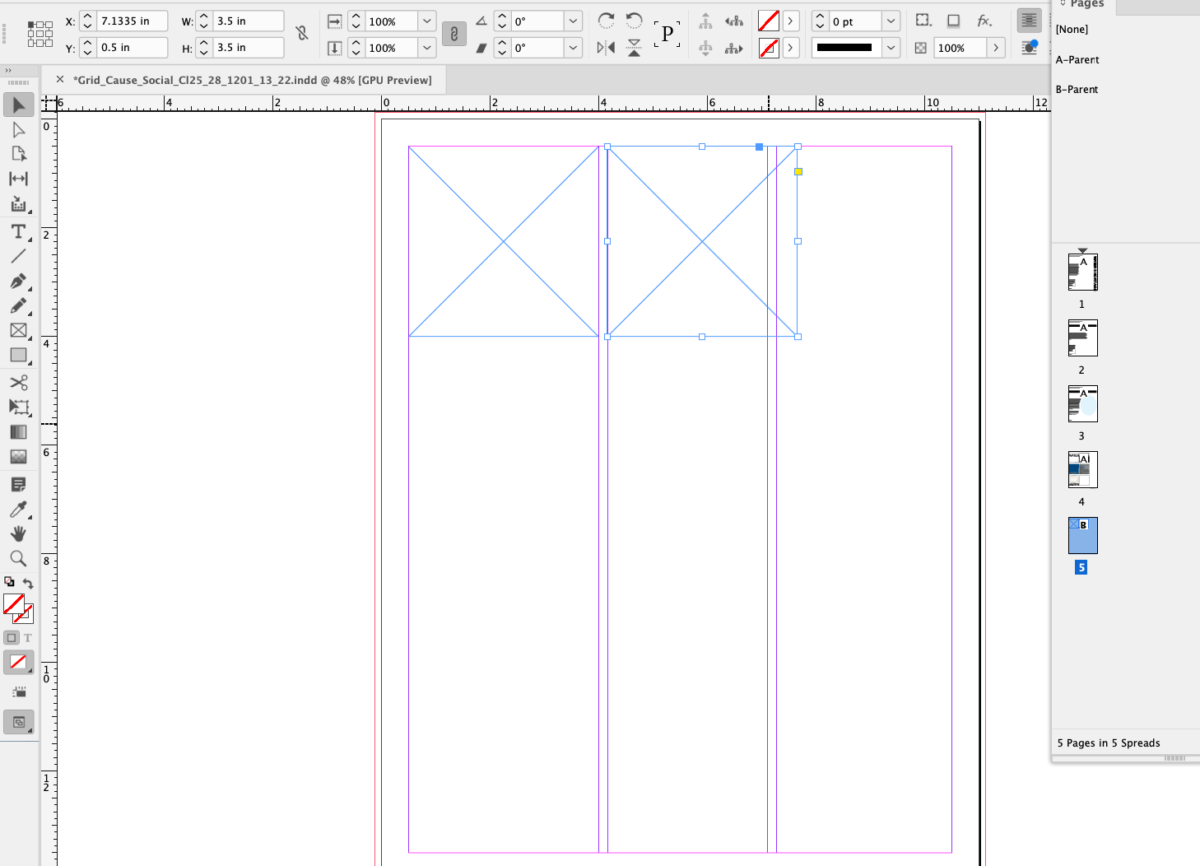
NOTE, however, that we set up the document to have 8 columns—which means the Parent page of “None” and the Parent Page “A” will have 8 columns.
Also, the Social Media posts are 3.5 inches x 3.5 inches, which means they won’t work on the 8-column grid at 100% of the size you created.
So, we’ll create a new Parent Page B, based on “None” and change the number of columns.

use the same document you have in the works and create a new Parent.
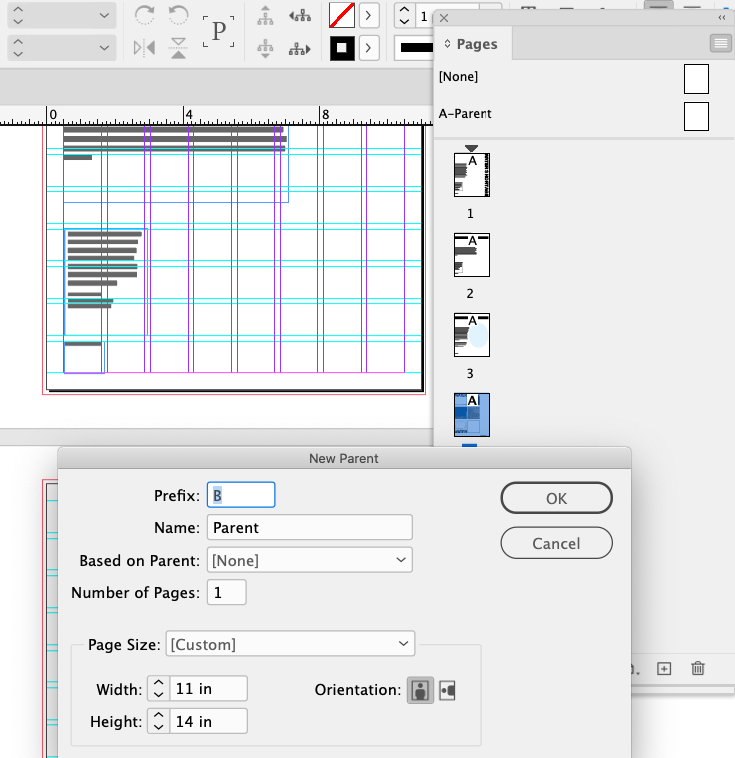
_______
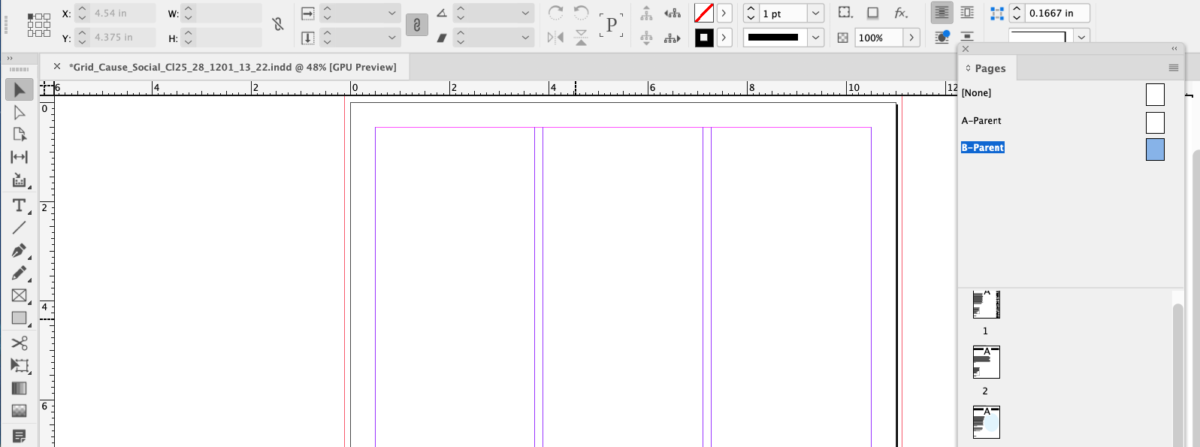
Because we set up the document with 8 columns, “None” has 8 columns.
_______
Don’t worry. We’ll change the number of columns to 3 IN THE “B” PARENT PAGE. Go into LAYOUT > MARGINS AND COLUMNS and change the number of columns from 8 to 3. Keep the same Page Margins and gutter margin between columns.
______
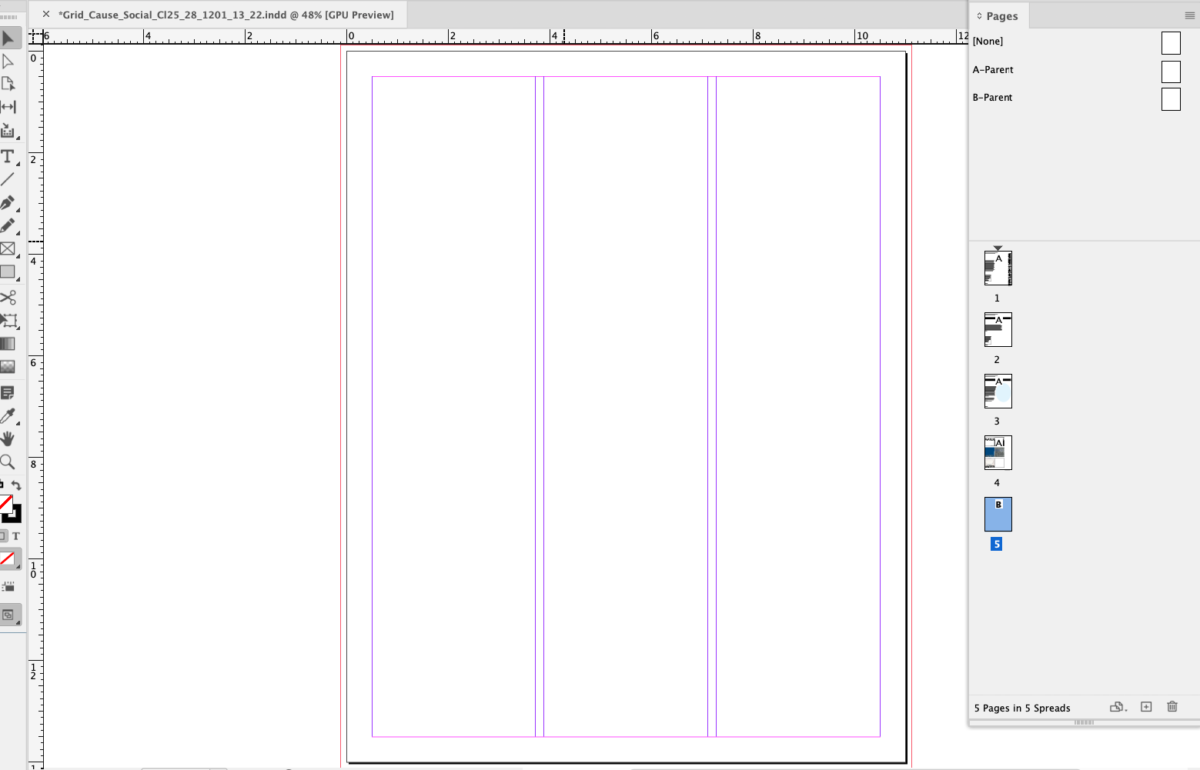
Now you can insert a new page based on Parent “B” (you can also simply pull the icon from the Parent section into the child section.
______
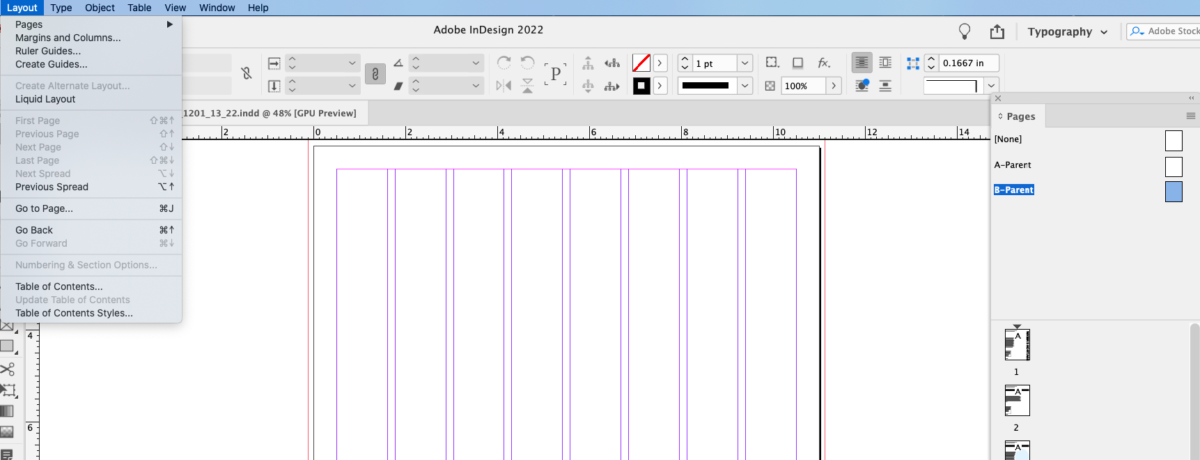
Next, we’ll create columns where columns 1 and 2 have widths different from column 3. To do this, we’ll move the actual guides that indicate the column and gutter.
Got to VIEW > GRIDS & GUIDES > and make sure to uncheck (or leave unchecked) LOCK COLUMN GUIDES.

______
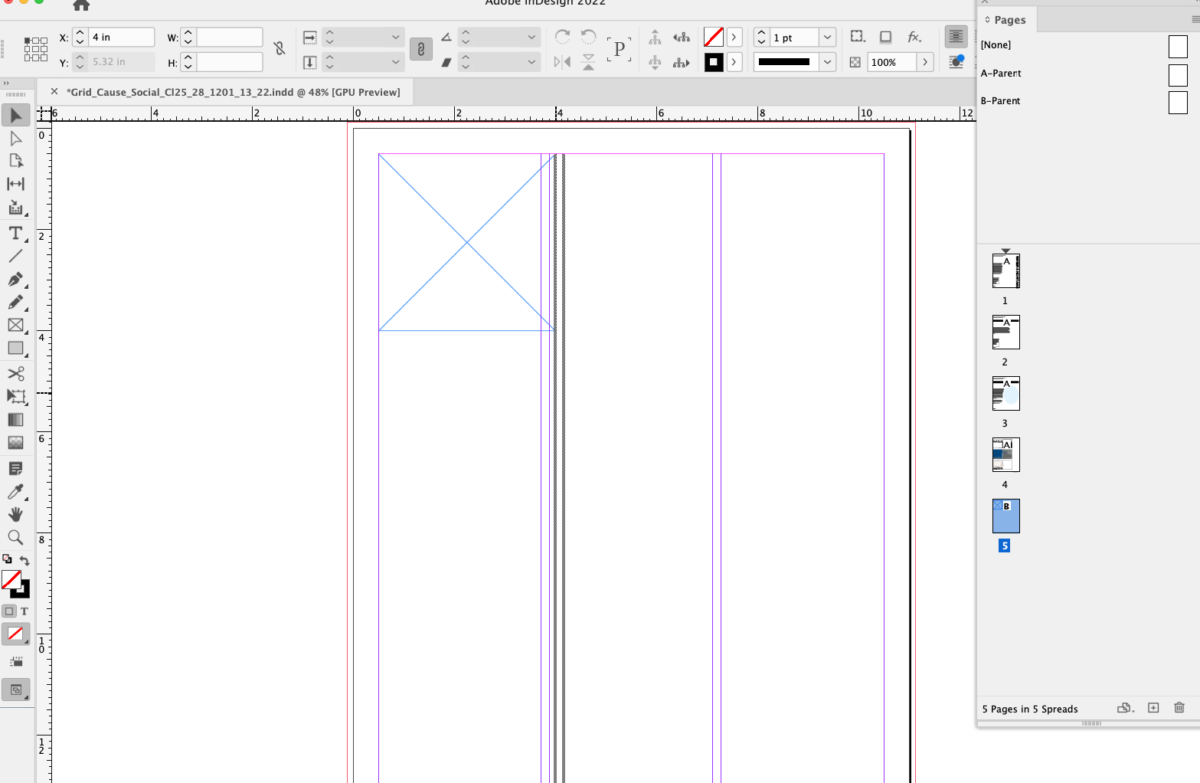
Create a picture box square that’s 3.5″inches (same a 21 picas).
Place on the top left margin. The guides don’t yet align with the right of the square.
With unlocked guides, you’ll be able to move the guides.

______
Using the Selection Tool (black arrow), move the gutter guide to align with the right of your square.
______
Place 3.5 ” another square to the right of the first square (i.e. in the second column) and move the gutter guide to align with the end of this second square.
______
Add two more squares for a total of four. Position the second two squares .5″ below the top two squares.
For X/Y coordinate lovers, the Y coordinate will be 4.5″
.5″ top margin + 3.5″ depth of square + .5″ = 4.5″
Remember, if you use a frame, the 3.5″ must be included in the dimensions of your 3.5″ square.
______
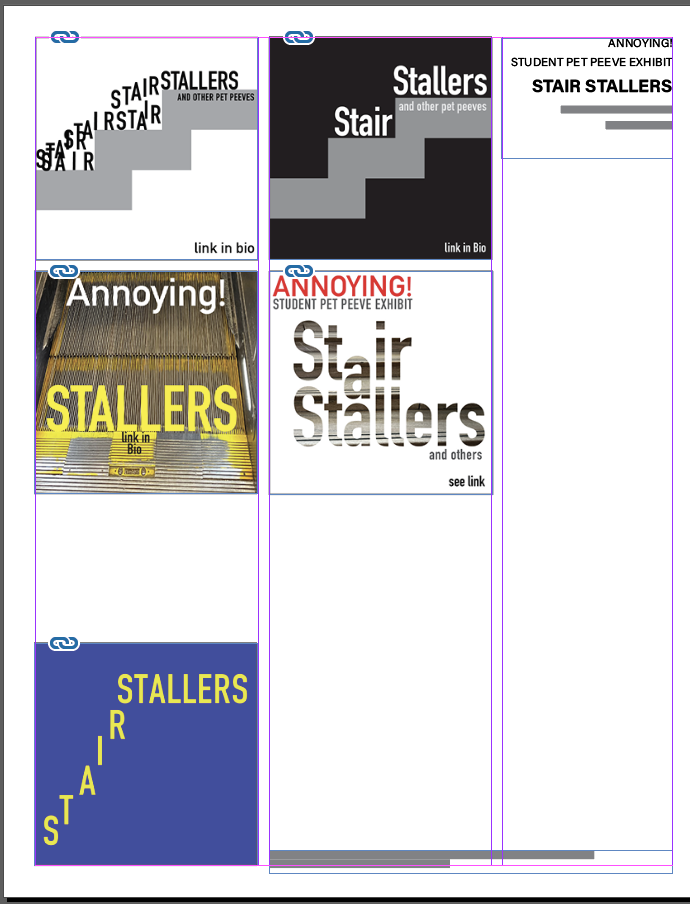
On your page, include the text:
Annoying!
Student Pet Peeve Exhibit
Name of your peeve
Social Media Posts
Your Name
Export your four Social Media Posts as either as PNGs or save as PDFs (PDFs are larger files, so PNGs will have less data. Pull into your page 4.
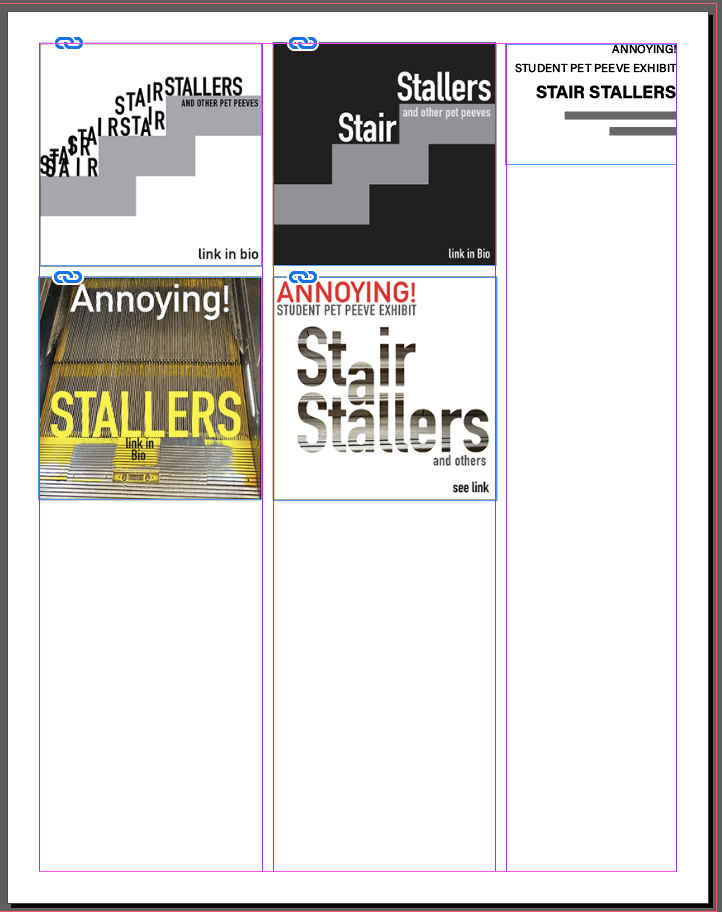
You’ll also do your animated Social post as a square. Insert a jpeg of your animation as well as insert a link. (You’ll also upload your animation to Dropbox.)
_________________________________________________________
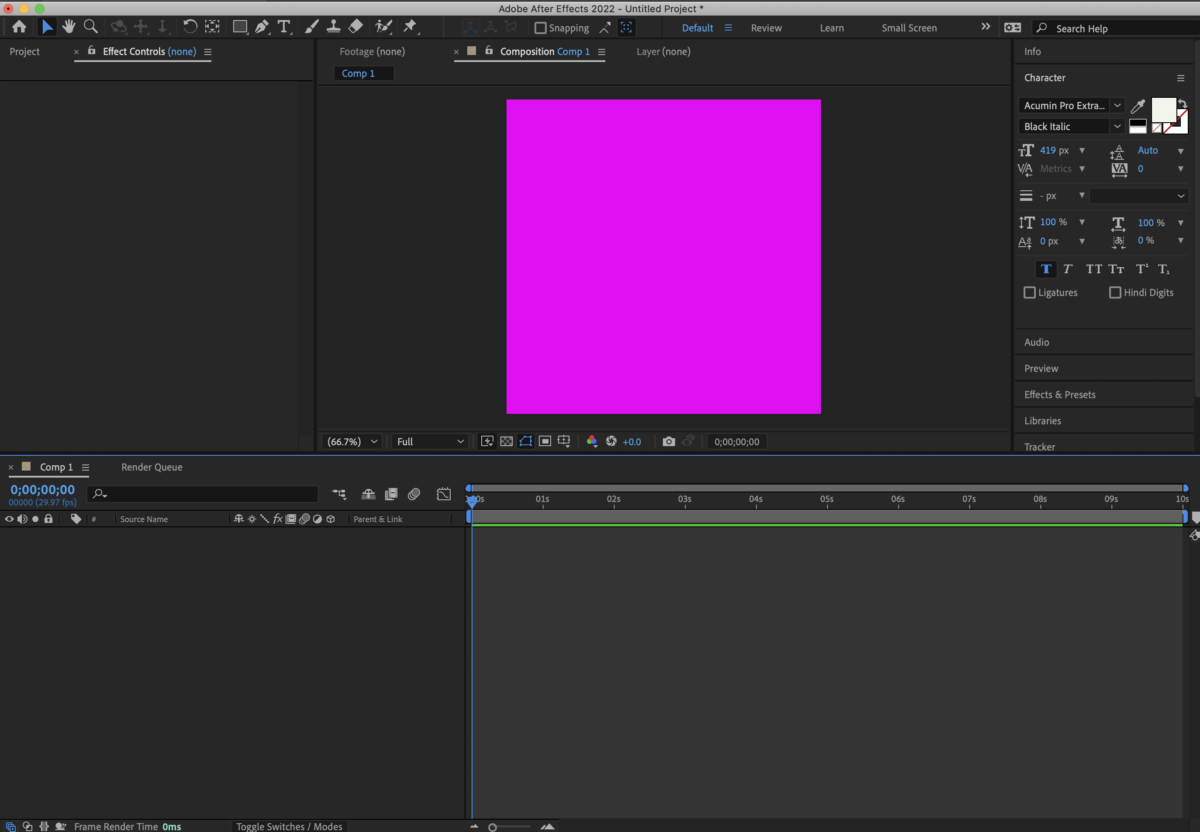
Activity 3
After Effects . A possible start.
To be touched on again in Class 29.
A note of thanks to Professors Kapusinski, Larkins, and Giuliani.


again
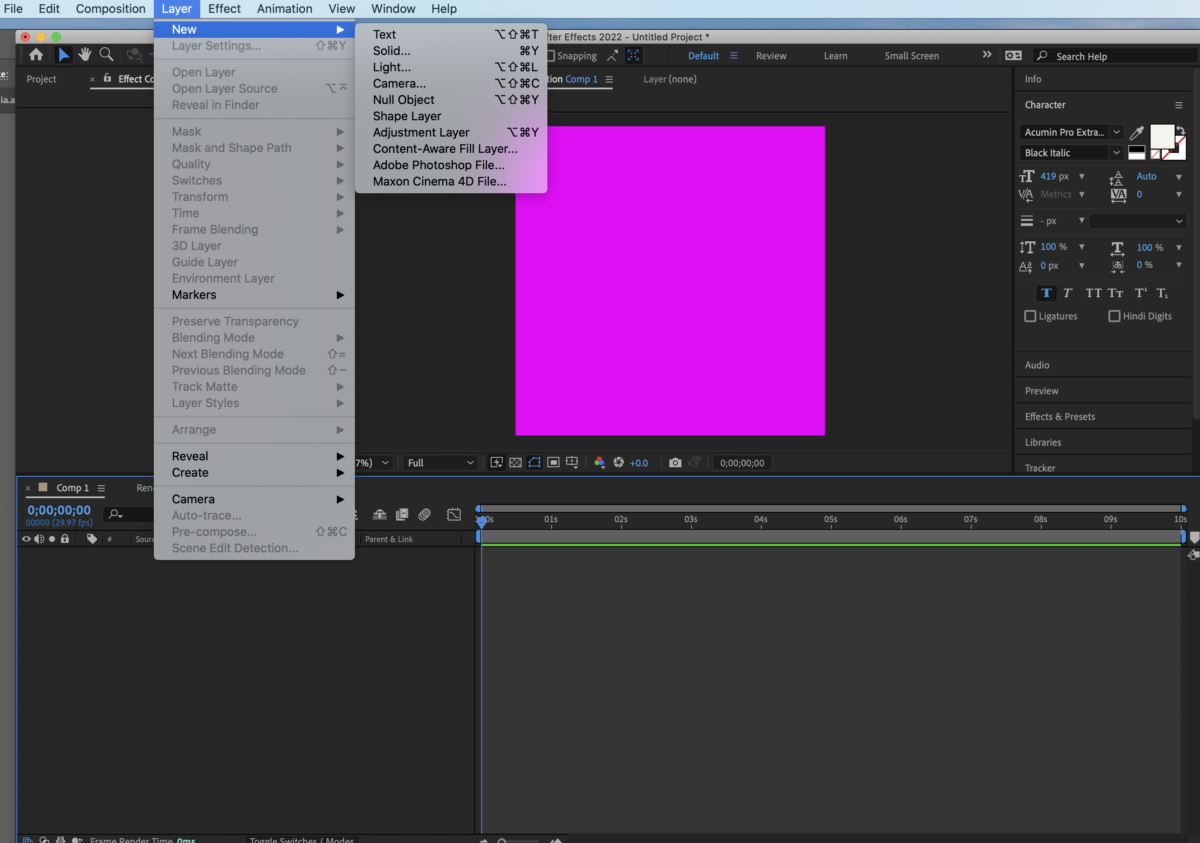
Go to LAYER>NEW>TEXT> Add a second word
Make sure that you have two layers
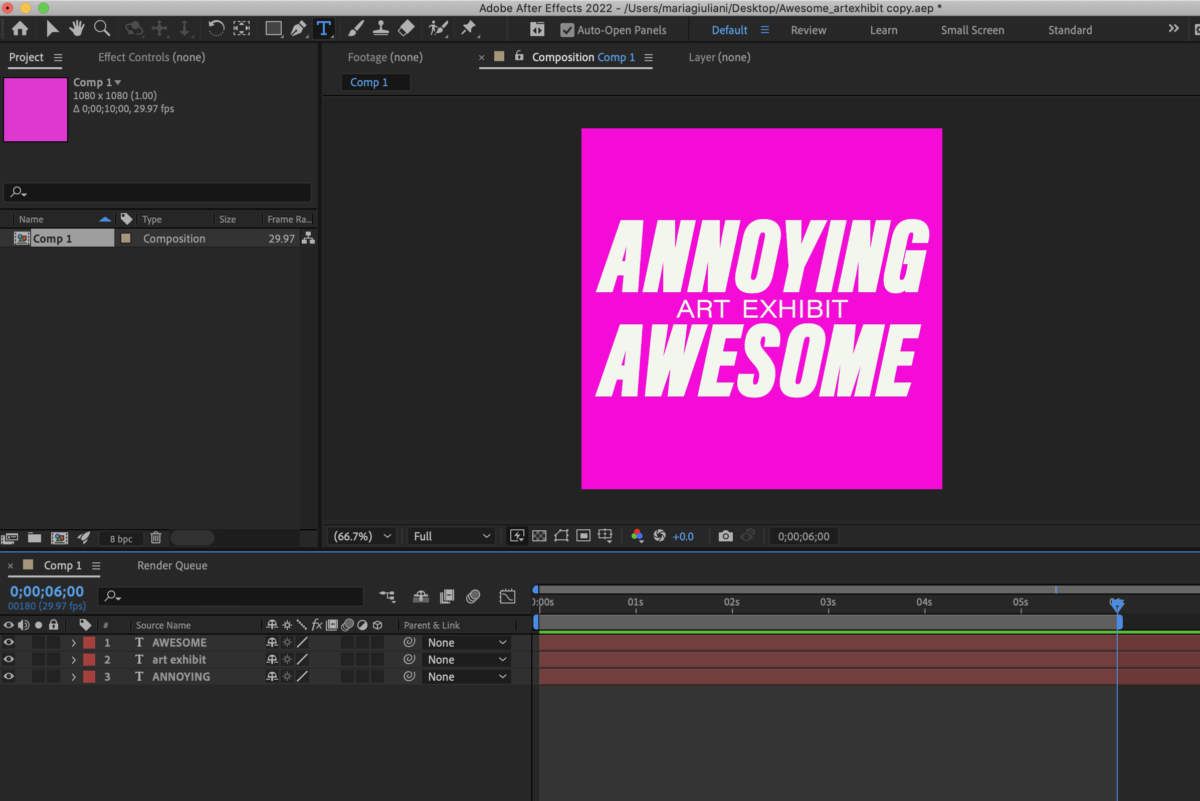
Now we will start creating the “animation” with the basic transform options of After Effects. We will only use POSITION and SCALE

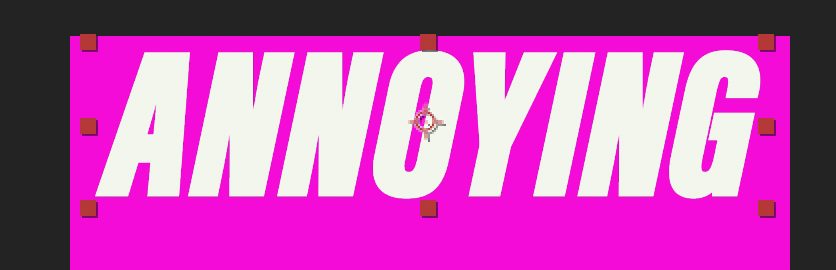

I am adding a keyframe for POSITION (P) for AWESOME and ANNOYING and
a SCALE keyframe to ART EXHIBIT

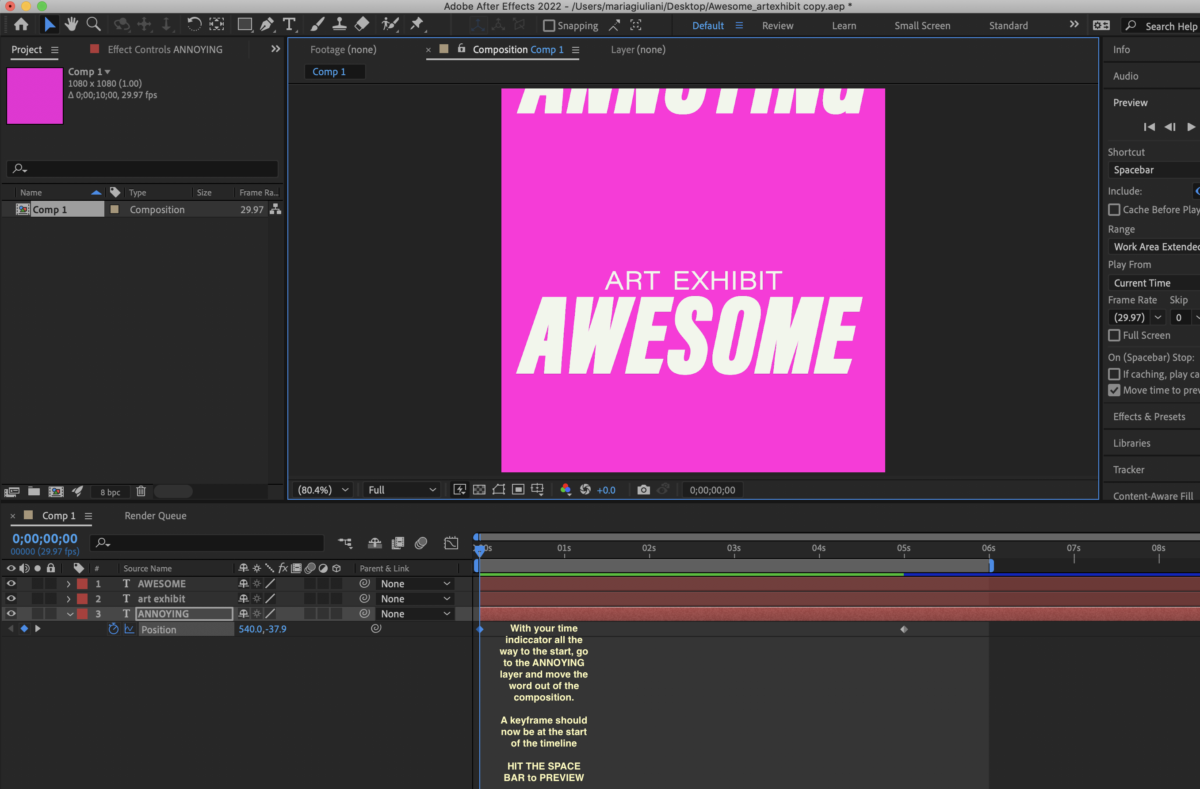
HIT the SPACE BAR to PREVIEW

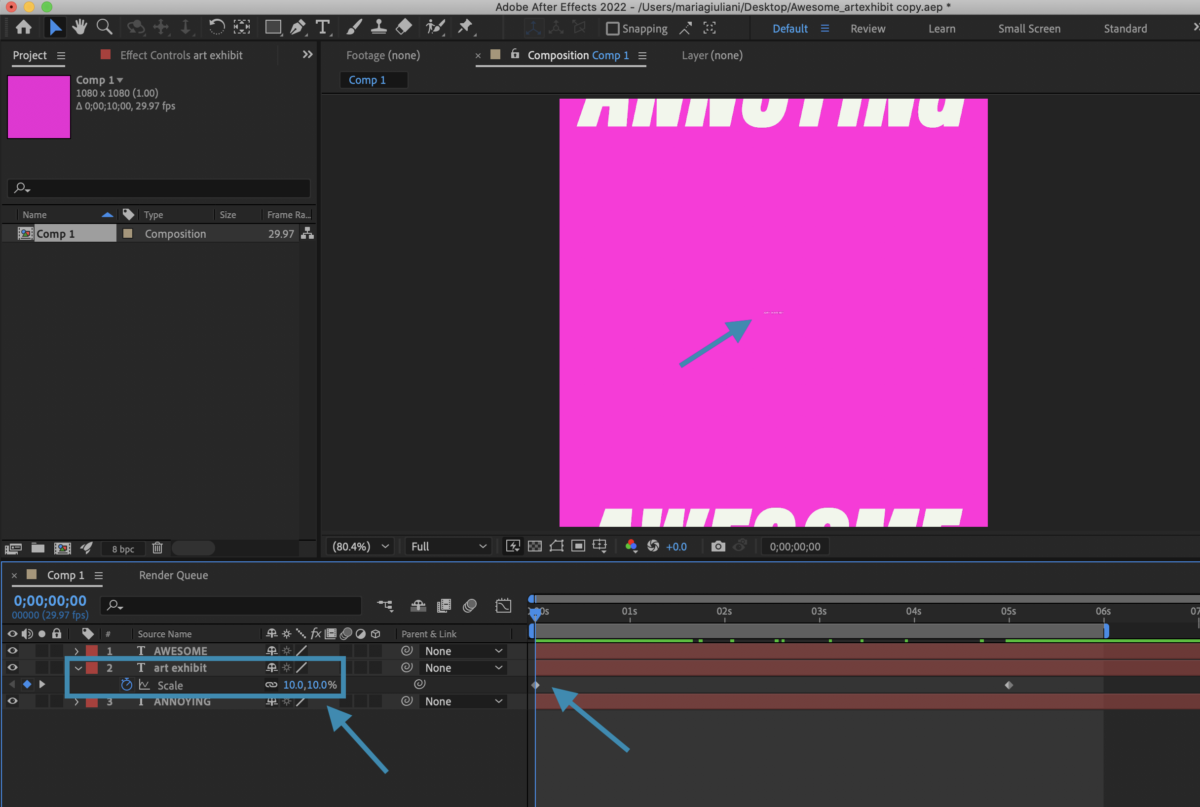
Note that I am starting at 10% — HIT SPACE BAR to PREVIEW
How to render:
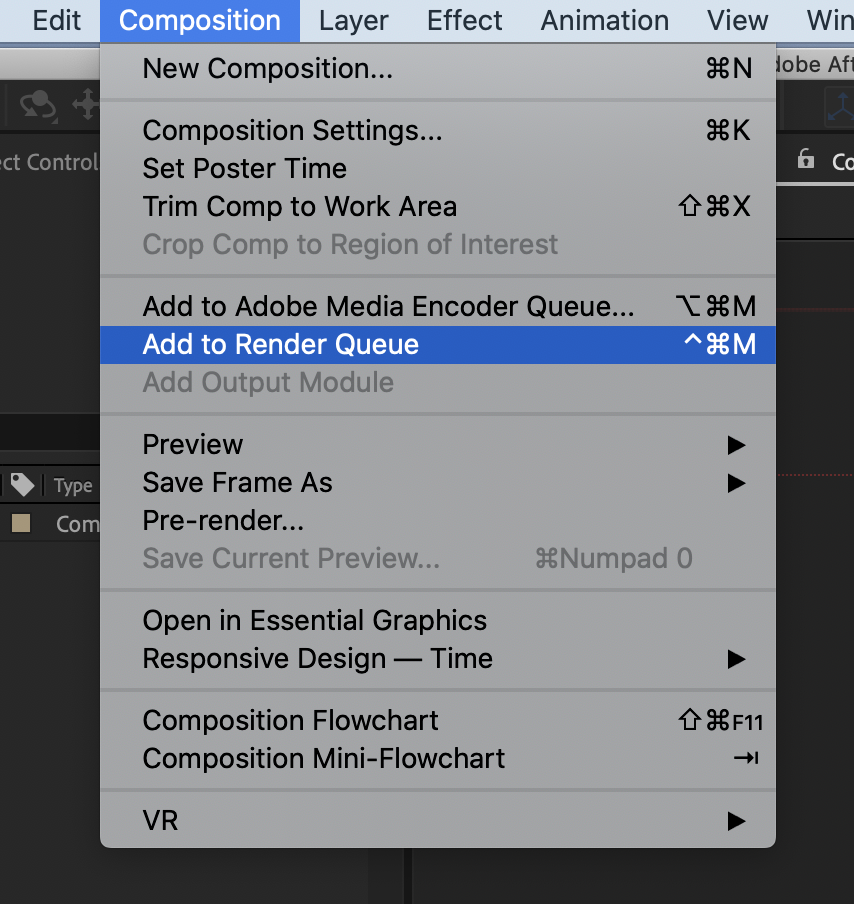
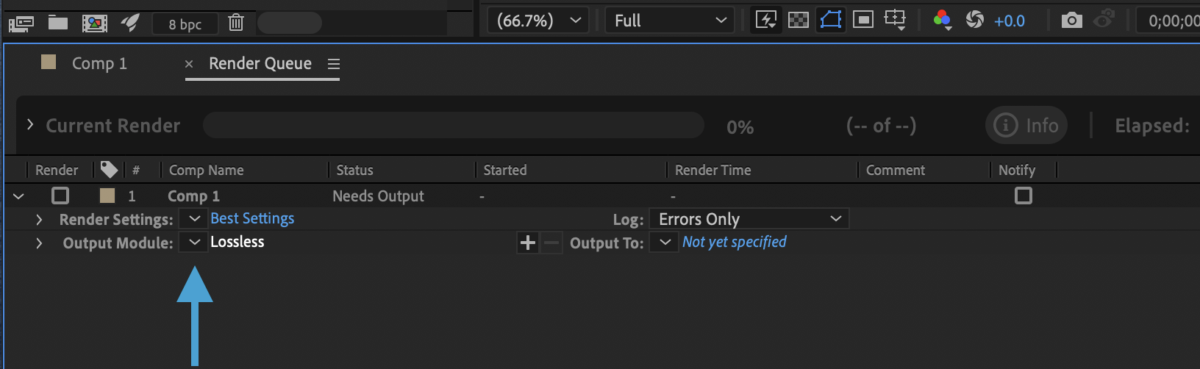
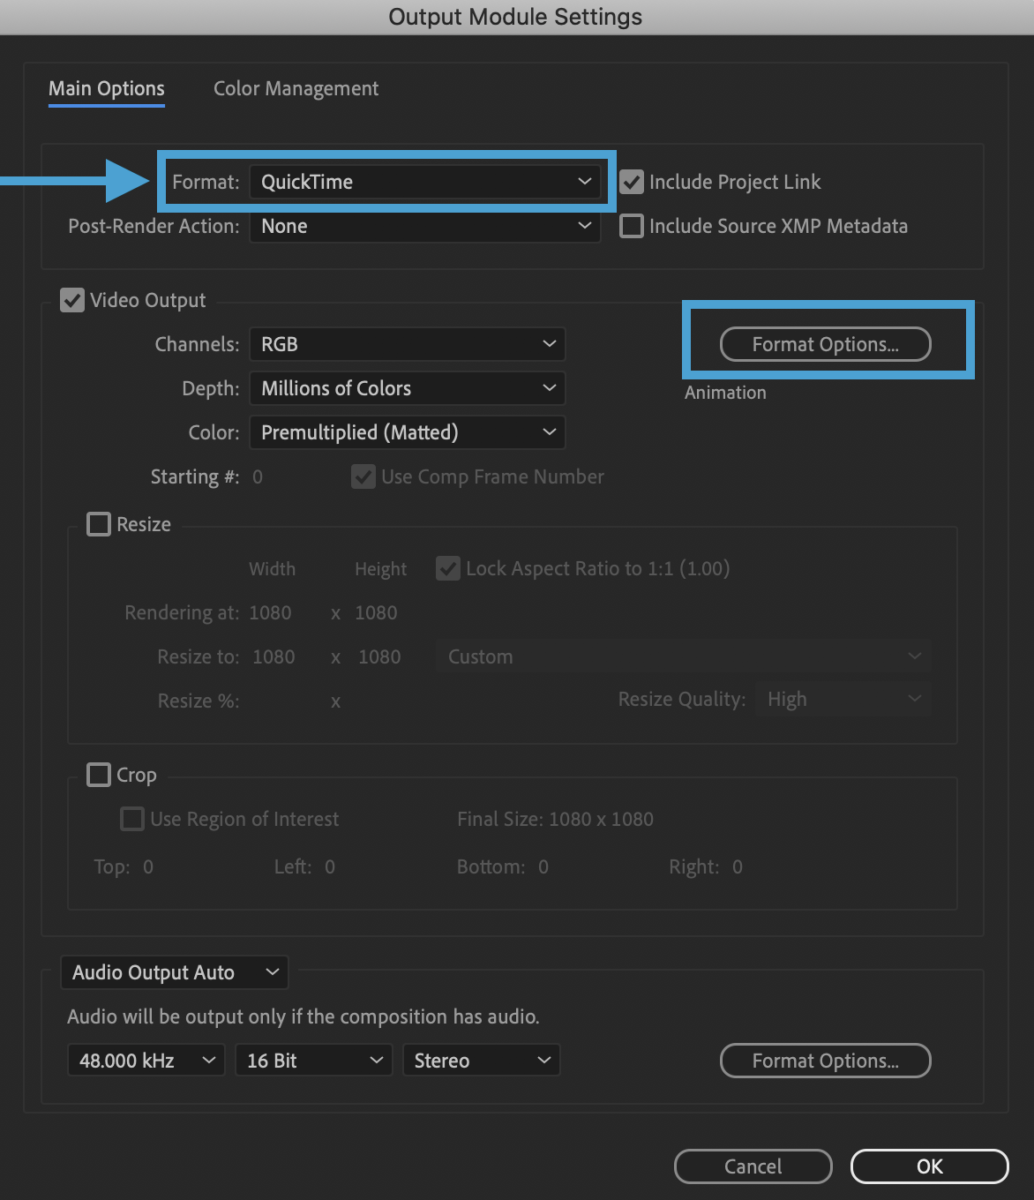


(This is the one that you will give me)
__________________________________________________
Activity 4.
If and only if you’ve refined everything and depending on your progress.
TYPE CHALLENGE.
Create a 7 inches wide x 5 inches high document with the word “Holidays” with TYPE ONLY and WITHOUT any illustration.
Use type to communicate how you feel about the holidays (Chanukah, Christmas, Kwanza etc.)? Stressed? Cozy? Both?
You can work in InDesign, Illustrator or Photoshop (or even AfterEffects if you already know it), but again, use TYPE ONLY. If you work in Photoshop, animate it.
Student Posts > Type Challenge > Lastname_Holidays_120723
____________________________________
We may do more After Effects in Class 29.
____________________________________
Assignments. Due Dec. 13 pm for Class 29 on Dec. 14
1.
Complete posters and social media post and Animation for review and completion in Class 29, and then presentation during Class 30.
PACKAGE AND UPLOAD TO DROPBOX. If you have a space problem, upload PDFs only for now. I’ll clean out Dropbox if necessary.
Lastname_Proj03_PrePresent_121423
____
2.
Animate your Social Media Post. You may start using AfterEffects (which we’ll return to in Class 29)
_____
3.
Optional: Type Challenge. Complete an 7″wide x 5″ card with the word “Holidays” with TYPE ONLY and WITHOUT any illustration. How do you feel about the coming Winter holidays (Chanukah, Christmas, Kwanza etc.)? Bored? Happy? Crazed? Use Expressive Typography. You can work in InDesign, Illustrator or Photoshop. You can animate some of it. Again, use TYPE only or predominantly.
Post to STUDENT POSTS > Type Challenge. Lastname_Holidays_120723
_______________
All Project 03 work should be complete by end of class, December 14 and uploaded by December 15 to be ready for presentation in class on December 19th (last class).
Grades depend on attendance, participation, timeliness, adhering to specifications on checklists, and aesthetics.


Leave a Reply