Class Info
- Date: Thursday, November 17, 2022.
- Meeting Info: In person, Pearl 116, 8:30 to 11:00am, followed by Professor’s office hours from 11:00am to noon in Pearl 116.
Topics
- 1. Class starts at 8:30am. Late arrival affects the grade.
2. Clean up desktop; log out. - There is class on Tuesday, Nov. 22. BUT No class on Thursday, Nov. 24.
- Type Talk Activity
- Sans Serif Type: next class.
- Seraphina and Tristan present their Projects 02.
- The Grid
- A grid is a system of vertical and horizontal guides used for the organization of a layout. Grids are used in graphic and web design.
- Quick Reference PDF: The Grid
(this was also linked to Class 21). - PDF of initial pages of Layout Essentials. See especially page 10, Elements of a Grid. Note how the grid is used in the design.
- Visual Hierarchy: Giving levels of importance to the difference elements that are part of a design.
- Examine this PDF with Visual Hierarchy Progression. Every page following the explanatory headings uses the exact same text, but the hierarchy changes when different principles are featured. (For example, a basic change in type size can make a difference in the way the viewer looks at the design.)
- Intro to project 3 | Posters Series and Social Media Posts. Each of you has chosen or will choose a key concern that is at the top of your mind.
Objectives
- Learn about the usefulness of a grid.
- Understand the parts of grid:
- Margins
- Columns and rows
- gutters (vertical and horizontal)
- modules and spacial zones
- Develop an understanding of organization in design
- Understand the parts of grid:
- Learn about visual hierarchy and how these design principles can improve or change the way we see and read.
- space
- type size
- spacial zones
- color/reverse
- alignment
- added elements (lines)
- variations in type (bold)
- dynamic compositions (diagonals)
Activities (3 Activities)
ACTIVITY 01
- Type Talk: Rocco Piscatello Posters.
- Go to the link showing posters by Rocco Piscatello.
- Look at every single poster (the navigation takes a minute or two to figure out) and read all of Piscatello’s descriptions of his designs, which give information about the designer as well as Piscatello’s design thought process.
- Select one of the posters then comment:
- Why did you choose this poster to discuss?
- Discuss the use of typography using the various classifications (Serif, Sans Serif, Scripts, Novelty).
- Notice and discuss any use of variations (styles) of the typeface in terms of weight, width, posture.
- Also notice and discuss the use of scale, color, and space.
- Post in: STUDENT POSTS >TYPE TALK> Lastname_PiscatelloPosters_111722
______________________________________________________
ACTIVITY 02
- Grid Exercise. Step by Step.
- STEP 01
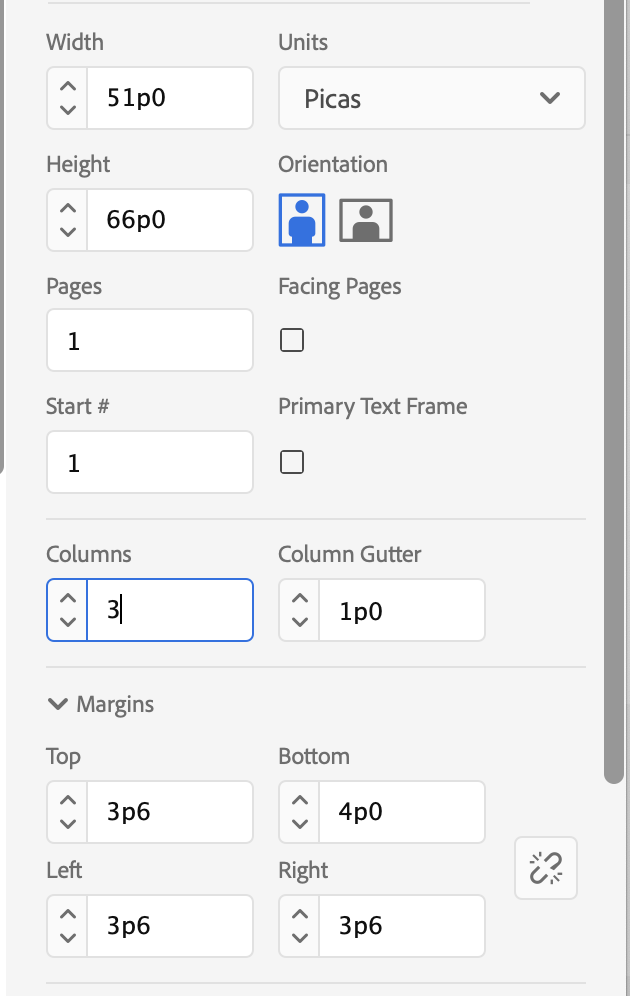
- Create a document 52 picas wide x 66 picas high (8.5 x 11 inches). This is portrait. NO facing pages.
- 3 columns. 1 pica gutter.
- Margins: top, left and right: 3p6; bottom: 4p.
- STEP 02
- In the Parent Page, go to Layout > Create Guides.
- Add 7 rows. No columns, because we already set them up when creating the documents.
- For the Options / Fit Guides to, select Margins.
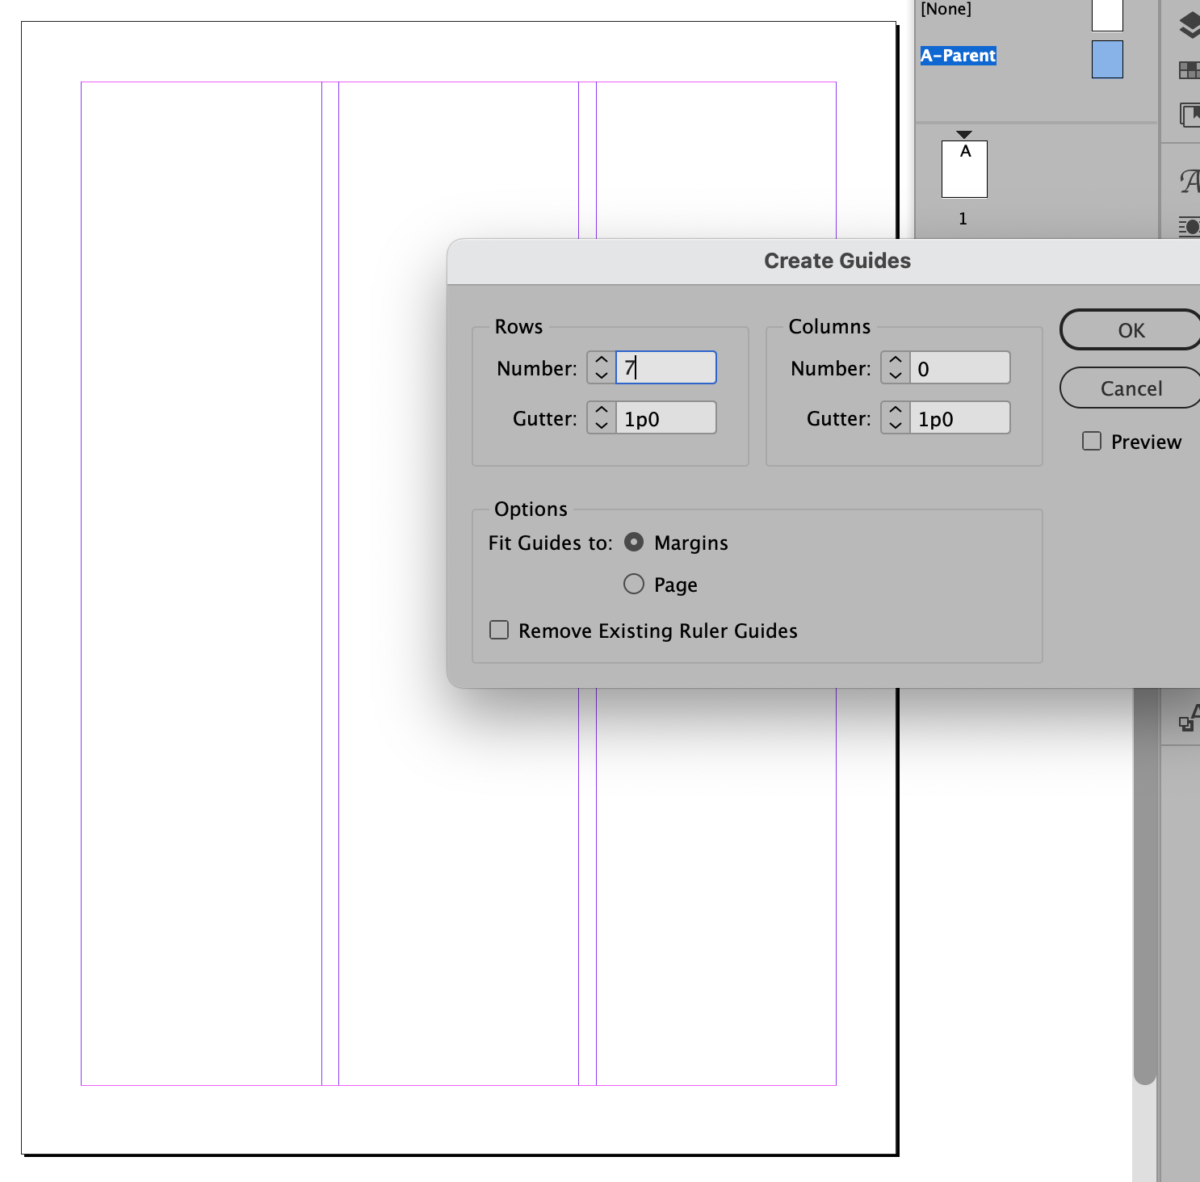
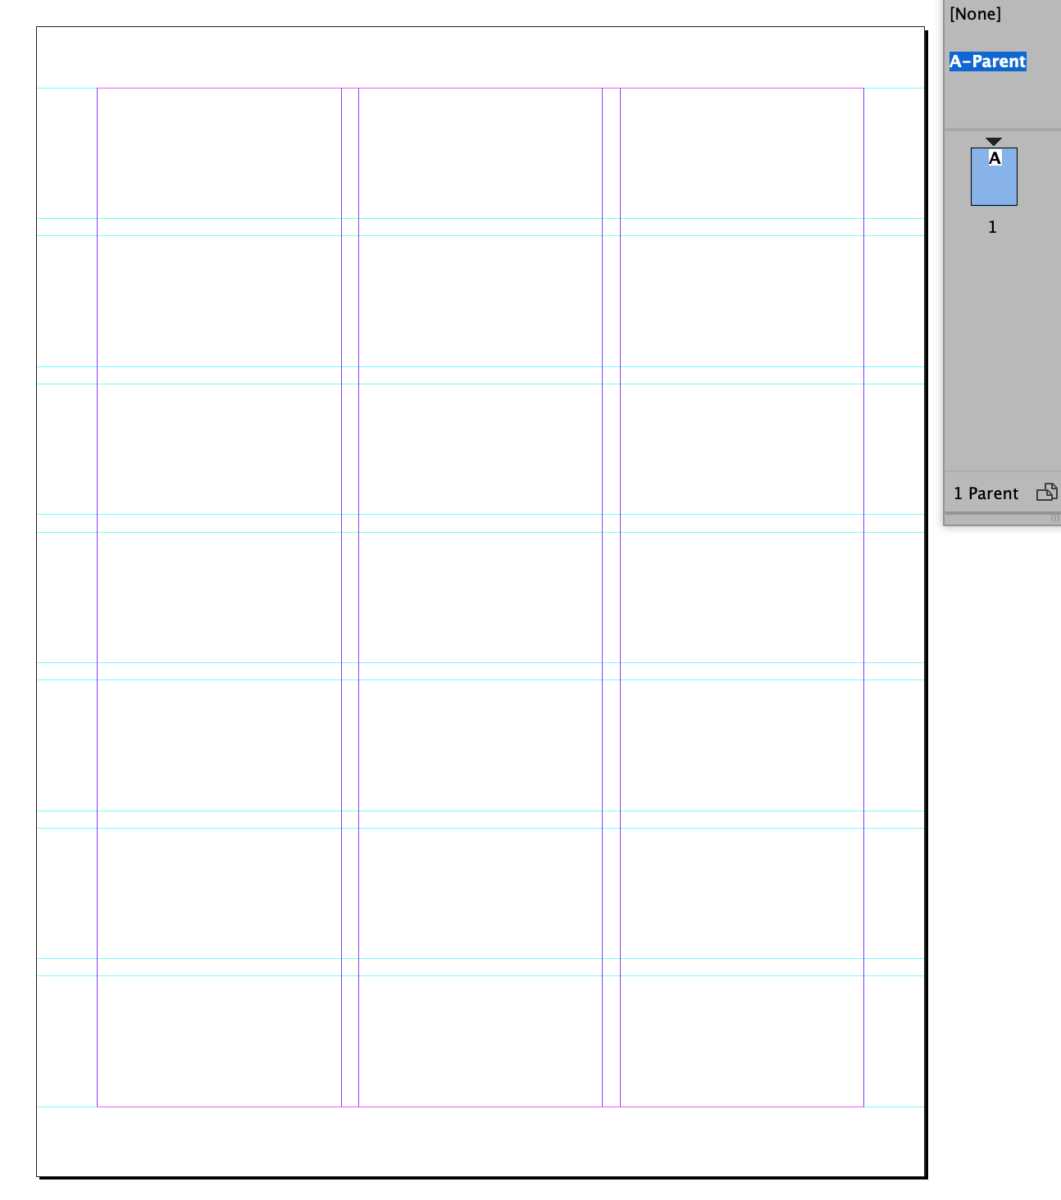
You’ll now have guides showing in your PARENT page. Your Parent page is in the upper part of the palette. Page 1 is not a Parent page; it’s really the first Child page.
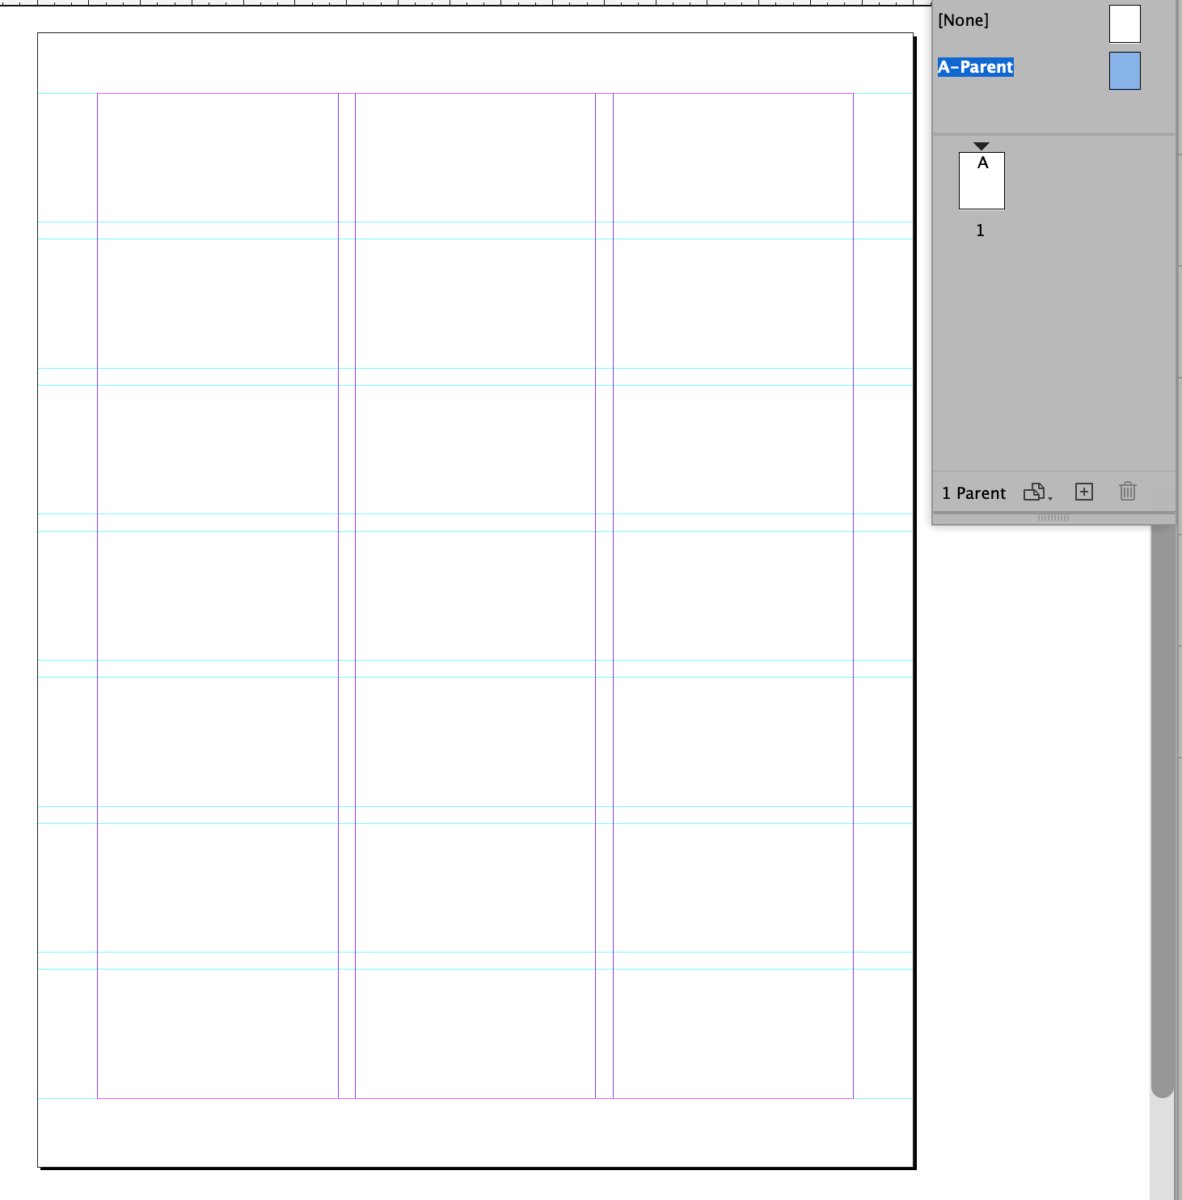
When you click on page 1 (NOT the Parent), you’ll see your guides because the Parent page is the template or master plan for your pages. Do not put your live images or text in your Parent page unless you want that info to appear on every single page you have.
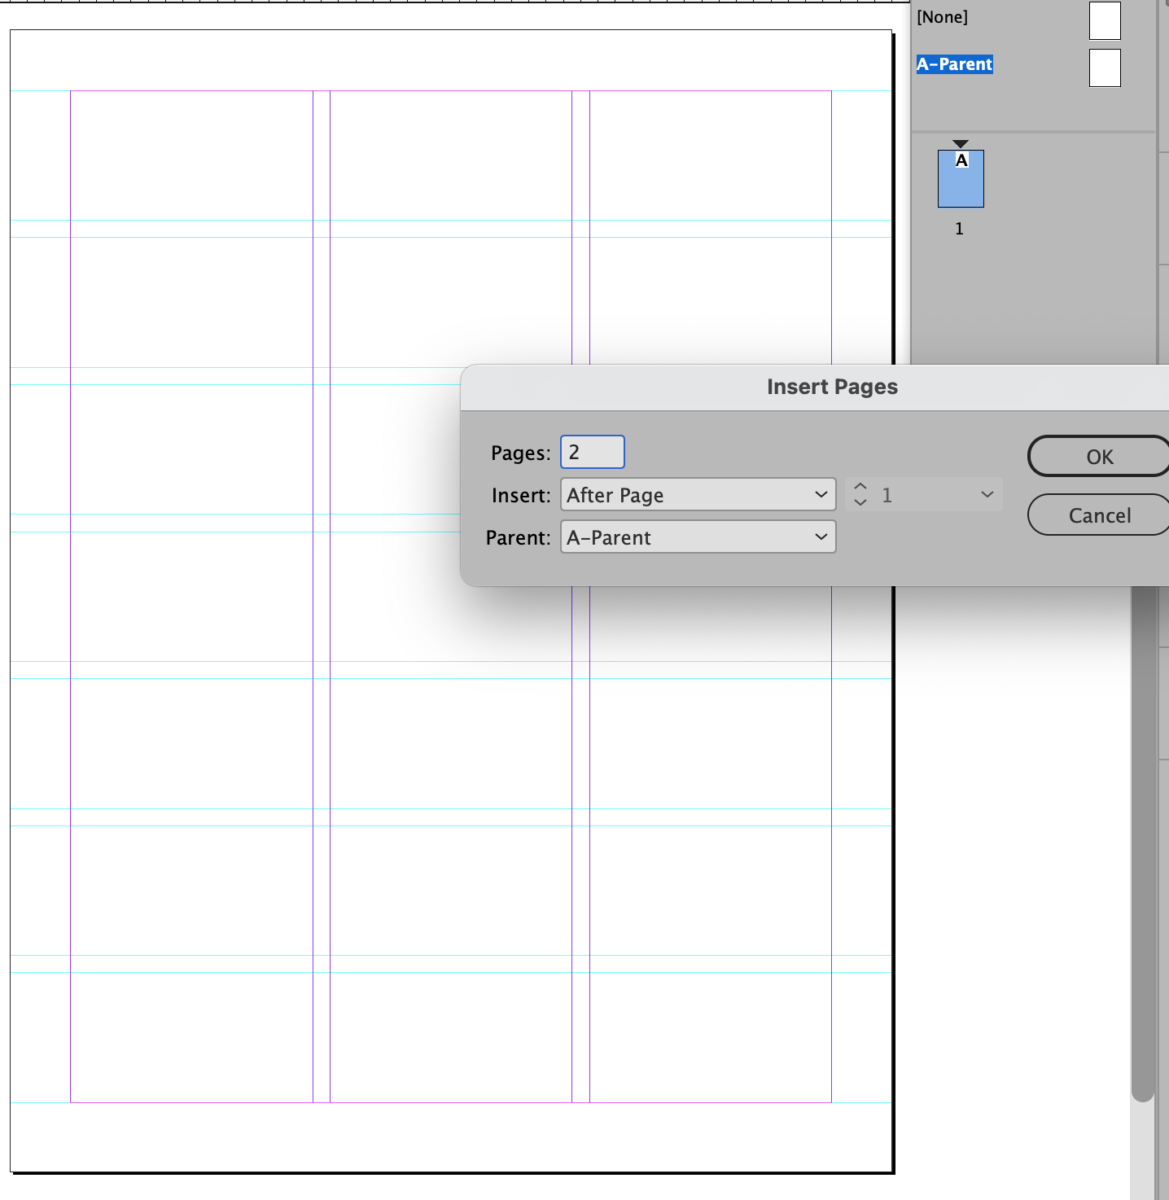
- STEP 03
- Next, add two more pages. You can either go to the drop down menu and insert pages OR pull pages down from the Parent into the lower/child area.
- You’ll now have a total of 3 pages.
- STEP 04
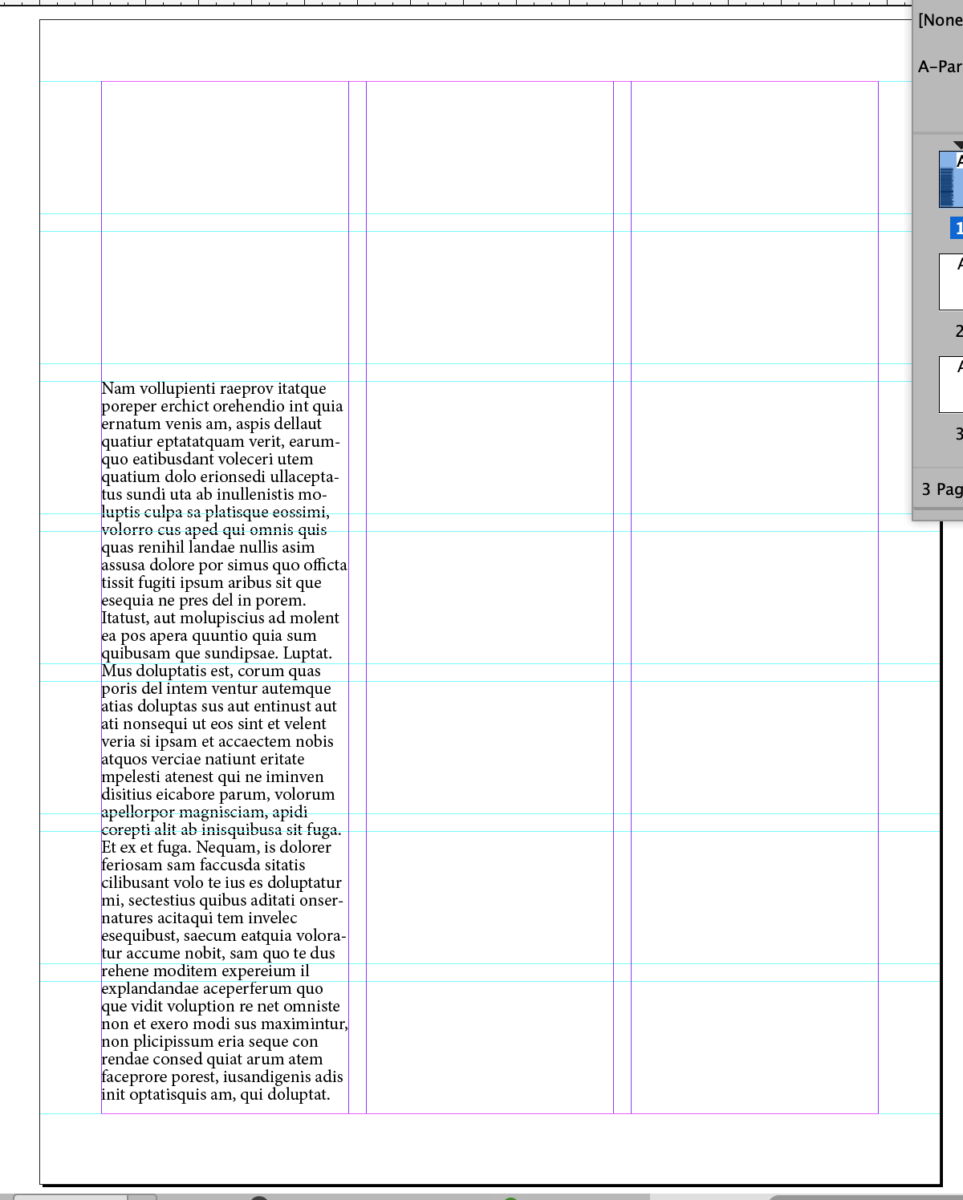
- We’ll test the grid with a heading, text, and grayed-out picture boxes (the one with the “X” in it) to indicate images for the time being.
- On page 1, create a text box (the one without an “X” in it) and then
- Within that text box, click on the Type Tool (the “T”) and then go to
- Type > Fill with Placeholder Text.
- STEP 05
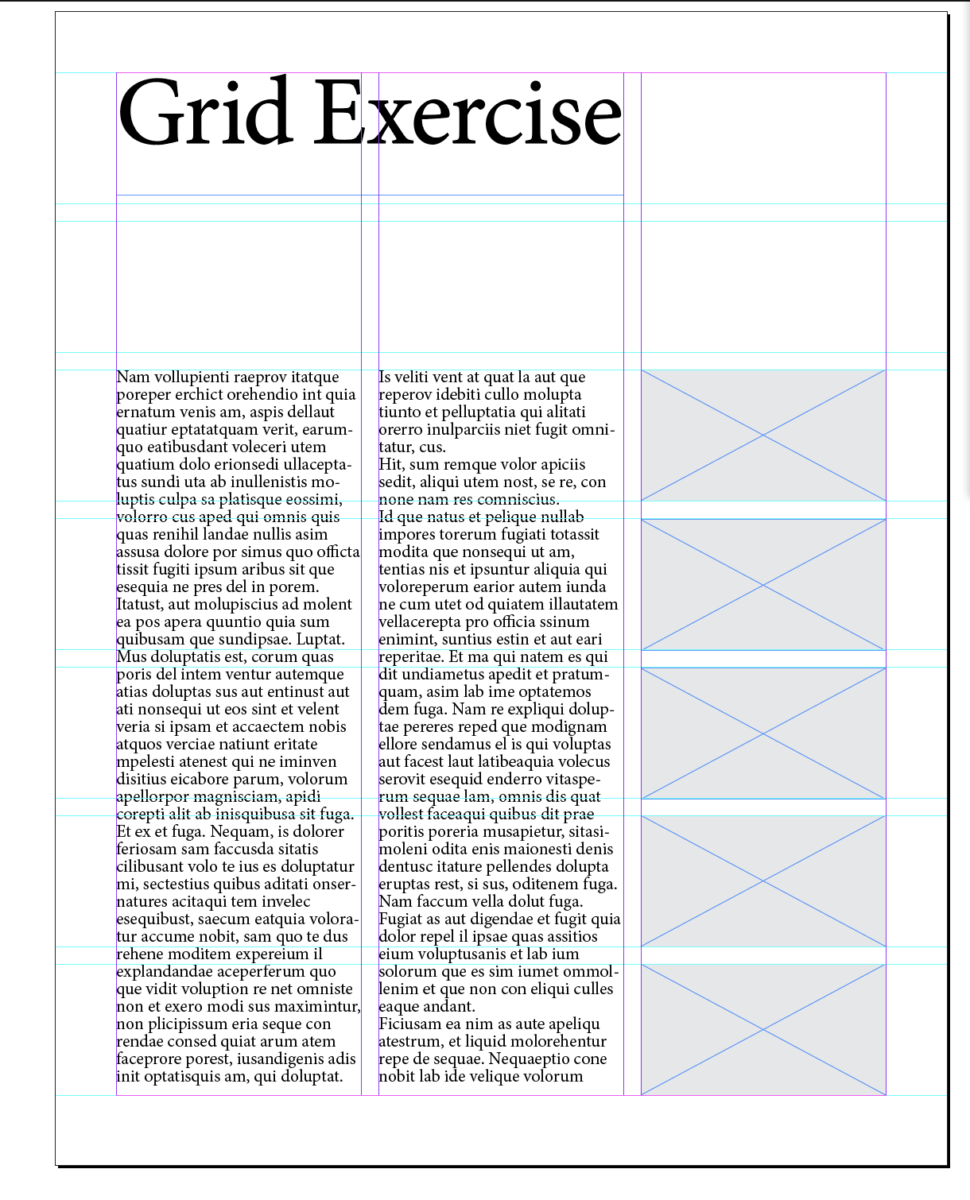
- Insert the heading “Grid Exercise”
- Draw Picture boxes
However, the text is not styled and there are no paragraph indents or spaces yet.
COMPLETE ALL THREE PAGES. FOLLOW THE SPECS BELOW (but you can change the text and only the text).
- Page 1:
- Heading 2 columns wide
- Text in 2 columns
- Image in 5 modules
- Page 2:
- Heading 2 columns wide
- Text in 1 column
- Image to fill 2 columns
- Page 3
- Heading 2 columns wide
- Text in 3 columns (leave 2 modules space between the heading and text start)
- Image to fill 3 columns (6 modules)
- Extra:
- Ok to experiment with other combinations AFTER doing the three above. Keep in mind paragraph indents, size, readability. Text running to the 3-column width will be impossible to read (SO many words in a line!), so look at text 3 columns wide only to learn that it’s not great.
___________________________________
ACTIVITY 03
Preliminaries
- Project 03. Start of Posters Series and Social Media Posts.
Theme: Cause for Your Concern. Review your text. - The steps below are for working in class next week, Nov. 22. MAKE SURE YOU HAVE YOUR THEME (i.e. CONCERN/PROBLEM that wants solving). We’ll get specific in Class 23.
- Brainstorm. Sketch> When sketching consider the following:
- Use type only
- TWO typefaces max. (but with extensive families ok)
- Black and White
- Follow the grid
- Emphasize your visual hierarchy
- Emphasize contrast with scale (something must be BIG, something must be small)
- You must consider and apply what was previously covered in class: Type selection and variations, alignment, word and letter spacing, line height, expression, etc.
- Content:
- The words: Cause for Concern
- Title of your Concern (different for everybody)
- Your personal text: One to Three sentences explaining your main concern.
- Imagery. What images come to mind? Remember, this is rough right now.
- Next class, I’ll show some of my process. For now, think, sketch.
- Brainstorm. Sketch> When sketching consider the following:
- This PDF with the main grid (for sketching). will help you to determine where and how to place content as well as to start thinking about typographical style. An old-school hard copy was distributed in class. This is different from the in-class grid exercise.
Assignment = To-Do After Class
- Complete Type Talk. Student Post >Type Talk. Lastname_PiscatelloPosters_111722.
- Complete Grid Exercise.
Lastname_GridExercise_111722 - Continue brainstorming and sketching for your topic/concern. Upload jpegs of process sketches to Dropbox.
Lastname_Project03_Sketches_111722
- DUE Next class:
- Complete Type Talk (Piscatello Posters). On OpenLab. TypeTalk.
- Lastname_PiscatelloPosters_111722
- Complete Grid Exercise. Take SCREENSHOTS WITH GUIDES ON and name them: Upload to Dropbox
- Lastname_GridExercise_page1_111722
- Lastname_GridExercise_page2_111722
- Lastname_GridExercise_page3_111722
- If you did additional pages, follow the same naming system.
- Complete text for your main concern, with name of concern.
- EMAIL me your text.
- Start sketches. Upload to Dropbox.
- lastname_proj03_sketches_117122


Leave a Reply