Class Info
- Date: October 6, 2022 (Thursday)
- Meeting Info: In person, Pearl 116, 8:30 to 11:00am, followed by Professor’s office hours from 11:00am to noon in Pearl 116.
Announcement
Project 1 and presentations are due: Class 11.
Books will NOT be printed. We will present PDF files to class.
Presentation of this project is 10% of your grade (i.e. one of the three that counts for 30% of your grade).
Topics
- Recap of Typeface Characteristics
- Quick recap of Type Challenge from Class 09 (September 22 for October 6!)
- Export Illustrator content to Page 13 of Book
- Page 1 of Book (Differences between a title page and a cover page). Design your page 1.
- Page 14 (Roundup of typefaces used)
- Page 15 (Blocks using the grid. BLACK & WHITE ONLY)
- Design Continuity
- Packaging a File
- Overview of completed book.
- One-on-one re: grades to date
Objectives
- Recap and review topics we’ve covered so far.
- Learn about what makes a title page different from the content within a book.
- Remember and review all typefaces used throughout your book.
- Ensure continuity and coherence (while presenting type in an eye-catching manner.
Recap (Vocabulary & Characteristics)
For Type Anatomy (Vocabulary!) re-re-review this PDF.
For Classification, re-re-review this PDF, which is a quick overview of a rich subject.
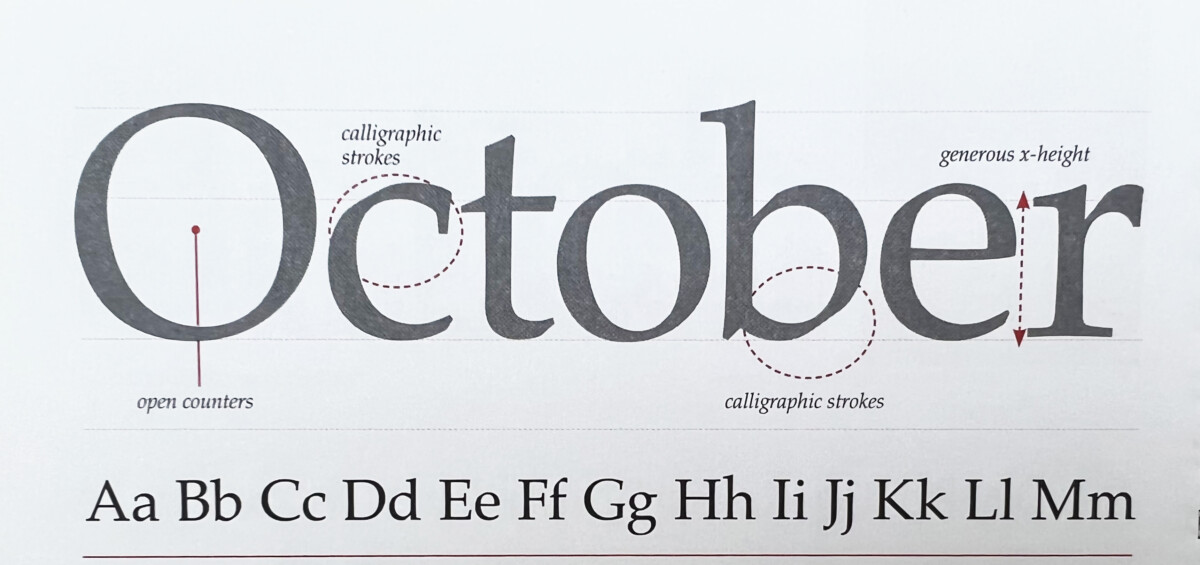
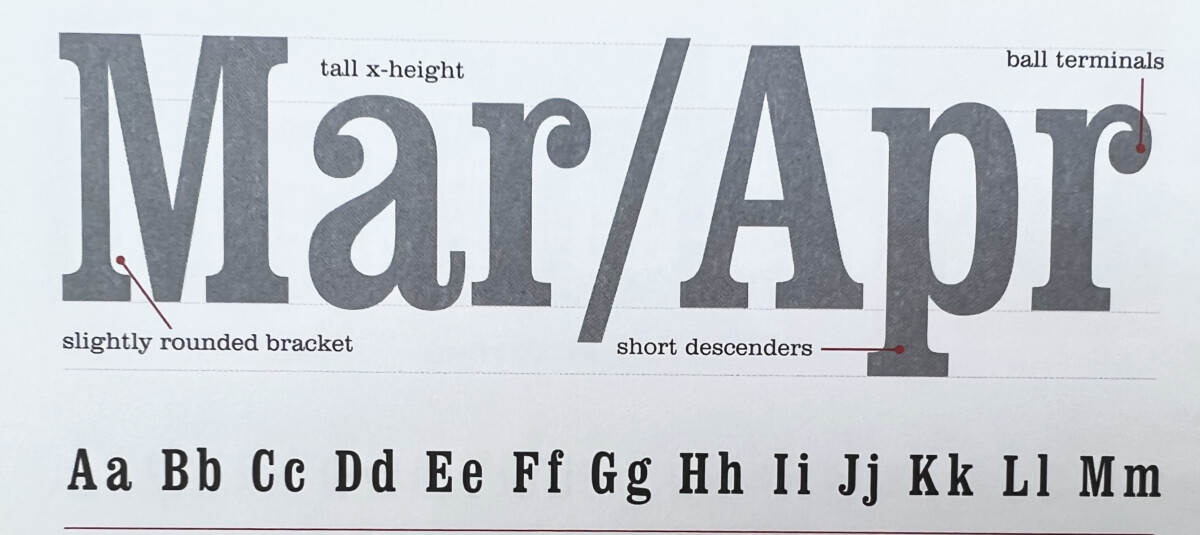
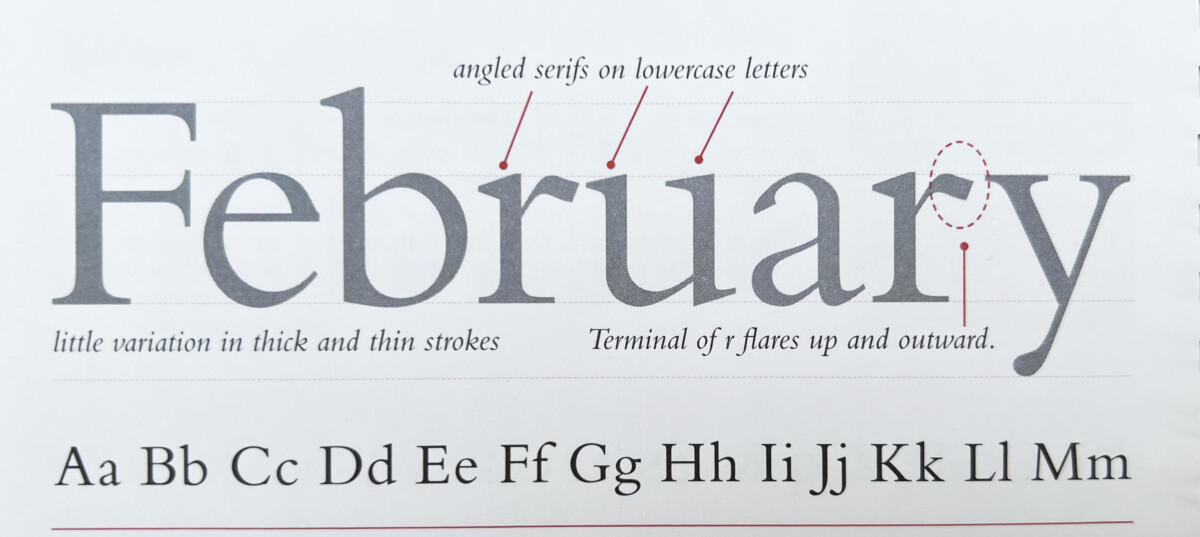
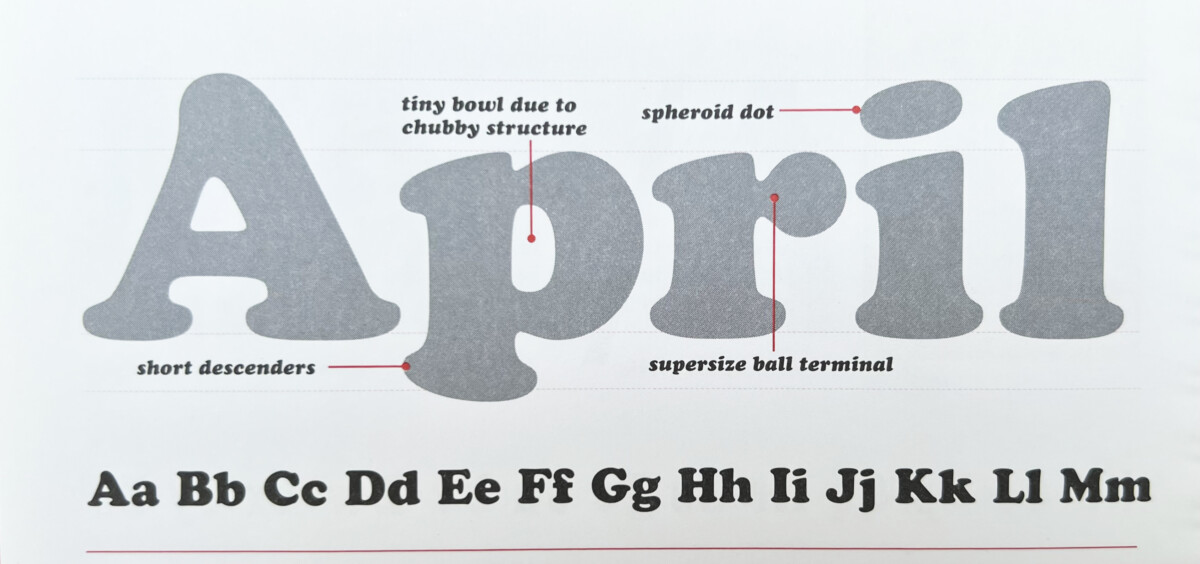
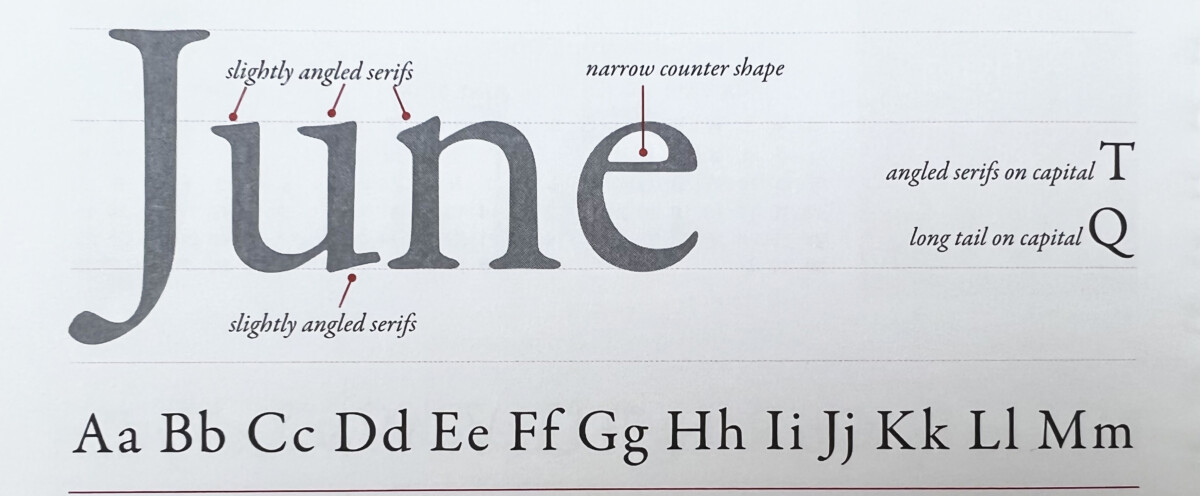
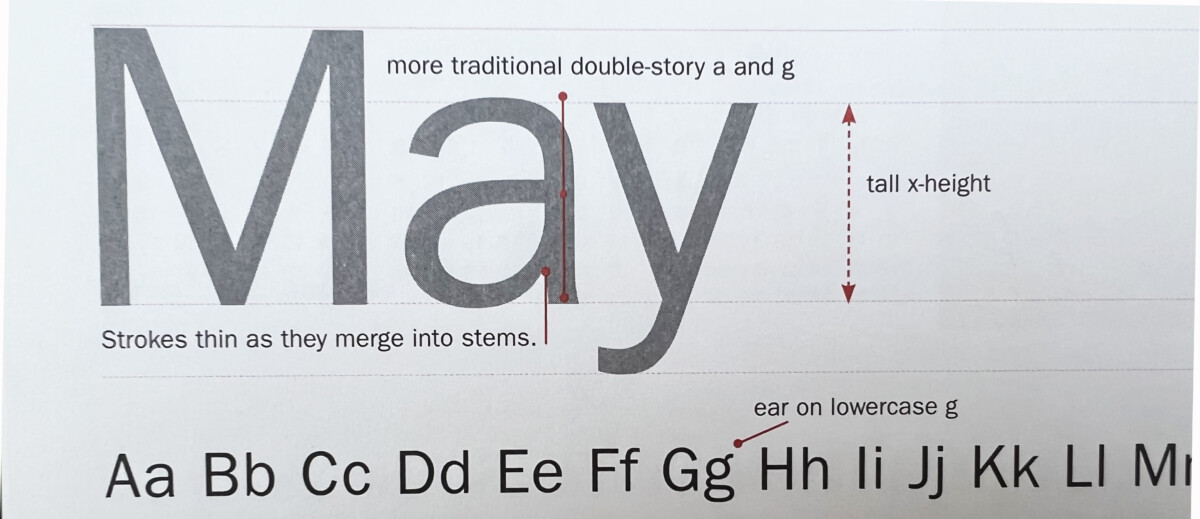
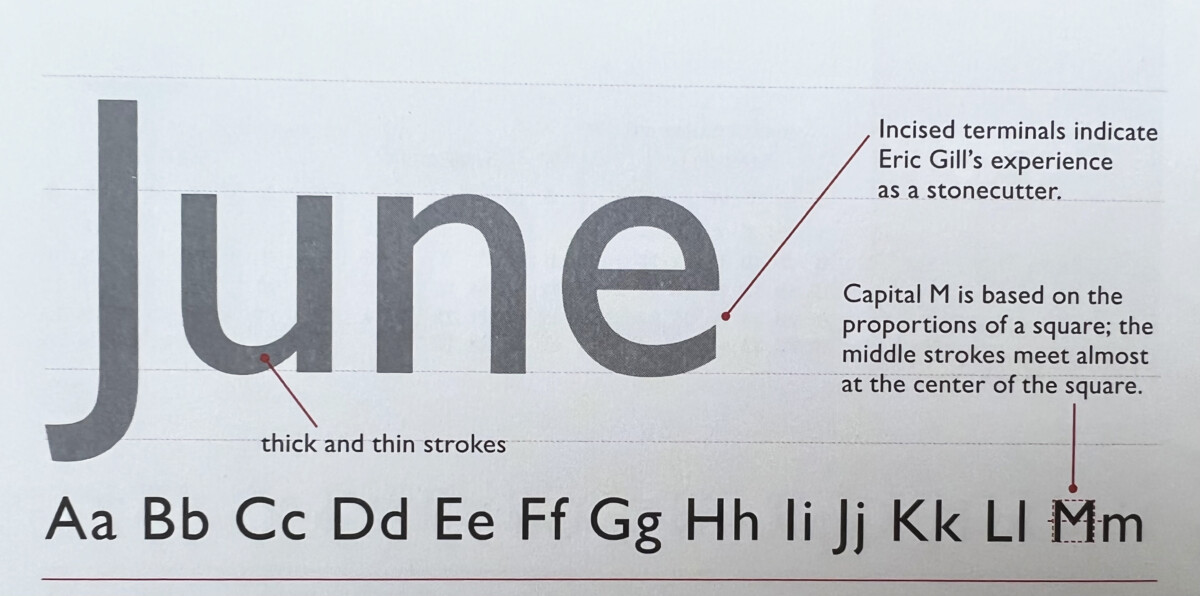
The gallery below gives some examples of type characteristics. Look at the letterforms and see/note distinguishing features.

_____________________________________________________________________________
Activities
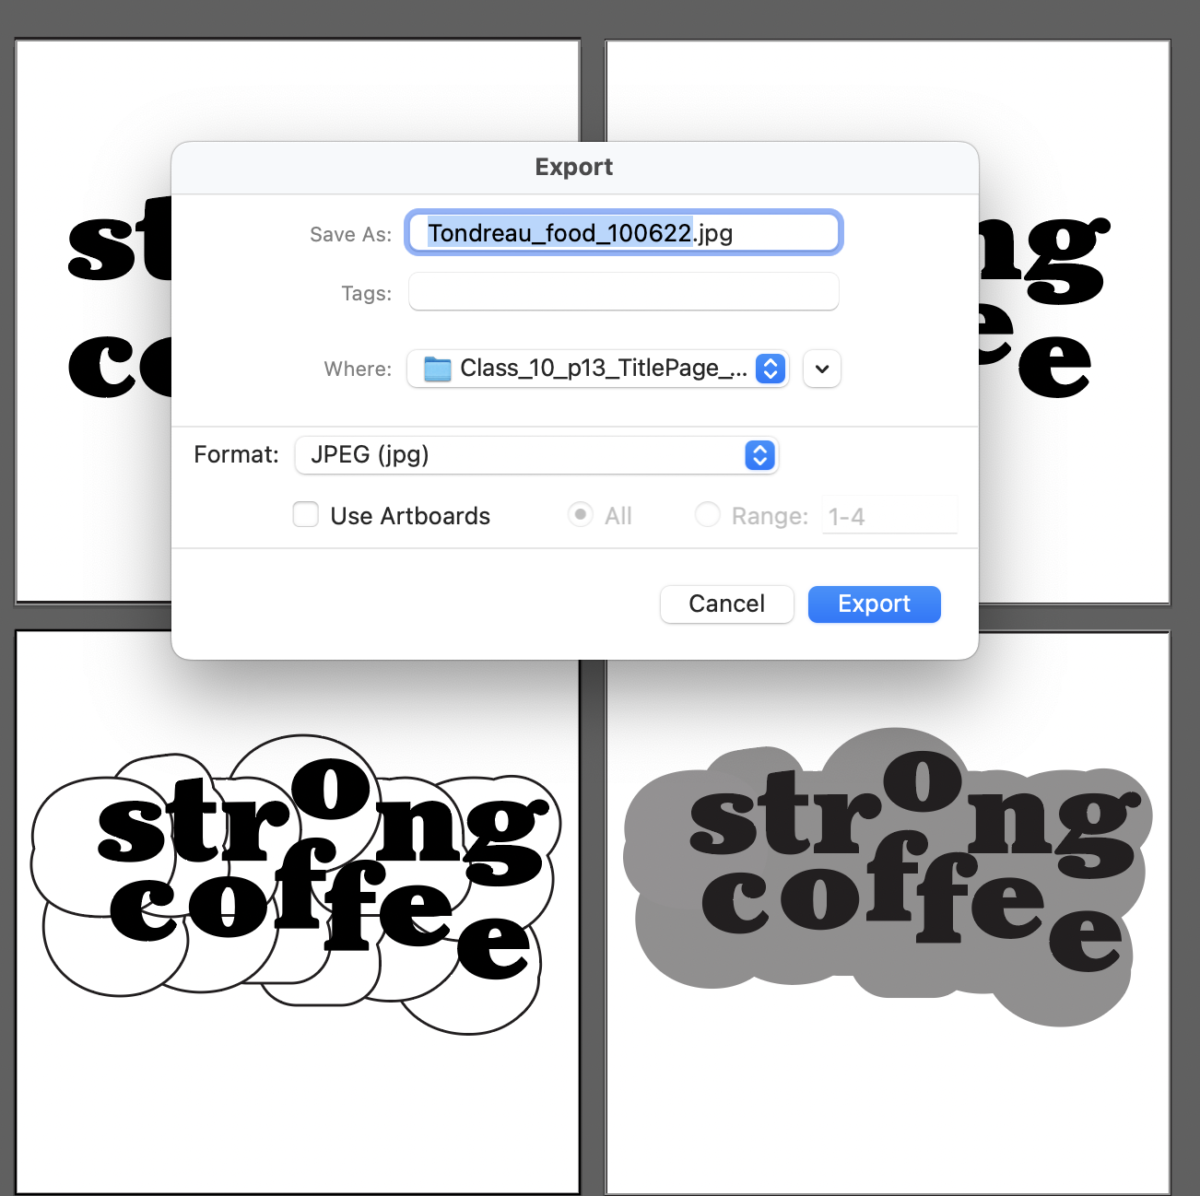
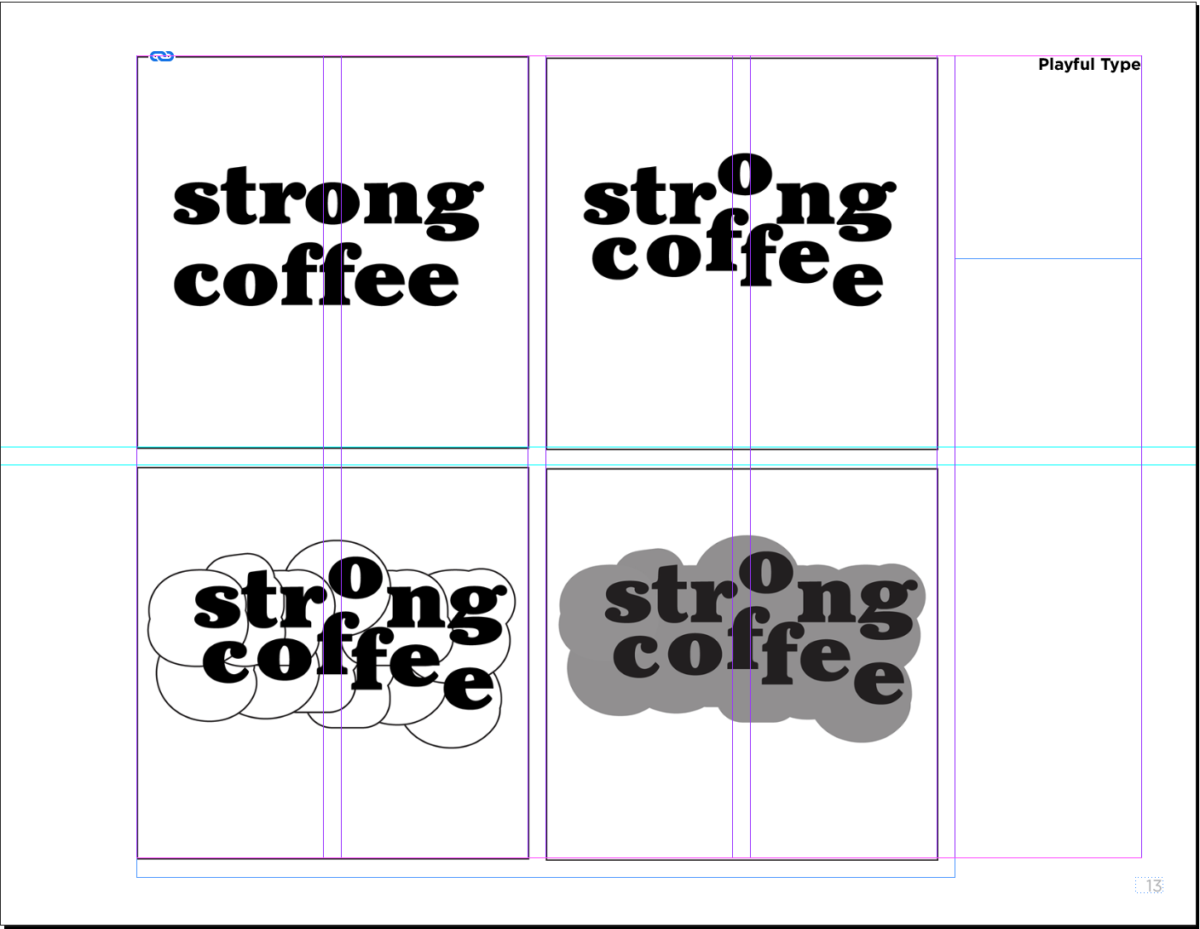
Page 13
How to Export Illustrator page and place into page 13 of our books.
In Illustrator:
Make sure that you complete your 4 artboards and corrections before exporting. Center your work within each artboard.
You can add borders in Illustrator this way:
- With the rectangle tool create a frame 3.6 x 3.6 inches (1pt black stroke)
- Copy and Paste and into all 4 artboards
- With the align window make sure this border is perfectly aligned with your artboards.
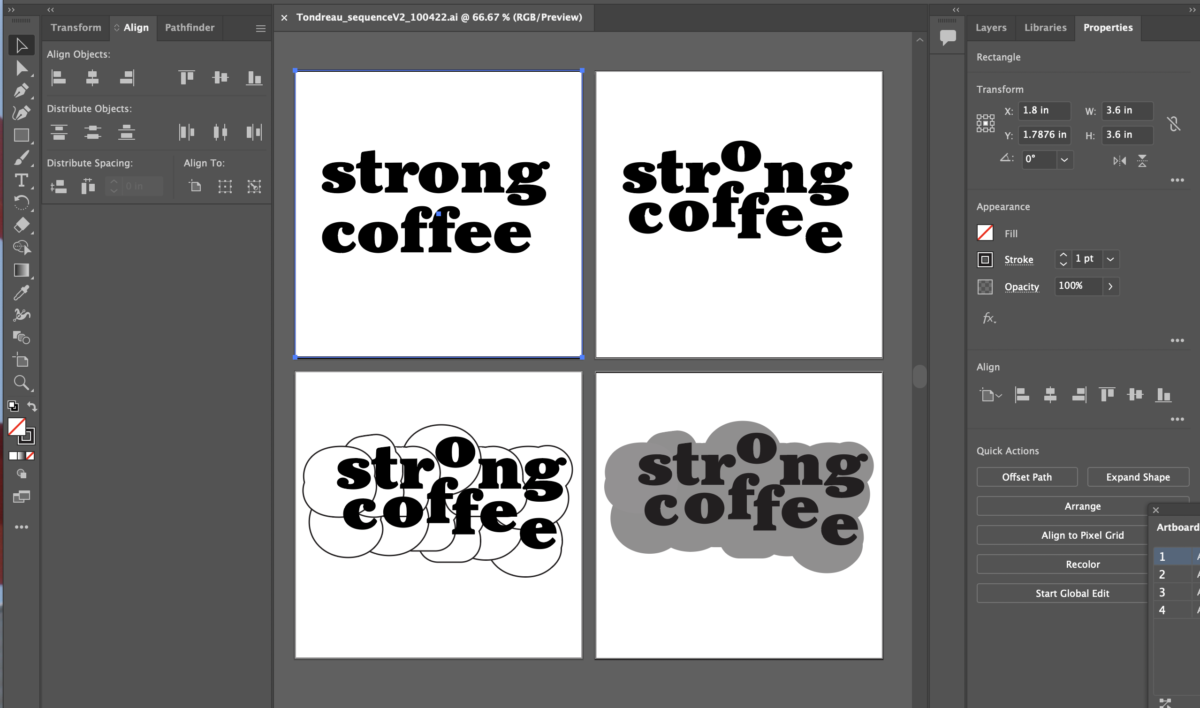
The size of our four artboards in Illustrator will, together, match the height and width of 4 columns in inDesign books (if the spacing settings are .1667inches (also known as p(). So, we will export as 1 image.
Save your Illustrator file, then go to File EXPORT> Export as


In InDesign
Go to Page 13 of your book.
5th Column heading = Playful Type
(Note! This heading is changed slightly from Class 09).
Then go to FILE> PLACE

Activities
COVER or Title PAGE
- PAGE 1: COVER (Really a TITLE PAGE)
- Page 1 must include the following words:
- Type Book
- Principles of Typography Featuring ___________________________
(the name of your chosen person or group) - By Your Name.
- COMD1127 Type and Media
- all type, no illustration, no photographs
- basic shapes and lines ok
- Black and White only (gray is ok; no color)
- USE THE GRID WE SET UP
- Your document can have bleeds. Because we won’t print your books export your PDF without crop marks and bleeds.
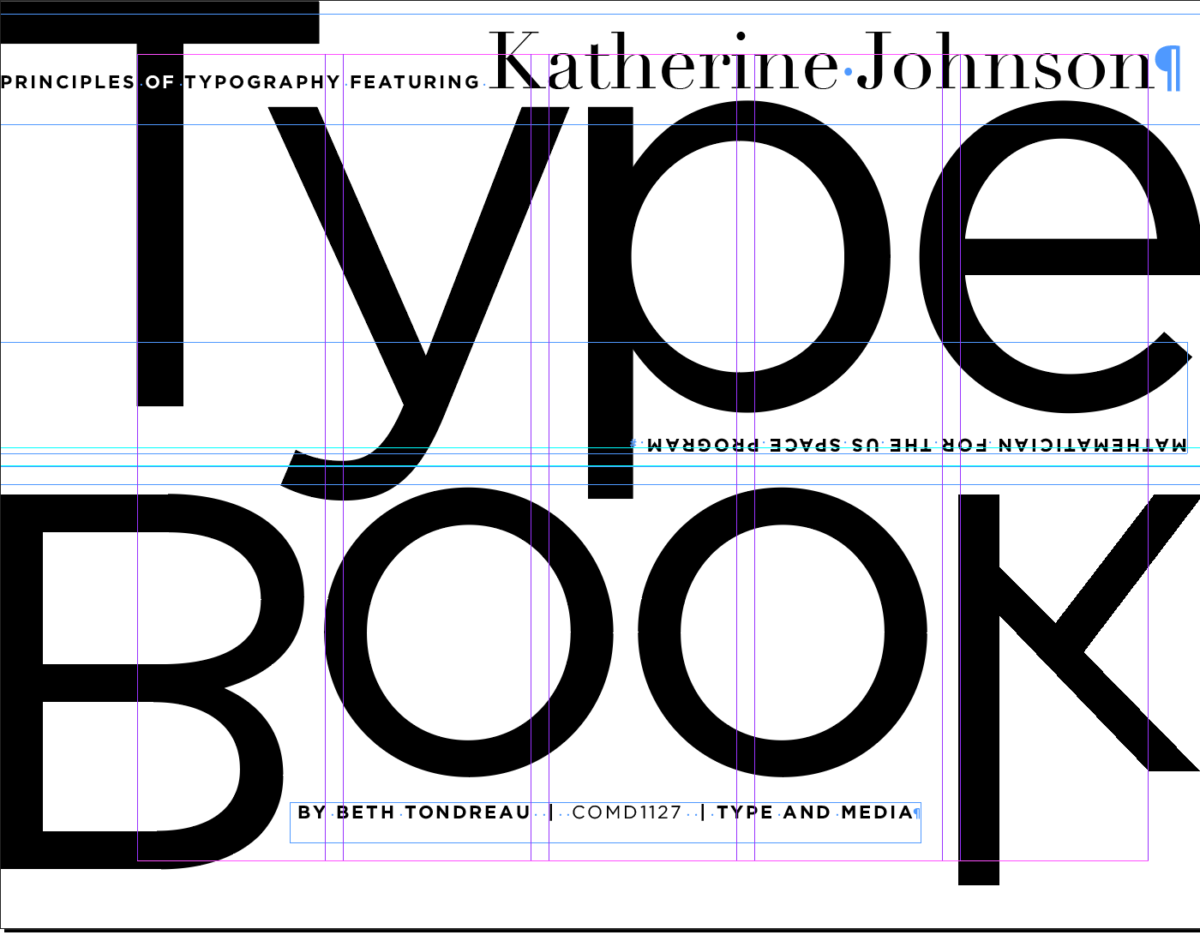
THIS IS MY QUICK EXAMPLE. DEVISE YOUR OWN DESIGN
Page 14
Use the text “This book was designed by ________ (your name) using:___________ (then list the typefaces you used). Heading: “Typefaces shown”

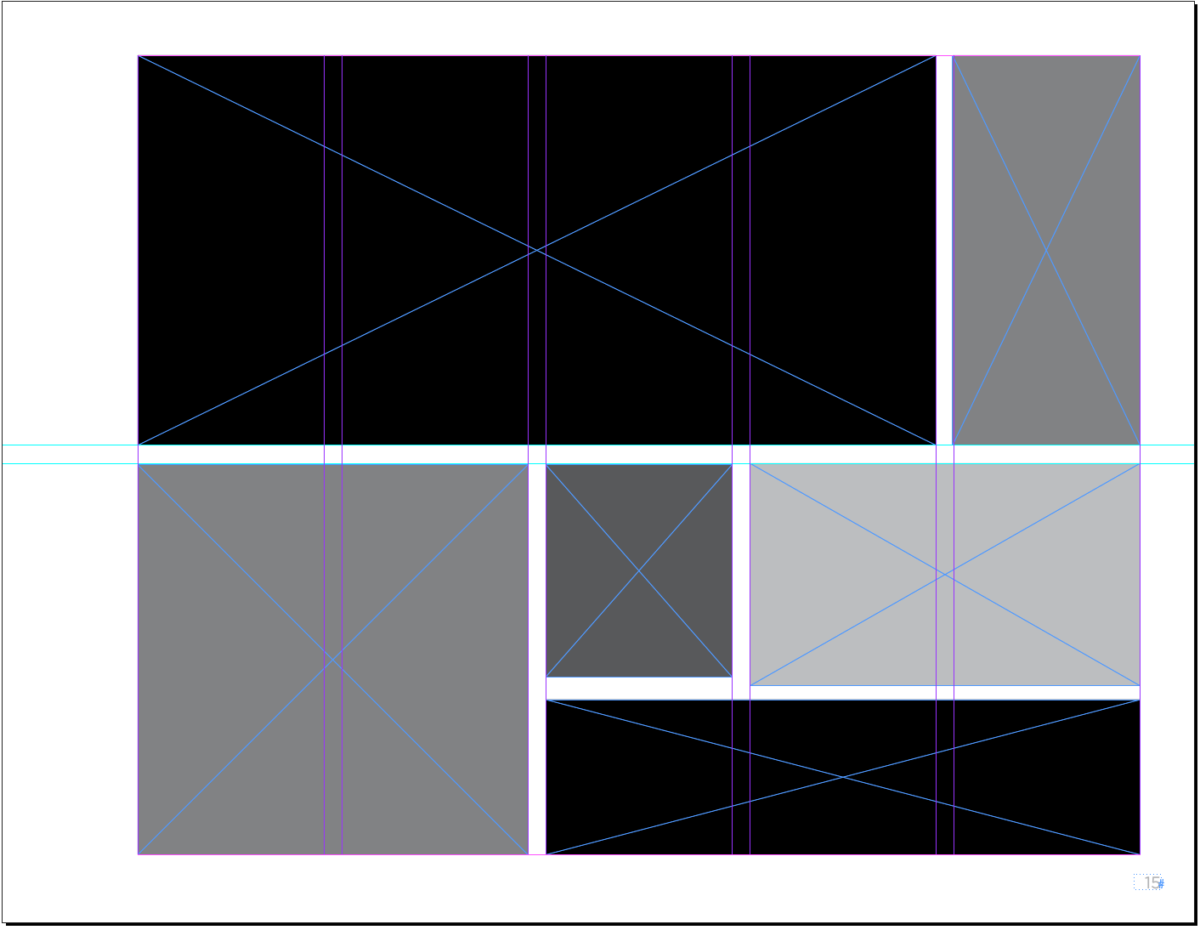
Page 15
Last page with variations on grid (IN BLACK AND WHITE ONLY)
POSSIBLE Extra Credit Pages ONLY FOR those of you who have done everything absolutely perfectly and have checked rechecked. Add 5 extra pages preceding the last page with a grid and set the exact text provided in a typeface in the category discussed. Use the text in Dropbox; instructions are in blue.
___________________________________________
Bleeds: document set up > bleeds > p9
_____________________________
Design uniformity and continuity
Look at all your pages, make sure that all headings are the same typeface, size, style, and are consistently placed (located on the page). This maintains a sense of uniformity and continuity and makes the book work as a unit.
Recap of Content:
- COVER/Title Page (Page 1) :
- Vocabulary (Page 2)
- Classifications (Pages 3, 4)
- Variation in Type: Width/Weight/Posture (Pages 5,6,7)
- Alignment (Pages 8,9)
- Leading (Line Height) (Page 10)
- Tracking & kerning (Word Space) (Page 11)
- Type on a Path (Page 12)
- Creative Type (Page 13)
- Designed by (your name) using (list the typefaces used) (Page 14)
- Last page blocks showing grid (Page 15)
- Corrections and Typography concepts and InDesign:
- Go through your pages, make sure that they are corrected as per comments and class lectures. It is your responsibility to also have a typographically correct book, and that ALL topics explained in class are taken into consideration. For example in the Classification of Type assignment, should have correct tracking and kerning.
- Additionally we are following a grid (InDesign file). Items on your pages must follow it.
______________________________________________________________
How to Package a File
File > Package (include all fonts and links—which in this case means images—your Indd and idml files, and a PDF.
- How to Package a file: InDesign go to FILE> PACKAGE


- Save as:
Lastname_Project01_TypeBook_101122 - Practice Packaging. IT is IMPORTANT to package once your file is complete
- Make sure all corrections to books are made.
- Here’s another look at a completed book (without the possible pages done for Extra Credit)
_____________________________________________________________________________________
IN CLASS: Upload to Dropbox the PDF of your entire book (so I can check in the next few days). Name this one:
Lastname_PreCheck_TypeBook_100622
_______________________________________________________________________________________
To Complete after class = Assignment:
Work on all your corrections.
Save your file as:
Lastname_Project01_TypeBook_101122
Package your InDesign file. InDesign will package your InDesign file, idml file, fonts, links and a PDF. Make sure your PDF does not have crops or bleeds.
Make sure to include the PDF of your complete book when packaging.
UPLOAD YOUR ENTIRE FOLDER to the class Dropbox.
You will present your Type Book during Class 11 (October 11).
Graphic Assignments are always due the day before next class by 8pm, and must be uploaded to the Dropbox to which I invited you unless indicated otherwise. Assignments go into Dropbox. Participation Activities go into OpenLab.


Leave a Reply