Class Info
- Date: Tuesday, November 1, 2022
- Meeting Info: In person, Pearl 116, 8:30 to 11:00am, followed by Professor’s office hours from 11:00am to noon in Pearl 116.
Announcement/Topics
Review Student Post > Type Scavenger Hunt: one example of an Old Style Typeface in use.
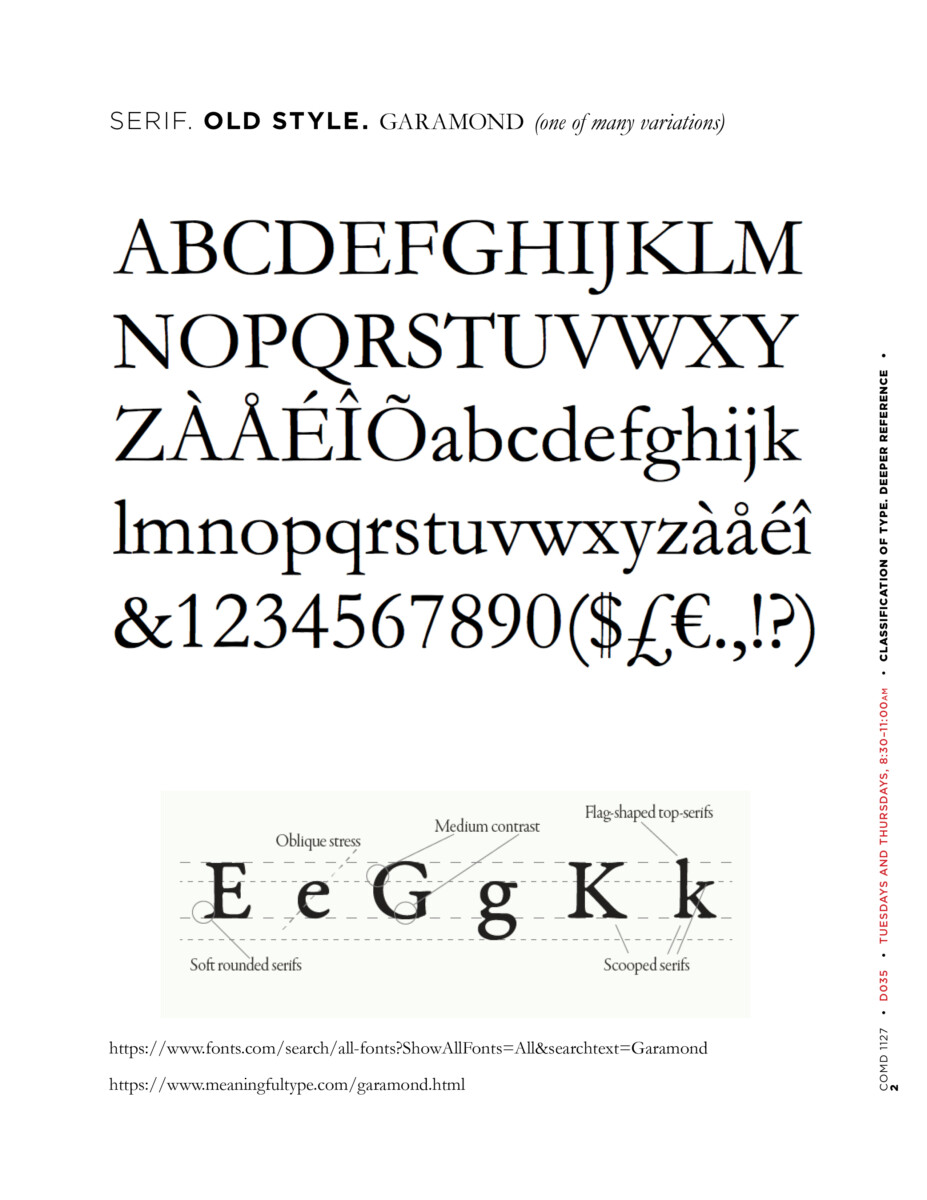
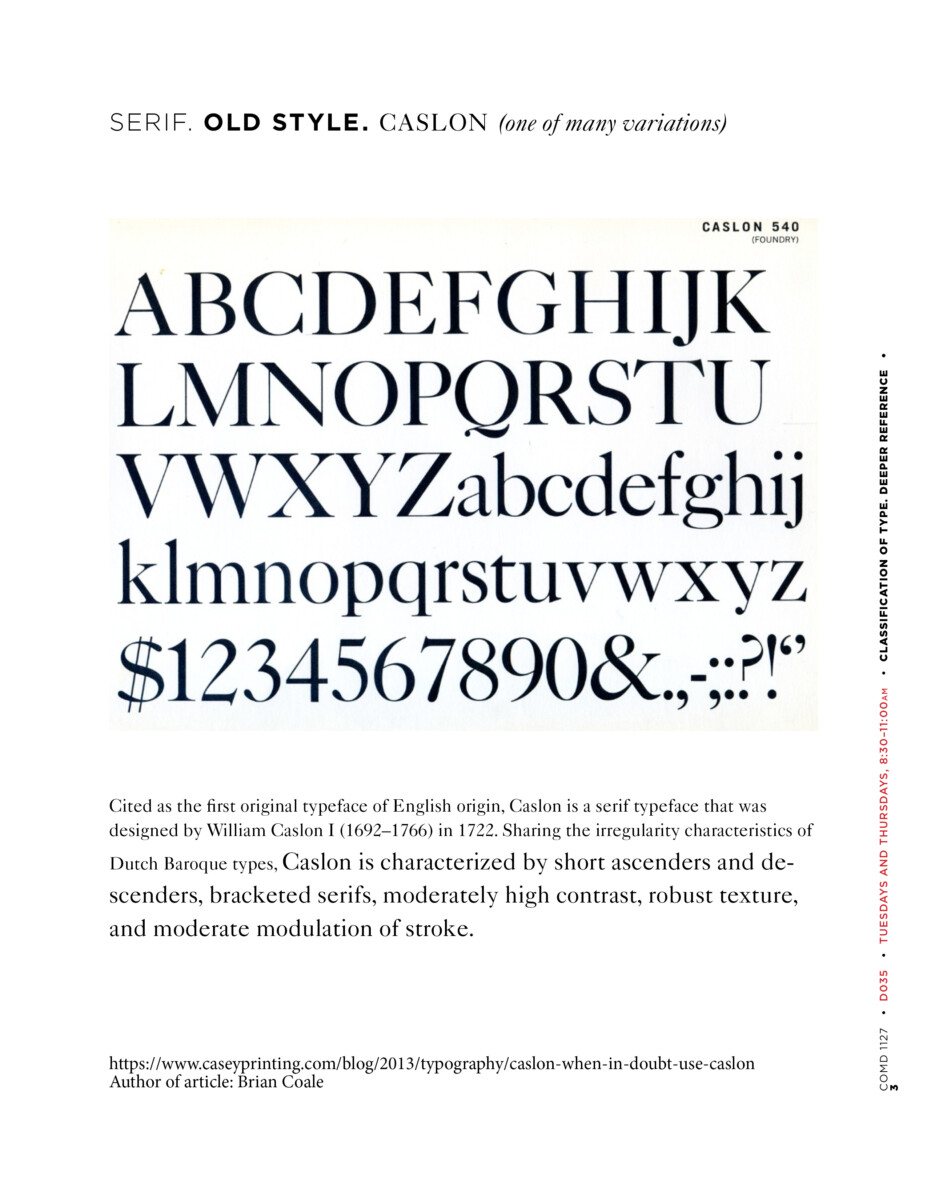
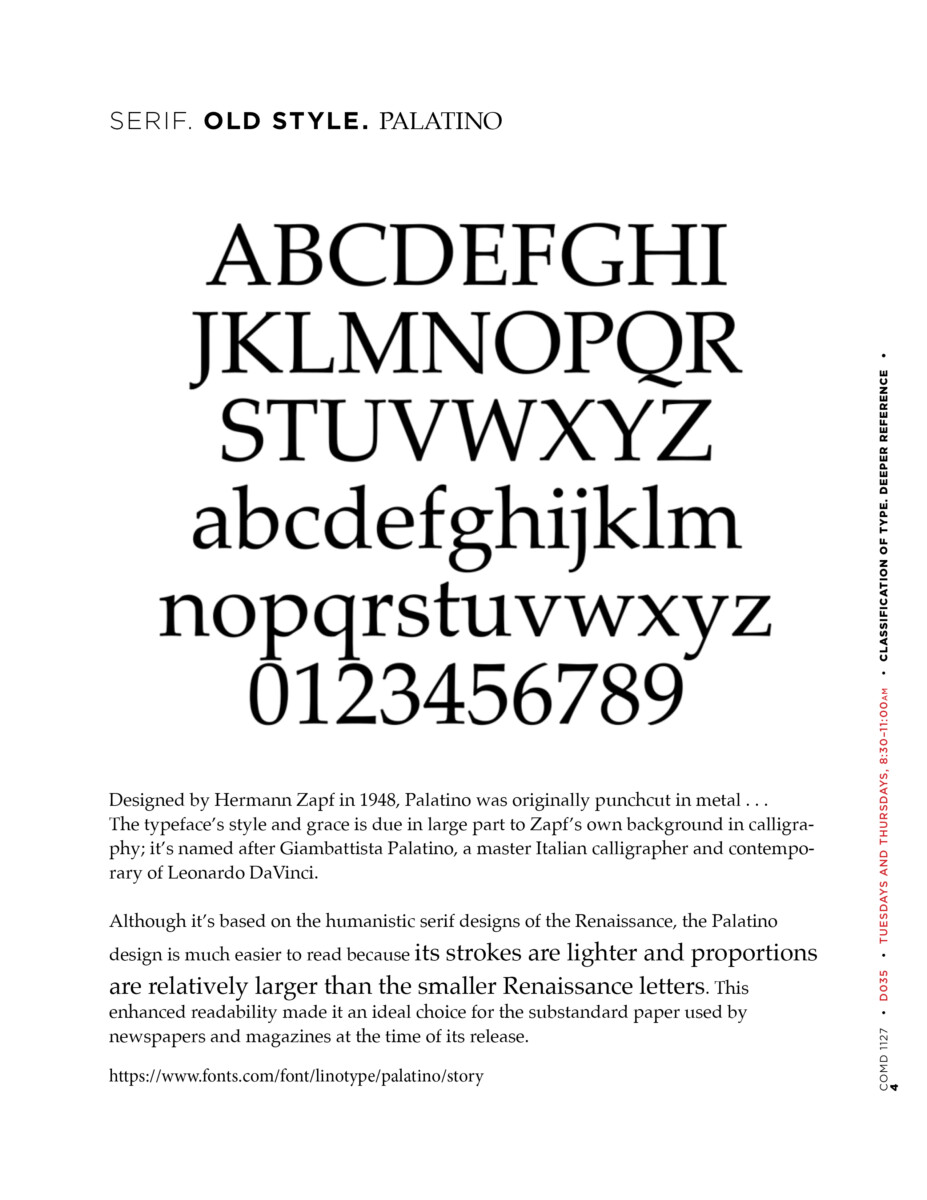
A recap of just three of many Old Style typefaces is on a PDF in Dropbox as well as below:

Project 2: Continue progress on the following:
- Expressive Typeface—i.e. FOUR Expressive words using a Typeface (Done in Illustrator)
- Expressive Lettering—i.e. ONE lettering solution showing your favorite food, show, movie, pastime. DUE CLASS 19 for Presentation Class 20.
Today: Activities
COLOR IN TYPOGRAPHY and LEGIBILITY:
Open the document created during last class.

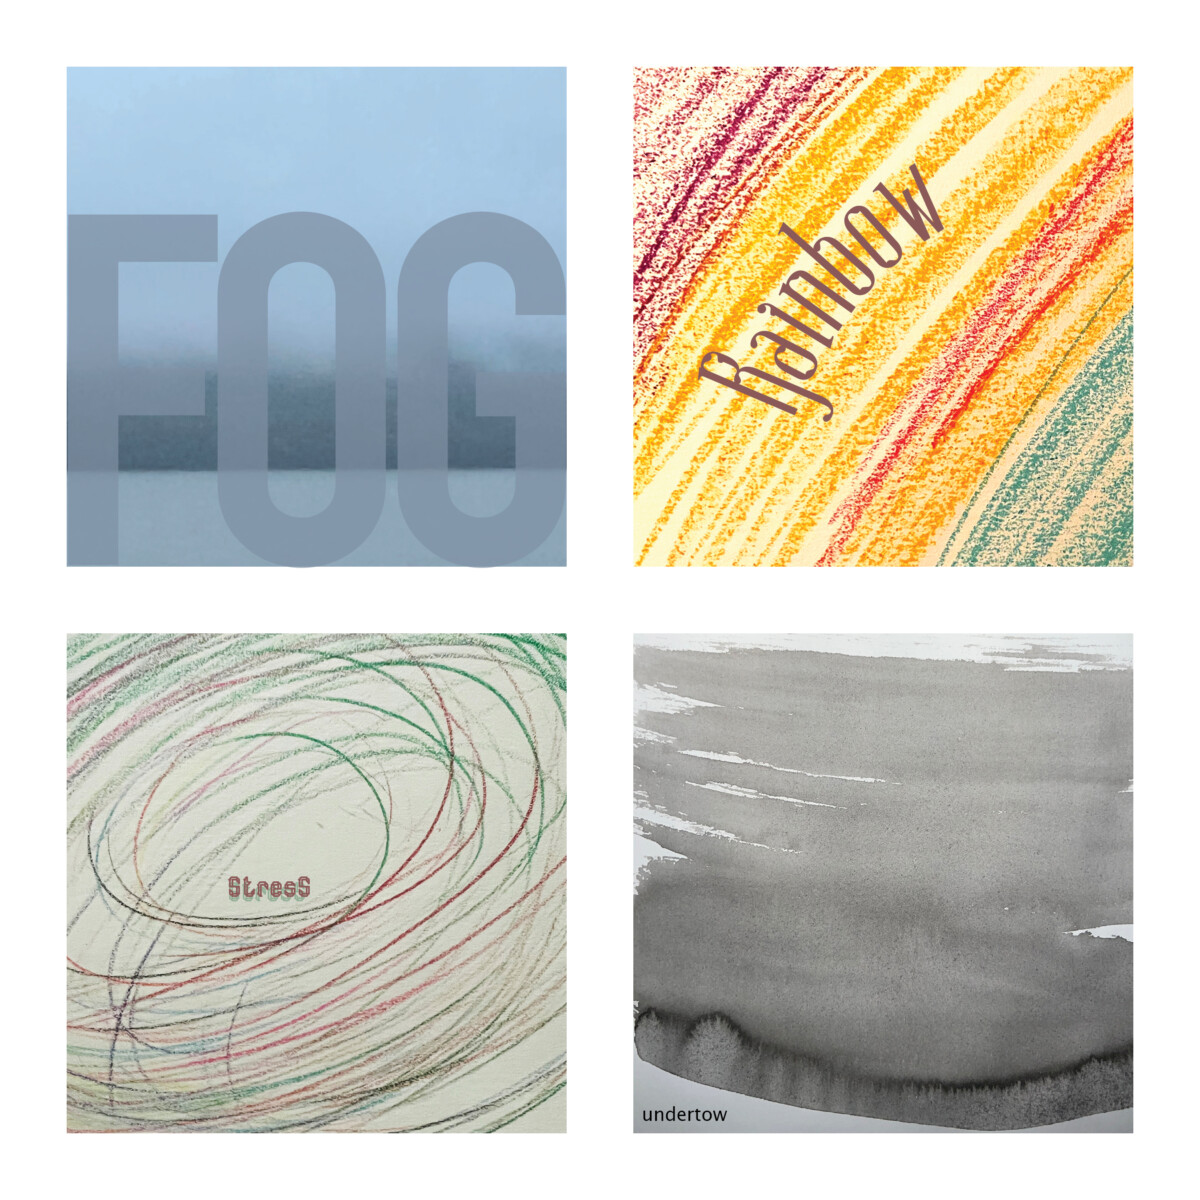
used CREATE GUIDES to divide the one-page document into 4 squares.
- Place textures (Most of you have done this step).
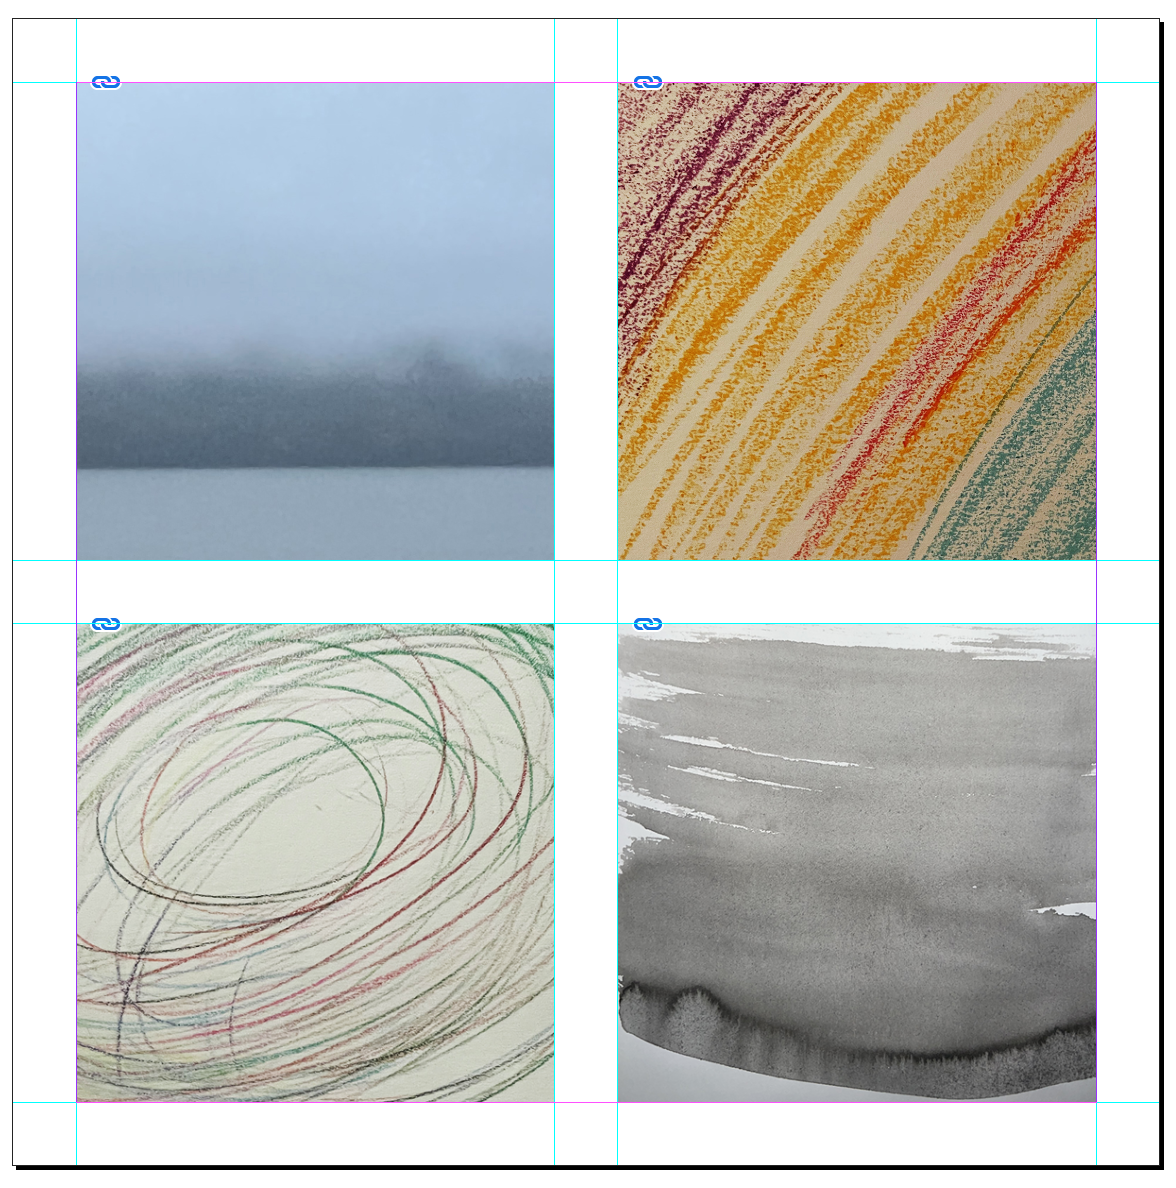
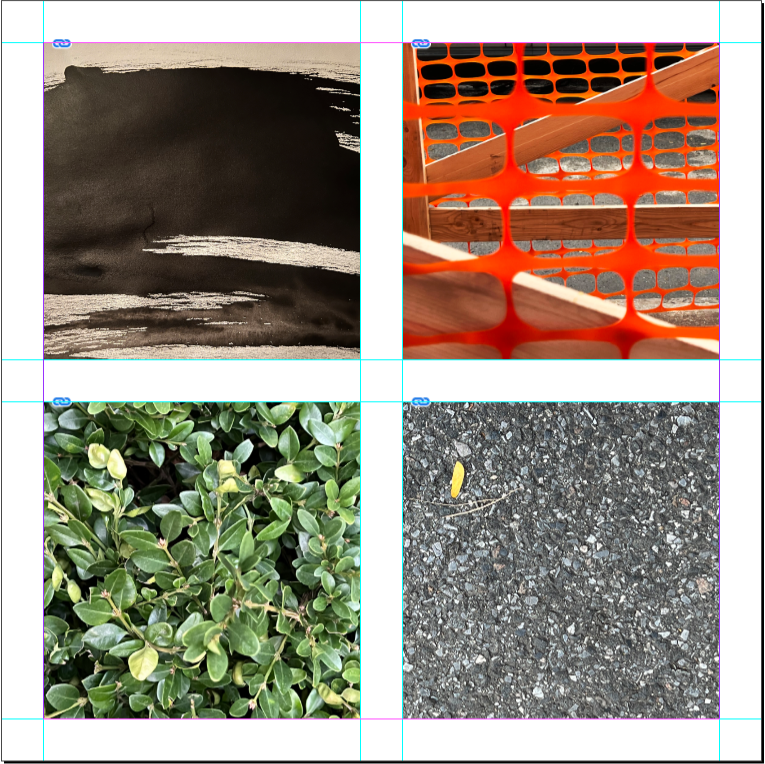
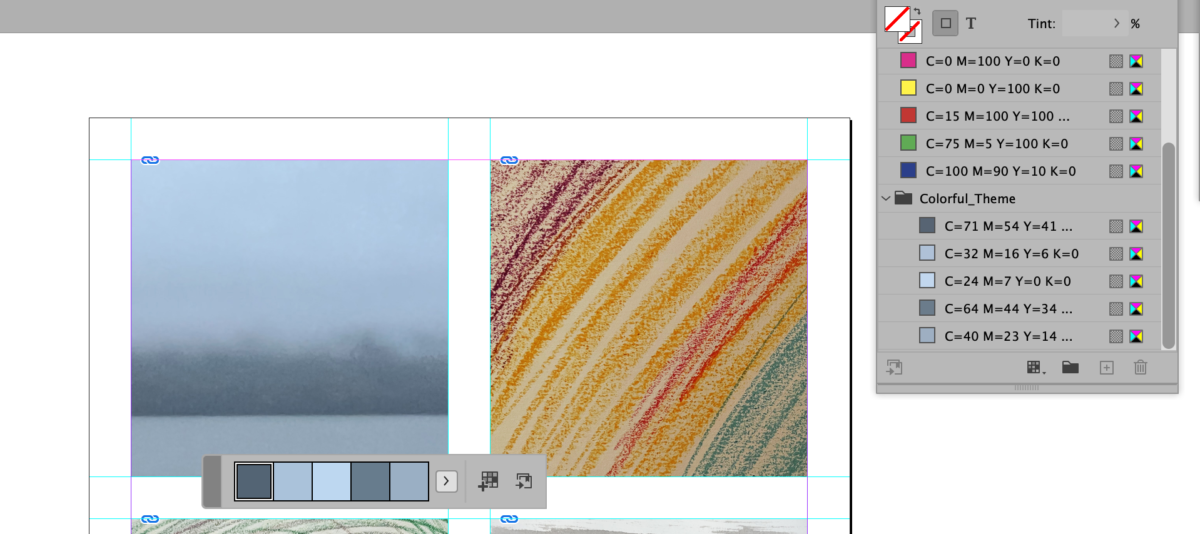
- WORD ASSOCIATION. Choose 4 words (thing/concept) that each of your four image calls to your mind. Words for the first four textures above could be: ”fog,” ”rainbow,” ”stress,” and ” undertow.” The example below the Color Theme instruction uses “OIL SPILL” (Scroll down to see)..
- Think about the image itself and how the word could be designed to represent it. The WORD(s) must be legible
- Place these words over your texture (one word or thing per texture)
- IMPORTANT: Think of typeface (Go to Adobe Fonts or Google Fonts), and choose variations of type style. Consider size, case, word spacing, placement, meaning, color and contrast.
- COLOR CONTINUITY: How to use colors that relate to the actual image, rather than the default colors from InDesign.
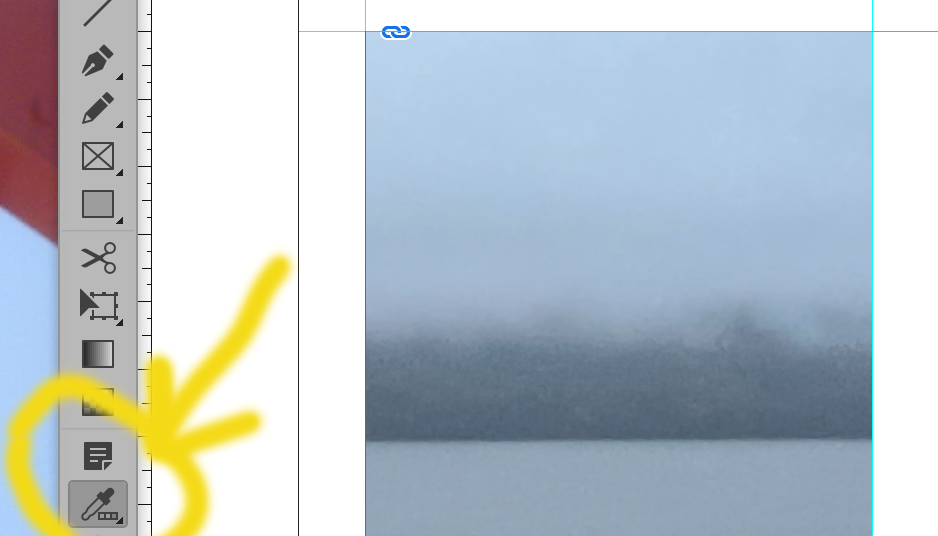
HOW and WHY to get actual colors from a photograph and place them in the swatch panel

- Go to Window: color > swatches
- COLOR THEME TOOL
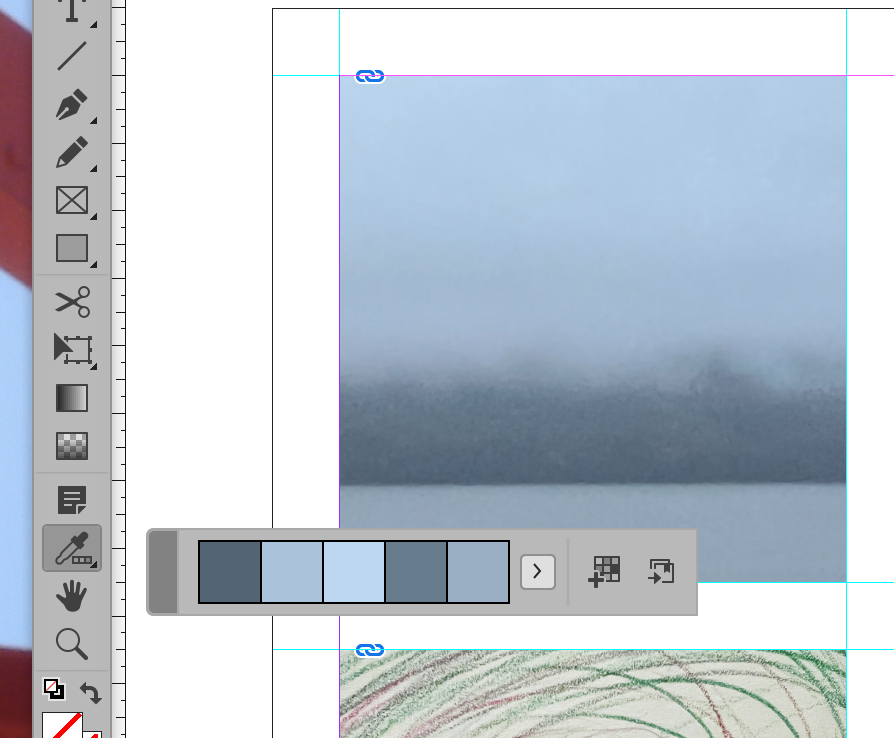
On the toolbox> go to the EYE dropper tool and switch it to the COLOR THEME tool - Click over the image with the COLOR THEME tool. You will see a strip of colors (and variation under the little arrow right next to it).
- Select the following icon to ADD this THEME to SWATCHES
- Finally you will see your colors on the swatch panel and you can use them to make a more cohesive design and relate the typography color to the image.

Below are images that give the same instructions for using the Color Theme Tool as above.
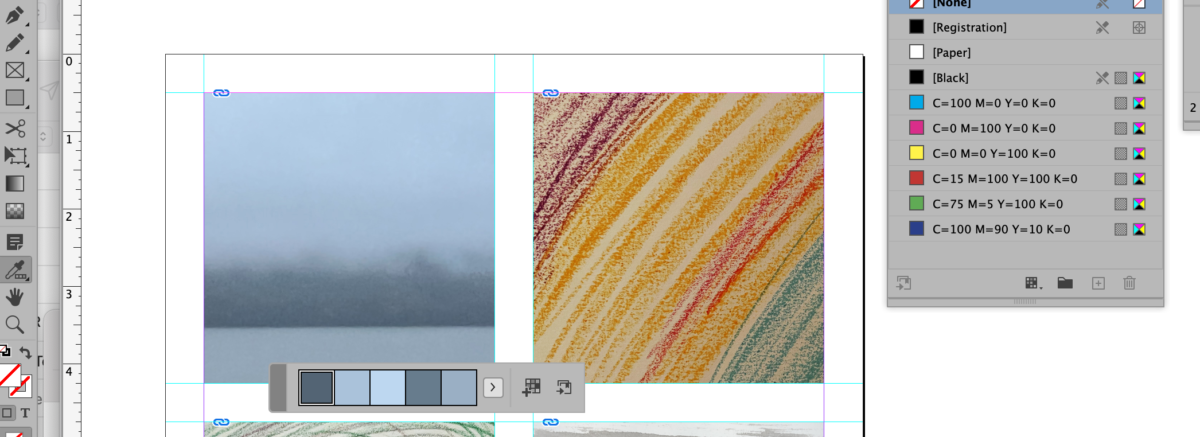
“Opt-click to add selected color.”
You can follow the same instructions for all of your images.

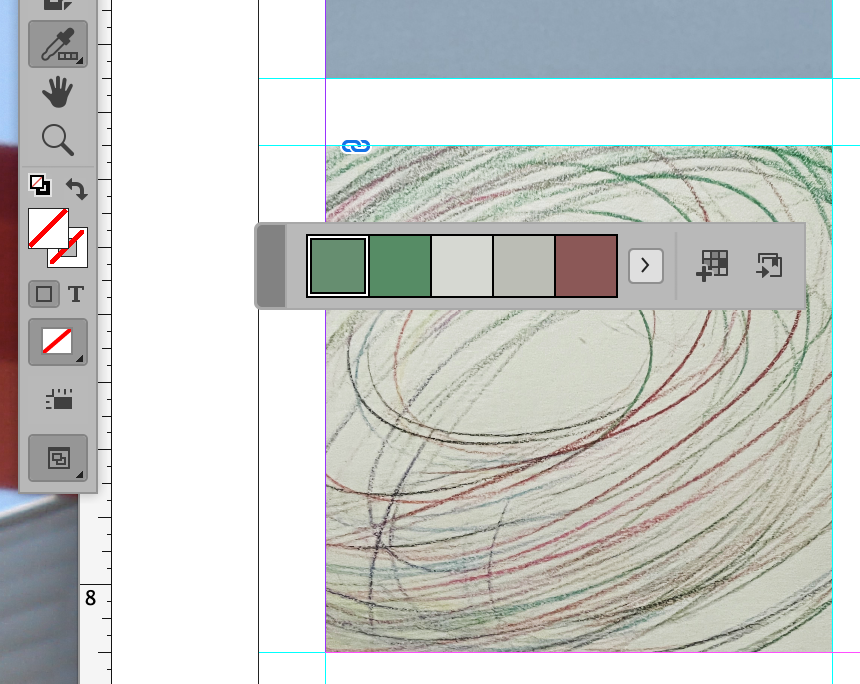
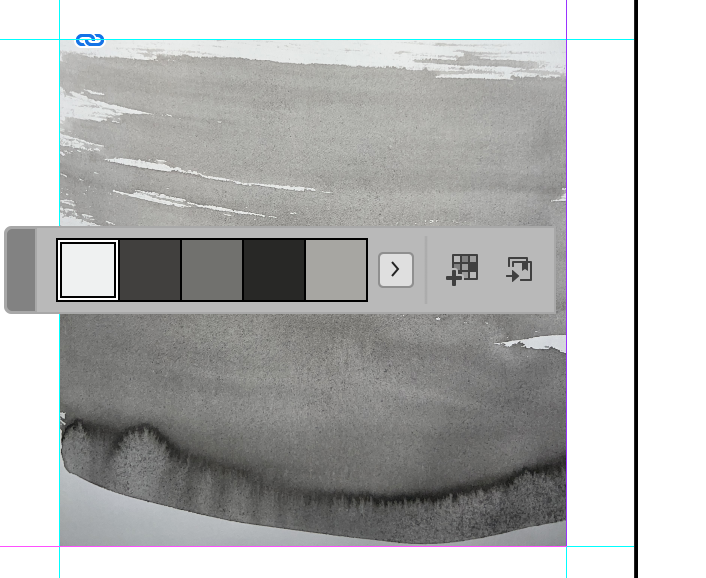
For all for images, choose a (different) appropriate face and insert over you image in your document, using color or surprinting or dropping out white. Do what works best/is most readable.
Below is a jpeg with words, type, and colors chosen to be appropriate and legible.
DURING CLASS:
- Work on you texture/color/Word Associations.
- Individual meetings with all.
Assignment / To Do After Class
- Complete InDesign document using image/word associations. Save as a jpeg: lastname_color_legibility_110122
- Export as a jpg with the same naming format and upload to Dropbox.
- WORK on PROJECT 2
Progress for lettering must be uploaded to DROPBOX by Wednesday night, November 2nd.
________________
Looking a bit Ahead
Info shown below applies to Class 18 in prep for Class 19 when you’ll pull everything together to upload PRIOR TO and PRESENT DURING CLASS 20.
- More lettering and Word Experimentation.
- Continue lettering project as per individual styles and approaches.
- Make all corrections and edits
- Start preparing for final presentation. Assignment is due Class 19. Package your InDesign documents by Class 19. Make sure your Illustrator documents are saved with outlines.
- PRESENTATION IS CLASS 20.
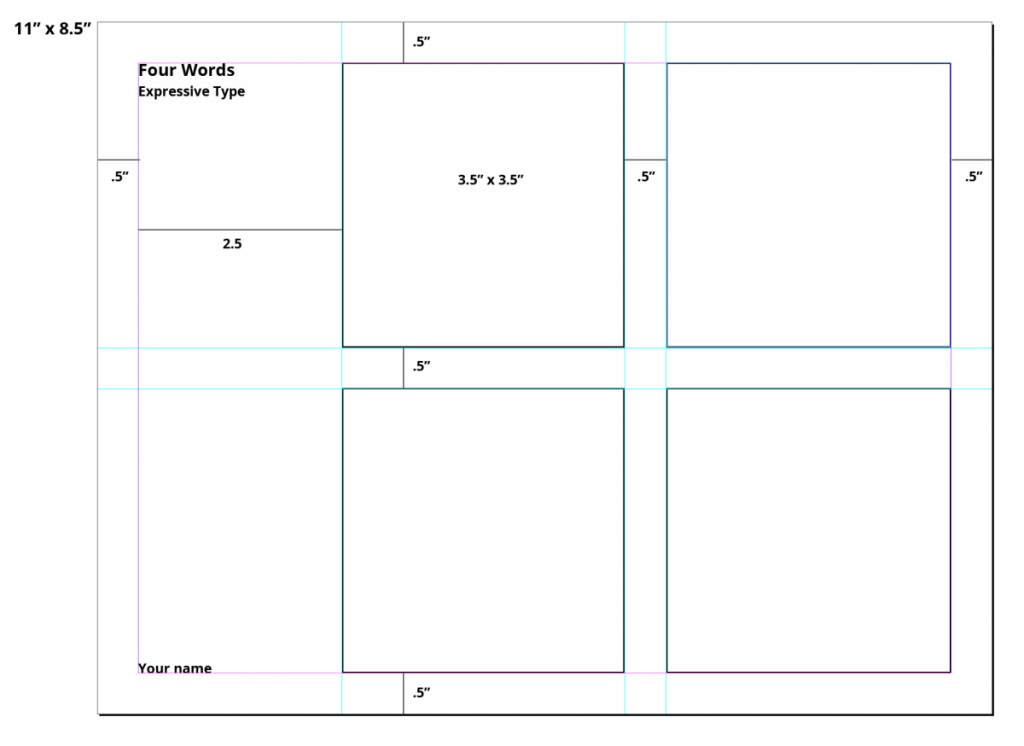
- InDesign Document. 11 inches wide x 8.5 inches high.
- .5 margins all around (see below for additional measurements and use those measurements
- Final versions of the four words (expressive type assignment—using a typeface)
- final version of the lettering assignment with images of process—creating expressive type not using an existing face (sketch and process).
Below is page 1 of your 3-page presentation for Class 20 (November 10). More to come in Class 18 (November 3).
_______________________________________________________________________________________
Grading Note:
Project 3: Steps/ progress not done by due dates (-15 per step)
Upload to Dropbox as instructed.
_______________________________________________________________________
Graphic Assignments are always due the day before class at 8:00 pm, and must be placed in class drive unless indicated otherwise. Assignments uploaded during class on the day that they are due are marked as late.
Participation Activities (Scavenger Hunts, Type Talks and Type Challenges) are due during class or the day before class at 8:00 pm if indicated by instructor.


Leave a Reply