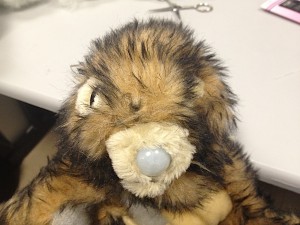
So I went to Radio Shack and bought a PIR Sensor, and we tested it during class. Yaro and myself felt good about this sensor, much better than the IR. She had ordered one the week after so know she feels confident about it and determined to use this sensor, it even fits better the theme behind the bunny, since we can replace the nose of the bunny with the sensor. The functionality and response of this sensor versus the IR sensor is a lot higher, whether we can effectively tamper with the set values of the sensor, remains to be seen. For this purpose the sensor works, it can trigger the other mechanisms, and at different ranges. We noticed that the motion sensor had a better and faster response opposite to the infrared. The code I used also wasn’t appropriate and when Yaro tested it with the code she’s working with, the sensor worked and performed better. The PIR sensor is more suitable for this experiment than the IR sensor. Controlling and figuring out the range of the sensor, is quite a task. The whole idea of proximity and manipulating ranges inside the sensor, are material for the next semester, too advanced for me right now.
I tested using this code and my Arduino UNO
//#define PHOTO 0 // photocell
#define SENSOR 3 // select the input pin for the sensor
#define RED 10 // the pin for Red
#define GREEN 9 // the pin for Green
#define BLUE 8 // the pin for Blue
int val = 0; // variable to store the value coming from the sensor
const int high = 255;
const int med = 155;
const int low = 100;
const int level = 450;
void setup() {
pinMode(RED, OUTPUT);
pinMode(GREEN, OUTPUT);
pinMode(BLUE, OUTPUT);
}
int value(){
val = analogRead(SENSOR);
return val;
}
void range() {
val = value();
if (val >= high) {
digitalWrite(RED, HIGH);
digitalWrite(GREEN, LOW);
digitalWrite(BLUE, LOW);
val = value();
}
else if (val <= low) {
digitalWrite(RED, LOW);
digitalWrite(GREEN, HIGH);
digitalWrite(BLUE, LOW);
val = value();
}
else if ((val >= med) && (val < high)) {
digitalWrite(RED, LOW);
digitalWrite(GREEN, LOW);
digitalWrite(BLUE, HIGH);
val = value();
}
return;
}
void loop() {
range();
digitalWrite(RED, LOW);
digitalWrite(GREEN, LOW);
digitalWrite(BLUE, LOW);
}


